Import the OBJ file you’d like to create a texture for under Tool – Import. Drag it into the workspace while holding shift, then hit Edit to enter 3D mode.
Head over to Tool – Geometry and turn the subdivision level to 1. Texture maps should be created at the lowest subdivision level, even though your ZBrush objects will have a much larger polygon count. Don’t be alarmed when you see your object seemingly lose all its surface detail.

Under Tool – UV Map, select a size for your texture map. Those are always square, so 1024 will create an image map of 1024×1024 pixels. The larger the map, the higher your surface resolution will be.
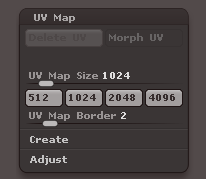
Under Create you have several options with cryptic abbreviations. Hover over them to see less cryptic titles for those options, or press CTRL/CMD while hovering to see a more detailed explanation of what these options do.
You must choose one of these unwrapping options to create your texture map. Doing do will enable the Morph UV button which will show you an animation that transforms your object into the UV Map – one of the best features in ZBrush in my opinion. It shows you exactly how your object is unwrapped.

This is just a preview, press Morph UV again to display your 3D object. You can choose other options here and see how those are unwrapped. Packed UV Tiles makes the most efficient use of space on your texture map.
Our object still shows no surface detail, so lets go back to Geometry and increase the subdivision level again to the highest point, just like it was when you started painting. This will show your textured 3D object again.
When you’re ready, head over to Tool – Texture Map. Pick what you’d like to create your map from. For texture maps select New From Polypaint. Note that these options will be greyed out if you haven’t chosen an unwrapping model in the previous step.
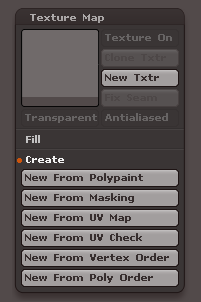
You’ll see a small thumbnail of your map in the above palette. This is good news. Now head back over to Geometry and decrease the subdivision to 1 again – leaving your object textured.
You can even go ahead and delete the higher subdivisions, leaving you object slim and light – just what we want. Export your object (or tool as ZBrush calls it), and with the new OBJ file you’ll also find a new BMP file which is your texture map.

Alternatively, if you don’t want to export your 3D object or you’re not a big fan of the BMP format, select Texture Map – Clone Texture to copy the map into the texture painting channel on the left hand side. From here you can export the texture as PSD or PNG file.

1 thought on “Creating Texture Maps in ZBrush”