The ZModeler is is a new feature in ZBrush 4R7. With this new gadget we can perform polygonal vertex modelling, something that was not possible before the introduction of this brush.
The term “brush” is a tad of an understatement if you ask me: this “minor addition” gives ZBrush abilities that are worth about $1600, which is what other polygonal modelling packages of this caliber cost. Existing users are getting this feature for free!
Like everything in ZBrush, the ZModeler takes a bit of getting used to. Here’s how to get started.
Add a new 3D tool to the canvas. You must start with something, and it doesn’t matter what it is. Let’s take the dog, the soldier, even a cylinder. Anything will do, as long as it’s a Polymesh 3D. Enter Edit mode as if you’d like to sculpt on this very object.
Select the ZModeler brush, either by picking it from the list, or by using keyboard shortcut B-Z-M.
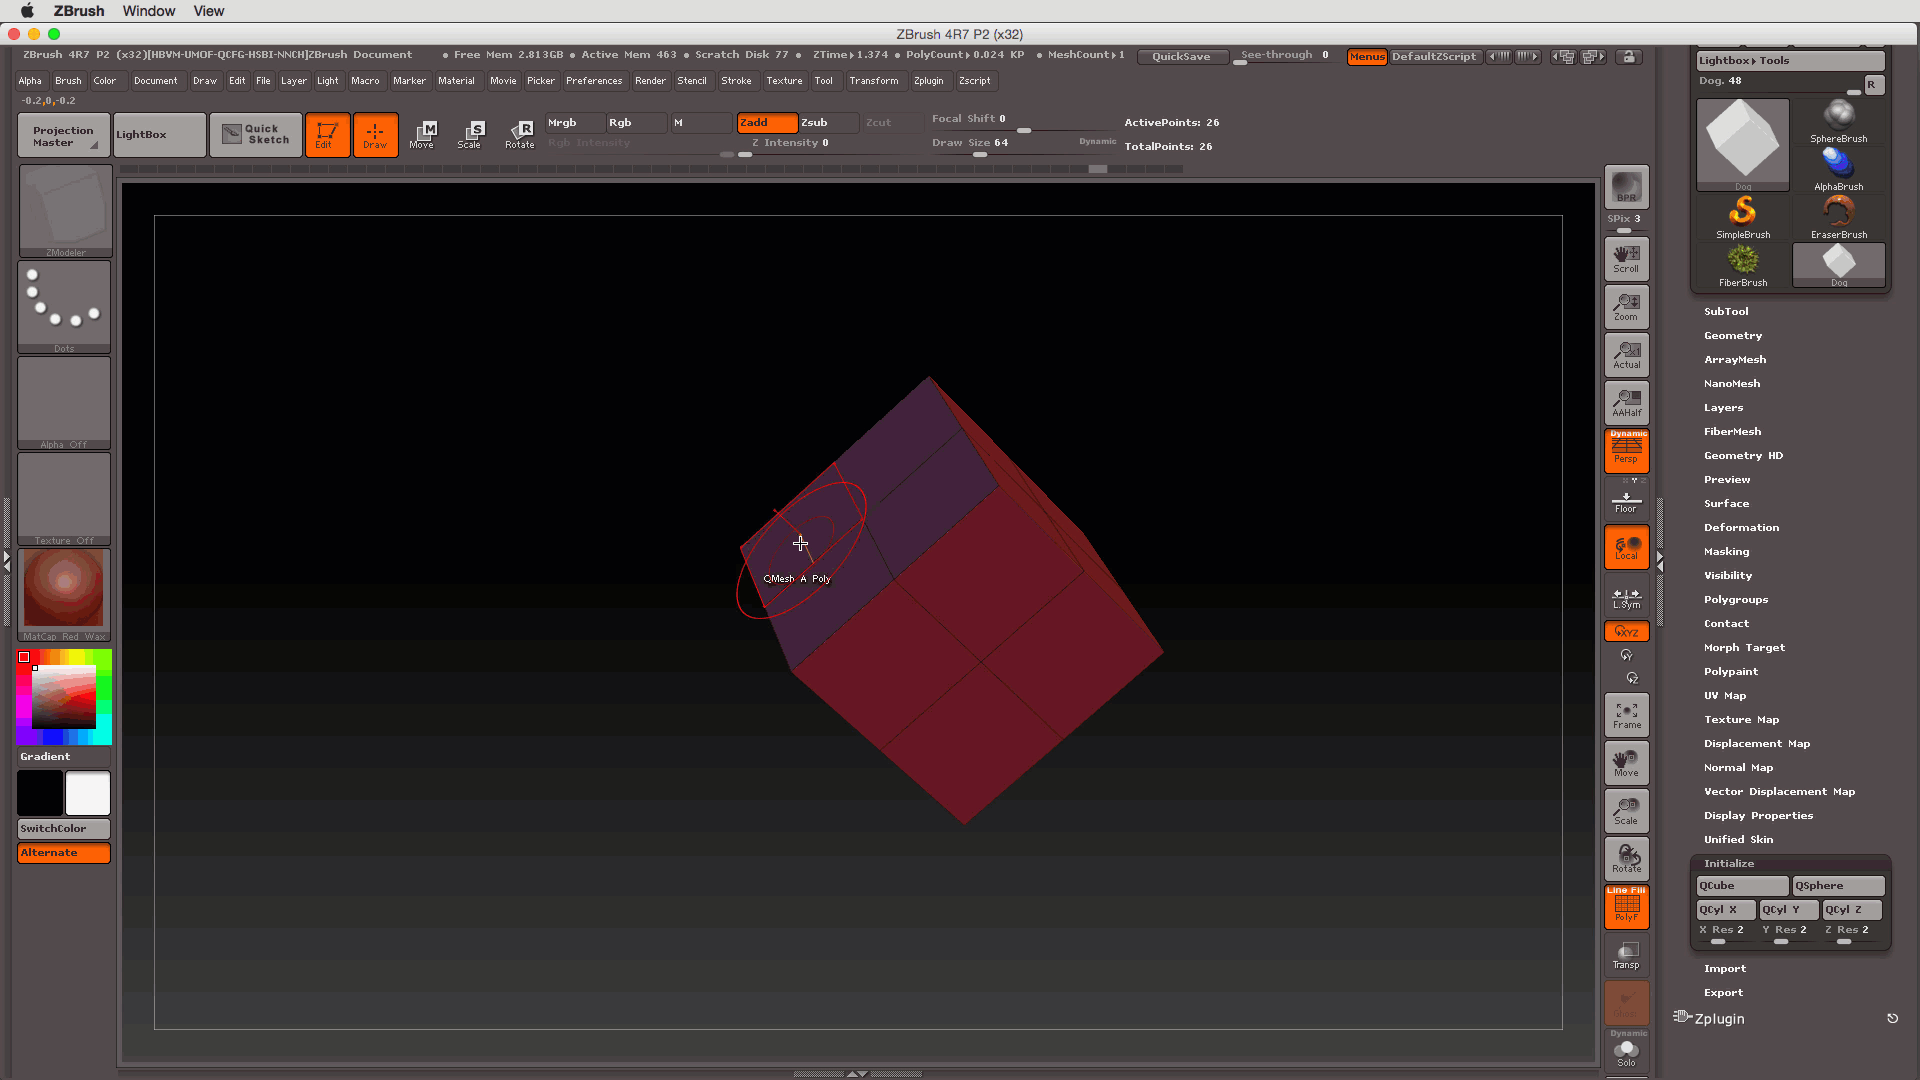
Once selected, head over to Tool – Initialize and find options to create a QCube, a QSphere or a QCylinder. These are low-poly primitives.
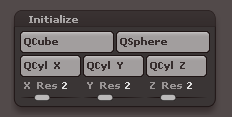
Choosing any of these options will replace the current 3D object. This action is not undoable. Specify the resolution per axis to define how many polygons you’d like to start with. Let’s try a default QCube:
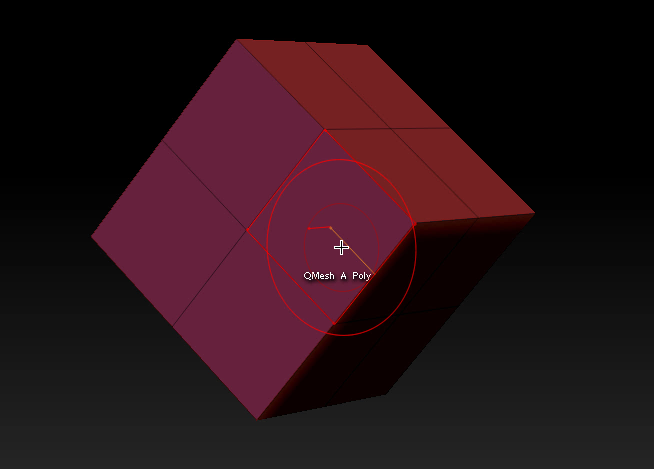
Watch what happens when you hover over a polygon, an edge or a point: the text changes depending on what action is set per selection. It’s a reminder of what will happen when you click-drag the current selection now. The default with a polygon is “QMesh a single polygon”.
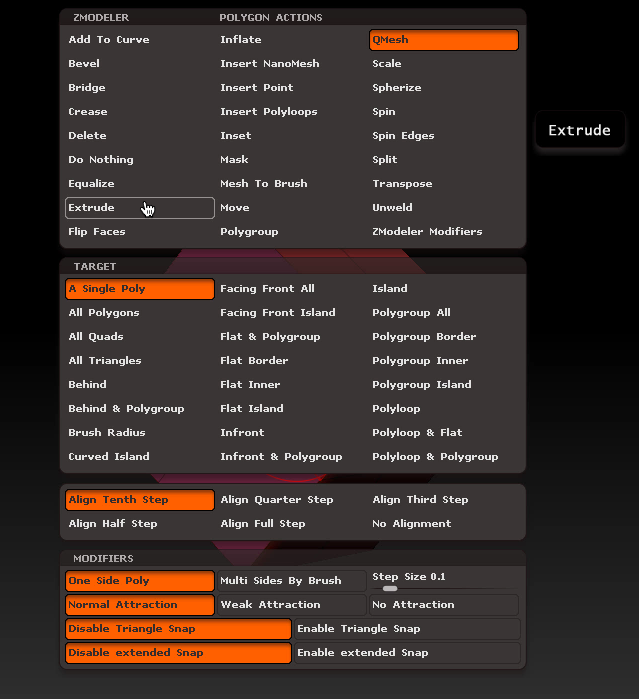
Press the SPACE bar while hovering to bring up a context menu. This will let you select a target and an action that will be performed on your selection. This context menu will be different for polygons (pictured below), edges and points.
This looks very scary, and it all sounds a bit confusing too – but trust me when I say this is an extremely intuitive and quick way of modelling low-poly meshes.
Let’s stick with the polygon example: the top of this menu, labelled actions, defines what you’d like to do to your polygon (extrude, bevel, bridge, etc). The target section lets you choose on what the above shall act: a single polygon, all polygons, all polygons that are quads, all polygons in front of the current polygon, etc.
Try it out with the default QMesh on a single polygon: hover over one, then click-drag. It looks like an extrusion at first, but when you select a polygon next to the previous one, the edges are pulled up. Some intelligent magic is happening:
Think of QMesh as an “intelligent extrude” – if it’s not what you’re looking for, feel free to switch back to the standard extrude option. Enjoy all the other options this brush has to offer, there’s a LOT to explore here!
You can select multiple polygons/edges/points by holding the ALT key.
Mask areas of your mesh by holding CTRL as usual.
Happy ZModelling!
- ZModeler Documentation: http://docs.pixologic.com/user-guide/3d-modeling/modeling-basics/creating-meshes/zmodeler/
- Demo Videos by Joseph Durst: http://pixologic.com/zclassroom/homeroom/lesson/zmodeler/
And can deselect any multiple objects selected by doing what?
No need to deselect anything – just click and drag on a different object when you’re done with the multi selection. It looks selected only because your multi select will create a new polygroup. Note that single-clicking on another poly will repeat the previous action. It’s easy to get confused about that…