UberEnvironment is a shader based light, available exclusively in DAZ Studio. It brings image based lighting to DAZ Studio when using the 3Delight render engine. It has been around for a while, but it has been a bit of a mystery to me for the last 6 years. I think I’ve finally grasped some of its basics – time to write them down before I forget.
Unlike traditional lights in DAZ Studio, UberEnvirnoment creates a sphere in the scene onto which a HDR image is projected. The sphere itself then emits light, creating some very realistic looking ambient light. UberEnvironment can be used on its own or in combination with other lights for nicely balanced results.
Historically, the UberEnvirnoment product had to be purchased through DAZ by a vendor named omnifreaker. It has since been updated to UberEnvironment2 and is now included for free in DAZ Studio 4.x (as part of the “Default Light and Shaders” – make sure this installed).
The product itself is difficult to find in the Smart Content tab because it appears mixed in with some other scary items. It’s much easier to access it via the Content Library tab: navigate to
- DAZ Studio Formats – My DAZ 3D Library
- Light Presets (not Lights!)
- omnifreaker – UberEnvironment2
You’ll find the following icons:
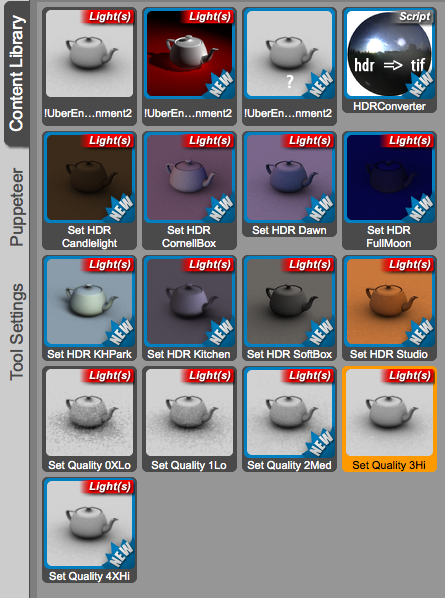
The first two icons are the base product. They can be added by double-clicking or by merging into the scene (using a right-click). This will not replace traditional lights in the scene. I don’t know what the difference between those two is, only that the second one brings in a much smaller sphere than the first.
The third icon is a link to the “official” documentation, and the fourth icon is a conversion script to use standard HDRI images with the format required by UberEnvironment (I know nothing about it).
The following eight icons resembling coloured tea pots will load one of eight preset HDRI maps into the scene. By default no image is loaded for an “ambient occlusion only” look. Double-click one of these eight icons (or load your own under Parameters – Light – Color) and you’ll see the image appear on the sphere.
And lastly, the bottom 5 icons represent render settings for the UberEnvironment light. Lower quality renders images faster but will introduce a lot of dark blotches – good to get an impression of the scene. Note that higher quality settings will take a while, especially if transparency and SSS is involved.
Once added to the scene, UberEnvironment can also be rotated to match any other lights. To better see this effect, select it and scale it down until it’s visible in the scene (don’t worry, it won’t render – it only shows up in the scene preview, and the scale of the sphere does not affect how the light is rendered).
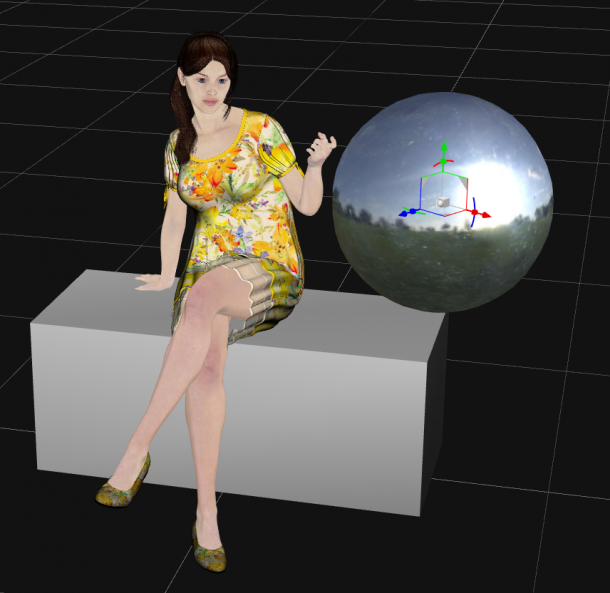
The hotspot on the HDRI image is the location from which the IBL is going to come from, casting shadows in the opposite direction. You can use the standard transform tools or the parameters tab to rotate the sphere.
Let’s look at an example
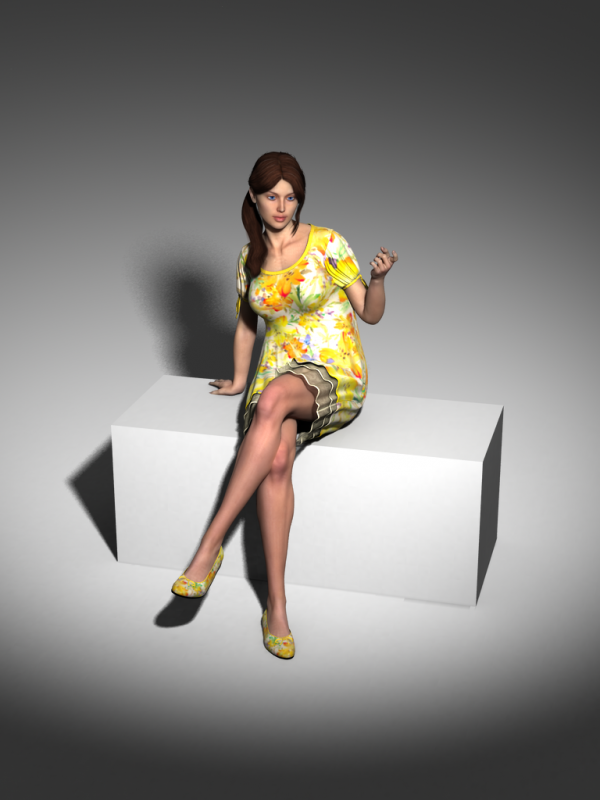
Here’s our model Lilith sitting on an uncomfortable looking box. She’s lit with a single spotlight. Nothing else is in the scene:

The shadows look very dark and the skin looks like plastic – that’s just how 3Delight renders things.
Now I’ll turn the spotlight off and add an UberEnvirnoment to the scene, which can create a lot of light by itself.
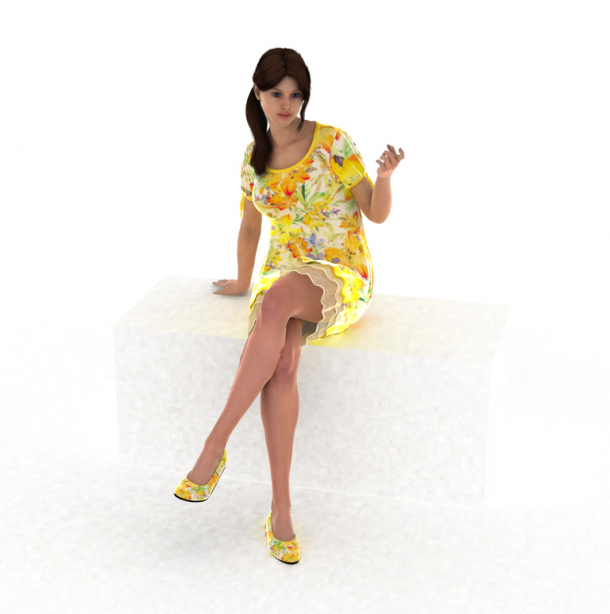
The skin looks less like plastic now, but much of the background has seemingly disappeared – so we’re using a little too much intensity. UberEnvirnoment is great when it’s mixed in with other lights. Let’s turn it down from the default 100% to 20% and turn our spotlight back on. This will mix both results together.
Not bad: softer shadows, less “crushed blacks” as we say in television. Both the spotlight and UberEnvirnoment have an intensity setting – adjust them for best results through test renders.
The above render took just under 10 minutes: as soon as it reaches skin or hair, DAZ Studio is seemingly stuck, give it a moment and will carry on. It’s all that sampling it has to do I guess. To speed up the render, select one of the lower quality settings.

This render took just over one minute, thanks to the low quality preset. Don’t worry about those blotches for now, they will disappear with higher render presets.
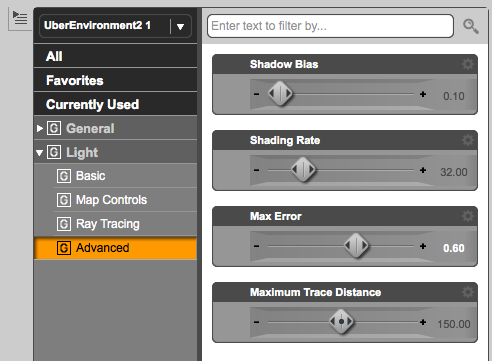
What do the render presets actually change?
Those presets change the values for Shading Rate, Max Error and Maximum Trace Distance. You’ll find those when you select the UberEnvirnoment in your scene, then select Parameters – Light – Advanced. Feel free to fiddle!
There are a lot of other Uber-products available, most of them work on a very similar principle: UberArea, UberHair, UberSurface, UberEverything.
These helpful links explain more about UberEnvironment: