While other 3D apps usually have an option to bring thickness to an otherwise flat object, ZBrush does not. Hurra.
Here’s an extremely fiddly and imprecise way to add thickness to a flat object (such as a 2D plane) using a Morph Target trick I’ve learnt from BadKing the other day.
First, bring in a flat object into your otherwise empty document. The Plane_3D primitive will suffice nicely for this demonstration. Drag it out, enter Edit mode and turn this thing into a PolyMesh 3D.
Turn the object on its side and hit Move (right next to the default Draw).
If you held down SHIFT while looking at the plane from its side, you’ll notice that you don’t see your object anymore – only the Move Tool. That’s just fine. It’s all part of the “fun” of using ZBrush. Have you used the Move Tool before? It takes a bit of getting used to. But I digress…
Click on the little blue circle on the right and you’ll see the tool change, expanding itself to the right. That’s excellent because we’ll move our invisible plane ever so slightly to the right in just a moment.
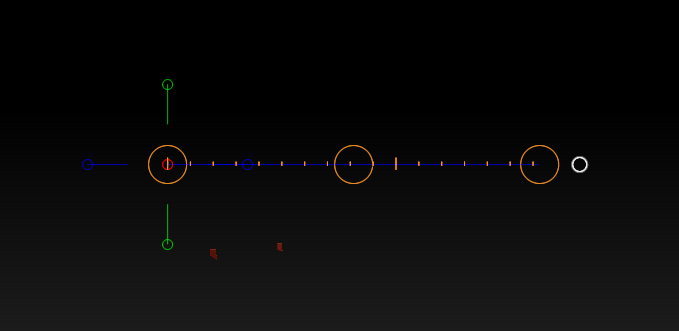
So in my screenshot, where the green line is, that’s the side of my plane. Feel free to turn the view around a little so we reveal the plane like so:

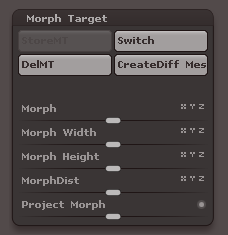
So far so good. Now take a look at the Morph Target menu (under Tool). It only has one usable button right now called StoreMT. Super. Let’s press that to store our objects current position. In fact, storing a Morph Target in ZBrush takes a snapshot of all vertices at their current position.
All the other options should spring into action:
Now hover over the middle circle of the Move Tool until you see a smaller white circle appear. Hold SHIFT while clicking on it, then drag ever so slightly into the direction of the orange line. This shifts the plane, and the amount you drag it away will soon determine how thick your object will become.
When you’re done, click the Switch button in the Morph Target menu. This toggles the position of your plane. How exciting!
Next click on CreateDiff Mes (short for Create Difference Mesh) and find that a new Tool has graced your Quick Pick Menu, aptly titled MorphDiff_PM3D_Plane. Select it to turn your current object into said tool, or use it like any other tool.
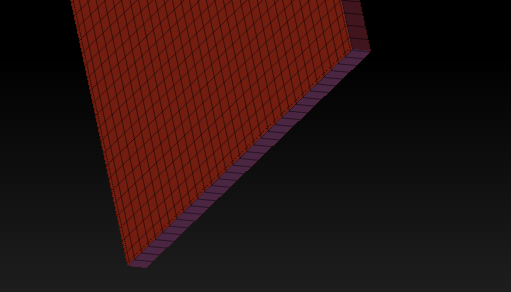
Now we have an object that has thickness applied. The End.
1 thought on “How to add thickness to an object in ZBrush using the Move Tool”