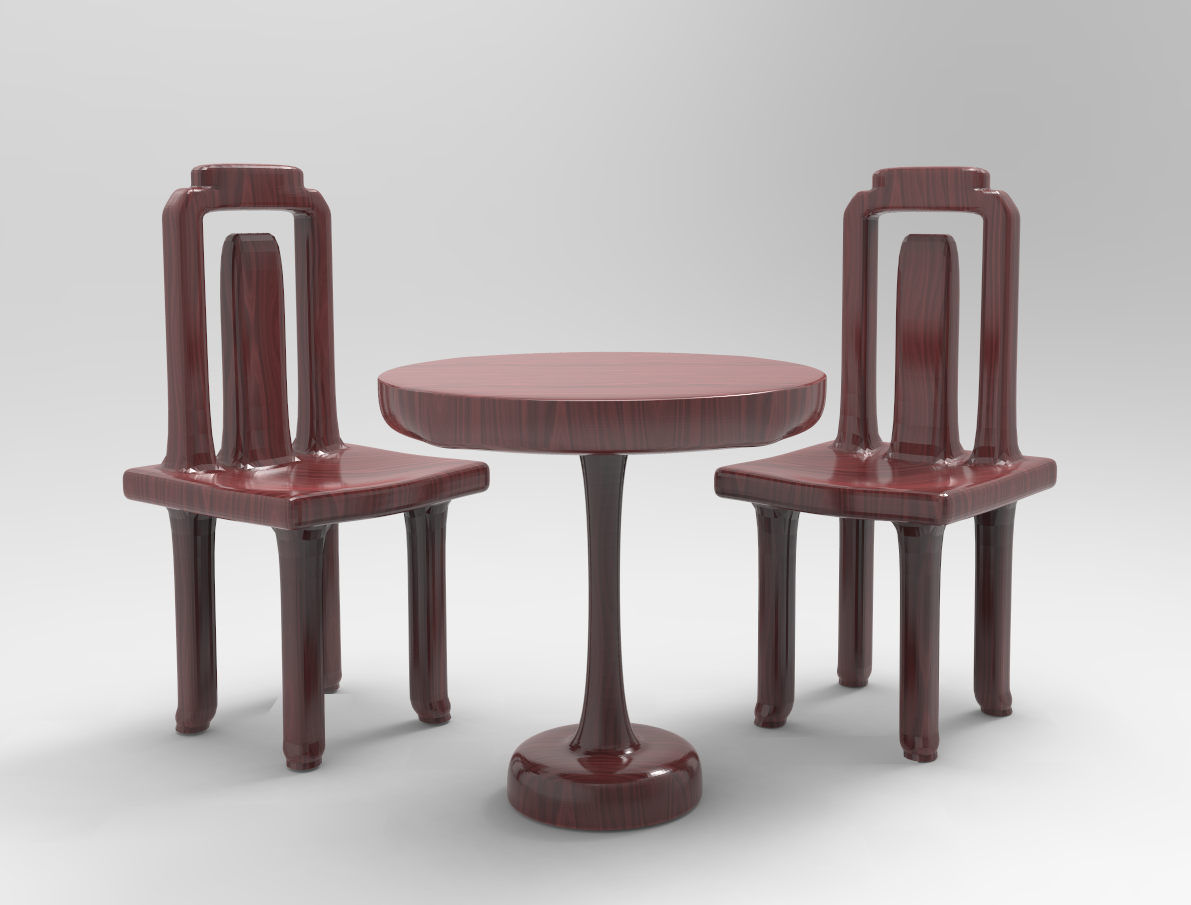
I was modelling a chair in ZBrush the other day and wanted to bring it into DAZ Studio for rendering. So I exported my chair as OBJ from ZBrush, imported it into DAZ Studio and was slightly surprised by the result: it looked more edgy, and not as smooth as it appeared in ZBrush.
Why was that, I wondered, and – more importantly – how could I fix that?
The secret sauce is called Subdivision Surfaces (SubD) and it’s easy to add to any object or figure that doesn’t already have it applied. Let me show you how to do this in DAZ Studio 4.8.
The Problem
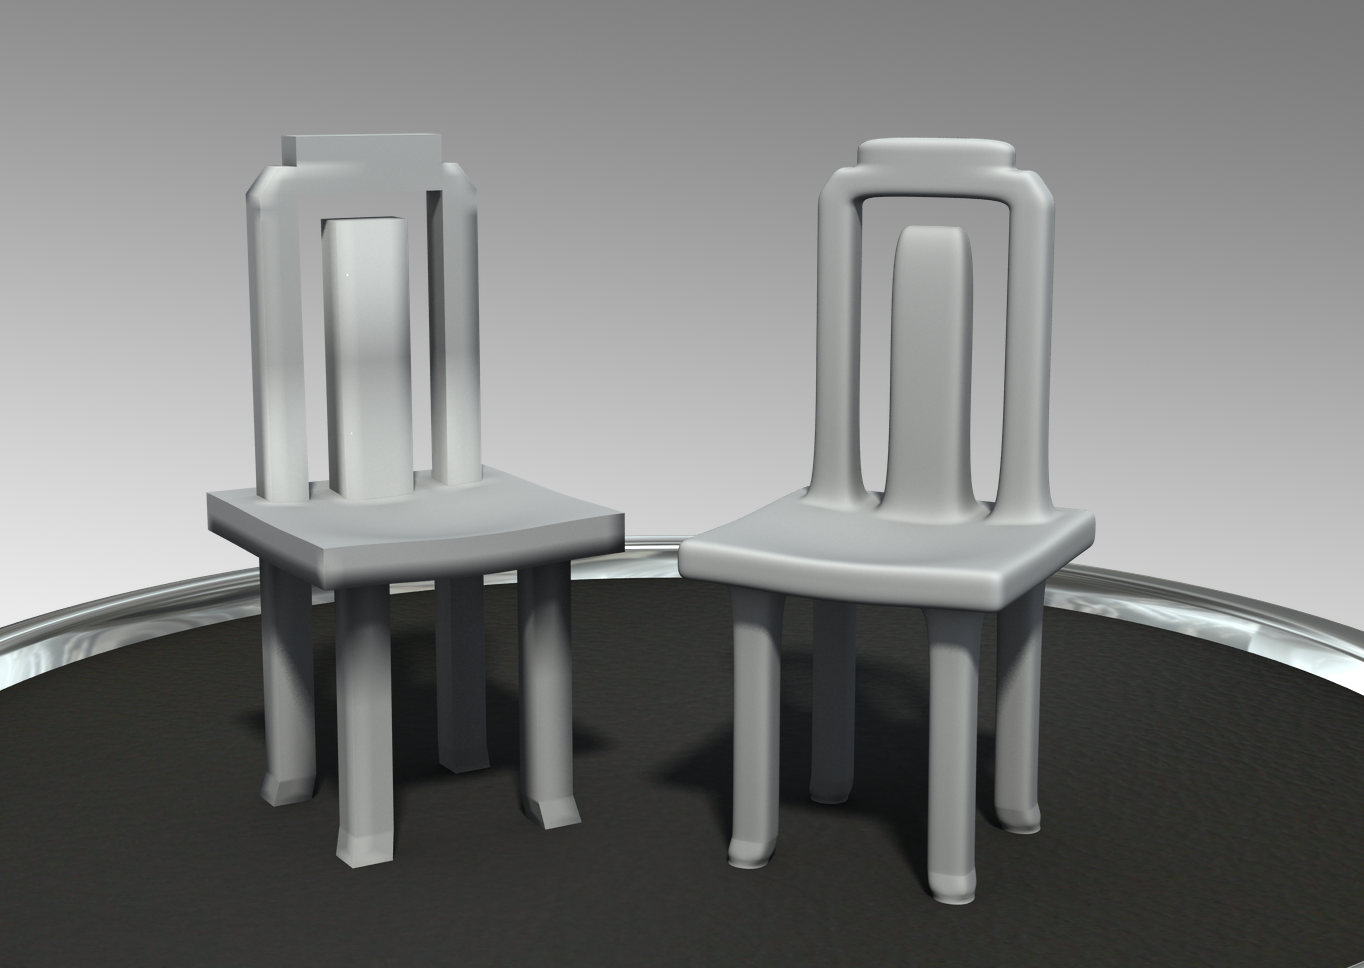
The above picture shows what my model looked like when I first imported it into DAZ Studio (left), and how it looked in my modelling app (right). It’s the same OBJ, the only difference is that the one on the right has one level of Subdivision Surfaces applied to it.
We all know what subdivision is, so what’s Subdivision Surfaces? In a nutshell, it’s an (optional) “implied geometry” that makes our models look nicer by adding one or more levels of subdivision to the mesh before displaying it. Computers these days are powerful enough to apply SubD on the fly, hence most 3D apps use this principle. It keeps the polygon count low and delivers excellent results.
Each level of subdivision quadruples the polygon count on our model on the fly, and even though your model doesn’t gain much weight, your computer may slow down considerably when adding too many subdivision levels on the fly.
All those extra polygons could alternatively be baked into your model so we wound’t have to do any extra processing on the fly, but that will increase the object’s file size and weight, so a healthy medium is what we’re looking for: smallest OBJ, looking it’s best when displayed.
But how do we tell DAZ Studio that we’d like to apply SubD to our home-made models?
The Solution
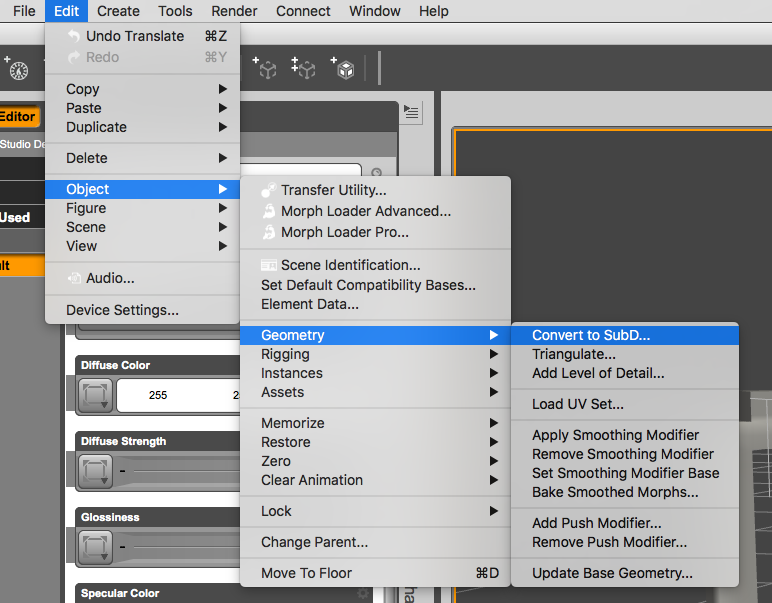
Select the object in question and head over to Edit – Object (or Figure, depending on your model) – Geometry – Convert to SubD.
This will add a new section under the Parameters Tab called Mesh Resolution. This is where we can tell DAZ Studio how many subdivision iterations we’d like it to use on our model.
View SubD Level defines how smoothed our object looks like in the viewport (0-3), while Render SubD Level defines how smoothed our object will be rendered (0-7).
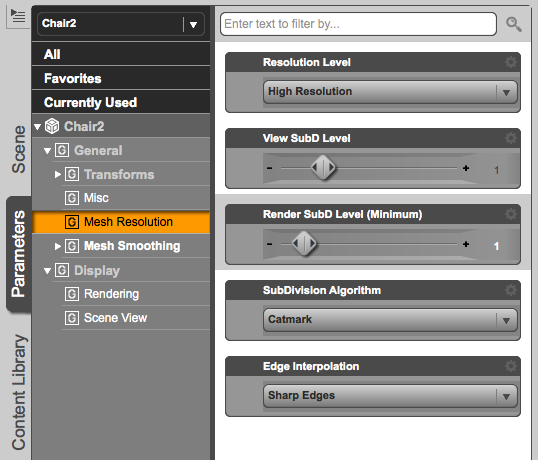
For the Uber Geeks among us there’s even a choice of algorithm that defines how these implied polygons are calculated. Resolution Level allows us to switch between the base model and the interpolated version (High Resolution).
You can learn more about Subdivision Surfaces in this article.
Is adding Subdivision Surfaces the same as adding a Smoothing Modifier?
No, those are two different things in DAZ Studio. The Smoothing Modifier can be helpful if a mesh has imperfections after applying morphs and bends to it, and it’s used in the fitting of clothes to avoid poke-through. A Smoothing Modifier can be used in addition to Subdivision Surfaces.
Check out Elliandra’s article for a quick demo on the Smoothing Modifier.