
In my previous article I’ve explained how to use Radial Symmetry in SketchBook Pro, and because I can never remember how to use it it Manga Studio (or Clip Studio Paint as it’s now called), I thought I’d explain it here for future reference.
The Radial Symmetry feature has been part of Manga Studio since version 5.0, but it’s slightly complex to get started with it if you’ve never used it before. Radial Symmetry is created with a Ruler Layer, so I’ll explain how to create and use one.
Here’s how to accomplish this rather daunting task:
Finding the Ruler Tool
First, find the Ruler tool in your Tool Bar. It’s the little triangular blue icon midst so many other tiny icons. If you can’t find it, expand the Tool Bar.
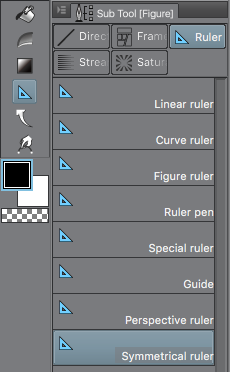
Somewhere next to the Tool Bar, find the Sub Tool palette and choose Ruler. It looks like the screenshot above. You’ll find several default rulers for other tasks here too. The one we’re looking for is the Symmetrical Ruler. Select it and check out the Tool Property palette (I know… don’t shoot the messenger).
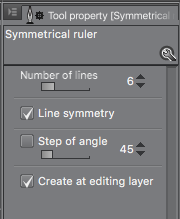
The Tool Properties let you adjust how many segments you’d like to draw with Radial Symmetry: you can create up to 16 segments.
Note the little tick box that reads Line Symmetry: it’s ticked by default, and it means that your drawings will not populate every segment, but instead every other segment. It’s a nice touch (see the variations in the GIF above). Untick this option and your strokes will appear in every segment of your canvas. Line Symmetry is only available when the number of lines is even.
Create at Editing Layer means that the ruler is created in the currently selected layer. Untick it and Manga Studio will create a separate layer for your ruler.
Creating your Symmetric Ruler
Now we need to create the actual ruler. It’s as easy as dragging somewhere on the canvas. At first you’ll see a line, quickly followed by the amount of lines you’ve specified above. You can create as many rulers as you like on the same layer, but only one can be active at a time for drawing.
To bring up control handles so that you can change the position of the ruler, or its rotation, you must select the Object Tool (it’s the little 3D Cube Icon), then select the center of the ruler (turning it purple, while inactive rulers will be green). Tweak and move to your heart’s content.
And finally: Using your Symmetric Ruler
With your ruler in place, pick a brush or pen and start drawing. Notice what happens: your strokes are happening right on the ruler layer by default. That may be fine, but you may want to draw on a different layer, or use several layers to finish your multidimensional masterpiece.
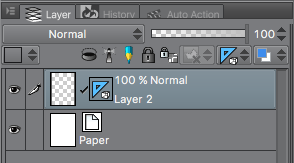
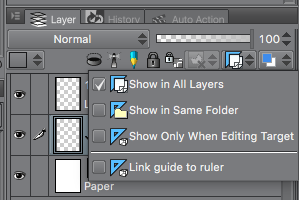
To do this, check out the Layers palette and select your Ruler Layer (it has a blue triangle next to it). Notice the little drop-down menu also showing a blue triangle: when you hover over it, it should read something like “Set showing area of ruler” – whatever that means.
Click on it to bring up a context menu that allows you to show this ruler on all layers. Note that doing so changes this logo into something else, which makes it a little more difficult to find the little critter later.
Now that the ruler layer is showing on every layer, create or select another layer to draw on and be amazed by what you can do with your new Symmetric Ruler.
If you have created several rulers on one layer and would like to activate another one, head back to the Ruler Layer, choose the Object Tool and select one of the others. The active ruler is purple.
Note that the eraser and blender tools are not reproduced in symmetry: only pen strokes, pencil strokes and brush strokes are applied with symmetry.
Well done if you’ve made it this far! Enjoy your adventures with Radial Symmetry, and don’t forget to check out the other funky rulers Manga Studio has to offer.
Hi, thank you so much for an extremely helpful article, which I’m sure has saved me hours of frustration. Just one thing to note, and I don’t know if you’ve discovered this since writing the article, but you can actually use the eraser in symmetry (and I presume the blender tool). You have to check the ‘Able to Snap’ option, under ‘Correction’ in the ‘Sub-Tool Detail’ of the eraser. I can’t claim credit for finding the solution, I found it on Deviant Art after the lack of a symmetrical eraser was driving me insane! Thank you again. DPB.
Oooh, that’s an interesting find indeed – I didn’t know that. Thanks for sharing, Darrell! Glad to hear my article was helpful 🙂