 Sometimes it’s necessary to have a 2D Texture Template for a 3D model. It makes texturing a lot easier in 2D painting apps.
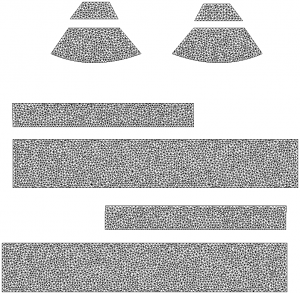
While some programmes like Marvelous Designer can create the UVs, and quite clearly show them to us, there’s no easy way to export them as a flat file – akin to the one you see on the right here.
Photoshop to the rescue! All versions of Photoshop 3D and Photoshop CC can import OBJ files, and they can not only display the UV Map as an overlay, they can turn it into a new Layer for us as well.
Here’s how to do it.
Displaying the UV Map as an overlay
Import a UV mapped and perhaps even textured OBJ file into Photoshop. You’re greeted with a 3D View of the object, and a small thumbnail of it in the Layers tab. I’m using the Marvelous Designer default dress for this demo.
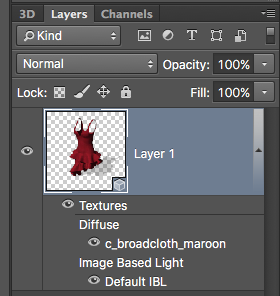
Notice the Diffuse Texture Map underneath the thumbnail. Mine is called c_broadcloth_maroon because that’s the texture file my OBJ references. Depending on your OBJ, there may be other maps applied here as well.
Double-click the diffuse texture anywhere right to the little eye icon (eyecon… har har har) and a new document PSB document opens, showing you the flat texture. This allows for easy changes. Right now all we see here is a Background Layer, with no indication of how the object is unwrapped.
In the Properties Palette, under 3D Paint, find a checkbox that reads UV Overlays. When ticked, Photoshop will display the UV Map on top of the current image. How cool is that?
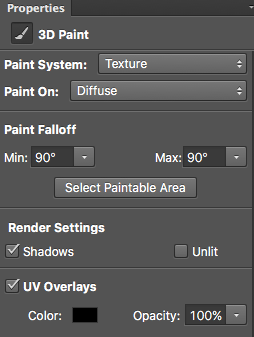
While this is a great help for painting textures, the overlay is presented much like a guideline or a ruler – it’s not exportable as such. We’ll see how to do that next.
Turning the UV Overlay into a Layer
Untick the UV Overlays checkbox for now and see the UV Map disappear again. What we really want is that overlay baked into our image, preferably as a layer. And of course that’s possible with Photoshop.
Head over to 3D – Create Painting Overlay – Wireframe will do just that.
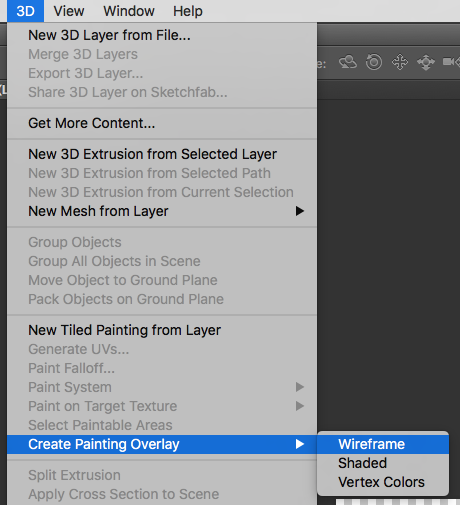
Selecting this will create a new layer with the same UV Map as we’ve just seen. This is your UV Texture Template.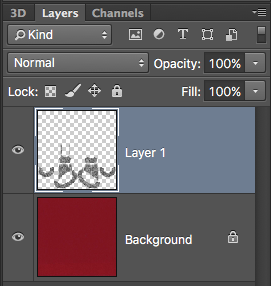
If you find that the current map isn’t big enough, simply resize the image to your liking and create the UV Overlay layer again to match your new texture size.