Turntable animations show an object or a collection of objects from all sides. They’re usually rendered as a loopable image sequence. The above is such an example of Michael 7, assembled as a GIF image. He’ll keep spinning forever!
Let’s see how we can create something like this in DAZ Studio.Build the scene as you usually would. I’m using a single posed character for this example. Now create a Null Object (Create – New Null) and drag your whole scene onto the new null (excluding the lights and camera).

We’ll rotate the null object instead of the actual object to avoid causing wobble. Frame the camera to your desired position and make sure all render settings are good to go.
Open the timeline and position the playhead on the first frame and set a keyframe. Now forward to the end of the animation plus one frame. For example, to create a 100 frame animation, set the animation duration to 101 frames (one more than you need) and position the playhead on the final frame (frame 100 in our case, as DAZ Studio starts counting frames at 0… so our 0-100 animation actually has 101 frames).
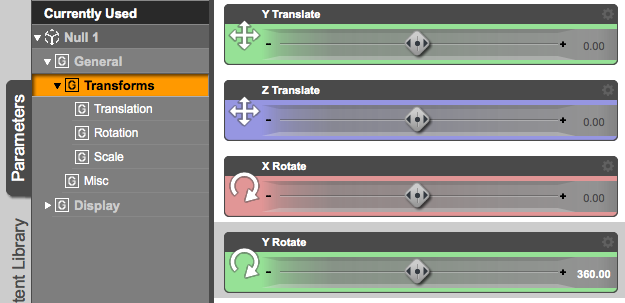
Position your playhead on the last frame of your animation, then turn the Y rotation of the null to 360. This will make your animation spin counter clockwise. If you’d like it to go the other way, use -360. Making this change will automatically set a keyframe. Hit play to see your handy work. Your object should rotate with the timeline without wobble.
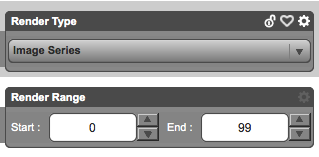
Under Render Settings, set the Render Type to Image Series and render the whole range, excluding the final frame (because we have that already; it’ll be the same as the first frame, so no need to render it twice. Again, in our example, render frames 0-99).
Assemble the sequence in an image editor and you have your turntable animation.
Extra Credit: avoiding Ease-In and Ease-Out
By default DAZ Studio will start and stop animating with a smooth ease-in and ease-out effect. It’s easy on the eyes, but in our endless loop it may not be what we want. Sadly there’s no easy way to avoid this without additional tools. It’s the way the keyframes are blended together at the start and at the end.
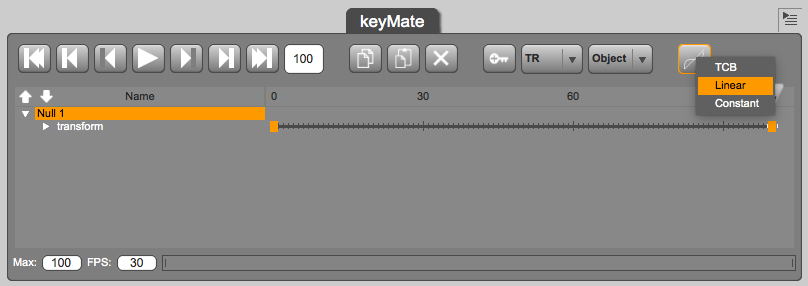
KeyMate is a plugin that can change this: simply mark all keyframes by dragging around them, then use the Interpolation Method switch to change those keyframes from the default TCB to Linear.