 You can define a pattern from any image in Photoshop and use it as Pattern Overlay later.
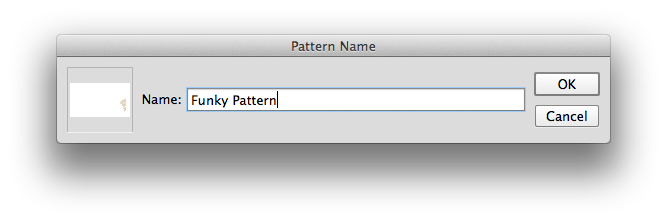
Simply head over to Edit – Define Pattern and give your new pattern a catchy title.
That’s it!
There are a few things to be aware of though: most patterns are used as tiles and will therefore repeat. Once a pattern is saved somewhere in the depth of Photoshop, you may want to export it along with other patterns, for sharing or safekeeping.
I’ll touch on those things briefly, but let’s start by how to use existing patterns.
Using Patterns in Photoshop
The easiest way to use patterns is with the Layer Blending Options. On a new layer, fill the area that is to be patterned with a solid colour of your choice. You can use a brush, flood fill a selection, use vector patterns, anything will do as long as it creates something on a new layer.
Double-click that layer (or right-click and select Blending Options). This will bring up a list in which you must find a setting called Pattern Overlay. Select it and click on it (you can tick the box without seeing the options otherwise, so tick the box, then click on the row – it highlights and will show you something like this):
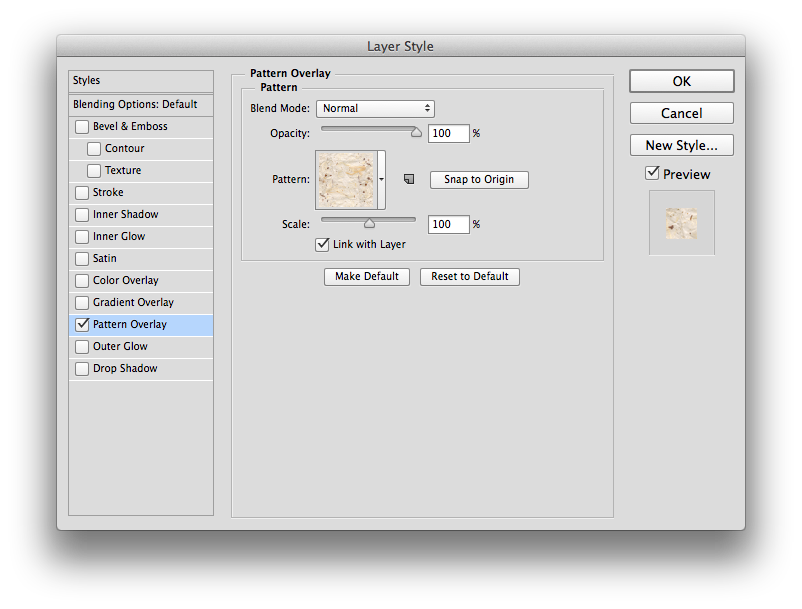
You can change several things here, the most important options are Blend Mode, Opacity and Scale. Just know this is where they are, then click into the Pattern Field to bring up other patterns and select one you want to use. If you have defined a pattern yourself, it’ll be at the bottom of the Pattern Box.
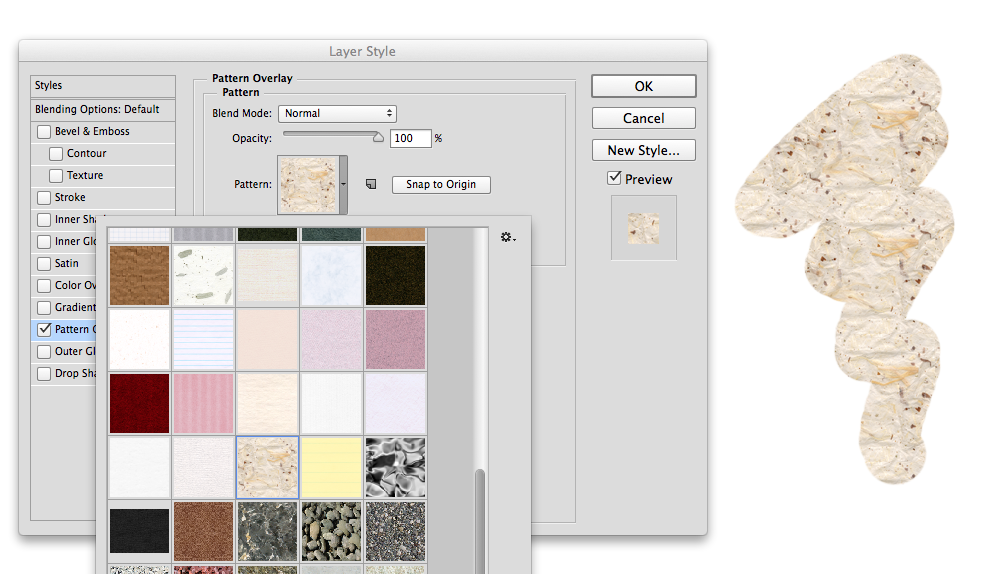
See that little gear icon in the Pattern Box? When you click it you’ll see another long scary list of options (such as Rename, Delete, Presets Manager and many others). You can add more patterns to the Pattern Box by selecting any of the items from the lower part of the list (Artist Surfaces, Rock Patterns, etc), or you can remove items from the Pattern Box if you don’t want to see them anymore (using delete).
Note that this is nothing final: deleted patterns can always be brought back, you’re not destroying files on your hard drive. You can choose to append patterns or replace what’s in the box. Try it out, you can’t break anything.
Using the Load option you can also add patterns you’ve previously made and saved – we’ll talk more about this later.
Back in the Pattern Overlay window, click OK and instead of your solid paint stroke you’ll see a pattern. Nice!
Defining your own Patterns
Most patterns are square, but Photoshop can accommodate other aspect ratios too. It depends what you’re creating. Perhaps a texture from a photo you took while you were out wandering the streets.
Load the image you’d like to create a pattern from as a new Photoshop document (via Open), crop it and correct it as you see fit, then simply head over to Edit – Define Pattern. Give it a catchy title and your pattern is added to the bottom of the Pattern Box we saw earlier.
Tiling Patterns
Patterns repeat by default, much like a tiled background on a website. For this to look seamless we must make sure that the edges of our pattern image repeat – otherwise you’ll see a rather ugly effect. The smaller the tile, the more annoying this can be.
If you’re interested in learning more about tiling patterns, check out this good old yet still relevant tutorial by Collis Ta’eed. Some things just don’t change in Photoshop 😉
Exporting and Sharing Patterns
To save your own patterns, or a collection of your favourite patterns to a tangible file we’ll need to use the Presets Manager. We’ve met him before as part of the long scary list under Blending Options, but we can also call upon him via Edit – Presets – Presets Manager:
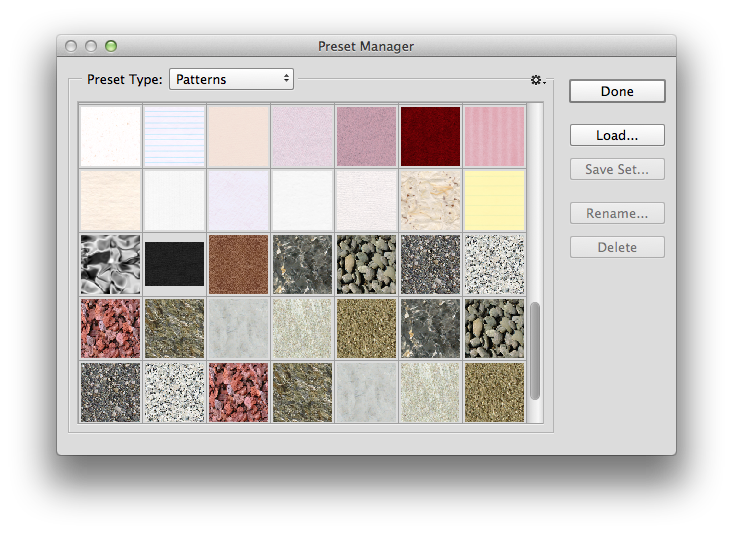
The Presets Manager is in charge of many other things too, as seen from the Preset Type drop down menu. Brushes, Swatches, Gradients – you name it. Select Patterns to bring up the list of patterns we saw earlier, which will include patterns you have defined yourself.
From the list of patterns, select the ones you’d like to save. Hold down CRTL or CMD to select multiple, all of which will now be highlighted. Select Save Set to save a single file which includes all your patterns, including their catchy titles.
Files saved in this way can be loaded on another machine running Photoshop, or simply at a later date when you need those patterns again. It’s that simple.
Happy Patterning!
Just one more thing: How to rotate Patterns
One of the lamest things ever in Photoshop is that there is no way to rotate a pattern once it’s in place – as there is in Manga Studio.
If you ever need to do this, follow this tip by Deke McClelland: