
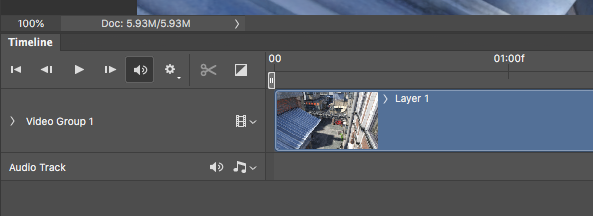
The Photoshop Timeline is a mysterious tool. You can open it from Window – Timeline, or you can open an image sequence/video clip and it’ll dock itself at the bottom of the viewport. By default it displays a sequence in a timecode of sorts, but it’s not the SMPTE or EBU timecode we’ve come to know and love. Instead, it’s something along the lines of seconds and frames, in a format like 02:02f or in other words, something NOBODY in the world would ever use.
But hey, they’re Adobe, and by default they can do anything they want (while extorting money from casual users). I don’t use Photoshop for physical film or video editing, but it’s a nice tool to have when converting rendered image sequences into video clips. I’ve described how to do this here.
When I work this way, I’m more interested in the frame count rather than some made up timecode-thing. I’ve found out how to change this in Photoshop CC, and thought I’d share it with you.
By default, the timeline looks like this:
To change it over to frames, head over to the left hand side and find that little square icon with the four lines above the two plus signs. It’s hidden you know, they probably didn’t want us to change this thing. Clicking this icon will reveal this menu. It has some other handy options to explore, make sure to check it out.
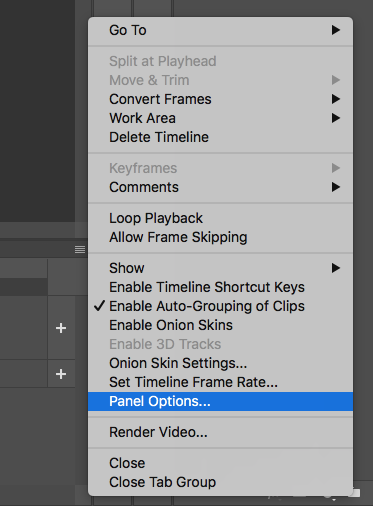
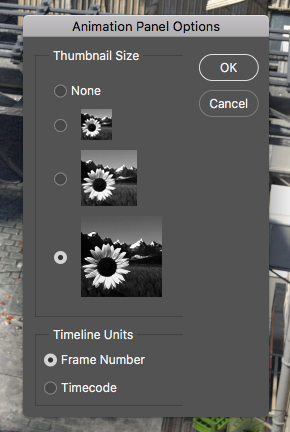
Under Panel Options we’ll find a way to make Photoshop count in frames. It’ll also allow us to display our timeline thumbnails larger or smaller – that’s a nice touch on 2k and 4k monitors.
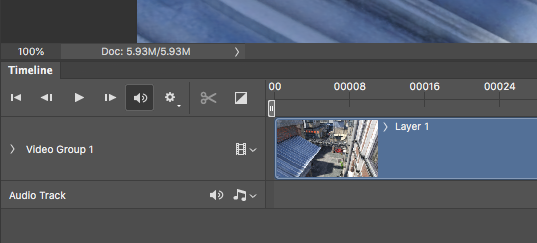
Now we can better understand where in our rendering sequence we are with our playhead. It’s not quite Premiere, but for short image sequences, this will do nicely.
Hope this helps!