Auto-fire means that you can keep holding down a button and a gun in your game keeps firing bullets at a pre-determined rate. No matter how a single-fire mechanism is setup, we can modify it to work automatically. In this article I’ll show you how it works. For this example I’m using the First Person Template, but I’ll try to keep it general so it’ll work with other projects.
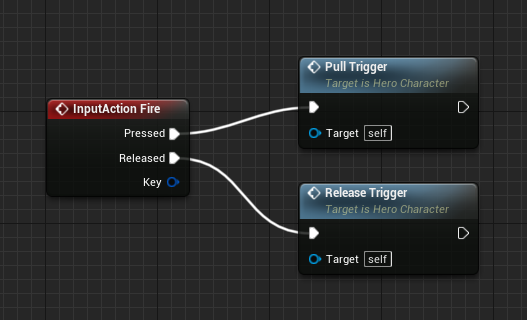
I’m assuming we have an Input Event setup that lets us detect a “button pressed” and “button released” event. Let’s create two custom events to go along with these and call them Pull Trigger and Release Trigger respectively. We’ll hook them up like this, so each can call a function (we end up with less wire salad that way).
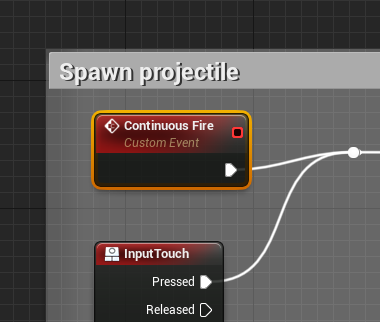
Now we’ll setup a third custom event that will do the actual firing. In the First Person Template this is happening in the FPS character itself, in a comment box where the projectile is spawned. I’ll call my custom even Continuous Fire, but by all means use something less prone to misspellings. Here’s where it plugs in (the actual firing mechanism is a tad complicated in that template):
Pulling the trigger
To call this mechanism, I’ll setup a Timer by Function node that will continuously call the Fire event for us. This will be hooked up to the Pull Trigger event we’ve created earlier. This is what the graph looks like:
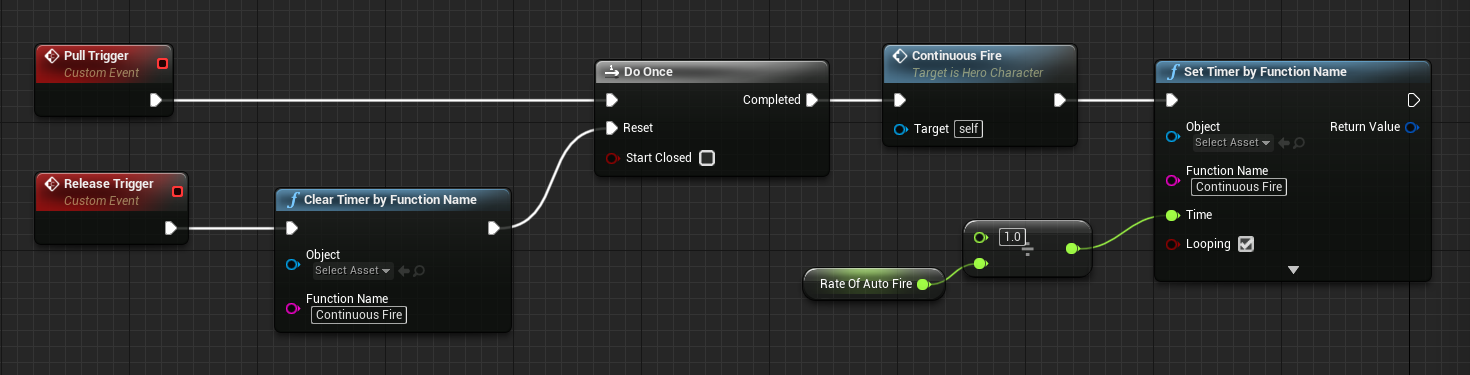
Let’s start from the back with the actual timer: the timer is created with the looping box ticked, so it happens over and over. The Time parameter is the interval that’s used to repeat this event. Ordinarily it’s just an integer, so 1 would mean “repeat this once every second”. That’s too slow for a gun, so we’ll use a shorter interval like 0.2. To calculate this a little easier, I’m dividing a Float Variable called Rate of Auto Fire by 1, so that we get to set a humanly memorable number like 5. Divided by 1 this would indeed be 0.2, and it lets us adjust the rate of fire easier. Make the variable public so it can be set from the Details Panel in the Level Editor.
Just before the timer is initiated, we’re calling the Continuous Fire function once. We do that so there’s no lag until the gun fires for the first time. It adds a sense of immediacy when you’re playing (try taking it away to see the effect it has). We’ll do all this once only, so that the timer is not set repeatedly while the player has his/her finger on the proverbial trigger.
Releasing the trigger
When the trigger is released again, the Release Trigger function is called. This will plug into the same graph, clearing the timer on our Continuous Fire function. We’re also resetting the Do Once node so that it’s ready for re-use on the next trigger event.
Simple yet effective.