I had never created a morph in an external app for Character Creator before, but I managed to make it work after a few false starts. Just before that fleeting knowledge escapes me again, here’s how to do it. I’m comparing it to the Morph Loader dialogue in Daz Studio and will use comparable terminology in this article.
The workflow is the same as in other apps that support morph targets:
- export the current figure as OBJ (it doesn’t have to be in base shape)
- make a change in an external app, export as OBJ
- create a new slider and specify the exported OBJ
I’m using the Base Toon character for this in CC 8.4, but I would image this also works with clothing items (haven’t tried that out yet though).
Exporting the Base Figure
This step is really simple: with the character selected, head over to File – Export – OBJ – Nude Character in Bind Pose. This will make sure that none of the attached clothing/anatomy elements are not exported. It would make it impossible to import the morph later. So even if you have a clothed character, don’t worry about the clothing.
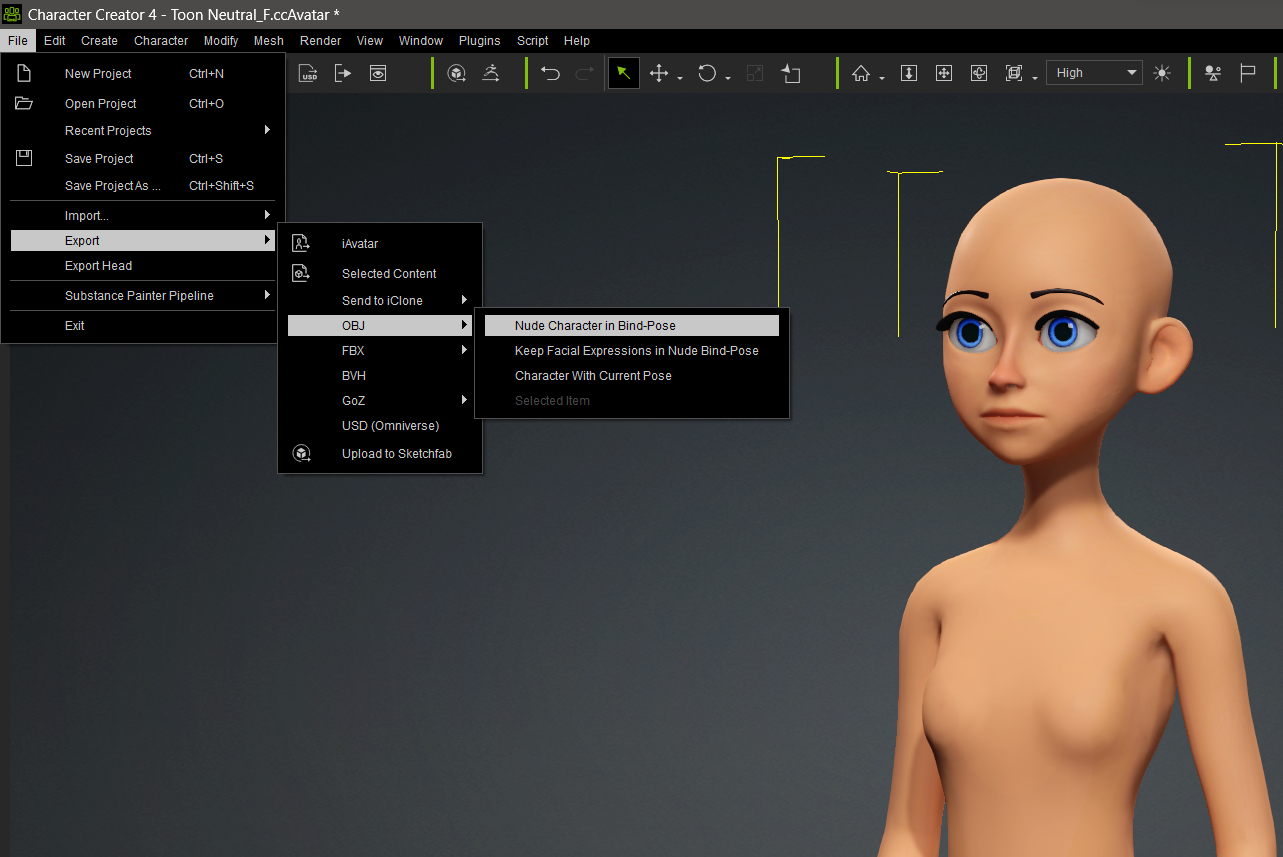
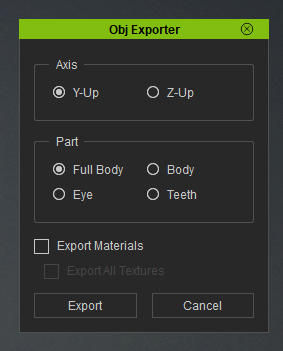
We have some export options, like up axis and what part of the figure we’d like to export. For our purposes, let’s use the default Y-Up and the Body. Full Body will also work, and it will come with teeth and eyes (lashes are part of the body geometry).
You’ll end up with one OBJ file, and an OBJ Key file that’s unique to your version of Character Creator. We’ll need that for the import later.
Making a Change
I’ll use Blender for this example, but any modelling application will work. Just make sure the scale is the same on import and export. CC exports in centimeters, but Blender uses meters. I’m not going to worry about the size mismatch, it’ll work fine if I import and export with both defaults.
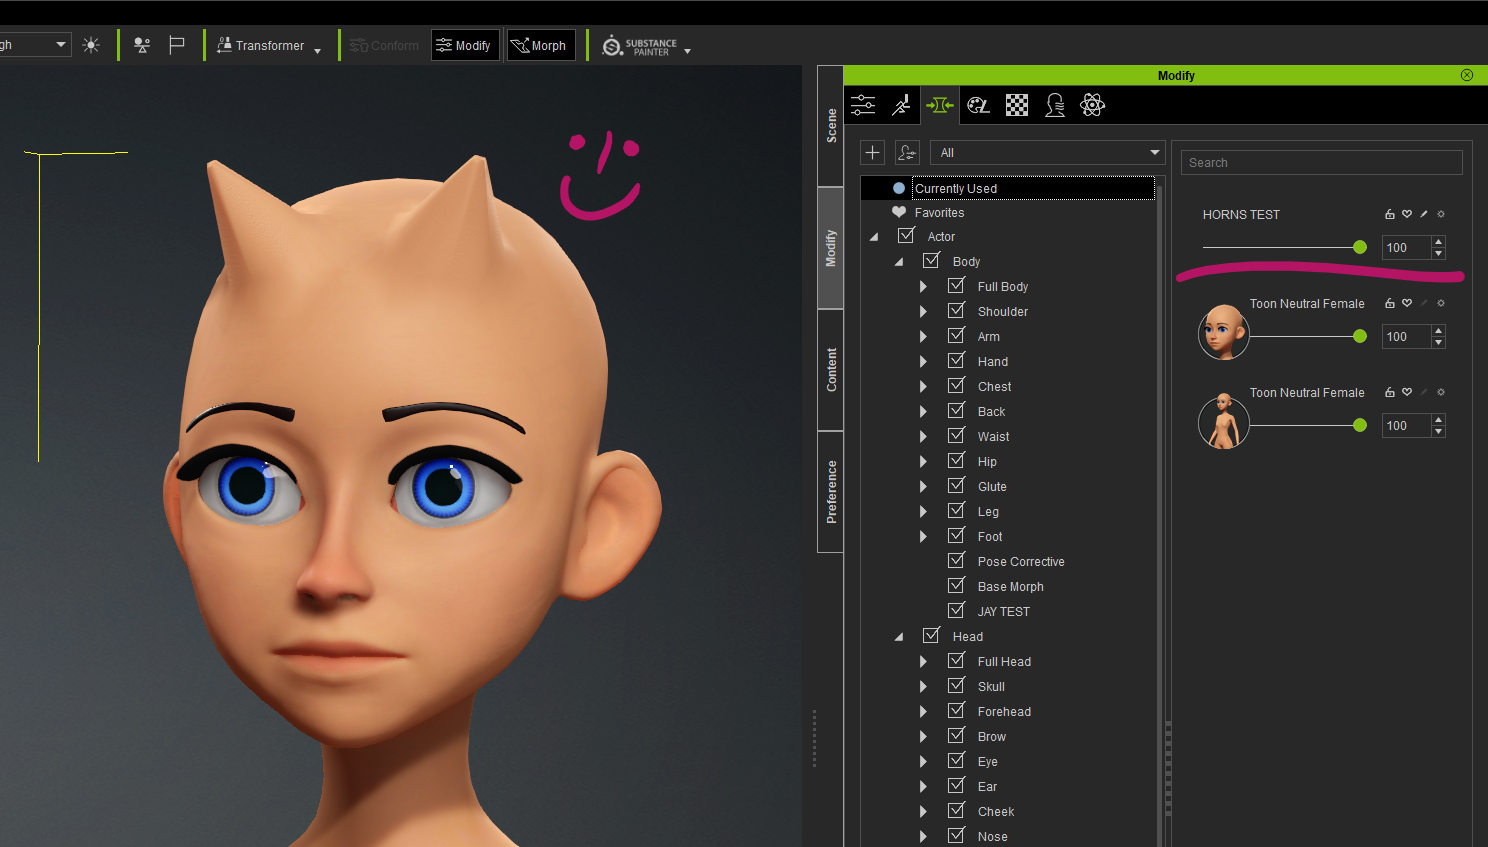
I’ll give my character some horns on the head, something like this:
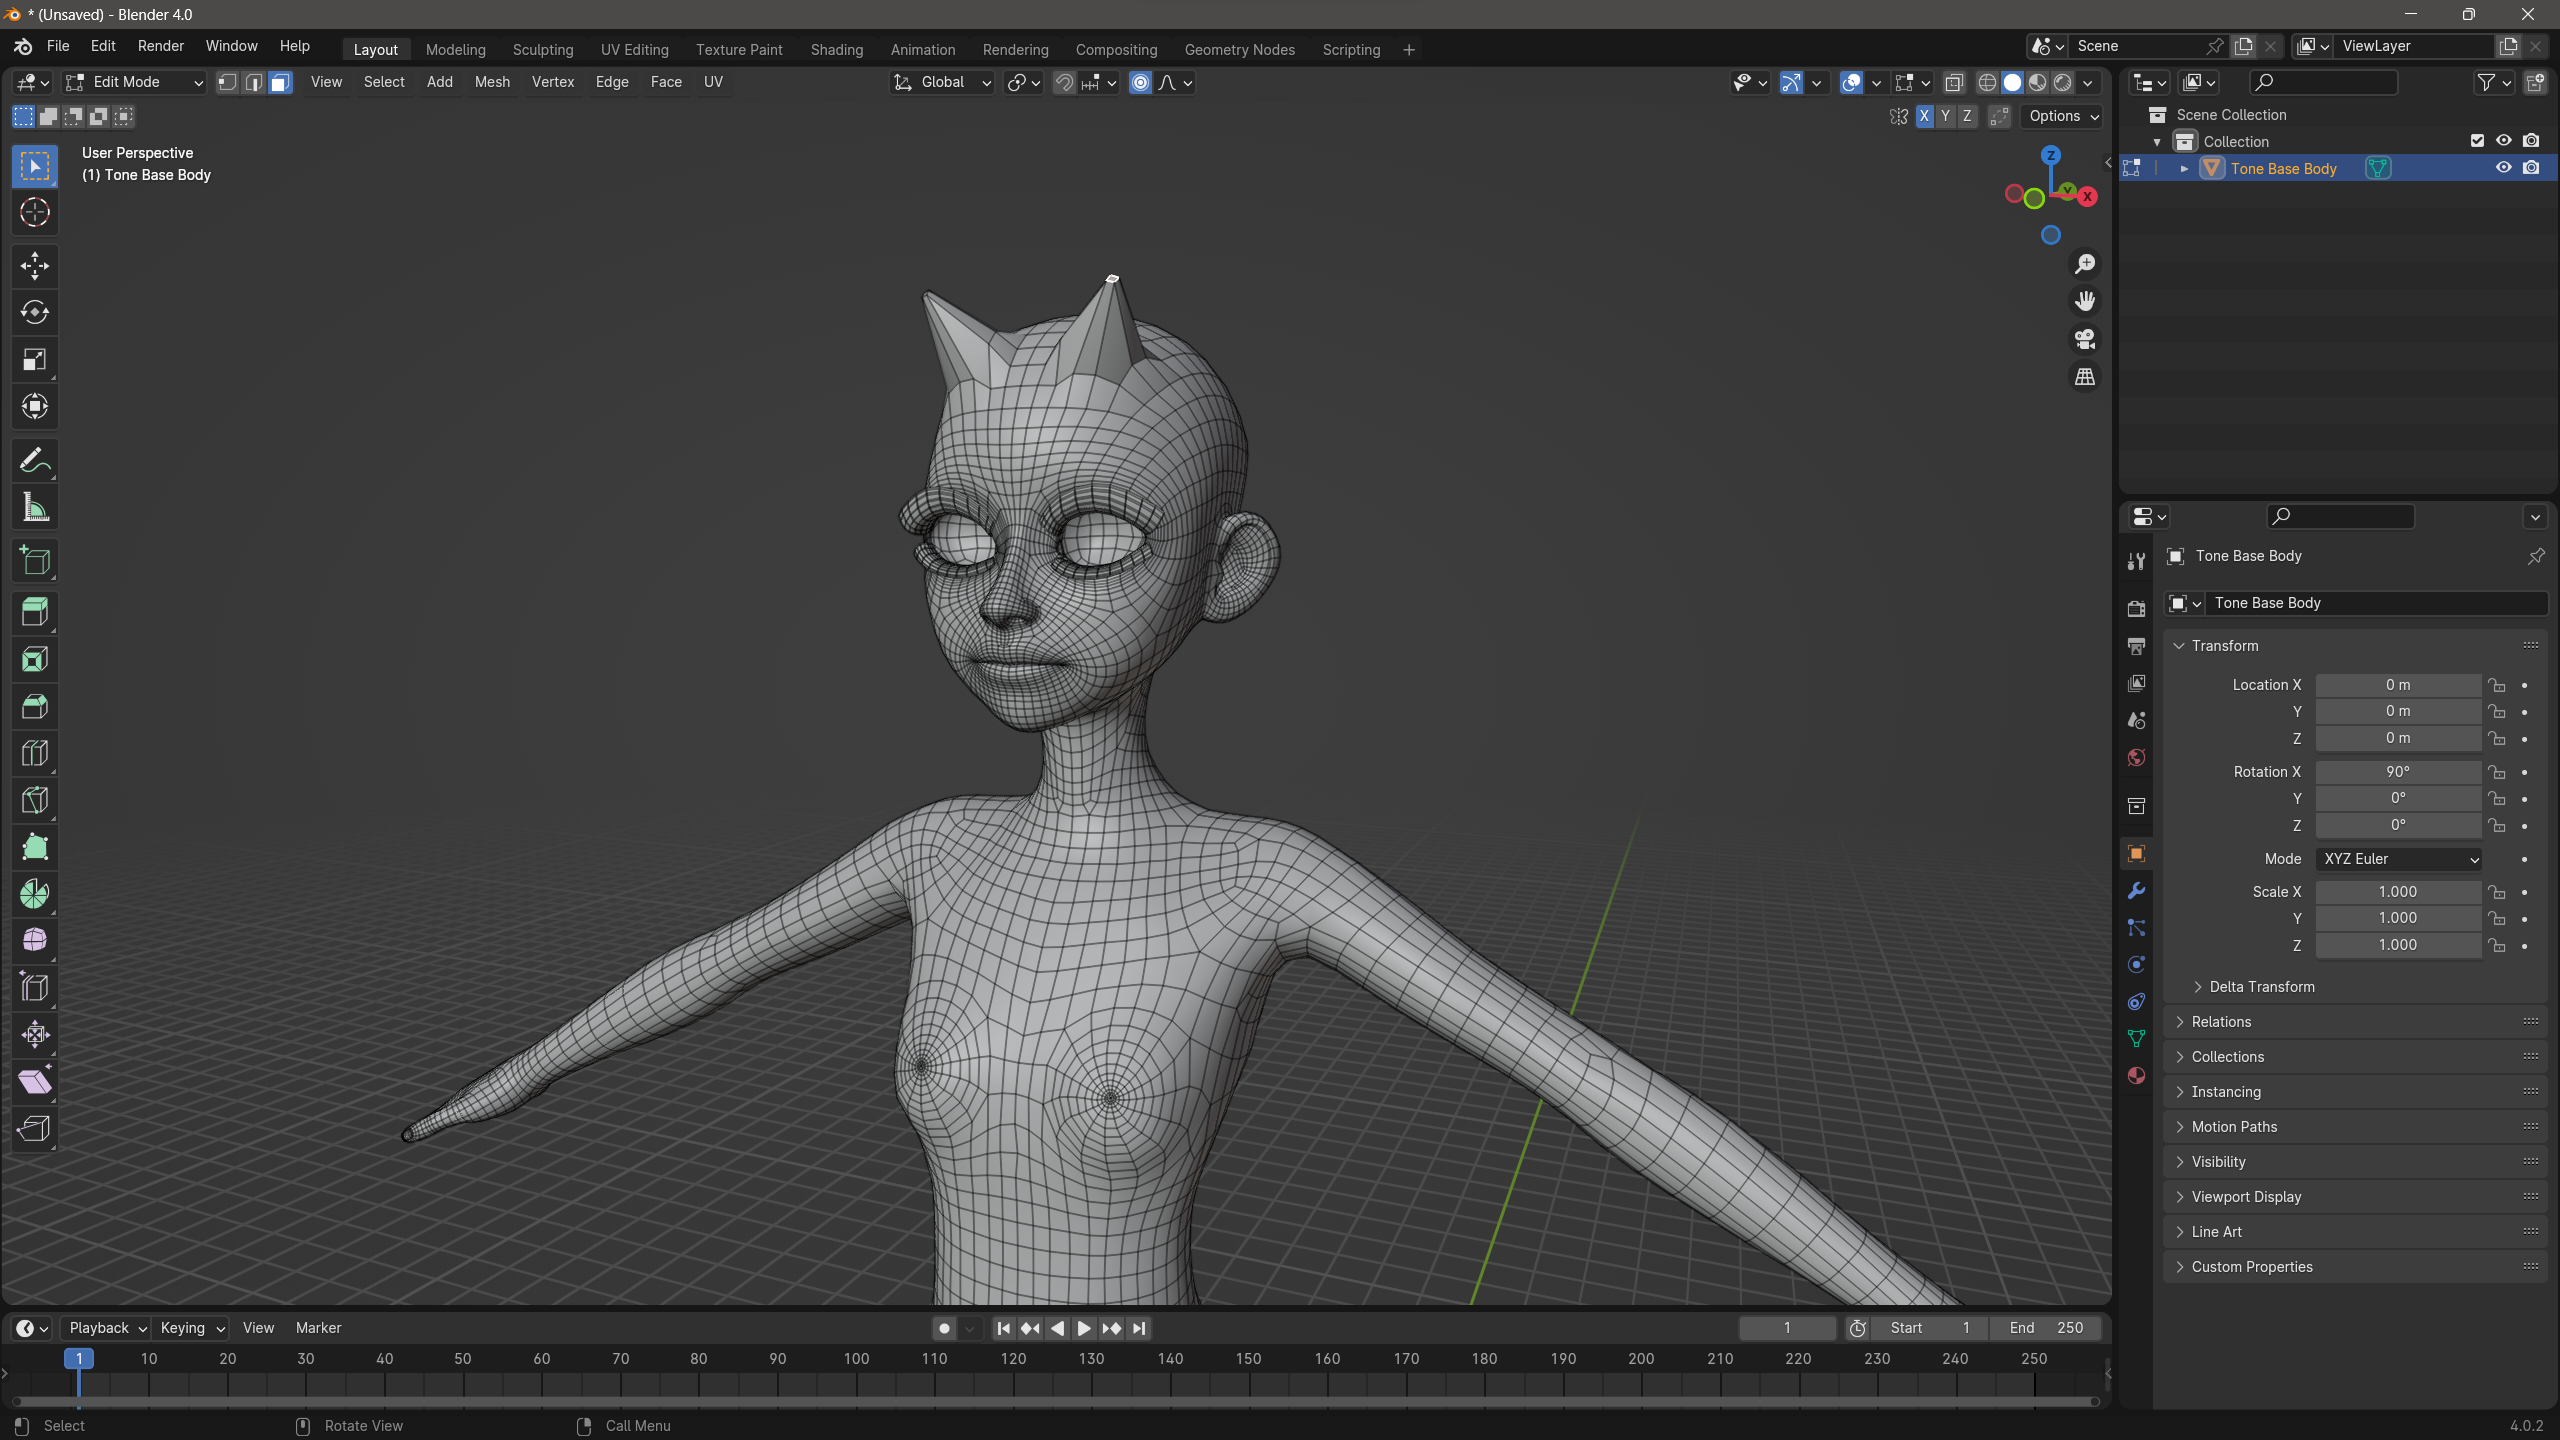
We could wrap the CC character around a full body scan, or be far more creative, just as long as we don’t change the geometry in any way. This means no removing or adding to the existing vertices, no splitting, no cutting holes – all we’re allowed to do here is to move existing vertices around.
When we’re done, let’s export the character out as OBJ. Again, make sure northing else is exported at the same time or the morph import won’t work. We’ll end up with a new OBJ file (hopefully of the same scale as on import).
Creating our Morph Slider
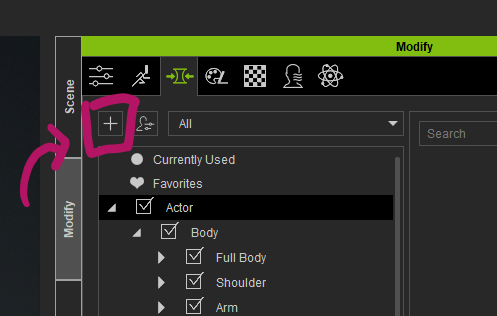
Back in Character Creator, select your character and find the Modify Tab and select the Morphs icon. There’s a plus icon at the top left, click that to create a new slider.
This brings up a dialogue with several options:
- Morph Name, Category and Location is where your slider will be located in the hierarchy.
- Morph Values let’s you pick the range of the slider
- Source Morph should be set to Current Morph, unless you’re 100% sure you’ve used the un-morphed CC3+ Base Character for export. This is the equivalent of enabling “reverse deformations” in Daz Studio
- Target Morph should be set to File, and this is where you specify the export from your modelling app (the file I’ve just made in Blender).
- The Checksum File is the .ObjKey file that’s been exported with your original export from CC. Make sure you specify it here.
- Thumbnail is an optional PNG file that can go with your slider, it shows up as a little icon
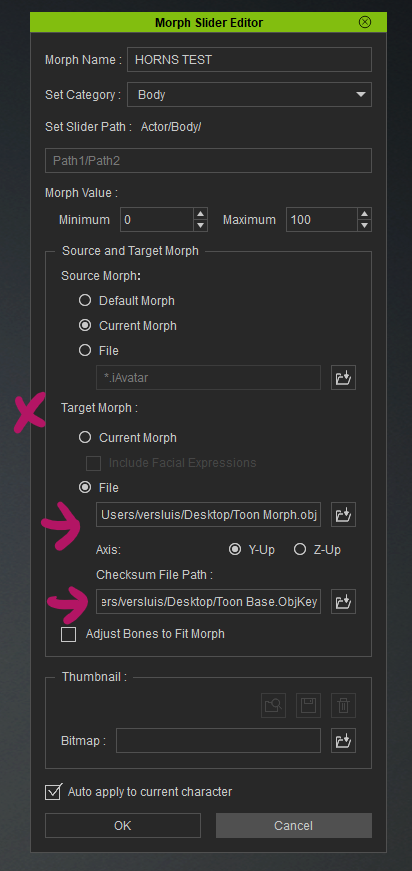
Auto Apply to character means the morph is dialled up to max once we click OK. If you’ve made proportional changes to the character (say taller body, longer arms, etc) make sure to enable “Adjust Bones to Fit Morph”. This is equivalent to “Adjust Rigging to shape + ERC freeze” in Daz Studio. It’s not necessary for my horns though.
There’s no need to save your morph, by some “under-the-hood” magic this happens automatically.
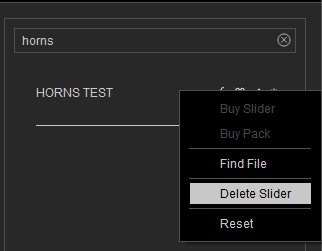
Removing an existing morph
If ever you want to get rid of a morph you’ve created, find it in the list and click the small gear icon next to it, then choose “Delete Slider”.
That’s it! Let’s see what exciting morphs we can create for our characters with this tool.