Importing Daz content into other applications is tough on a good day, but trying to use Transformer with Reallusion’s Character Creator pretty much takes the cake: 9 out of 10 attempts will fail guaranteed. In addition, only the base texture comes in by default. Genesis 8 and older generations usually work, but 8.1 and 9 can cause severe trouble.
I’ve just found something that worked more or less and wanted to note down the settings before I forget them again. I’ll also give you some tips to make this process as painless as possible. Have fun, and remember there are so many other things you can do with your life 😊
What’s the workflow again?
Let’s start with the basics, I keep forgetting how to do this too. For characters and clothing:
- export the FBX from Daz Studio with the settings shown below
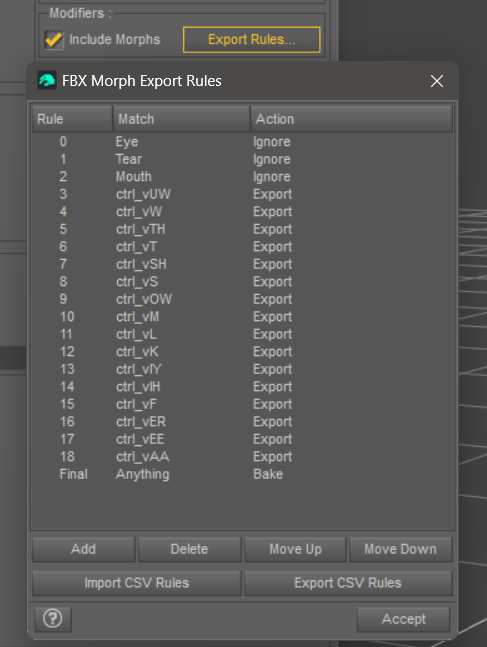
- include viseme morphs for animation (optional)
- in CC, head over to Create – Transformer and choose CC3+ or CC3 (depending on Daz generation)
- if successful, a window asks for “Basic or Advanced” options (choose Advanced)
- run Mike’s Magic script (optional, but will import all maps)
FBX Export Settings
These export settings seem to work most of the time (with CC 4.4 and Daz Studio 4.22.1.78):
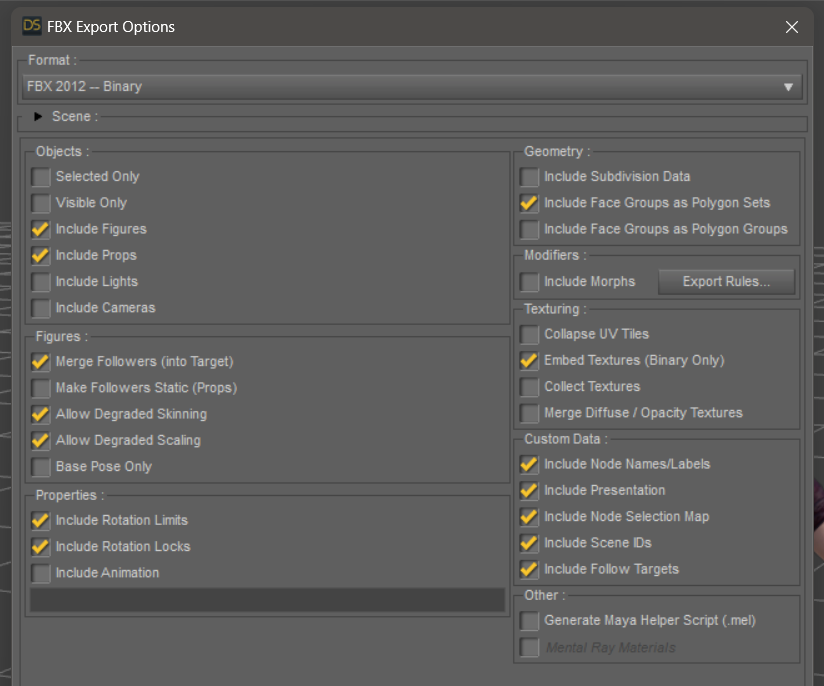
Disable “embed textures” to force CC to look at the source textures. We’ll talk more about this further down. Enable “include morphs” if you want your characters to use facial expressions.
Importing into Character Creator
Just in case you didn’t know this, the import pipeline for Daz characters only works via Character Creator. We can’t go straight into iClone. Click the Transformer button, or find it on the menu via Create – Transformer. We have to pick the correct CC generation on import. As of Character Creator 4, it works like this:
- Genesis 9, 8.1 and 8 use the CC3+ character
- Genesis 3, 2 and 1 use the CC character (can be converted to CC3+ afterwards)
Choose your exported FBX file. If successful, this dialogue will appear.
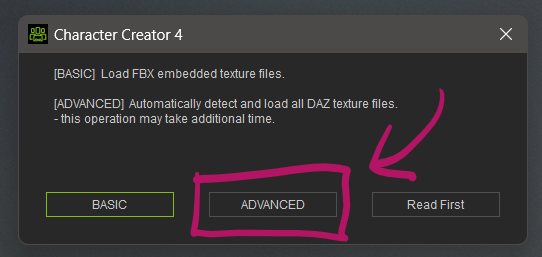
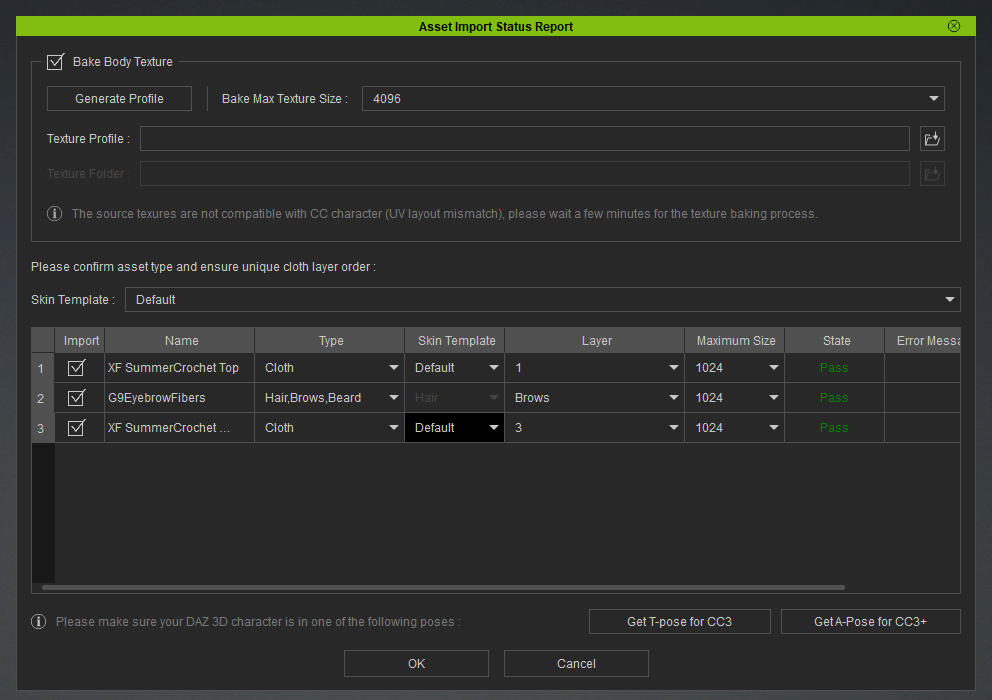
Select Advanced and choose Bake Textures with the size you’d like to transfer. Use the drop-downs to tell CC what the attached items are (i.e. hair, brows, clothing), then hit “import” to start the conversion. Note that this is going to take a really long time depending on the size of your textures, as they have to be re-baked and split up to work with the native CC Base UVs. Smaller texture sizes transfer considerably faster.
Importing additional maps
The above will import only for the base textures, but not of the other maps like normals, roughness etc. Reallusion suggest to create an INI file that describes to CC where to find the other maps and specify this on import. Doing this for every single character is a laughable suggestion at best. It does however work, and since we’re mainly concerned with the normal maps, it’s relatively easy to fill out.
Another option to make this a bit more painless is a script by Mike Kelley. He has taken the time to write a couple of them in Python, allowing us to extract the information needed to create such an INI file from a DUF we save from Daz Studio. His script parses the DUF file and copies all maps into a directory we can specify on import, together with an INI file.
Note that I have never gotten this to work because of file permission issues, and the fact that there’s several versions floating around, together with zero documentation. It’s Mike’s personal project after all, not a commercial product. If you want to try it out, you can find the scripts here (may or may not the latest versions):
- INI File Creator Script for Daz Characters: https://mega.nz/file/Ev5zDRza#3Q-DpCQ_44l7MlsSaa6Lkyx4Fle81xDbqBKVmyp2Xvs
- Material Fixer Script for clothing/props: https://mega.nz/file/FjRjgZCL#C2HGu-tKPcpD3jqRfo4itRW9m-63x9F1rg0kQEoP4A0
- one of Mike’s videos trying to explain the script: https://youtu.be/OYrp1b2B4jY
Alternatively, you can find and import the maps manually after conversion (costs time and patience).
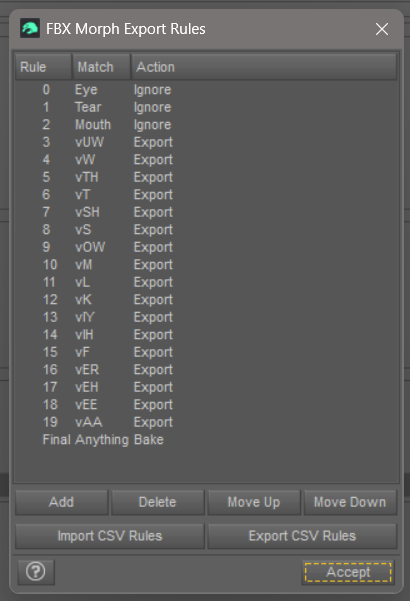
Viseme Morphs
If we want our characters to be able to talk in iClone, it is vital to export the viseme morphs. iClone can use these to add proper lip sync. These can’t be added afterwards, and without them, lip sync looks awful.
Depending on the figure generation, we’ll need different morphs. Here are the ones we need for Genesis 9:
For Genesis 8 we need the following morphs:
I don’t have the info for Genesis 8.1 or any other figure generation right now. I’ll add them here if I ever find the time. I might also dig out the CVS file for both so you can download it from here.
Troubleshooting
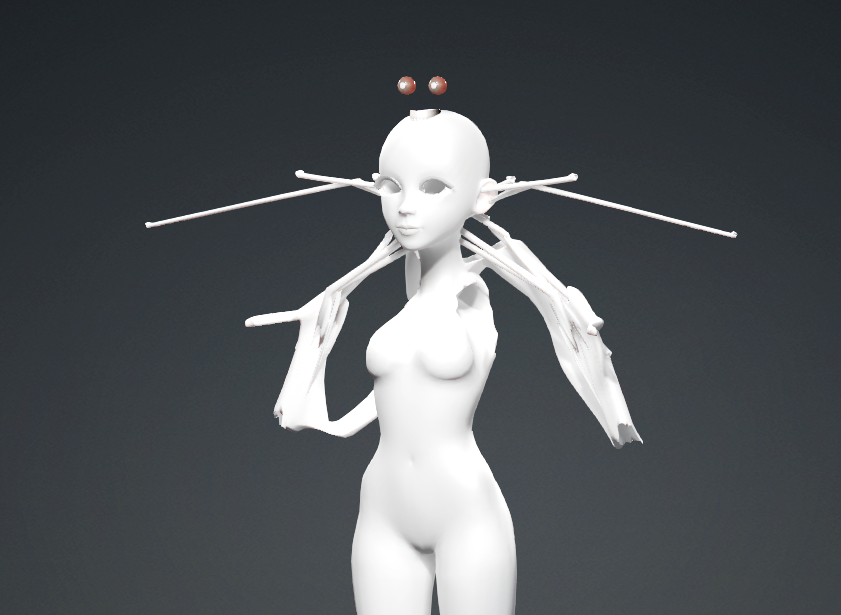
If your Transformer import looks like this, things haven’t worked out. Happens 9 times out of 10. It’s not you, it’s “the system”. Chances are the culprit was one of the following:
- one of the attached clothing items
- hidden geometry caused by clothing (feet for example)
- for Genesis 9: missing or modified eyes or teeth
The best way to rectify this is to export the figure without clothing, made from a base figure. The most reliable way is to NOT load a character preset directory from the library but instead
- load the Genesis 9 Base figure (grey character, not the dev load)
- dial in your character’s head and body morph
- apply the materials
Character vendors often add or reference something to their figure preloads that greatly confuses CC and generates monsters like the thing above on import. Better be safe than sorry.
That’s all I have for now. This article has been sitting in my drafts section for over a year, I thought it was time to publish it – unfinished or not. I’m sure I’ll add to it over time.