I’ve been experimenting with Groom Hair in Unreal Engine today, first time ever and I currently know almost nothing about it. Groom is UE’s strand-based hair system with real time physics we don’t have to setup from scratch, unlike those horrible cloth weight maps and collision shapes. Groom hair “just works” – I have no idea how or why.
Turns out we can convert card based Daz Hair into stand-based hair via Blender, then export it as Alembic and use two UE Groom plugins to get it working. Quite the ordeal and a “settings bingo” that’s fun for the whole family. Here’s what worked for me step by step. I’m using Daz Studio 4.22 and Blender 3.6.5 for this (because later Blender versions don’t work without a patch), together with Unreal Engine 5.3 because Groom Hair isn’t stable in the 5.4 preview.
I’ve made a supporter preview video about this workflow. Eventually I’ll make a public version of this, but I’ll have to learn a few more things for it to be a complete solution. Until such time, here’s that video:
Exporting from Daz Studio
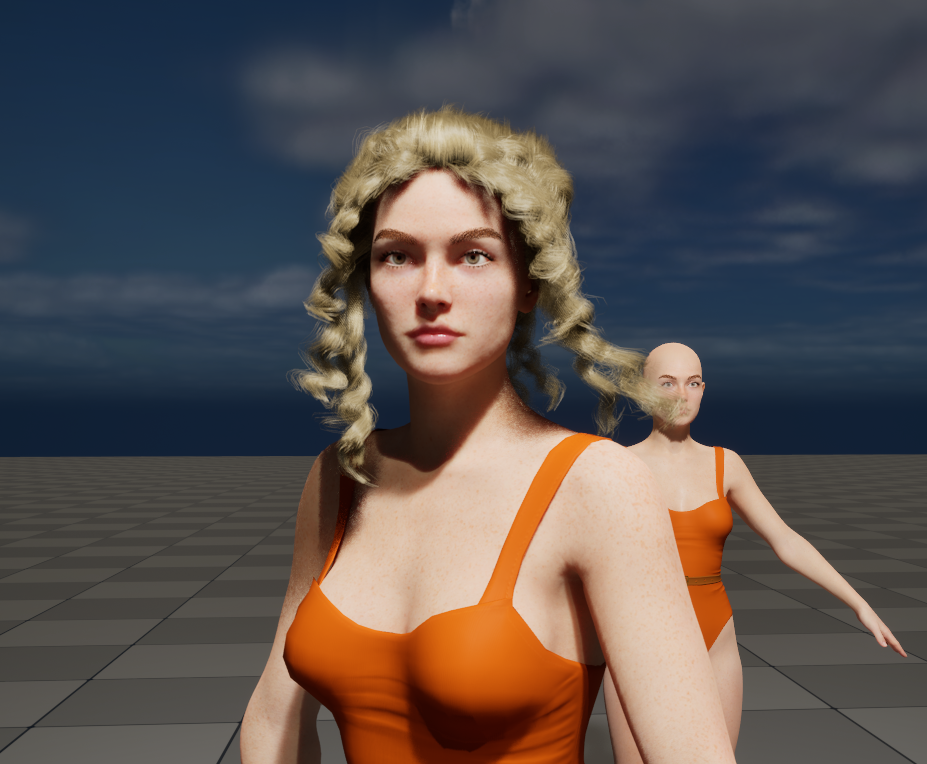
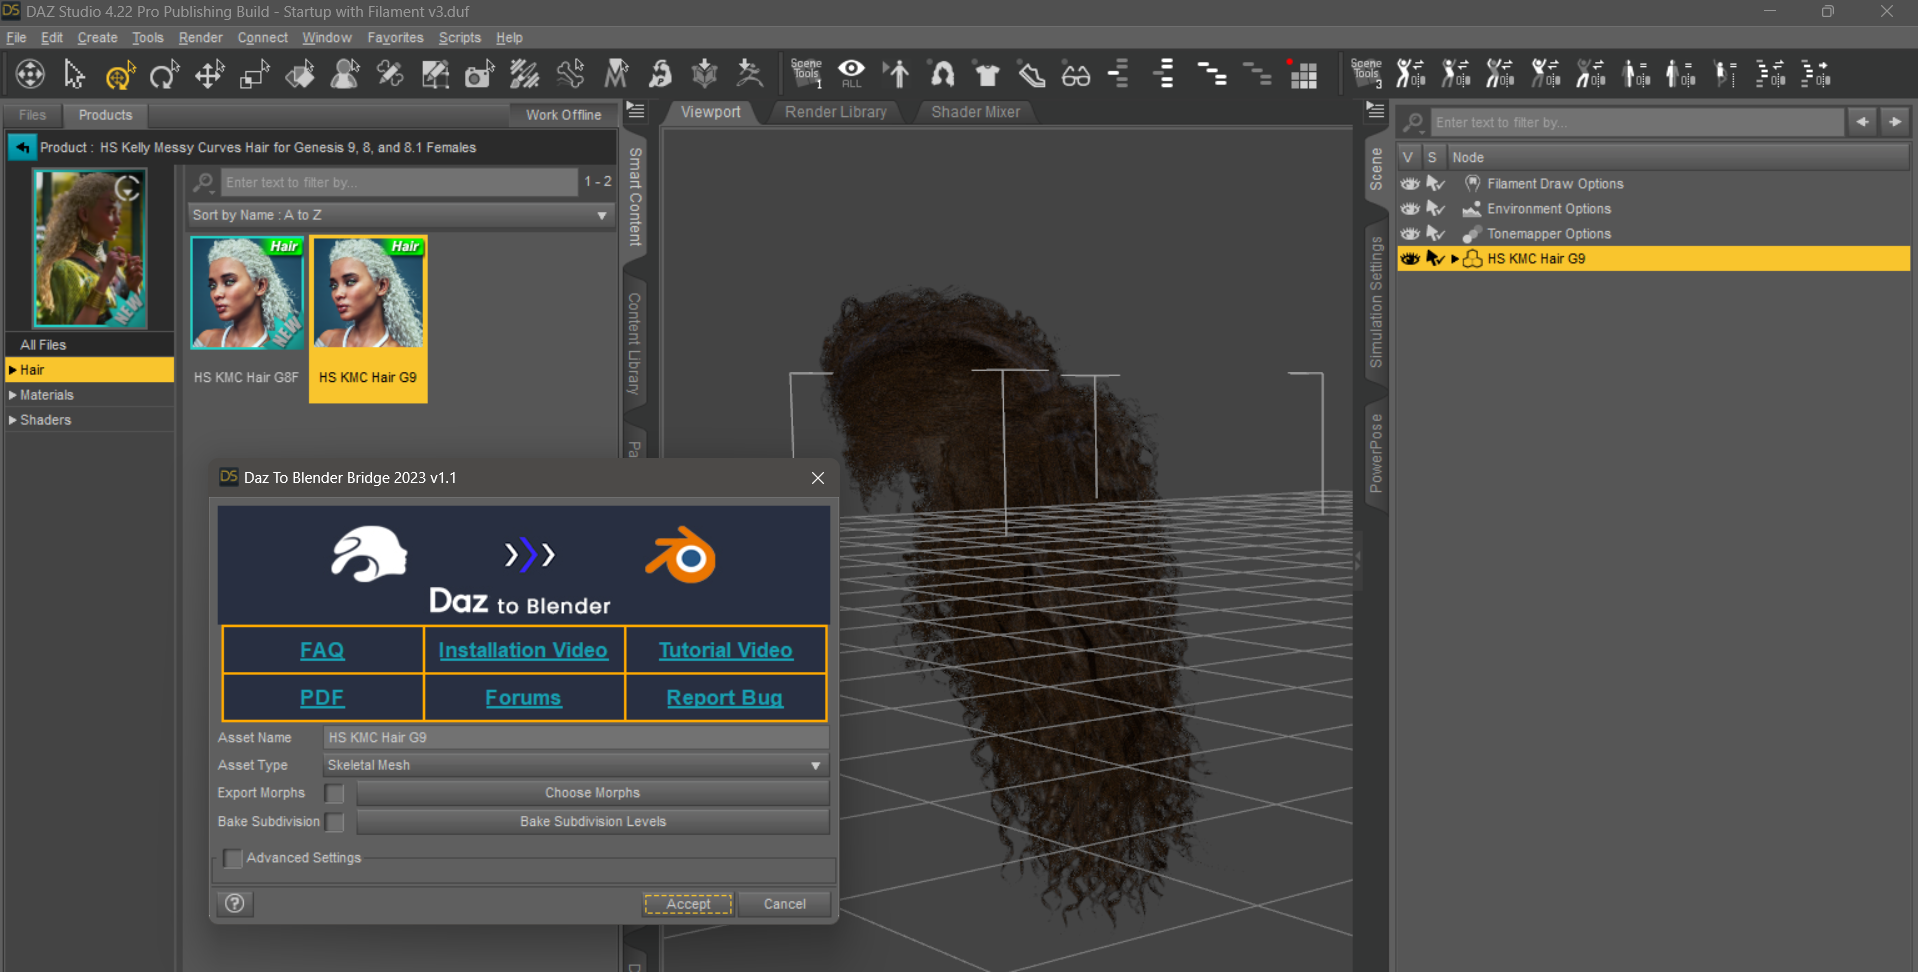
I’m going to use the Messy Curves hair for this demo. I’ll load in the G9 version without a character and will use the Daz to Blender bridge to quickly export it without worrying about scale or materials. This is the easy part.
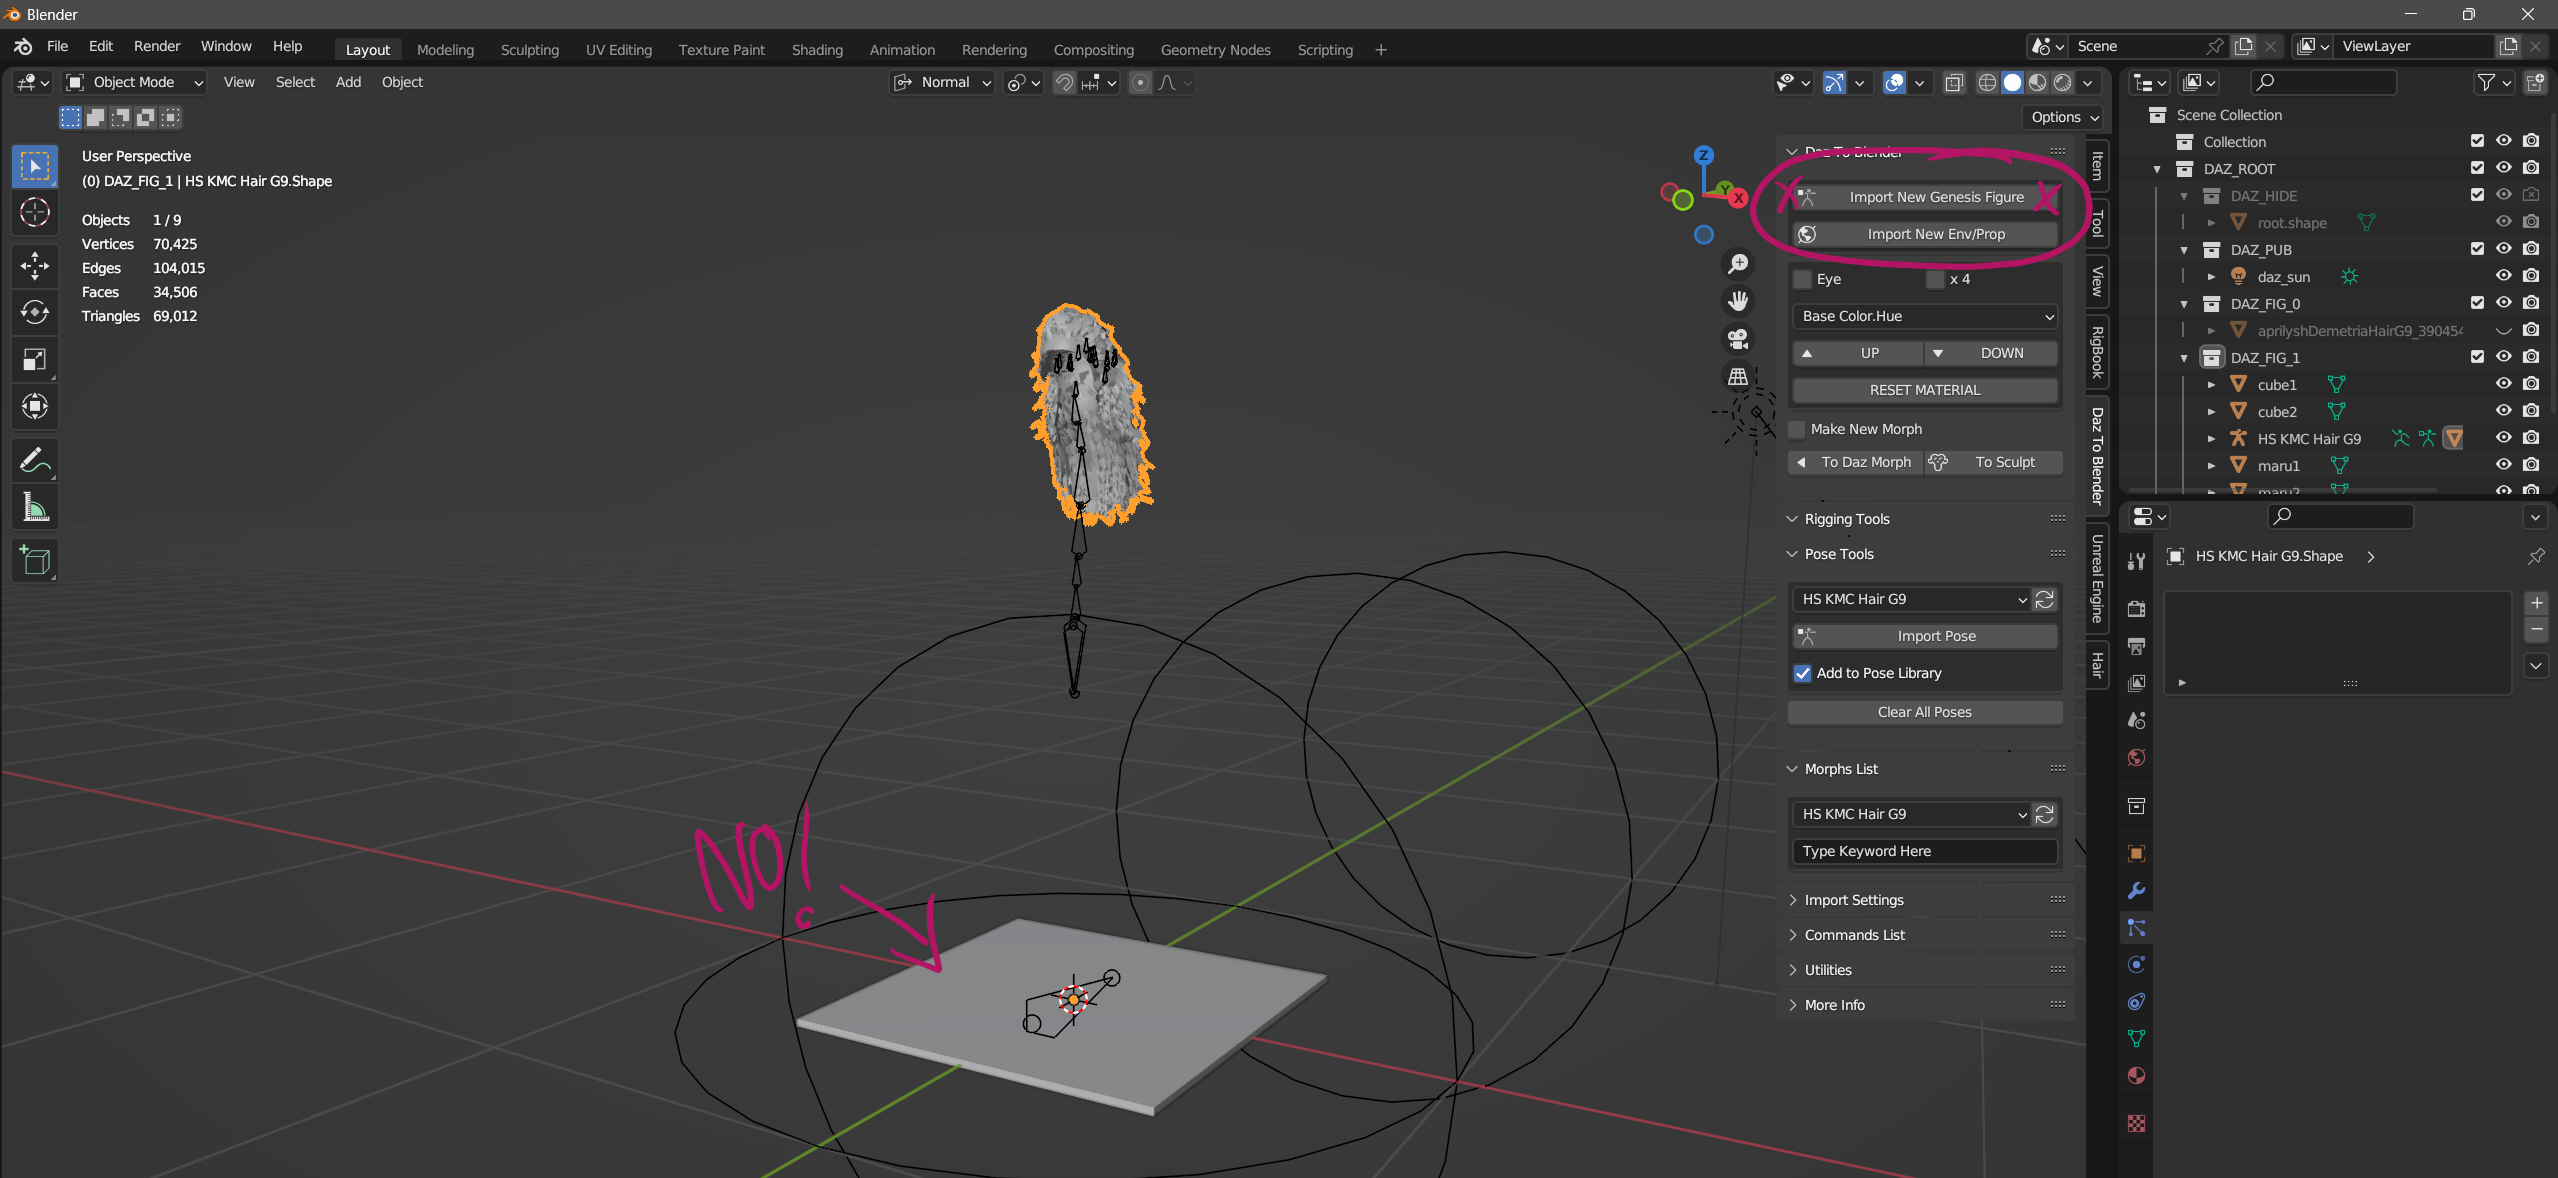
In Blender, choose to import a Genesis figure (not quite correctly labelled, it should really say “import a rigged figure”, but perhaps that’ll change in the future). See that flat cube at the bottom? Yeah, let’s delete that, we won’t need it.
Converting to strand-based hair and exporting from Blender
This part is a little harrowing, but we’re doing something rather crazy: detaching the scalp from the hair prop, then growing stand-based hairs along the card hair via the particle system. We’ll get through this, trust me!
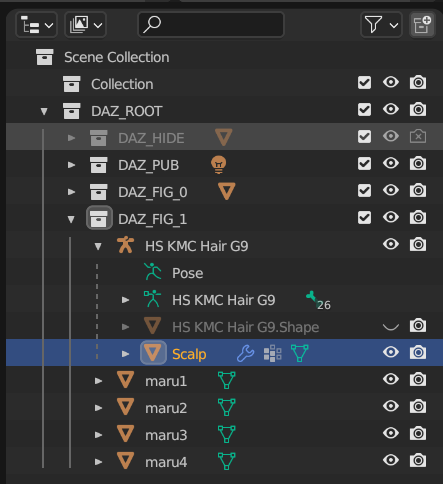
First, let’s select the hair and enter Edit Mode. Select the scalp of your hair, either by hovering over the scalp and pressing L, or by selecting a material zone referencing it. Once selected, hit P to separate by selection so you have a separate scalp object. Let’s rename it to Scalp so we won’t get confused.

Now we need to use that seriously clever conversion script by Cinus (works with Blender 3.65) or my own updated version of this script that works with Blender 4.1 and above). Download the ZIP file in the forum post, install it directly into Blender and enable it. This will make a new tab on the tool shelf available called Hair (press N to bring it up).
Select the scalp first, then SHIFT-select the other part of the hair and select Convert Hair. It’ll only take a moment.
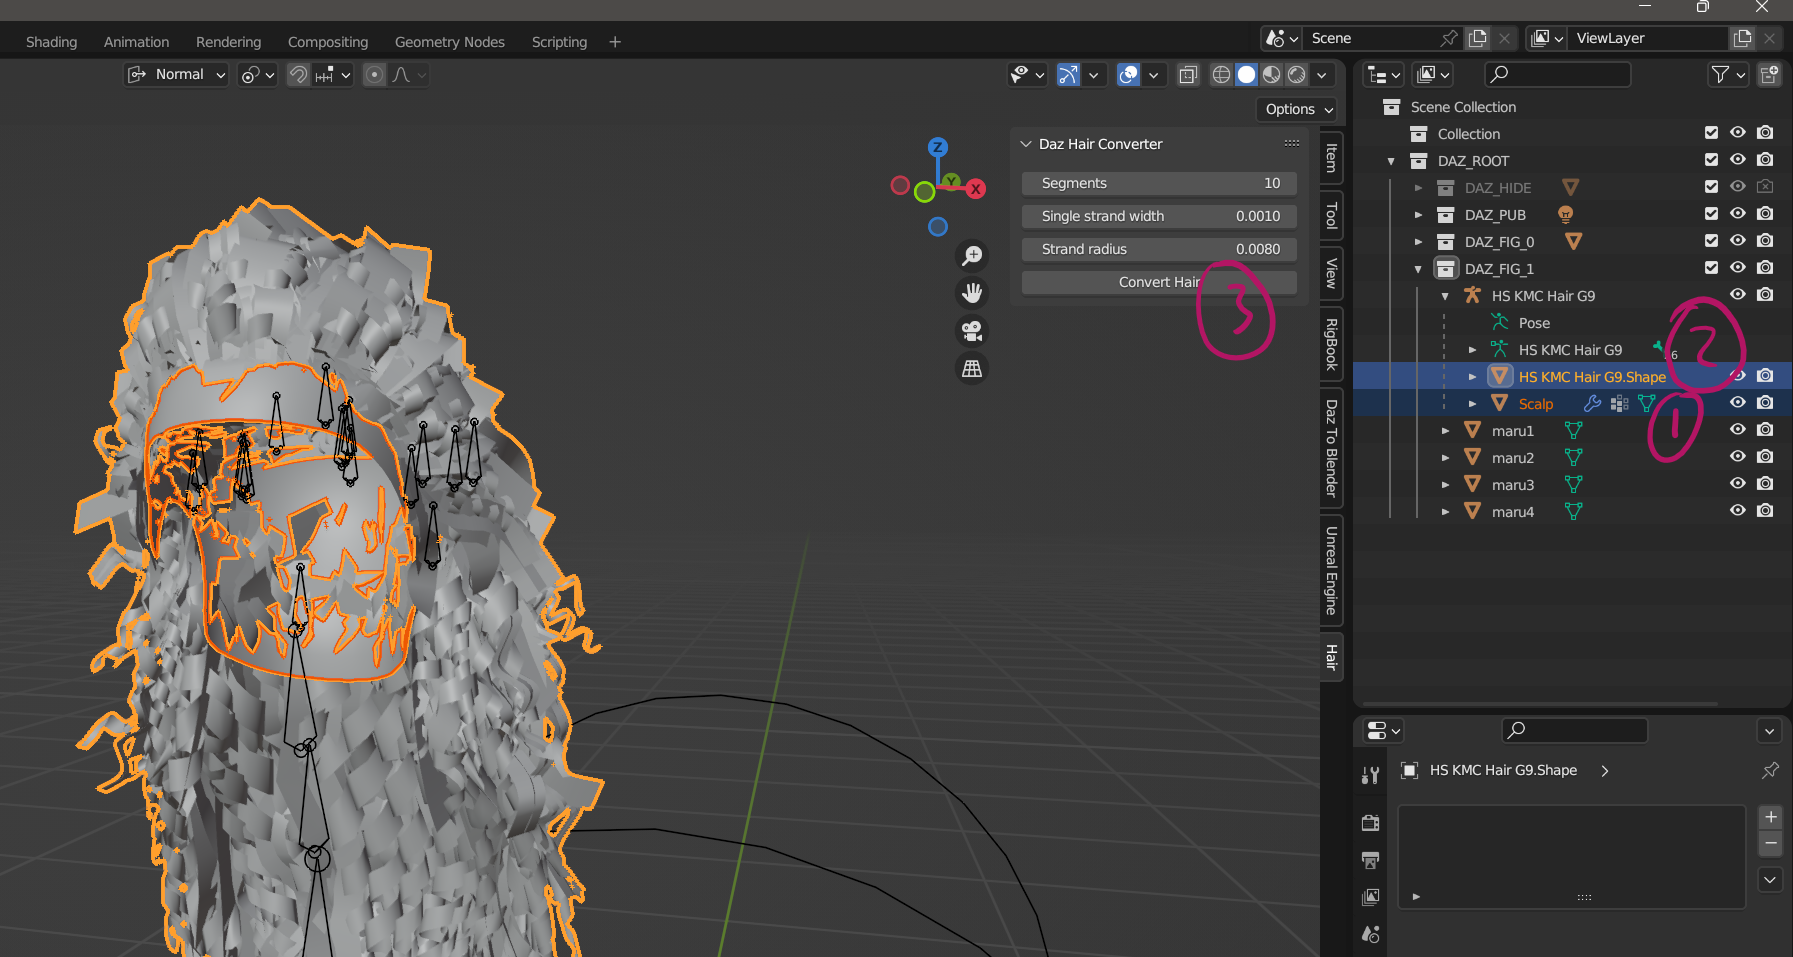
Notice how the hair part has been made invisible and turned into strands. We’ll only be dealing with the scalp part from now on.
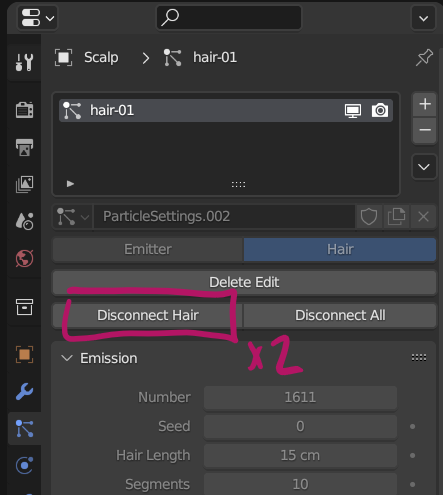
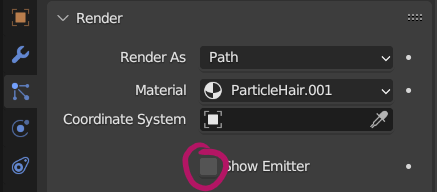
On the particles tab, disconnect then re-connect the hair. Also, in the Render section, disable the option “Show Emitter”. There’s no visible change in the viewport, but if we don’t do this, UE won’t recognise this object as groom hair.
Now all we need to do is to export our hair as Alembic with the following settings:
- Scale: 100
- Start Frame: 1
- End Frame: 1
- Enable Selected and Visible Objects
- under Particle Systems, disable Particles and leave only Hair enabled
This will create an Alembic ABC file for use in Unreal Engine.
Importing Groom Hair into Unreal Engine
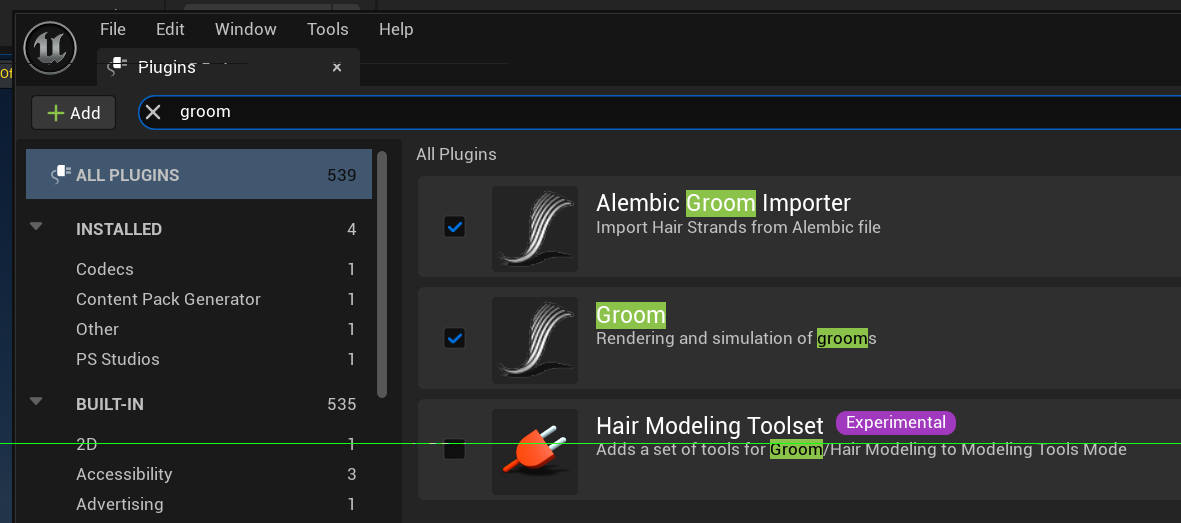
UE needs a couple of plugins enabled so that Groom hair is enabled, and that the Alembic importer can detect hair strands. Head over to Edit – Plugins, search for “groom” and enable the two plugins, then restart UE.
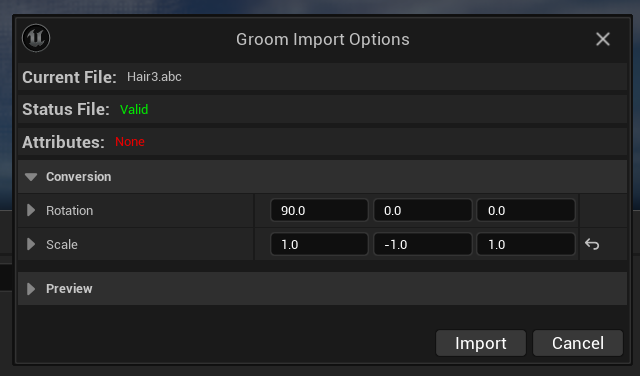
Right-click in your content browser and choose Import, then navigate to your ABC file. An import dialogue like this should open up, adjust rotation and scale settings as shown (90 on X rotation, -1 on Y scale). Note that if you see a different import dialogue with options such as skeletal mesh, static mesh and geometry cache, something on export from Blender went wrong.
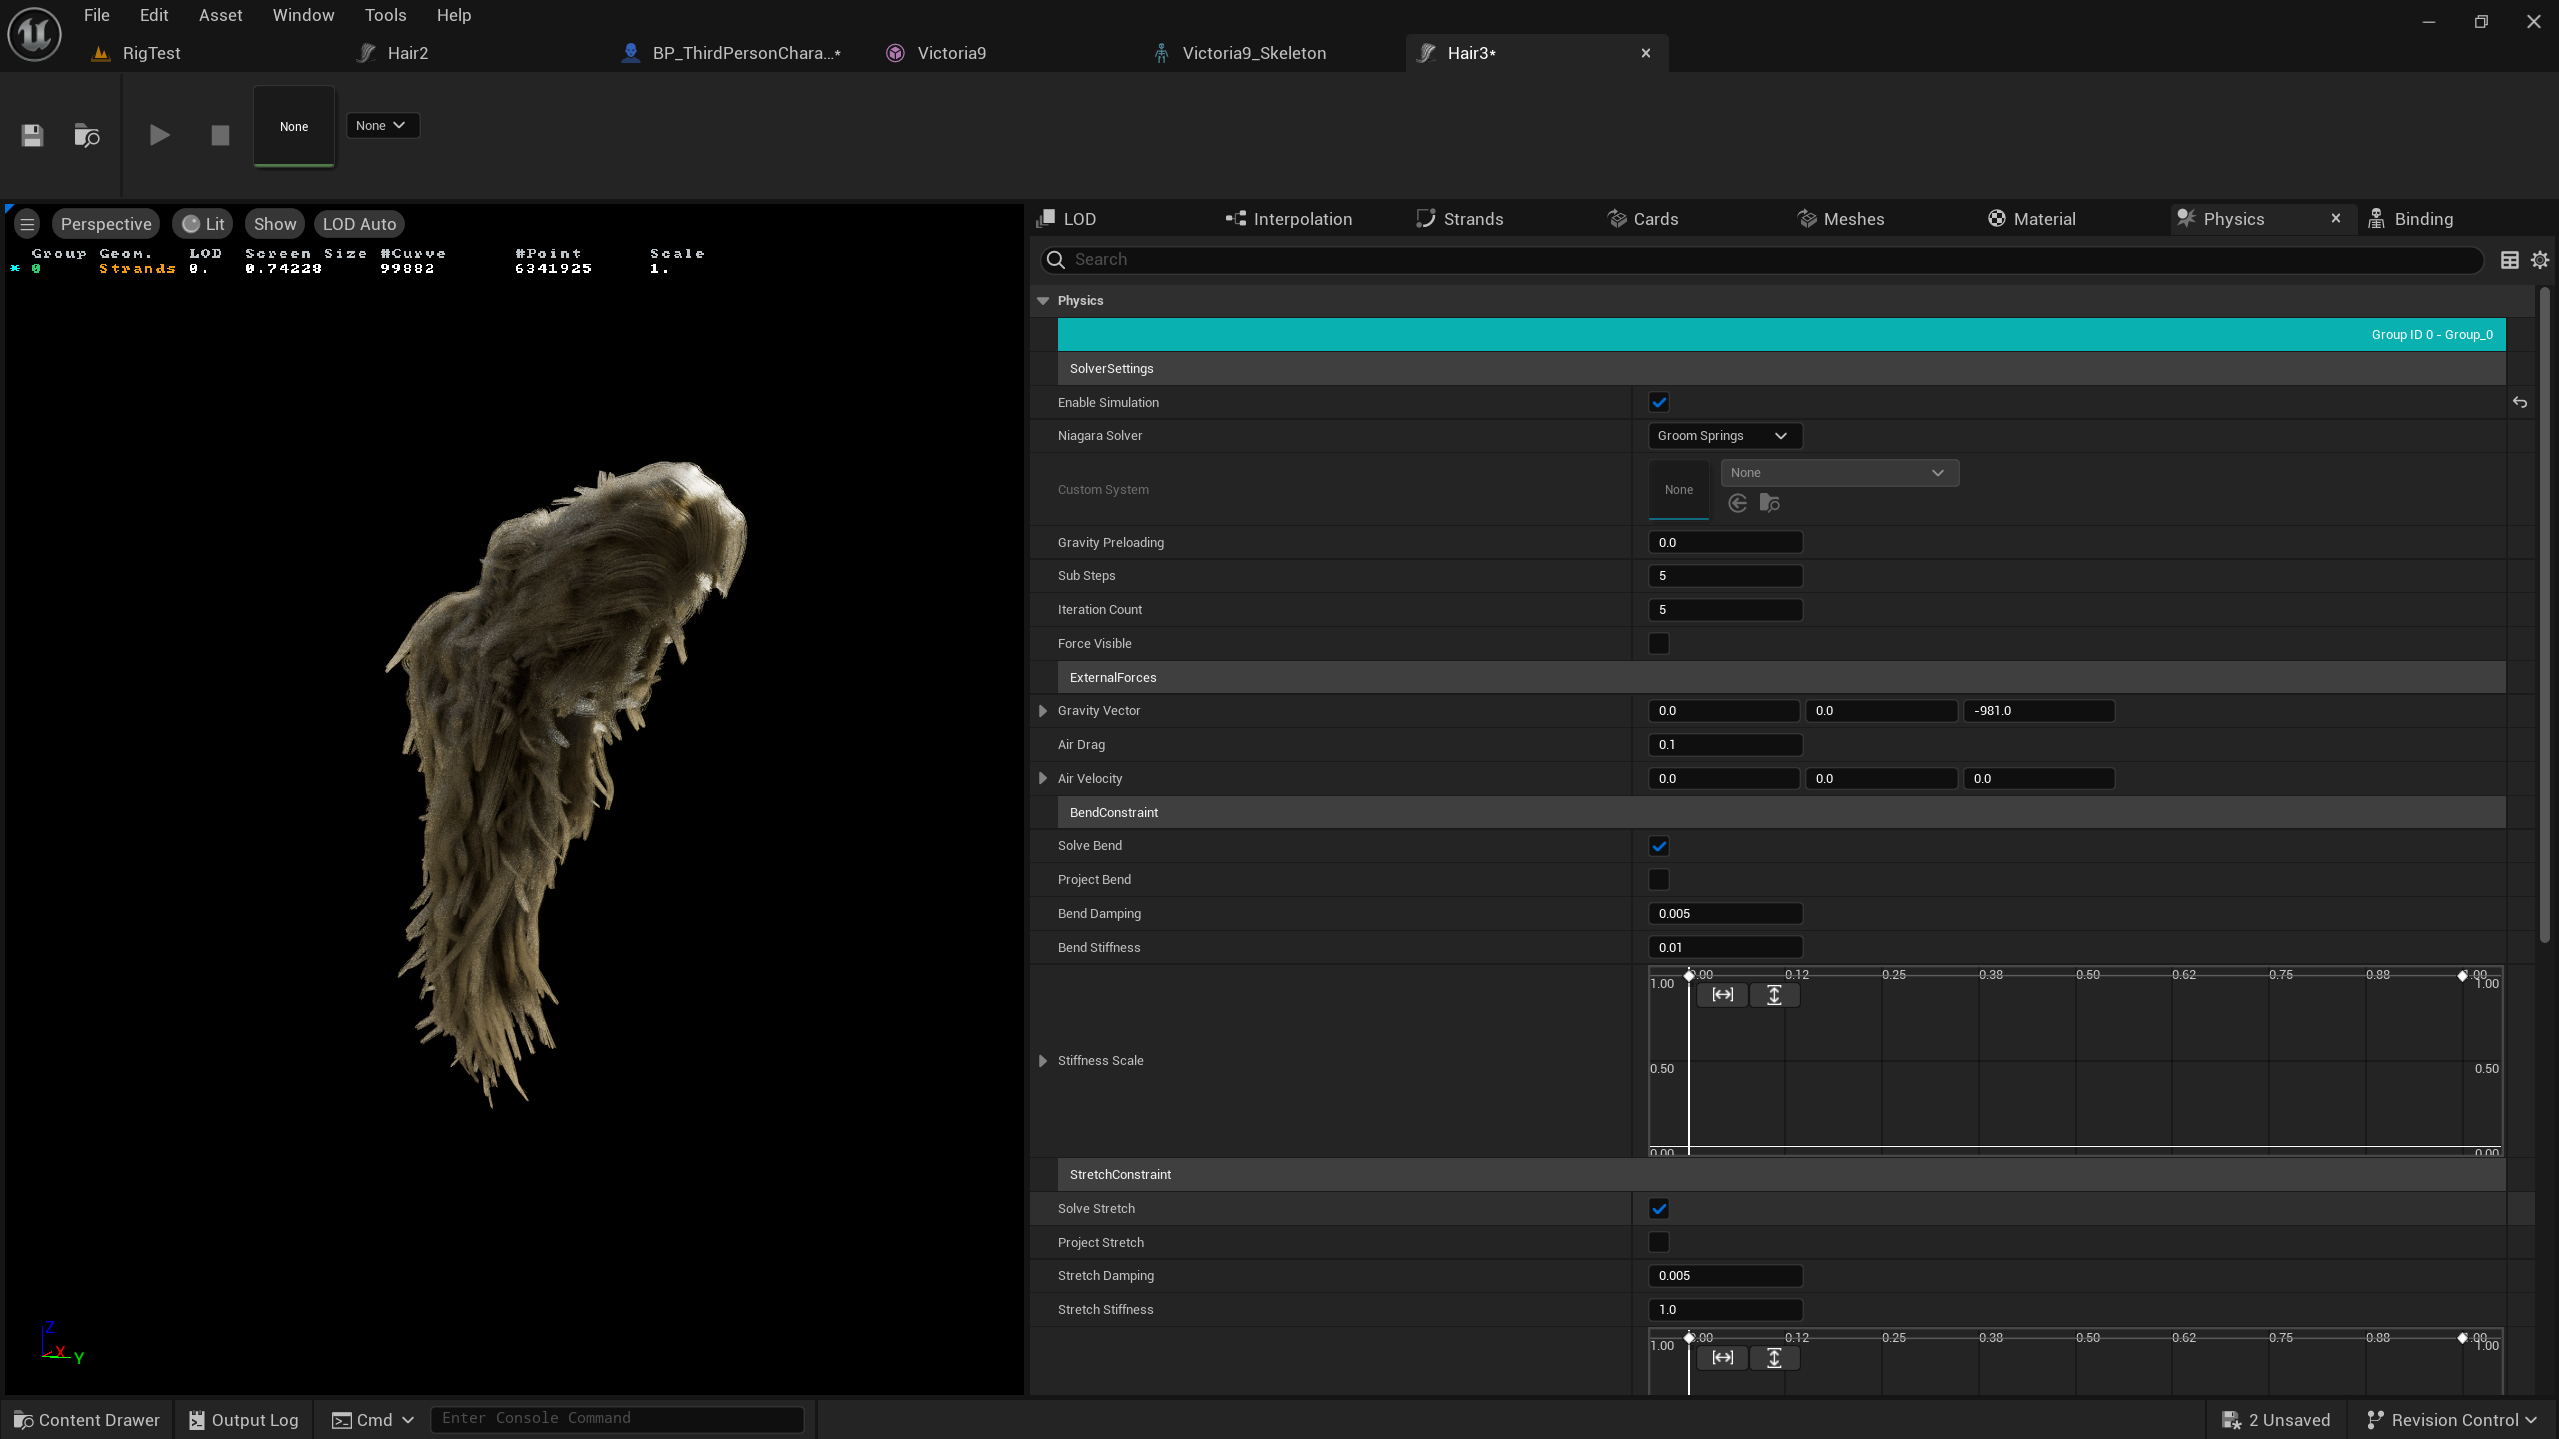
Once imported, you have a working Groom hair object like this one. Those tabs on the right are super tiny by default, drag them out to read the headlines. Under physics, enable simulation to see the hair move in action. Feel free to adjust settings like hair root and tip scale to reduce the geometry of the hair, or the hair width to make the strands thicker and give more volume. We can add a material entry to the array under Materials (the default blonde doesn’t look bad though).
Bend Damping and Bend Stiffness can be adjusted to make the hair drape less erratic (be prepared for ugly surprises). Although these steps seem like a lot, I’m amazed just how well these hairs perform and how nice they look out of the box. Imagine this with great hair shaders!
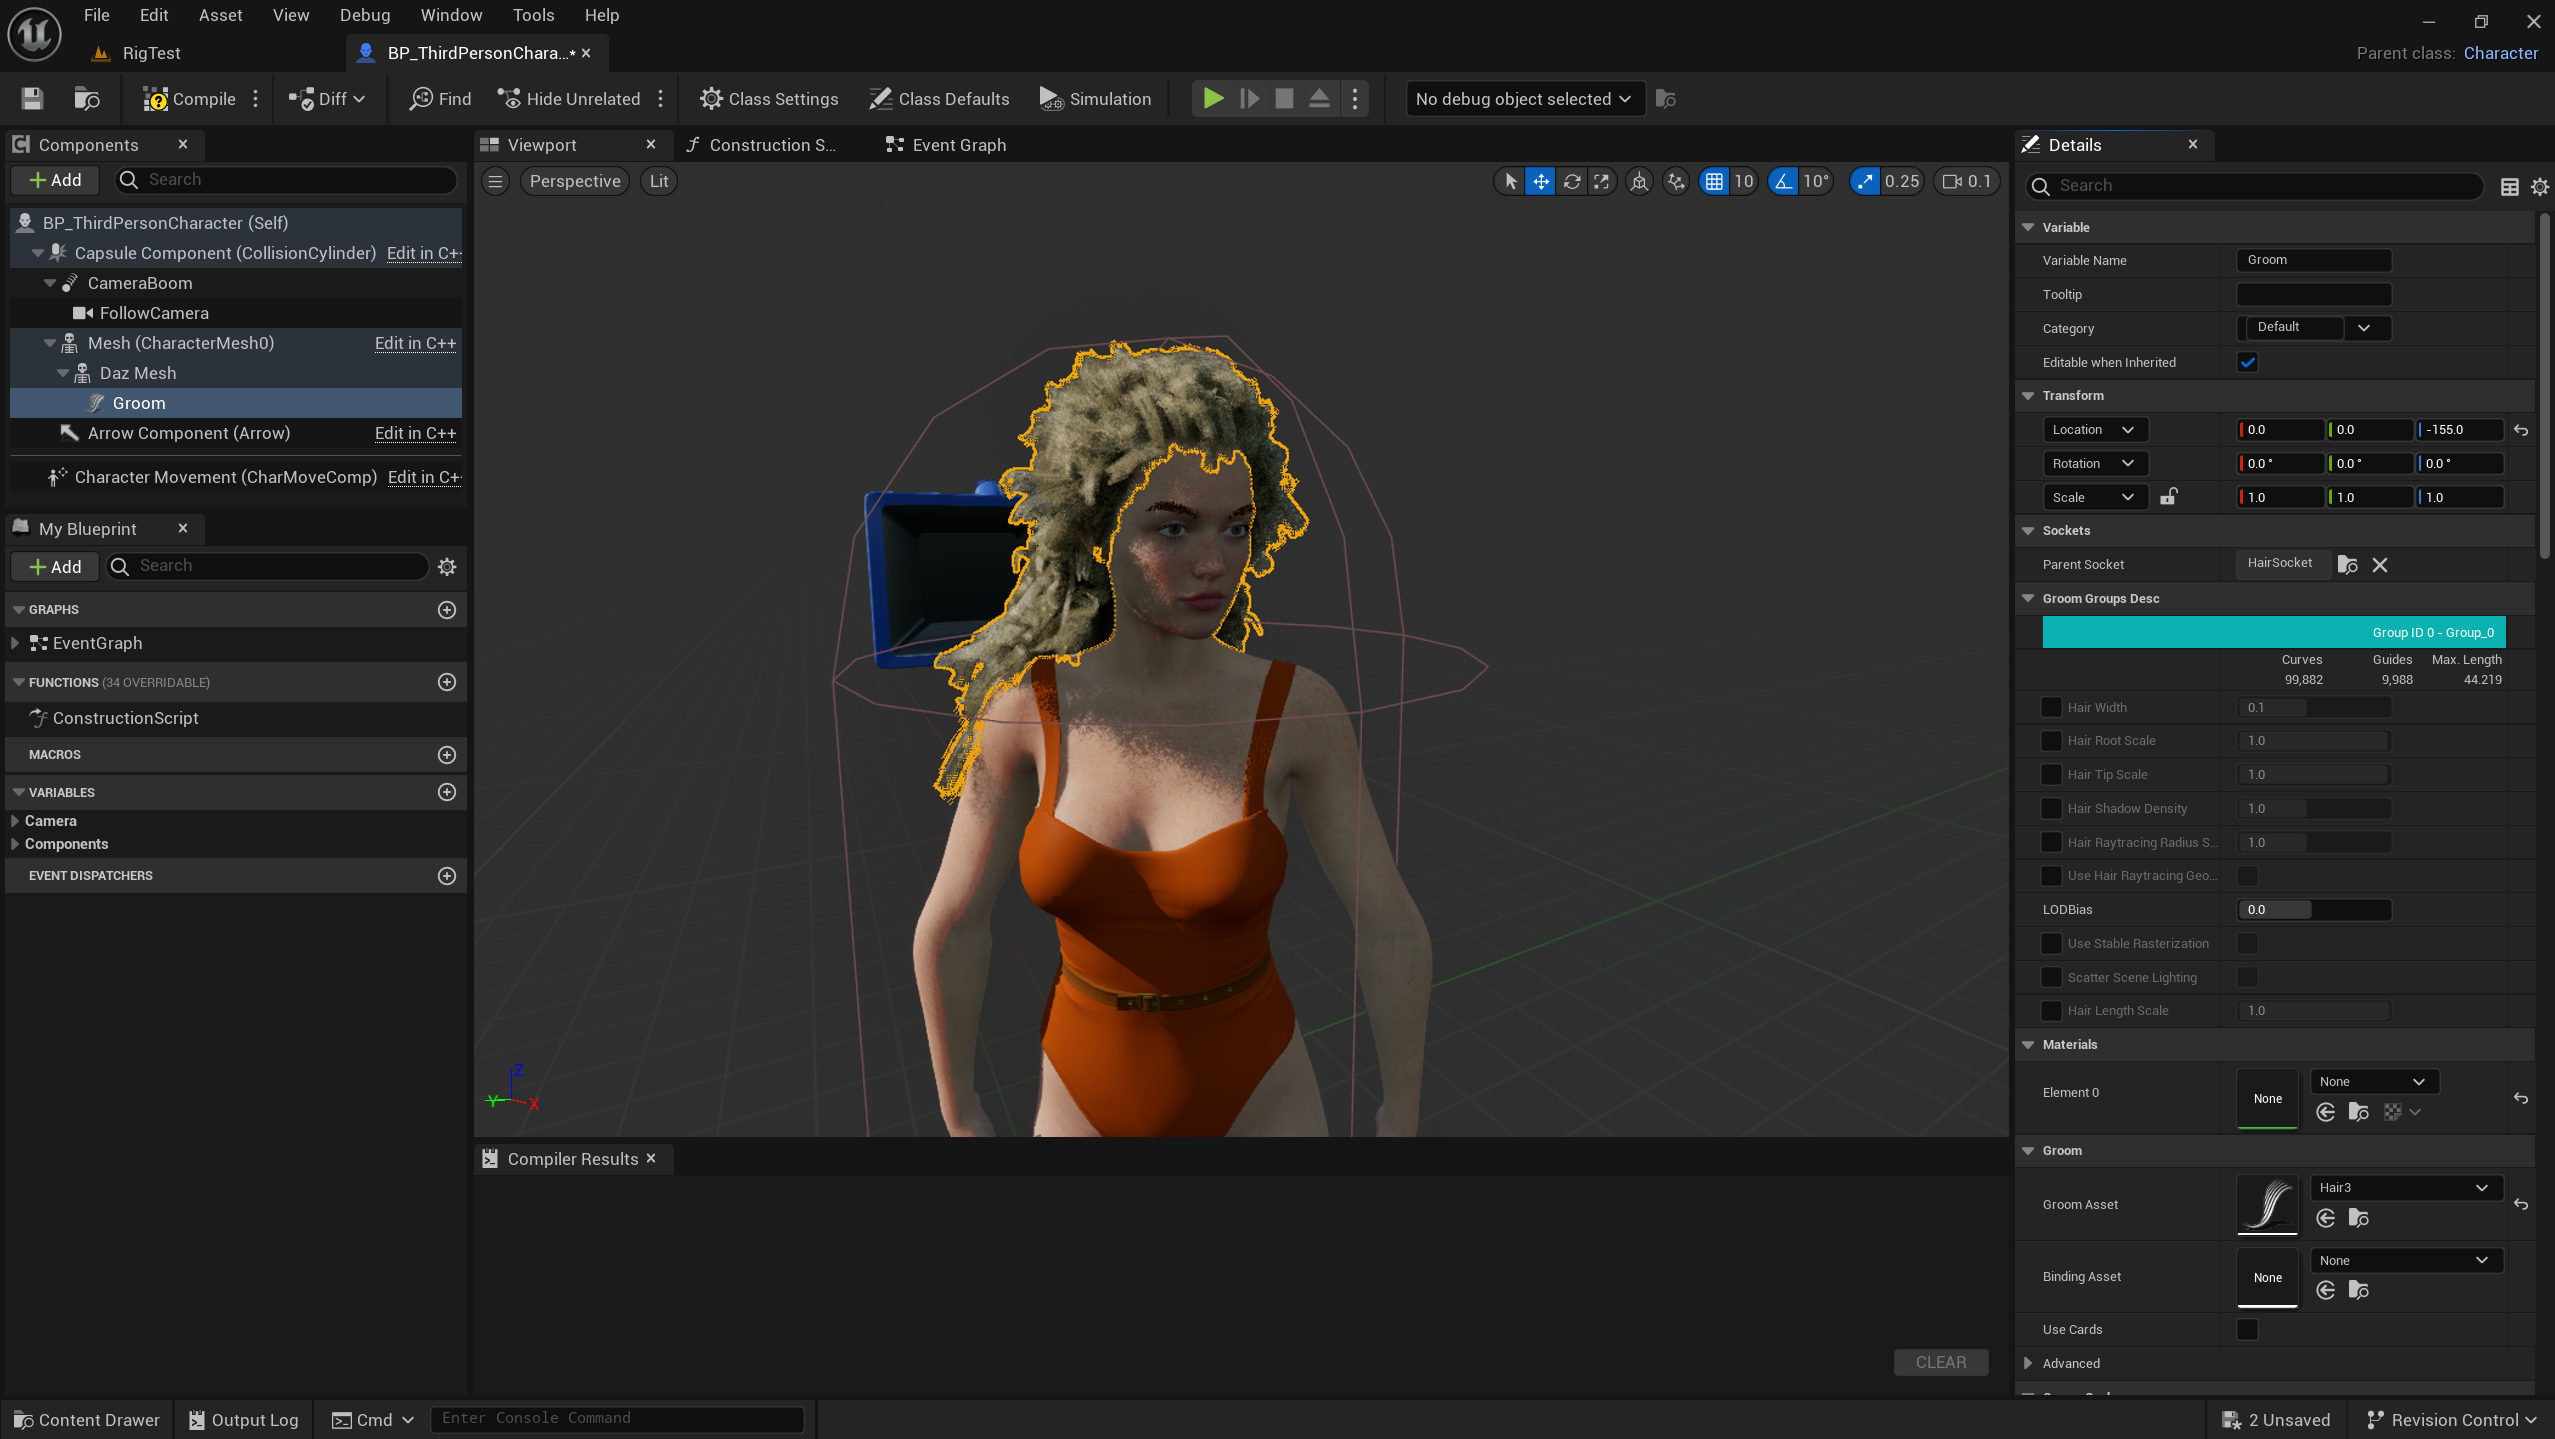
To attach our hair to a character, add a Groom component to the blueprint, then select the groom. Add a socket to the character’s skeleton’s head, then pick the groom hair and adjust its height/rotation/scale.
What about dForce Hair?
Good question! dForce Hair is already strand-based in Daz Studio, and my early tests suggest we can convert it just the same, albeit without the Daz to Blender bridge. To make it work, enable Viewport Line Tessellation Sides in Daz Studio (1 or 2 is sufficient) so that it shows up in the viewport, then export the FBX manually, import it into Blender and proceed as described above.
dForce Hair is a little more work to get going because it can have multiple parts to it, each of which needs to be adjusted with Line Tesselation separately.
That’s all I have for now! Try it out, have fun and good luck.
Further Reading
- Clever Hair Conversion Script for Blender by Cinus: https://www.daz3d.com/forums/discussion/445851/hair-converter-add-on-for-blender/p1
- jobutsu made a GitHub Repo for this converter: https://github.com/jobutsu/DazHairConverter
- I updated this repo so the converter works with Blender 4.1 and above: https://github.com/versluis/DazHairConverter
- watch a supporter exclusive video I’ve made about this workflow: https://www.patreon.com/posts/dforce-to-groom-105044321