When I import a mocap clip from Rokoko Studio into iClone, it’s usually not coming in aligned to the world centre. It’ll still work, but in target applications it would be helpful to have the pivot point where my character is, and the rotation aligned to where s/he’s facing. Thankfully iClone has us covered in both regards.
Tweaking the Direction
In this example Kevin walks to and faces right, and he’s not starting at the pivot point.
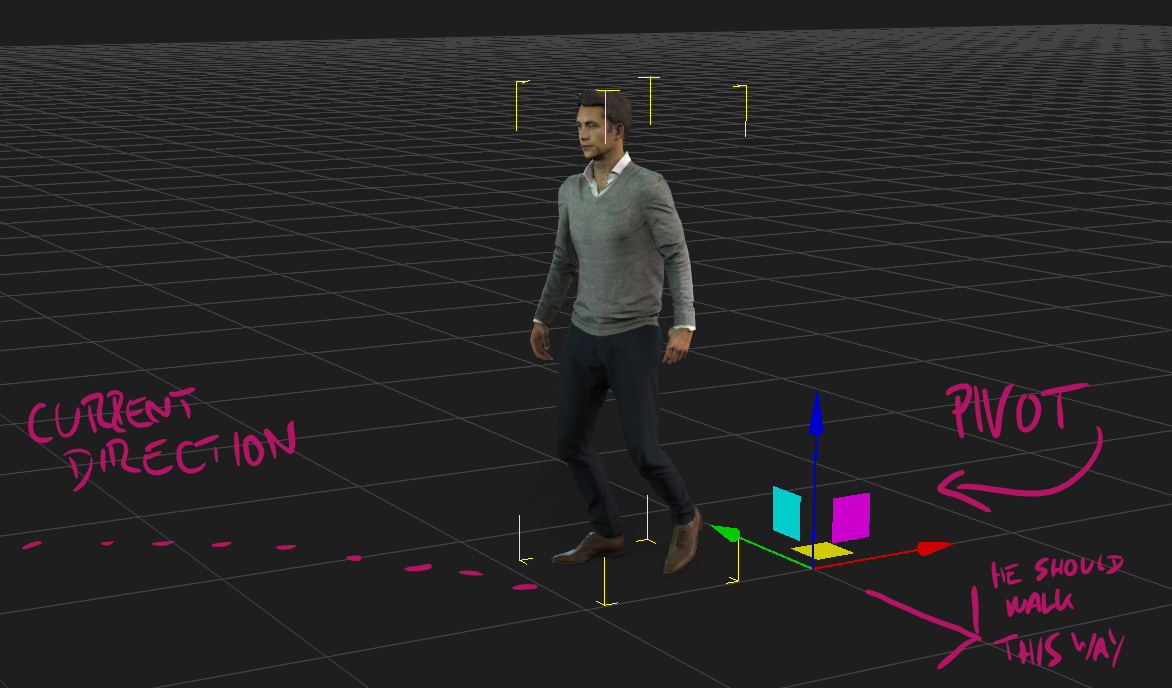
To fix this, I’ll select the clip on the timeline (previously imported with Motion Alignment disabled), then right-click and choose Motion Direction Control. I’ll bring up a blue line showing us where my character is heading, as well as numeric rotational values for the current clip’s direction.
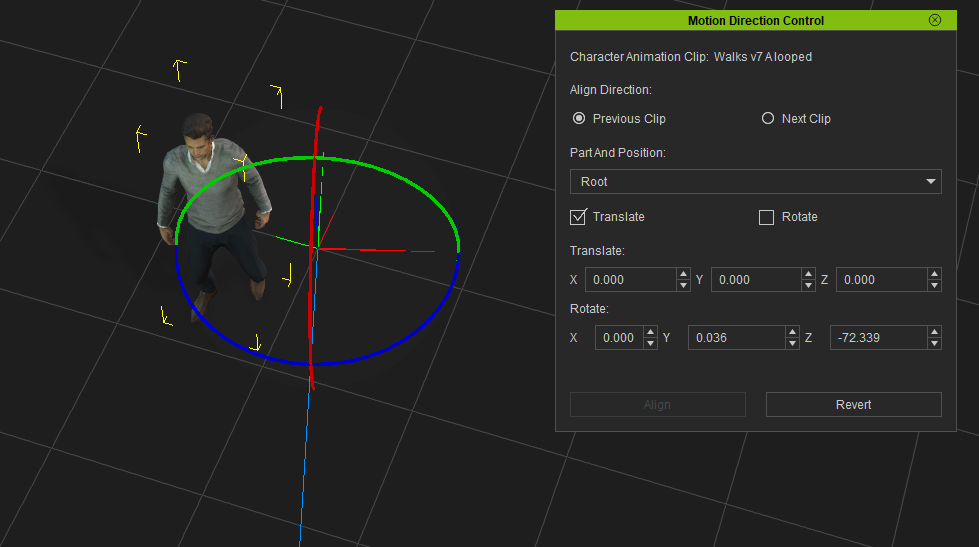
When I set the Z rotation to zero, Kevin will walk in a straight light. That’s a great start, but his pivot point is still not in his centre. Let’s fix that next.
Tweaking the Pivot Point
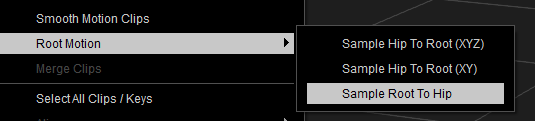
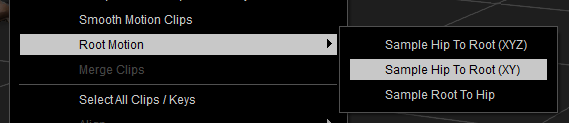
I’ve looped my clip from a few segments, and when I watch the pivot point now, I’ll see it re-position itself every so often. For a single mocap take, the pivot point may stay in the same spot, but in either case, it’s currently not travelling with the character. Let’s transfer the forward motion of our character to the hip bone so it’ll be independent from the pivot point. To do this, right-click the clip and choose Sample Root to Hip (under Root Motion).
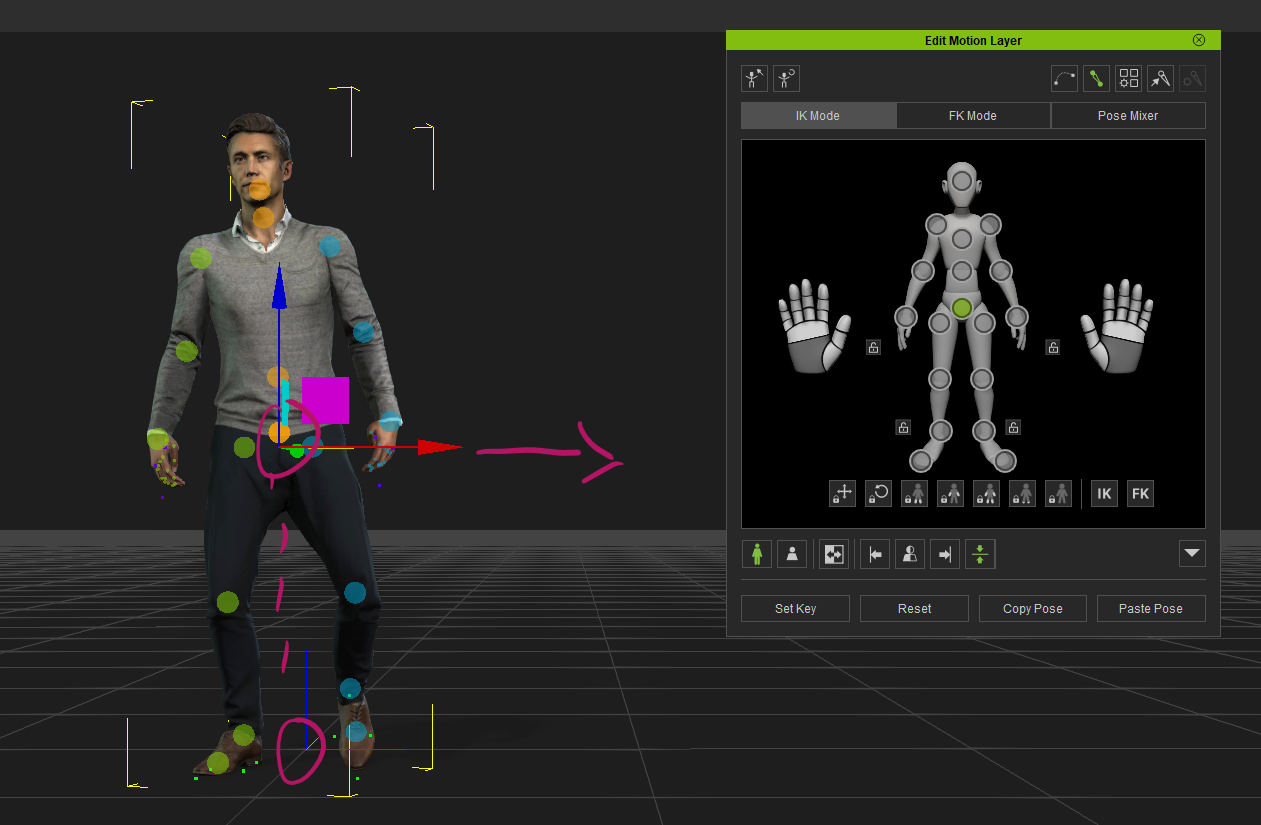
To correct the pivot point origin, I’ll move my playhead to the first frame of the animation, then switch to the Edit Motion Layer tool. Select each of the foot locks and switch them from their default IK to FK. This will allow us to make hip adjustments that will affect the whole figure without keeping the feet in place.

We’ll have to eyeball the next step because mocap poses are rarely captured with a perfect posture. In my case, all I have to do is move Kevin over to the left and align his centre of mass with the origin point (with the hip selected). That should do the trick.
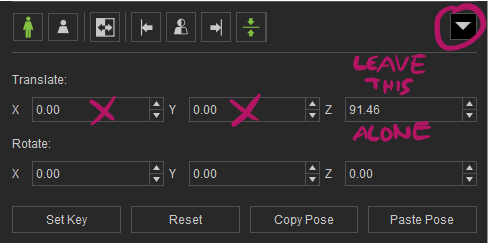
For numeric control, we can use the arrow on the right to expose those values (set the X and Y values to zero, but leave Z alone as it’s the hip height).
If you’re happy with a static pivot point, you can use the animation as is (it makes no difference to Unreal Engine). If you prefer a pivot that’s following the character, we can use Sample Hip to Root (XY), essentially the opposite of what we did earlier. Or, if your mocap data contains a change of height, we can use Sample Hip to Root (XYZ).
Finally, and because we’ve made a Motion Layer adjustment, we need to bake that information back into the keyframes. We can either select a Collect Clip and save out the motion, or head over to Animation – Flatten All Motion with Constraint.
NB: Flattening doesn’t seem to have an effect when the animation comes into UE.

Thanks to Tristram Anyiam for explaining all this in a video on the Reallusion channel.