Recently I bid on a very good looking Commodore Plus/4 on eBay. I’ve never had one and have only heard the stories about this little guy: mismanaged marketing, the failed successor of the C64, the computer nobody wanted. A sad story – especially considering that it’s a really good machine that paved the way for the C128.
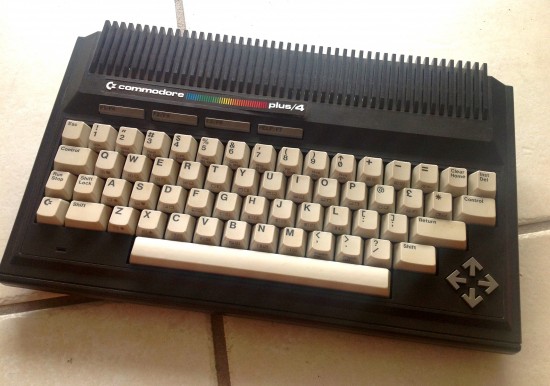
With almost the same powerful BASIC commands as its successor, the Plus/4 is much smaller than the C128, a little over half its size I’d say. It takes up much less desk space and can use the 1541 floppy drive. Other peripherals were not compatible (joysticks, datasette drive, etc), neither was existing C64 software – which was widespread and popular at the time. The Plus/4 did have more colours but no sprites (which made computer games amazing in those days), and its sound qualities were less sophisticated than those of its predecessor.
The major downfall of the Plus/4 was undoubtedly its marketing and strategic decisions within Commodore: Jack Tramiel wanted a $99 machine that would sell alongside the expensive $500 C64 in 1984/85 and wipe out the fragmented home computer competition. Design of the 264 family began thanks to him – this included the C16/C116 and Plus/4 – even a 364 with speech module (only legends know about, like the CBM Museum).
Before the launch of the new machine however Tramiel left the company in 1984 – and with Commodore’s visionary gone, the rest of the clueless board of directors turned the Plus/4 family into a C64 replacement. Well, it flopped. Badly.
Since it was never meant to be what it became, and because it wasn’t compatible with existing popular software, less than 1 million units were produced worldwide and the Plus/4 was discontinued within a year of its launch.
Nevertheless, learning from their galactic mistakes, Commodore quickly developed the C128 and added everything to it that was missing on the Plus/4.
My Plus/4 Story
I bought mine for $49 including shipping from California, boxed with both manuals and dedicated 1531 Datasette. A complete bargain! Other than being a bit dusty, it was in great condition – some minor ageing issues aside.
One of the tragic things about shipping 30yr old computers several thousand miles, even with the best packaging, is that components can break, old solder joints can snap, and things may not survive the journey. It’s the nature of shipping retrotech.
Then there are those abysmal power supplies Commodore built back in the day: they’re usually potted and can’t be opened and are no repairable. Voltages over time may increase which leads to the death of many a chip in the best working machines. Another tragic story.
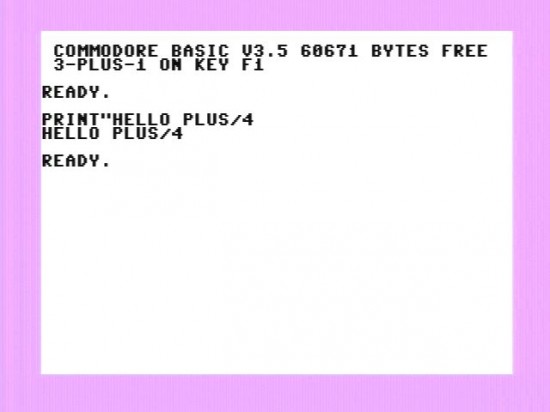
I was delighted to see that my new Plus/4 WORKED out of the box! The power supply measured the correct voltages, cursor blinks with a glint in his eye. The packaging was not only adequate, it was fantastic! I was really lucky with this purchase:
The only thing I noticed was that several of the keys did not respond well unless I hammered them or pressed them repeatedly. Time for a thorough examination and a quick fix!
Join me if you will on a journey under the hood of the Commodore Plus/4.
Let’s fix’er up, Cap’m!
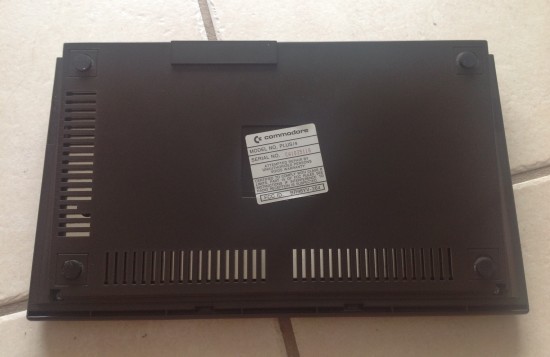
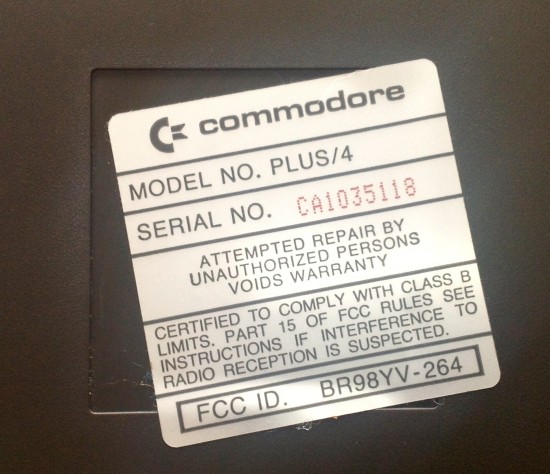
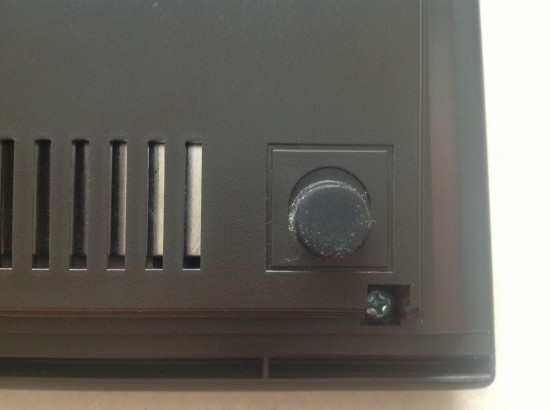
As I said, the Plus/4 was in very good condition – once I had removed that layer of dust. Commodore Quality Control however was never the best as these examples show. Would it have killed them to apply a little more glue to the face plate and take a little more care when placing that serial sticker at the bottom, perhaps into the correct place? Same goes for the feet:
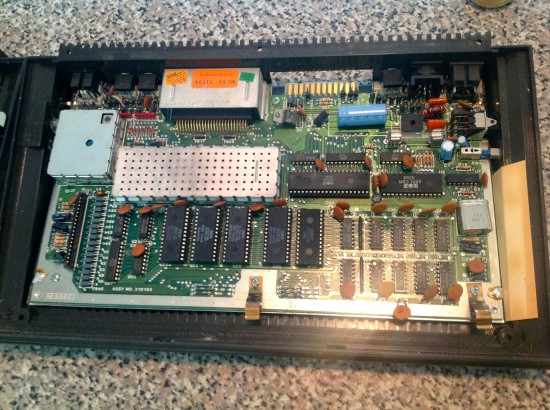
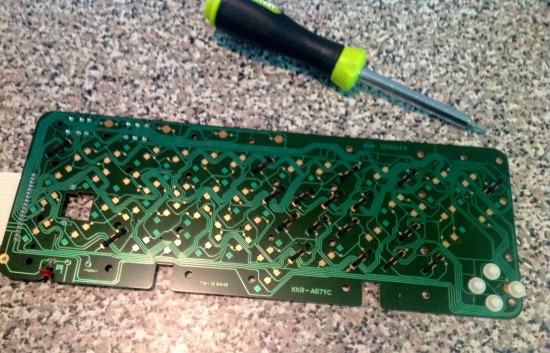
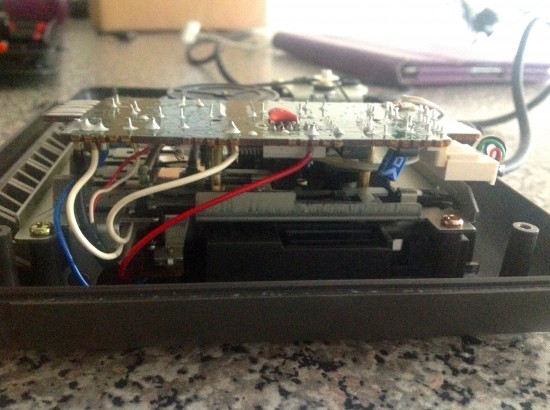
That’s just Commodore for you. Once I had removed the four screws at the bottom we can see the main board. All in good condition here, no leaking capacitors or any other surprises:
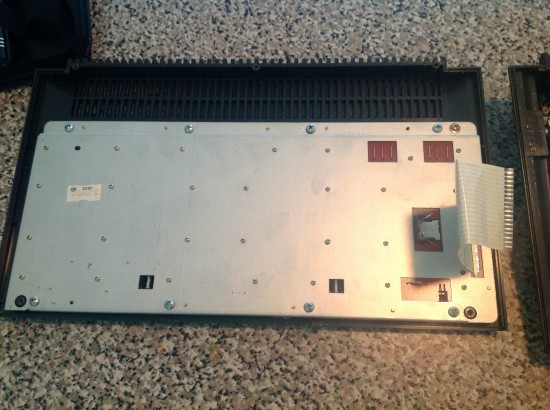
I did notice that the keyboard is connected with a very thin flat cable instead of the usual IDE type cable as it is on the C64. On the Plus/4 it’s like a flat piece of plastic with glued on contacts. They’re OK to get out but very fiddly to get back in – just thinking ahead here.
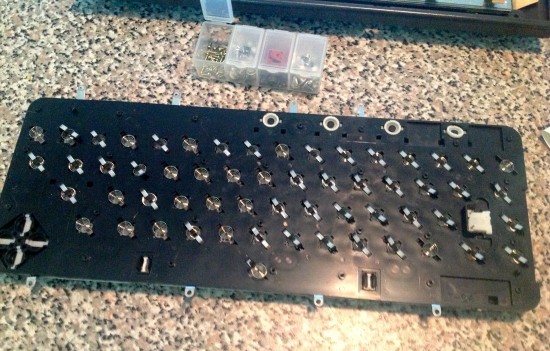
With the keyboard (top part of the case) removed, let’s take a look at how we can get to the actual contacts that are made when keys are pressed:
We need to take off eight large screws and TWENTY-SIX tiny ones. Are they nuts? Must have taken ages to assemble this thing! I understand wonky keys on a Plus/4 are very common, much more so than on the C64 and C128.
Removing the screws is one thing – but the Shift/Lock key appears to be soldered on – that’s just below the white flat keyboard cable. You can see it better in this screenshot:
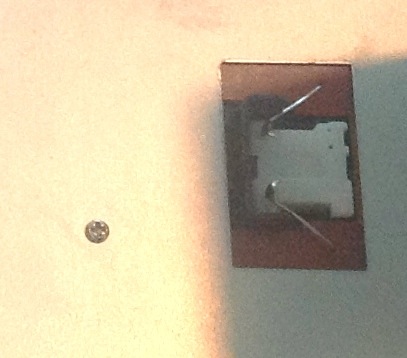
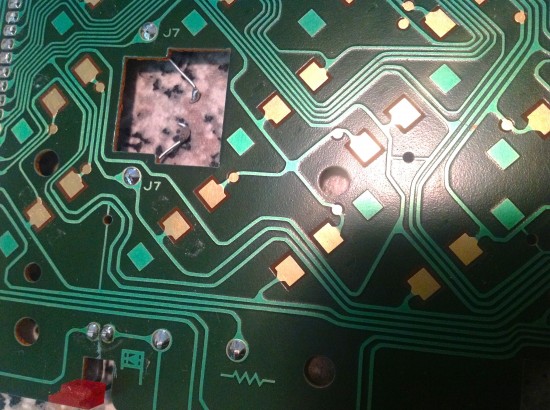
I’ve de-soldered those two wires with my new RadioShack soldering iron, loosened some more tiny screws on the other side and revealed this – the board underneath the keyboard:
The four little white circles are the cursor keys (bottom right), and the black little strips are placed over two contacts. When a key presses down, the black rubber strip creates a contact, which in turn tells the OS that a key has been pressed. The other side of the keyboard looks like this:
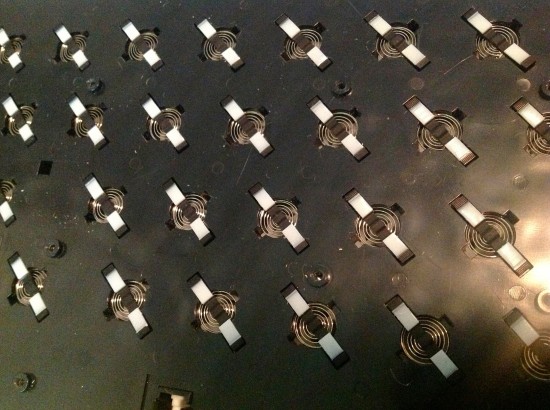
A small spring makes the keys “springy” and holds on to the rubber strip (which is white on the bottom – probably an insulator, the black bits being perhaps a conductor).
To whip this puppy back into shape all we have to do now is to clean each of these rubber strips from this side and clean the metal contacts on the board underneath. Contact cleaner will do, but Windolene / Windex will do just fine too. And it smells better.
Once they’re nice and shiny again we’ll put it all back together, insert that flat cable without the metal contacts coming off (because that’s fatal) and then all should be well.
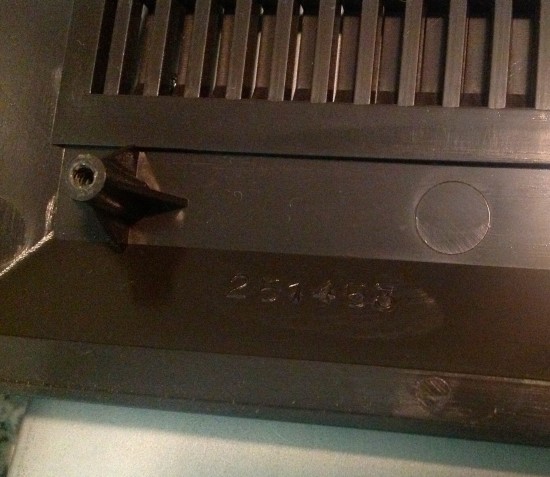
I even found a secret serial number on the inside of the case:
And that was that 😉 Now the keys are as responsive as on the day he left the factory.
Welcome back, Plus/4! How’s 2014 treating you?
The 1531 Datasette
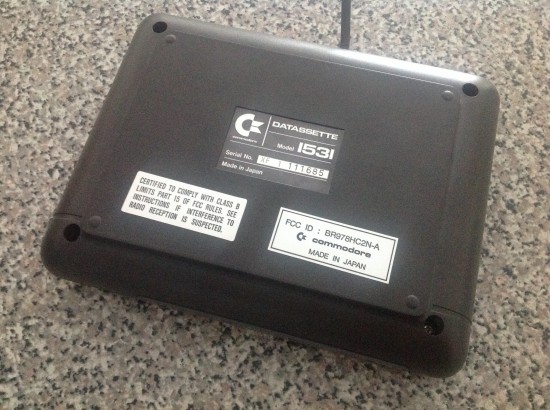
The dark grey (evil twin) tape drive for the C16 and Plus/4 is internally identical to the white version known as 1530 or C2N. The only difference is the connector which is flat and fits onto the C64/C128 board, while the 1531 connector is a mini DIN.
With the right adaptor, either datasette can be used on either computer – even though the recorded format is not compatible. For example, a programme saved by a C64 on the same datasette cannot be read by a Plus/4 (they use different frequencies to write data).
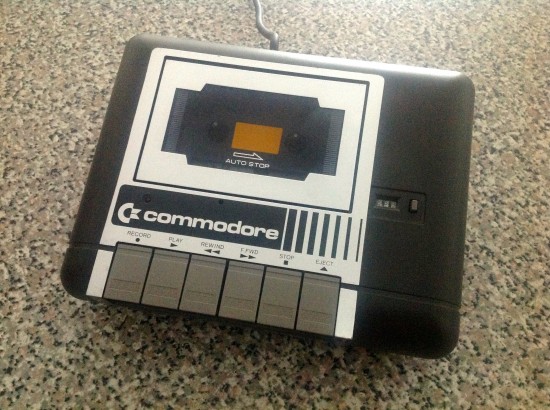
I remember having the same 1531 with my old C64. It always looked a bit “special” to have a dark grey version instead of the white one that all my friends had. Maybe that’s why I have such a sweet spot for this little thing.
A first test showed that the Plus/4 was happy to save his own BASIC programmes, but was unable to find anything on tape when either verifying or loading. This was odd, and I didn’t quite know what to make of it. The good news was that motor and mechanical functions were working as expected.
Searching the internet did not show any forum threads with my problem. It’s an exotic one then. The first thing people seem to suggest instantly – with any datatsette problem – is “your playback head is misaligned”. Immediately, even before “try cleaning the head and capstan” (which I did). As if that was the only thing that can ever go wrong with tape drives.
However, according to internet legend and Commodore Repair Guru Ray Carlsen a misaligned head is probably the last thing that’ll ever happen to a datasette – and aligning it without a proper alignment tape (as logic dictates) is pretty much impossible.
Ray had a very helpful tip though: There is a switch inside the datasette which will tell the drive if it’s recording or playing back. Over time said switch can get oxidised. Makes sense to me – let’s get the screwdrivers out and take a look inside:

Not a lot of electronics in this thing I must admit – which is always a good thing. The belts all look good, so does the rest of the internals here. In the top left corner you can see the little motor which powers both the capstan spindle and take-up spool on the other side. The smaller belt is for the counter (soooo cute).
The switch Ray mentions is a bit hard to get to, so let’s take a look at the side of the PCB – which by the way doesn’t like to lift very much. I didn’t want to take it apart completely either because I had fantasies of hundreds of tiny plastic pieces littering our kitchen floor:
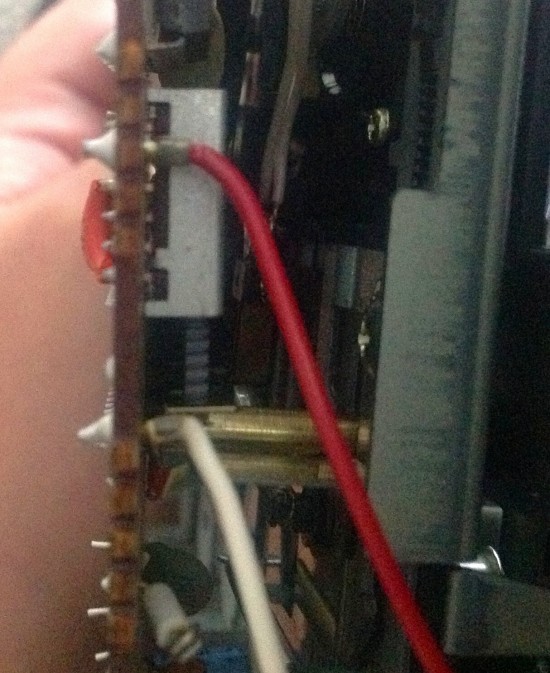
There it is, the little grey thing behind the red cable. Gets pushed up by the RECORD button. A couple of properly directed squirts of contact spray from RadioShack should do the trick, and a bit of time to dry out.
The problem was still there. Now what?
It occurred to me that I don’t really know if the drive is not reading, or not writing. Or both. I don’t have a “cassette player” anymore so I can’t check if anything ever makes it to tape. I don’t have an adaptor for my other datasette either – so what is a boy to do?
Check this out: on the Plus/4 it’s easy to listen to what’s on tape thanks to a small machine code snippet I’ve discovered. The author didn’t mention where he got it from, but I’m pleased to say that it works! I now knew that the datasette could hear (if not load) the programmes I’ve saved with my 1530 with a C128.
Assuming playback works, it means that the recording part was compromised.
After posting my puzzle in a forum I’ve discovered while investigating an SD card reader for Commodores (yes – they exist, and from what I hear they are AMAZING!!!) I noticed that this problem was starting to consume me. Why was I so obsessed with getting a tape drive to work, if in all likelihood I would never use it? I currently have four 1541 floppy drives, an SD2IEC on my way, no room on my desk and a TON of other stuff that really need doing – was I ever going to make use of the dark evil twin datasette?
I can’t explain why. But I wanted this thing to work. For whatever reason. Was I beginning to lose the plot here?
I read everything Ray had to say about datasette repair, read countless forum posts, tried to source the parts to build my own adaptor – and I made an interesting discovery: on eBay.com the 1531 dark grey datasette is really rare. On eBay UK it’s 10 a penny! Anyone ready for an import/export business?
I was almost ready to order a couple from the UK (I know… ridiculous!) when it hit me: if the 1530 and the 1531 are identical, then perhaps I could just swap the cable! No adaptor necessary! No cost involved! It’s genius!
I got my screwdriver out again, opened the white 1530 up and discovered that it was indeed NOT the same as the 1531. Very similar on the outside, but not on the inside.
The Commodore Repair Manual for datasettes confirms this: there have indeed been many internal variations on this thing. For example, my 1531’s cable is attached with a white snap-in adaptor on the main board, whereas the 1530 cable is soldered on. Then it hit me again:
OXIDISATION! Just like what happens to socketed chips over time: take off the connector, then put it on again. In fact, do it two or three times. Maybe it was just a bad connector?
See that white thing at the top right there? That was the culprit. Once that was back in position the Plus/4 was happy to read from and write to his dutiful datasette friend!
Another Happy Ending
I have to say: it was a lot of fun solving this puzzle. The seller (barjboy) was really nice and inquired if the unit was working as he did not have a video cable to test it before its departure. Like me and the datasette, it drove him crazy if this thing was actually working or not.
Now the Plus/4 and his datasette can live a happy retirement party in Miami Beach, FL – together with some of the other bits of Commodore Retrotech we’ve acquired recently. We’re celebrating with new “audio cassette tapes” from our local RadioShack – can you believe they still make them? C-60 and C-90 as a double-pack for about $6 plus tax.
Good thing I’ve got my Frequent Solder Card 😉
Hey man, thanks for this, it helped me alot getting my dad’s old plus 4 working. Had to take tape deck apart and clean little reader thing and in plug power in and out, thanks been a real help
Sam
Great to hear, Sam! Glad I could help 🙂 Long live Commodore!
What’s under the keycaps of this keyboard? The PCB is marked “KKR”, but that’s not a normal KKR type keyboard (most Plus/4 machines have KKR PCBs and the expected switches) but yours has an anomalous PCB and a switch type I’ve never seen before. (Which is of course run of the mill for Mitsumi! They seemed to have a new keyboard design out every other month.)
Sadly, I’ve not found the spec for KKQ and KKR, only KPQ and KPR.
That’s why I’m curious to see what’s under the keycaps, i.e. does the top of the slider look anything remotely like KKR?
Hi Daniel, wow you’ve got a keen eye, and you clearly know more about old keyboards than I do 🙂
As far as I remember, under the white keys was nothing, the keys are hollow and a little rubber hood pushes the spring downwards so that the contacts on the board would be closed. I don’t think I’ve taken a picture from the top of the keyboard. Let me see how easy it is to pry a key off, if I manage to do it, I’ll add a picture of it here. If memory serves me right, it was an extremely cheap setup though.
All the best,
JAY
Am I right in my guess, that the keyboard ribbon is 18pins @ 100mil pitch?
I’m so sorry Sarreq, I can’t remember how many pins it had, nor do I know what the pitch of a cable is.