Reference images are nice if you’re modelling something from scratch: take pictures from the front, the back, the sides, and then use them to create a 3D model with all those fancy extrusion tools and what have you.
Trouble is, how do we get them into Blender as a backdrop? Let me show you, before I forget (again).
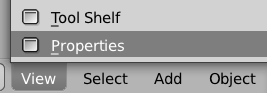
First, cast your eye at the bottom of the default interface, somewhere on the left, underneath the main 3D view. Select View – Properties.
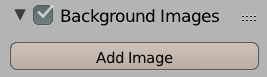
This will open a panel on the right side of the main 3D view with a scary plethora of options. Ignore them all and scroll to the very bottom of the list, to a section labelled Background Images. Open it with the little triangle thing, tick the check box, and click on Add Image.
This will open a dialogue to find an image you’d like to use. We’ll tell Blender in a moment where that image should show up. Once selected, the above expands into yet more scary options, but these are only for the image you’ve just selected. It’ll look something like this:
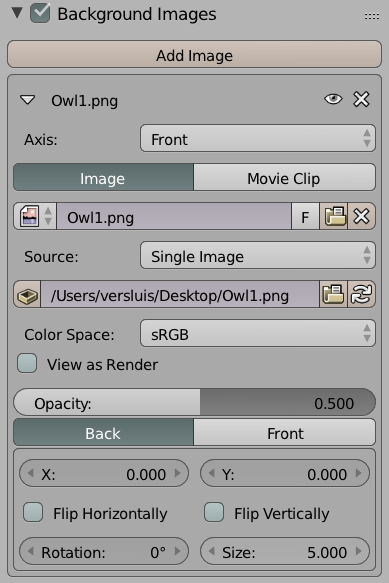
Just underneath the file name (Owl1.png in my case) there’s a drop-down to select where we want to see this image. You can choose a view (such as Front, Back, Left, etc) or an axis in this menu. Feel free to set the opacity and other options, including the size and position of your image.
See that the Add Image button is still there? You can add other images and they’ll all appear in this extremely cluttered list, and each of them has their own set of options. Once set it’s a good idea to de-clutter that poor sidebar by collapsing those options with the little triangle thing next to the file name.
So where’s the image?
That’s the thing about Blender: once you’ve added your reference images, they don’t appear to show up in the viewport just yet. That’s probably because you’re looking at your scene from a random angle.
In Blender, reference images only show up when you look through a orthographic camera, i.e. straight from the front, back, left, right, top or bottom.
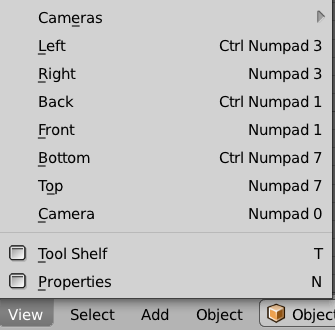
Select an orthographic camera by heading over to View again, and pick one underneath the Cameras headline. You’ll see some handy shortcuts displayed on how to switch them too.
So in my example, I’ve setup one reference image, and selected it to be displayed from the front view. Next I’d pick the Front Camera (1) and my image should show up in the viewport. If you can’t see it, it may not be scaled correctly. Pan or zoom around and see if you can find it, then scale it properly.
Note that if you move your camera only the tiniest bit, shifting the angle, the reference image immediately disappears (because the perspective and relationship between your object and the image would be instantly destroyed). In that case, just select your desired camera again and the image will return.
Speaking of orthographic: although those cameras do give us a full-on view of each perspective, they are by default still “perspective” rather than “orthographic”. To switch any camera from perspective to orthographic and back, hit the 5 on your keyboard.