I’ve just found out how to change values for Morph Targets on objects in Unreal Engine via code. This will come in handy when any attribute needs to be updated either as a result of user input, or via automation. Here’s the basic workflow:
- know the exact name of the Morph Target
- add a Set Morph Target node in Blueprints
- populate it with the name of the morph
- give it a value (between 0 and 1, equivalent to 0% to 100%)
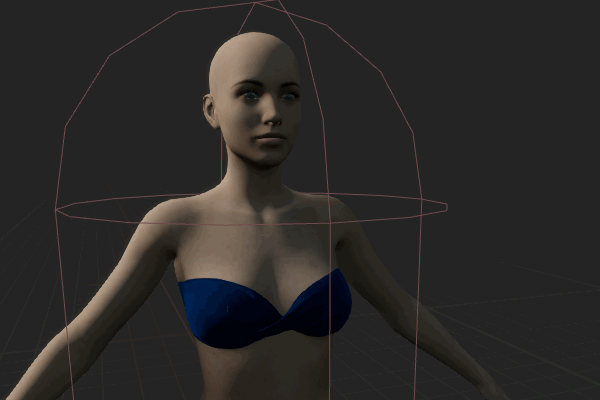
Here’s a small example that continuously changes my Genesis 8 character from Basic Female into Olympia. While not particularly useful in itself, it illustrates how a parameter change can trigger a morph.
Finding the correct Morph Name
I’m assuming for my example that we have a mesh object that has morph targets. Mine is a Genesis character that I’ve imported with DAZ to Unreal. FBX import will work too. Open the skeleton of your object (not the mesh), and take a look at a window called Anim Curves. Mine looks like this:
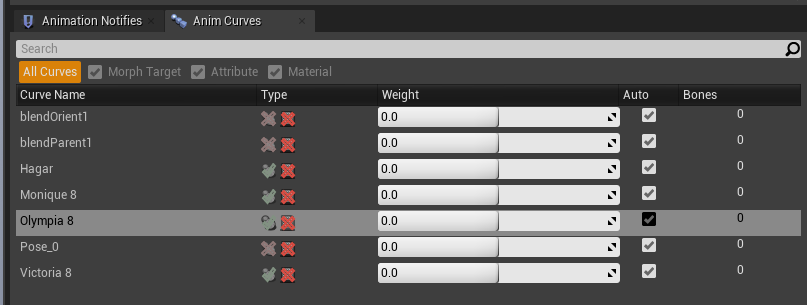
We can already modify these values manually here if we wish. My morphs seem to be named in a relatively memorable fashion, but they could be long and cryptic. To copy a name, select it and hit F2, the choose CTRL+C (make sure not to change the name).
Changing the value in Blueprint
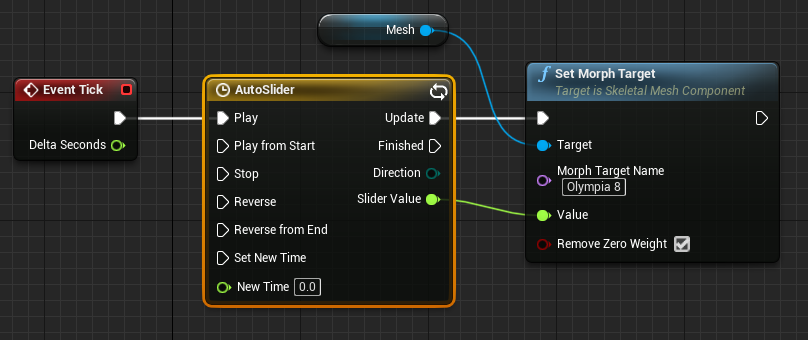
With our object (or character) converted to a new Blueprint class, open it and take a look at the Event Graph. I’m hooking into the Tick Event here and connect it to a Set Morph Target node. This is where I can add a float value between 0 and 1, and give the name of my morph (Olympia 8 in my case).
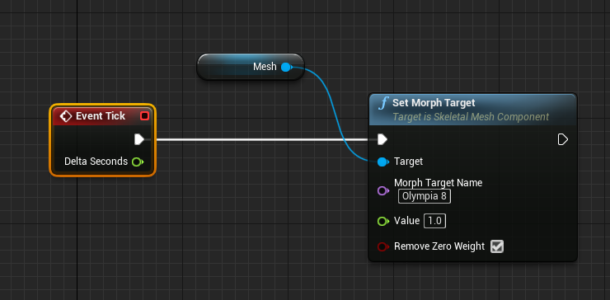
When I compile and simulate the Blueprint, I can see that my morph has sprung into life.
Animating the Morph Value
To take this one step further, I’m going to build a little timeline that will adjust this value from 0 to 1 and back over the course of 2 seconds. You can use anything that drives a float value on the above node.
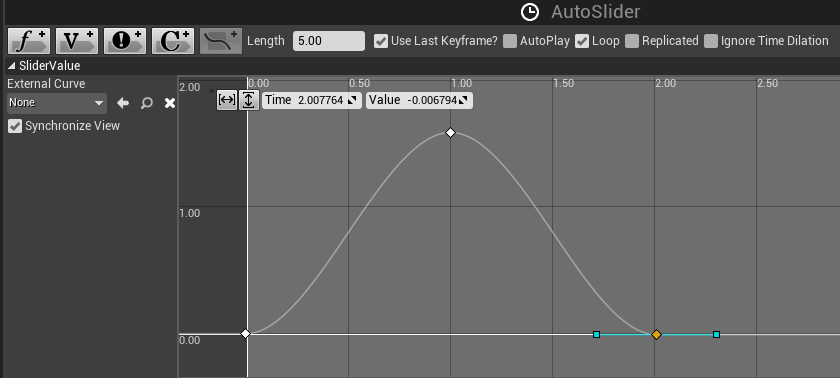
This is a node called Timeline. At the top left there’s a track called SliderValue, which will drive the output of the value, which in turn is set with keyframes. I’m actually interpolating the between 0 and 1.5(ish) to exaggerate the effect a little. Now I’ll hook the timeline node into Tick Event like so:
When compiled, we’ll see our figure change shapes automatically:
Kudos to Brandon Kish who explained the whole process in this video. Thanks, Brandon!