I’ve just figured out how to setup keyframe animations in Unreal Engine, and thought I’d make a note of it before I forget. I made the animation above a little while ago by “poking around”, but it wasn’t as smooth as I liked it to be. I think I’ve found the missing bits now, so here’s how it works. From what I gather, Unreal Engine calls Keyframe Animations “Cinematics”. They’re a little tricky to setup, because the whole engine is built for so much more, but in principle we need to:
- create a new Level Sequence
- create a Cinematic Camera
- add the camera as a Track to the Sequencer
- create keyframes for/with the camera
- add a Camera Cut Track
- export your animation as a video or image series
I’m going to create a camera animation like in the demo above, but any regular mesh object and Actor can be animated, including lights and their properties, so this process is not limited to cameras. However you need at least one camera to render out the sequence, at least that’s my goal here. The process will be different if you’d like to trigger the sequence from within a game, which is not in the scope of this article.
Let’s see how to do this step by step.
Creating the Level Sequence
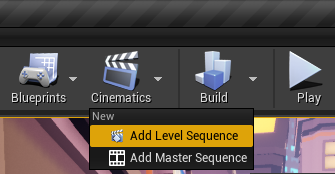
Head over to Cinematics and add a new Level Sequence.
The content dialogue shows up. Pick a location inside your project, and a handsome name to save the file. This will open the Sequencer window at the bottom, where you’d expect a timeline of sorts to be. Right now it’s empty, but we’ll populate it with good stuff in a moment.

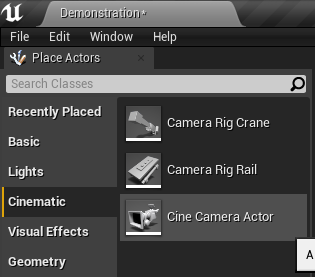
Before we do that though, let’s add a Cinematic Camera Actor to our scene. It’s in the window to the left of the view port. Drag one in as you would any other object from the content browser. I suggest giving it a memorable name so you can find it easier in the plethora of potential files in the outliner. The default is CineCamerActor1, but I’ll name mine JayCam. Note that you can create multiple animated cameras this way and later cut between them. If that’s your intention, name them appropriately so you know which one is which.
With the camera selected, click on the green Track button in the Sequencer window, choose Actor to Sequencer, then pick your object so it can be keyframed. Technically it adds a track to the sequencer. If your camera is selected, it’ll be the item at the very top of the list, otherwise you can search the list for an object you’d like to keyframe.

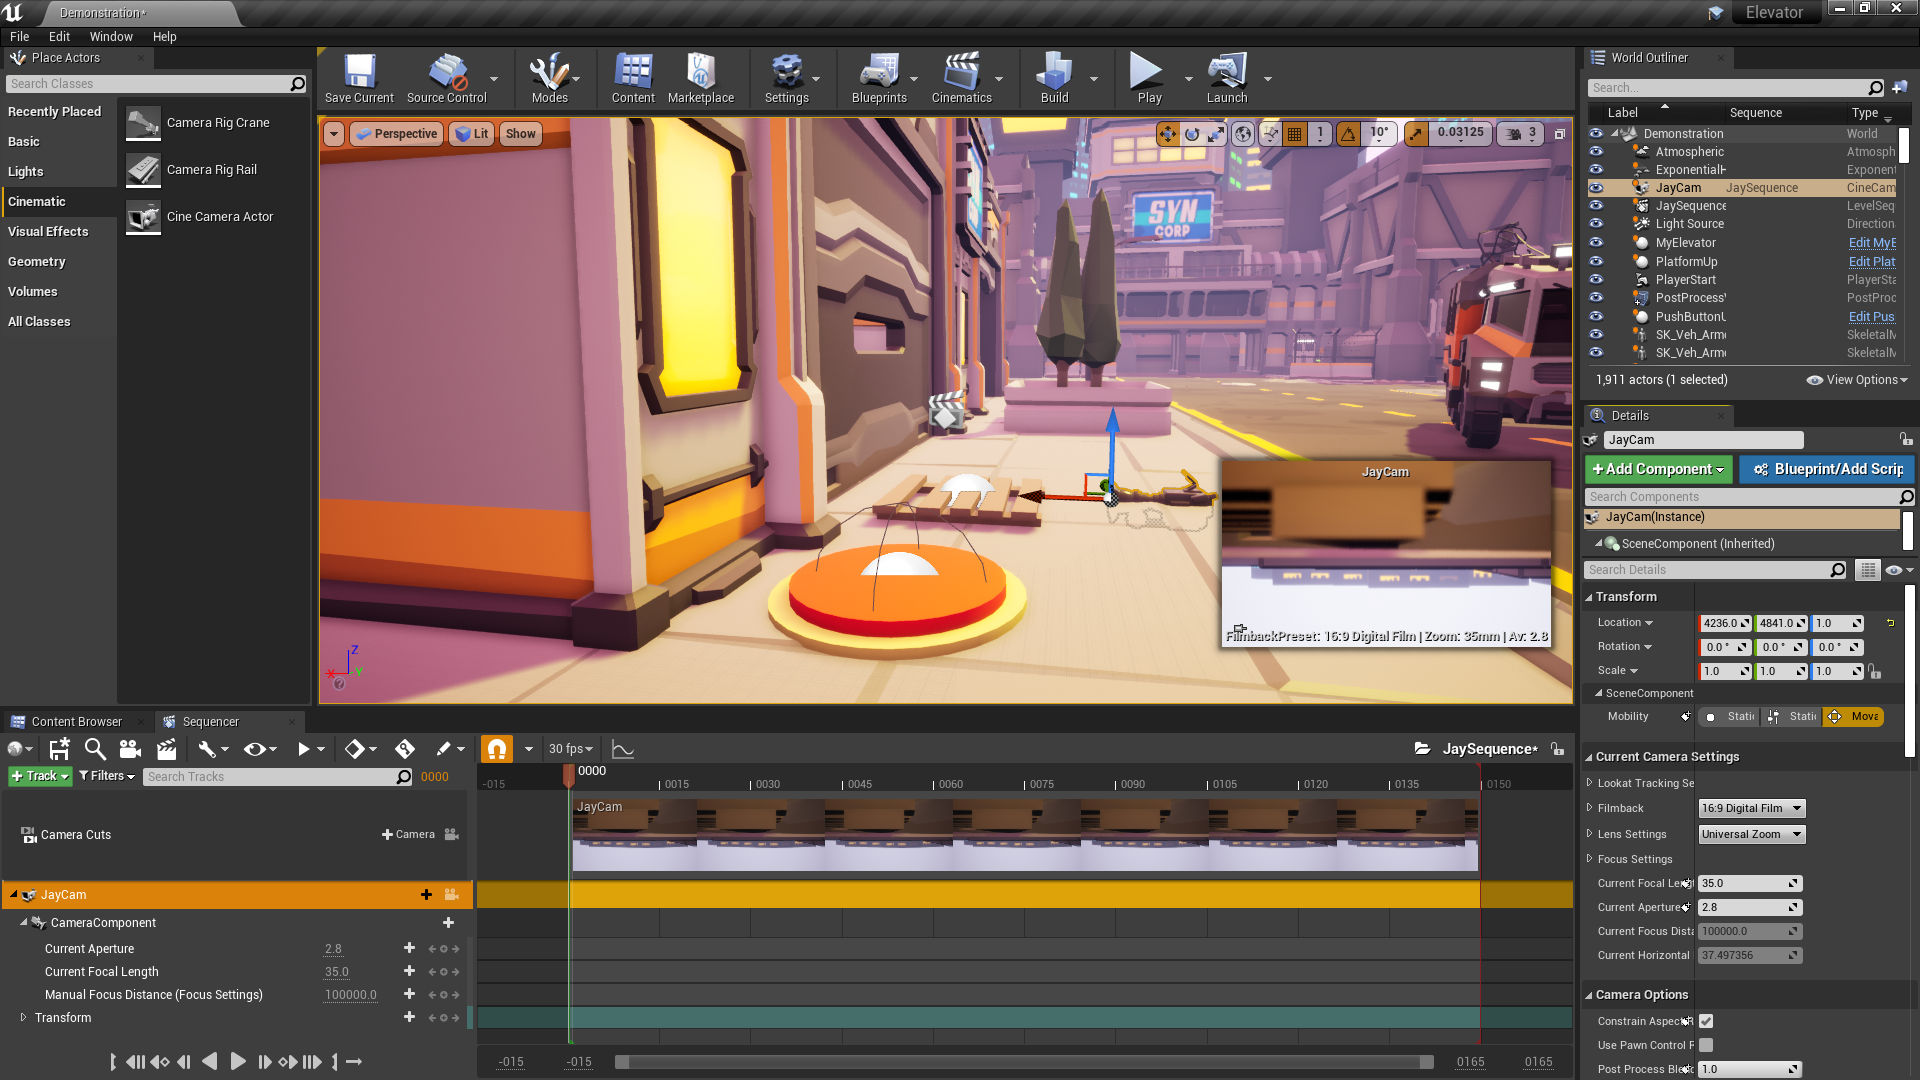
You should now see various properties of your camera to animate, as well as an inset preview of what the camera sees. Note the duration of the timeline at the bottom right. Adjust it as you see fit (click to enlarge).
Animating your camera (or object)
Move the camera around with its gizmo and set keyframes with the super tiny plus icon in between the arrows on the track (next to the word “Section”), or use the handy Auto Keyframe option (key inside a diamond icon, disabled by default).

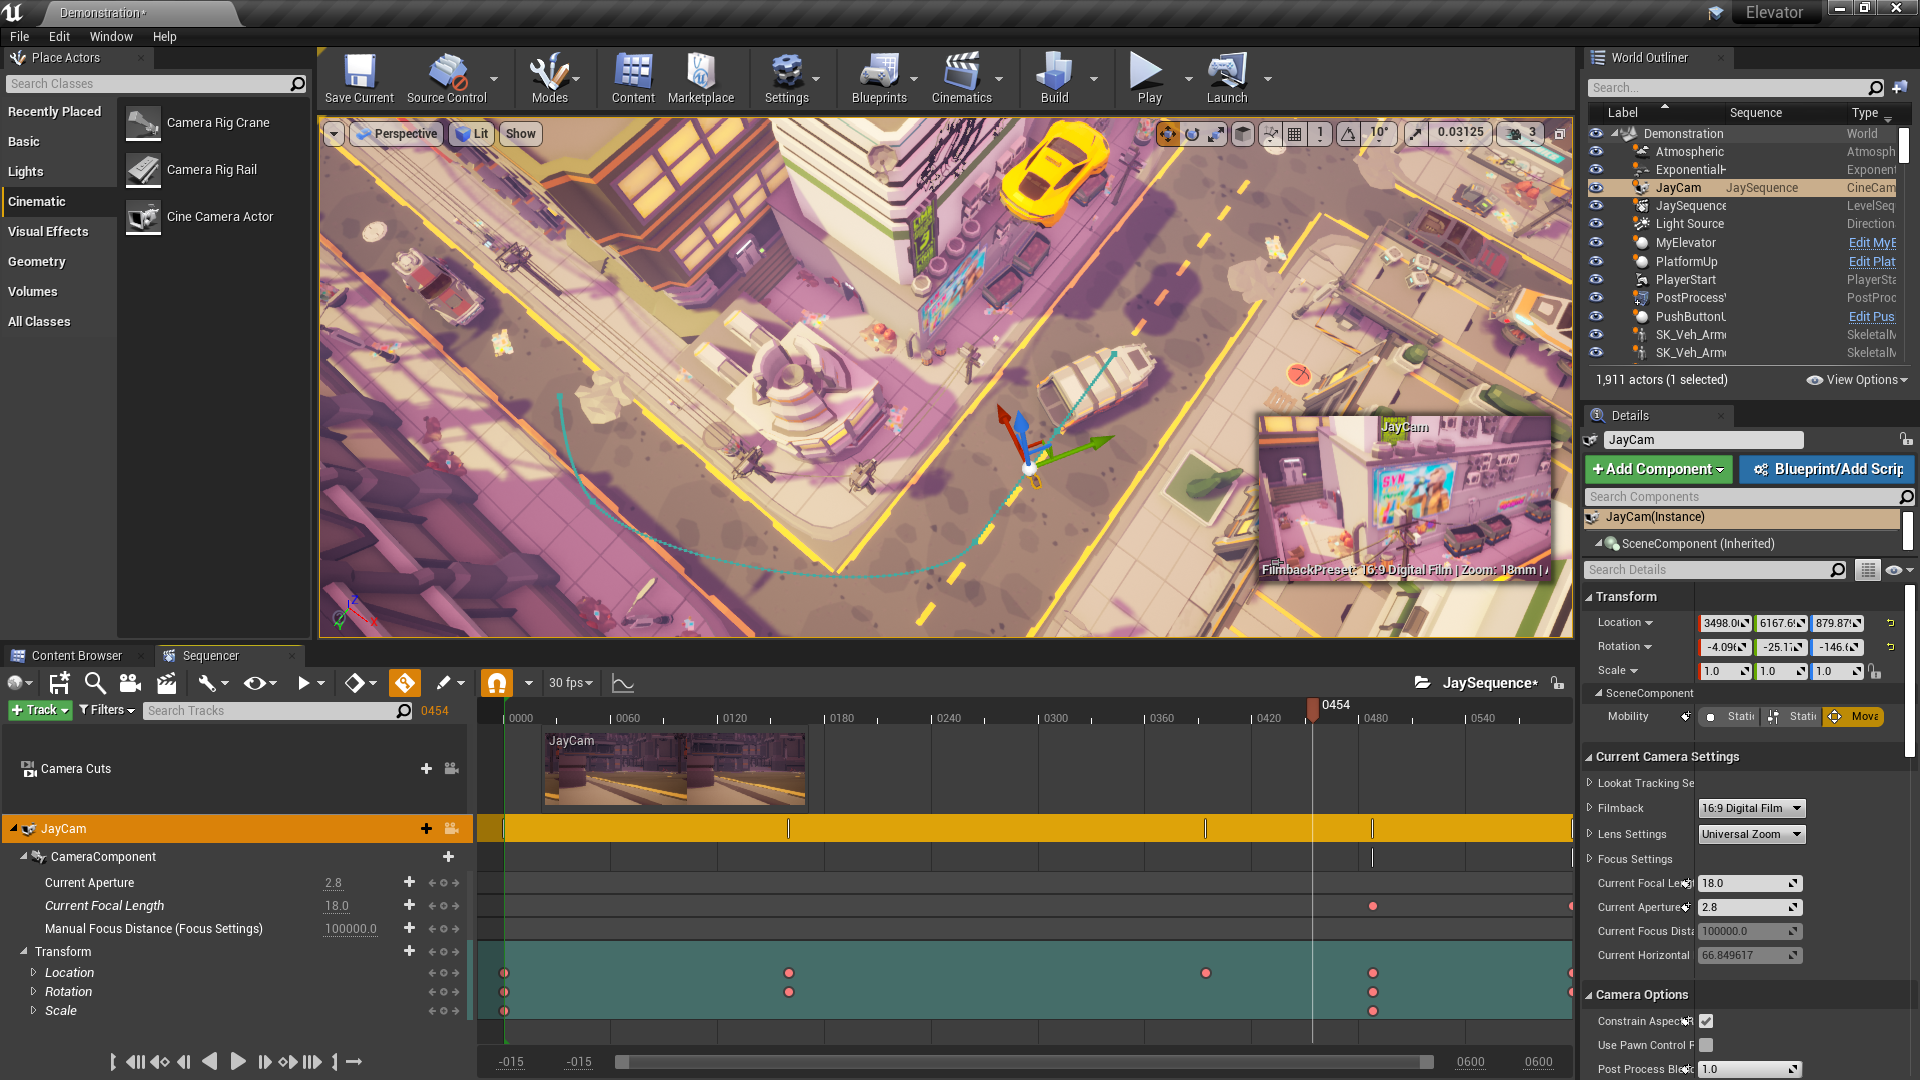
After adding several keyframes, I’ve got a little camera pan through a scene, and my sequencer looks like this. The blue line in mu scene is the motion path, the red dots in the timeline are my keyframes (click to enlarge).
Exporting the animation
We’re ready to put some action on film (very figuratively speaking). Before we shout “cut and print” and call for lunch however, let’s add one final important track to the timeline that will let Unreal Engine know which camera to render during export. It’s the Camera Cut track.
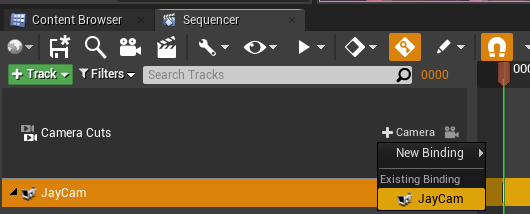
I only want to render a single camera, so all I need is a single cut on this track. Park your playhead at the beginning of the timeline, click Camera in the Camera Cuts Track and choose your handsomely named cinematic camera actor (JayCam in my case). If you had multiple cameras, you can park your playhead at any position and cut to a new camera this way.
Depending on how lucky you are, this might result in several smaller chunks of track. Drag the cuts track out so that it contains your whole animation duration, preferably without sub-clips on the cuts track. Now we’re ready to render! Pick the little clapperboard icon to export your animation.
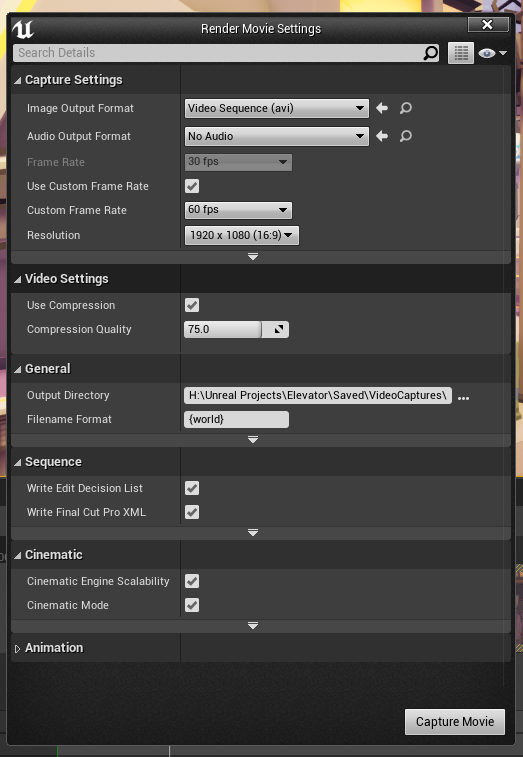
A rather scary window opens, but all we really care about is the location of our final output, the format (video or image sequence), image size and the frame rate. If you wish, you can open the Animation tab at the very bottom and specify a custom start and end frame, but thanks to our earlier work, this should be taken care of. Hit Capture Movie to to export your movie.
Unreal Engine will now go ahead and render every frame as per your requirements. This will take a little longer than real time, but it’ll still do several frames a second (hardware and scene complexity depending of course). This is actually my favourite part, and the speed gets me every time. I’m used to animations taking days and weeks rather than seconds and minutes!
During the render you’ll see a preview window pop up. I’m guessing this is supposed to show each rendered frame in its entirety for our benefit, but on my system it only shows me the top left corner of each frame. I’m not complaining, but it looks like a half finished beta version to me. Here’s what my quick animation looks like:
That’s the principle! Not that difficult if you know what to do. If you have any questions, drop me a line. Happy animating 🙂