The beauty of Unreal Engine’s node system is that it’s relatively easy to extend your application code visually. At the same time, this can lead to extremely messy code (literally spaghetti code, considering the amount of noodles on the screen). While such code may be working in the heat of the moment, your future self won’t be able to read it. That’s where functions come in handy.
Unreal Engine offers various ways to organise code, and a function is one of these options. Consider code like this:
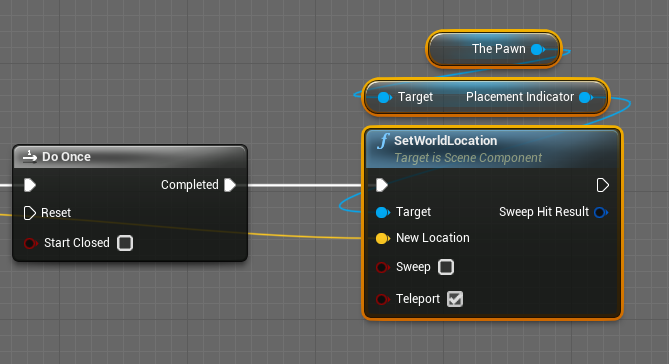
The end bit is something you may do several times in your project, and while this is a simple example, the action could be infinitely more complex. It might be tempting to copy and paste this block, but that’s unwise. What happens if a detail needs to be changed? Where are all the pasted instances? Imagine the amount of work it takes to track them down and make the change many times over. Also consider how messy a huge complex Blueprint will look over time.
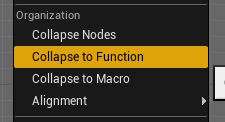
Thankfully, we can left-click and drag around such a block, right-click and select Collapse to Function.
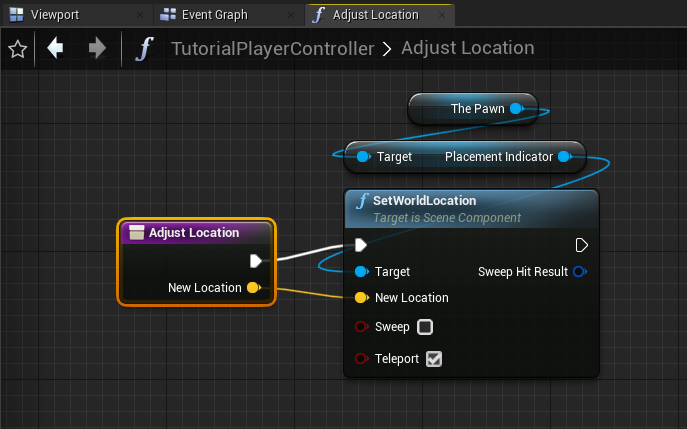
Once selected, Unreal Engine will do something like this:
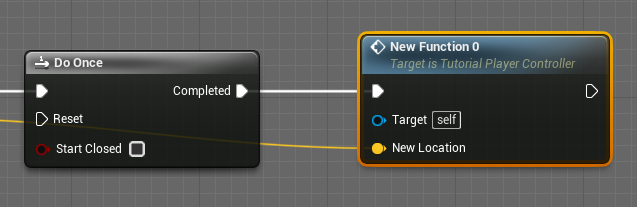
We now have a new function that’s hooked up to the previous node, complete with Input and output (if there was any). It’s not called anything meaningful yet, because Unreal Engine didn’t quite know what this code is for, but it was clever enough to create a new function with an input for a value we needed. If you have a more complex setup with multiple inputs, Unreal Engine will handle those too. It’s rather magical!
But where did our code go? Let’s take a look at the left hand side of our Blueprint Graph, in the Functions section.
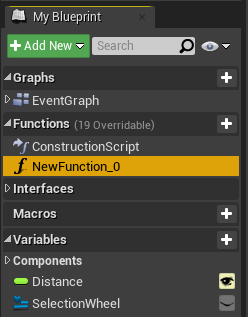
Double-click it to open a brand new Blueprint Tab! In addition to the regular Event Graph, we now have one named after our own function. This means we have a whole screen dedicated to the layout of these nodes. No more scrolling around trying to find where this part of the code is hiding, intermingled with other important nodes dedicated to something else. Also notice the purple colour of our starting node. It’s just a visual queue to set itself apart from the red and blue nodes, indicating a Function Blueprint.
We can rename out new function into something more meaningful at the top right, under Details. I’ve gone ahead and named mine Adjust Location, but anything will do here. Notice the description field. This lets you make a note of what this function is used for so you and your colleagues remember later. Super important for future success!
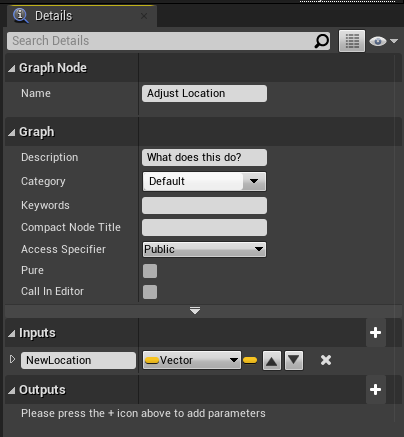
You can also rename any input values here, if they need to reflect something more specific or generic. In my case, New Location was part of the original code, so Unreal Engine took that across.
One last thing this example does not show is an Output Value. If my original code selection would have had any, this would be available here too. If you need to expand your code and add outputs, the bottom section in the Details Panel is where you’d do that – same for additional inputs should that be necessary.
Macros
You may come across code that cannot be collapsed into a function when you try. Anything that contains a Timeline node, or deals with delay/wait functions is affected. This is where Macros can come in handy. As Blueprint users, they work almost exactly the same, just showing under the Macros Tab. Under the C++ hood, they work very differently though (thankfully we don’t have to worry too much about it, but if you’d like to find out more, check out this article).
In a nutshell: if collapsing to a function doesn’t work, try collapsing your code into a macro.