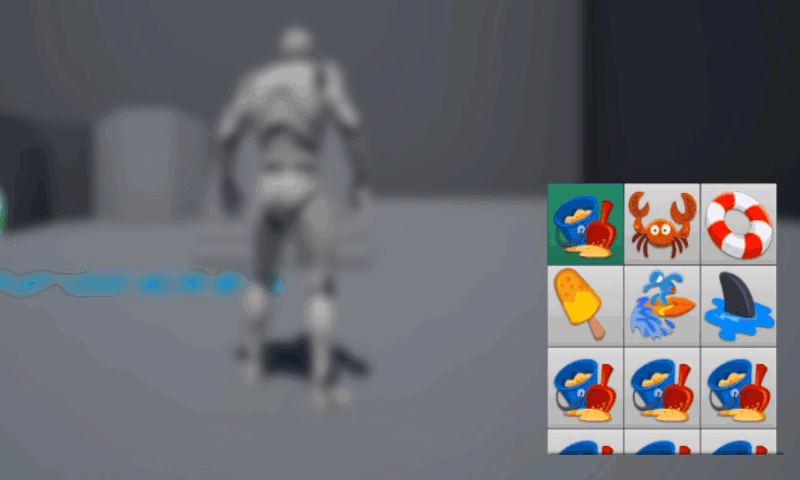
I wanted to implement a scrolling selection menu in Unreal Engine, inspired by the one I’ve seen in The Flame in the Flood. It looked a tad complicated to begin with, but I’ve put I did some digging and found a way that works great. This can be combined with my previous article about Gamepad Navigation too.
Essentially the menu seen in the animation above is made up of several buttons, each of which have an image as a child. Therefore, each button already has a click event assigned to which we can react. The layout was a tad complicated for me to comprehend, mainly because I didn’t know what options the Widget Canvas would give us nor what they were called. The ones that work best for this type of menu are the Scroll Box and the Wrap Box. The whole hierarchy is as follows:
- Canvas Panel
- Scroll Box
- Wrap Box
- Button (with image)
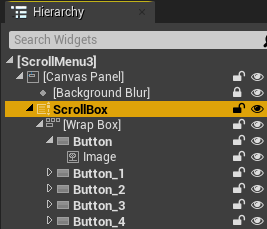
I’ve smuggled in a Background Blur effect, but it has no bearing on the scroll functionality.
The Scroll Box
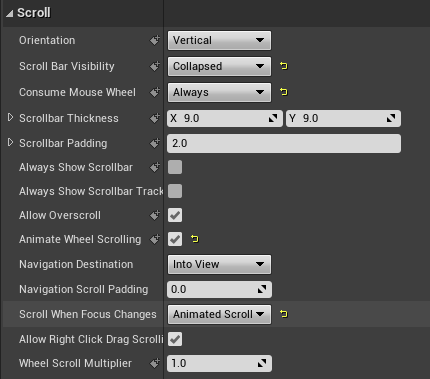
Our scroll box is the container that makes the scrolling magic happen. Anything inside it will be scrolled either horizontally or vertically. Scroll bars can be shown or hidden. One item I found particularly interesting was the Scroll When Focus Changes option. Setting this to Animated Scroll means there’s a swish movement applied to the container, otherwise it just jumps into place.
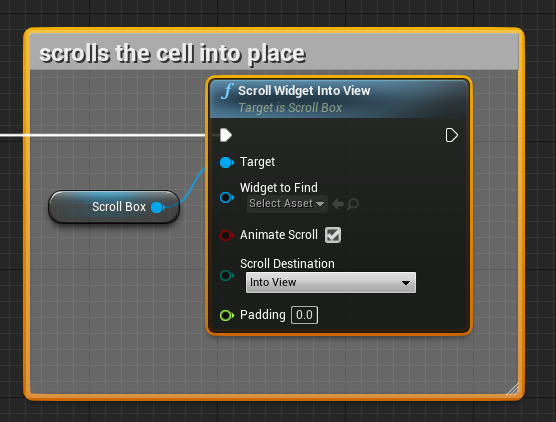
Speaking of scrolling into view: while this thing works great with the mouse wheel out of the box, for gamepad/keyboard navigation we need to apply a special node when an off-screen button is focussed. If we don’t do that, the Scroll Box doesn’t want to scroll. Took me a while to figure this out. With a reference to our Scroll Box, we need the Scroll Widget into View node (plugs in right after we highlight a button).
The Wrap Box
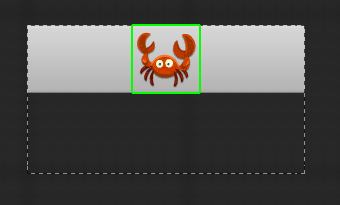
We can add anything we like into the Scroll Box, and it’ll size up to its outer limits. This means that by default, if I drag in a button and apply an image, it’ll look like this:
My next button would go fill-width underneath it, ignoring the square aspect ratio of my source image. That’s where our Wrap Box comes in. This is another container that will essentially stack items from left to right as long as it has room, and will “line break” if it runs out. That way, I can add as many buttons as I like into my Scroll Box.
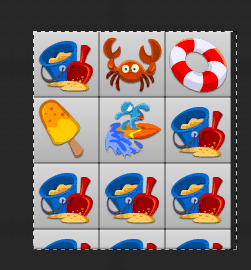
There’s nothing else we need to do, just make sure all buttons end up inside the Wrap Box (which then goes inside the Scroll Box).
The Button
Regular Buttons can have exactly one child, and we need to drag it in manually if we want one: either Text or an Image. Those items will then be drawn on top of the button itself. Buttons will size automatically to the size of an attached image or text font size, but they also have plenty of options to tweak like padding and width.
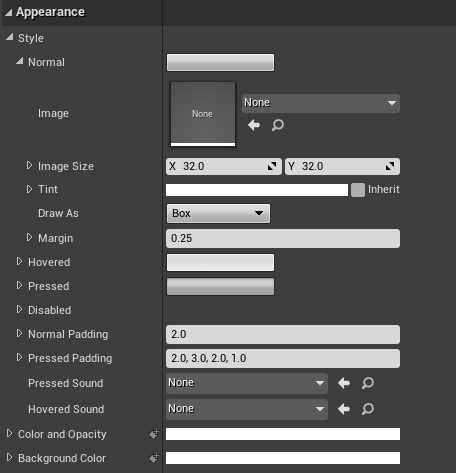
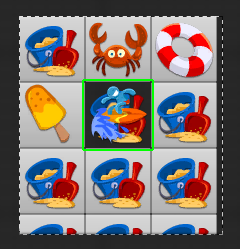
We can specify an image here instead of dragging an image object onto the button, with the effect that the button itself isn’t drawn. Instead any transparency contained in the image will be used, which lets us create rather interesting effects (check out the transparent surfer guy):
Note that each “button state” can have its own image (normal, hovered, pressed, disabled). Imagine the possibilities!
Hi! This was really useful, just have a question, hope you could help me: I’m trying to use the UE default Widget Navigation System and I’m trying to set my Scrollbox to Wrap when I’m at the Bottom. It works fine when using the Scrollbox alone, but when I add any panel inside to create this type of Grid, it Wraps up to the top element IN VIEW. Do you know a workaround for this?
Sadly I don’t, I can only assume that panels inside a scroll box are not supported, or that the panel is too wide to be able to wrap.
The only way I’ve been able to do it is by usin the Explicit or Custom Navigation modes from the panel, although yoyu need to either place each element in your panel manually, therefore being able to call them, or doing some complicated functions to let the Panel know what Widget you want to focus :-/
If anyone has found another workaround for this, I’d highly appreciate being shared on it