Unreal Engine can make pawns do things, like chase down and follow the player. This is known as AI behaviour, for Artificial Intelligence. It works surprisingly well! Here’s how to set it up – in its simplest form. In principle we have to
- create an AI controller
- add the AI controller to the pawn
- define a Nav Mesh Bounds Volume
- make sure both characters are inside said volume
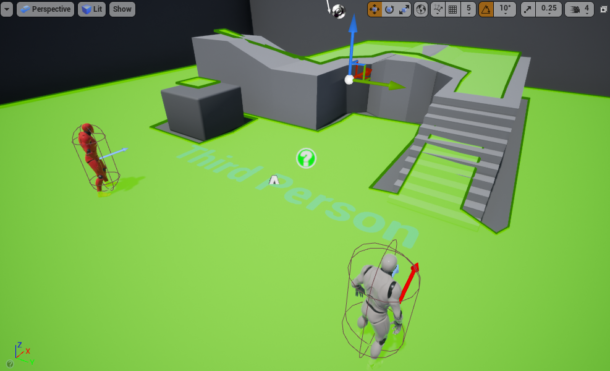
In my example I have two Unreal Guys: my own third person character, and another one I’ve turned red. I might put them all into a demo project so you can experience their behaviour for yourself. There’s a video at the bottom of this article that shows how this works.
Creating the AI Controller
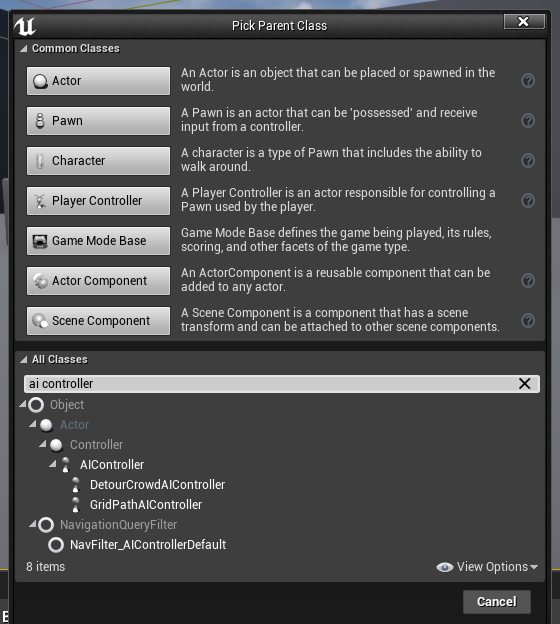
This thing is a little tricky to find. Create a regular new Blueprint Class and search for AI Controller. It’s under Actor – Controller. Pick it and name it something memorable (I’ll call mine EnemyAI).
I’ll create a custom event in the graph that can be triggered when I’d like my red guy to head towards my grey guy. There’s a node for that AI Move To. Here’s what it looks like:
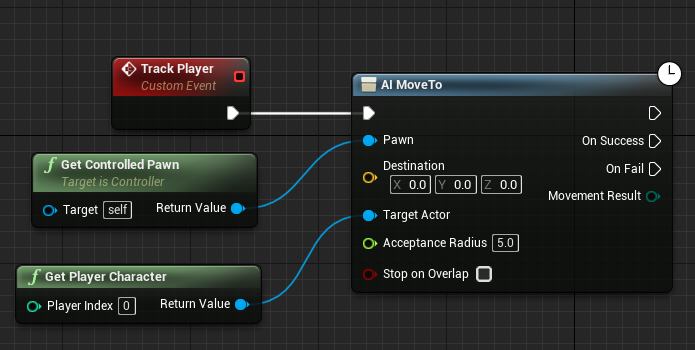
This takes in a Pawn (the red guy, or the enemy controlled pawn) and a target (our grey guy, or the player character) and move the pawn towards the target. It will become more clear in the next step why the red guy can be accessed as the controlled pawn. The Acceptance Radius is how close the pawn will approach the target.
We want to call this event in intervals, either when the enemy spots the character, or just update where he needs to go on the fly so he follows us around. I’ll create a Timer by Function for that, so every second his “hunt-to” target is updated. When I move, he will spot it. I’ll tie that to Event Begin Play so it starts immediately, but change it as you see fit.
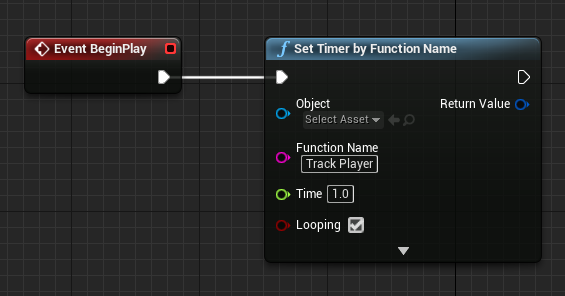
The timer needs to be set to looping for it to execute continuously, and it’ll need a function to call – that’s the name we set up in the previous step. Compile and save, we’re done in the AI Controller.
Plugging the AI into the Enemy Character
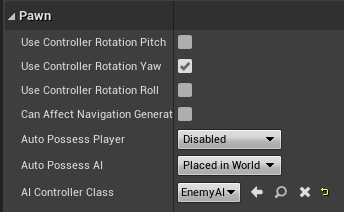
My red guy is just a regular Unreal Guy with a different material. As such, he’s based on a Character Class, a descendant of the Pawn Class. In the class defaults there’s a Pawn section in which the AI Controller can be specified. I’ll pick the one we’ve created earlier.
Now the AI Controller can access its pawn and use the AI function to drive it to the target (i.e. grey guy).
Defining an area for the Enemy AI
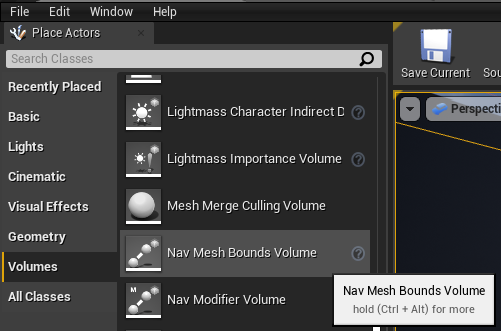
We need to add a special object into our level called Nav Mesh Bounds Volume. It’s hiding under Volumes on the right in the Place Actors tab. Drag one into your scene and scale it up to wherever you’d like the enemy to walk.
It looks a bit like a Box Collision and won’t show up when you play. During placement, press P to make it toggle its visibility to green. The volume needs to penetrate the floor a little bit so Unreal Engine can work out where our AI can travel to. It’s really clever and works out paths that can be taken, including walking up stairs. Here’s what mine looks like when extended to the outsides of my demo level:
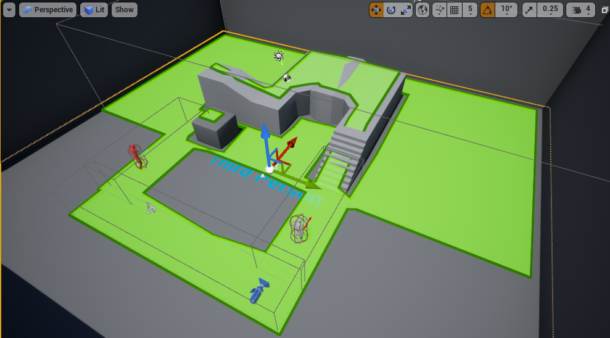
You can combine multiple Nav Mesh Bounds Volumes into a network of paths for the AI to travel in. Here I’ve defined some safe zones for my grey guy. They’ve all just overlapping volumes.
Both characters need to be on this grid for the chase to begin. This concept is loosely explained in an excellent tutorial by Zak Parrish called Twin Stick Shooter on the EPIC website.