I like using iClone as animation front-end for Unreal Engine. Although a lot can be done directly in UE, not everything is as convenient to achieve as it is in iClone. The pipeline is designed with humanoid characters in mind and works well enough, but things get hinky when it comes to non-standard characters like animals, especially those that are UE source assets. Here’s how I work with those:
- export the mesh and all animations from UE
- import mesh into CC, then import animations
- send mesh with animations to iClone
- craft animation sequences around assets (transferred as proxies)
- export FBXes from iClone and use in UE Sequencer
This sounds much simpler than it is, and pitfalls lurk around every corner, so here’s a step-by-step guide with illustrations. I’m using iClone 8.5, CC 4.5 and Unreal Engine 5.5 for this article. I’m using the Farm Animals Pack by Protofactor if you want to follow along.
Exporting assets from Unreal Engine
First hurdle: getting your non-standard figures out of Unreal Engine. It’s a two-step process, let’s export the skeletal mesh and the animations separately.
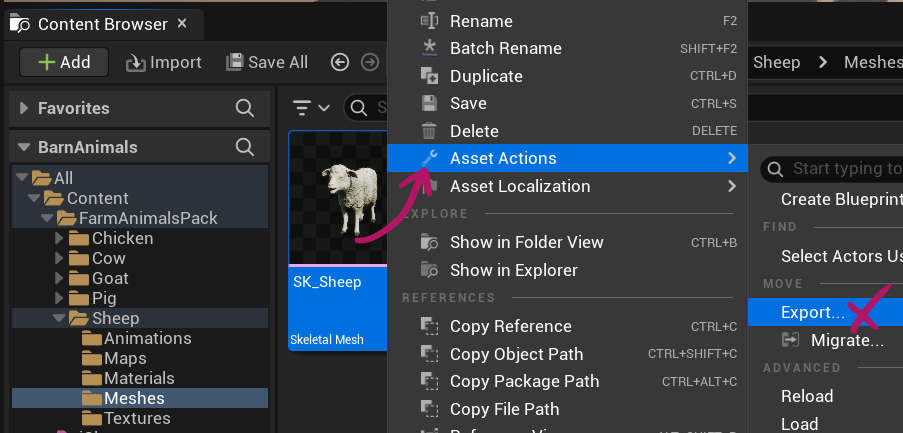
For the mesh, right-click on the one you want to use and choose Asset Actions – Export.
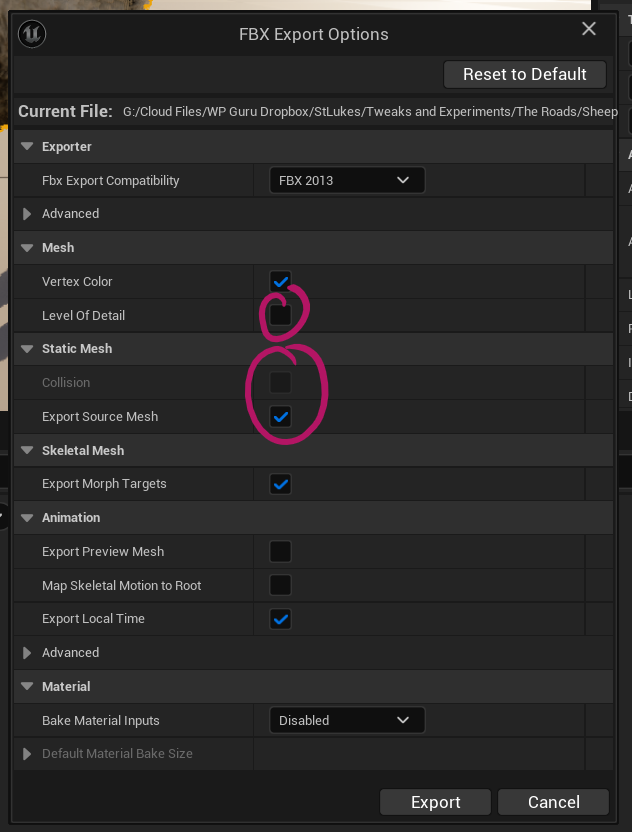
Most of the default values will work, but I prefer to untick Level of Detail Collision. This avoids unnecessary meshes overlaying one another.
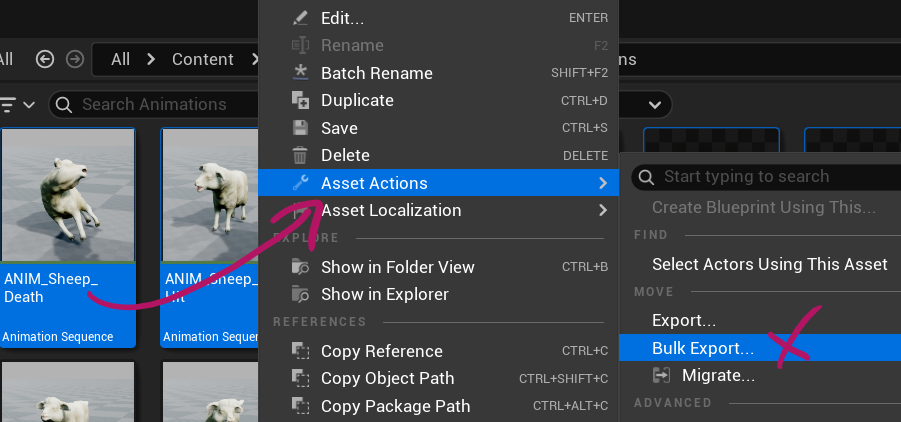
These types of creature assets often come with a variety of animations that we can utilise in iClone. To export them all in one fair swoop, select the ones you want to use and choose Asset Actions – Bulk Export. This will avoid the same export dialogue popping up multiple times.
The export settings are the same as above, but we can untick Export Source Mesh and set Bake Materials to Disabled. This will keep our files a bit smaller and make the export faster.
Importing into Character Creator
Our sheep will be imported as a non-standard character, which will retain the skeleton and animation compatibility. Head over to Import and choose the FBX mesh from the previous step.
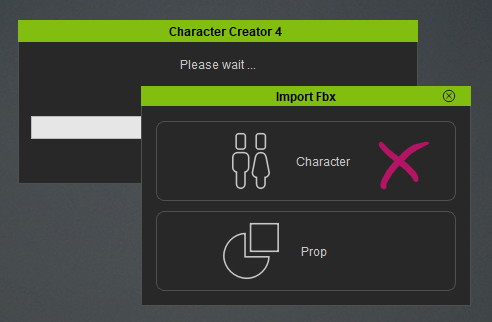
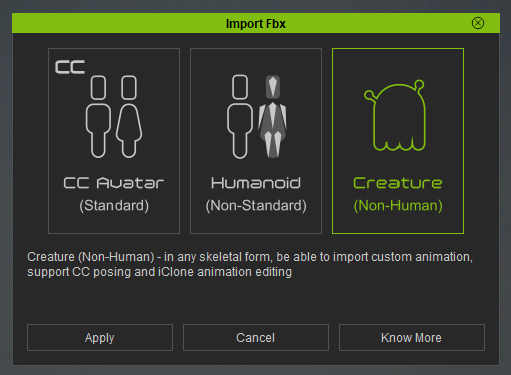
Choose Character, then Creature (non-human). If you have a biped character you can try Humanoid. If CC recognises the skeleton structure, it will even give you the option to choose it, but with quadruped animals that’s never the case.
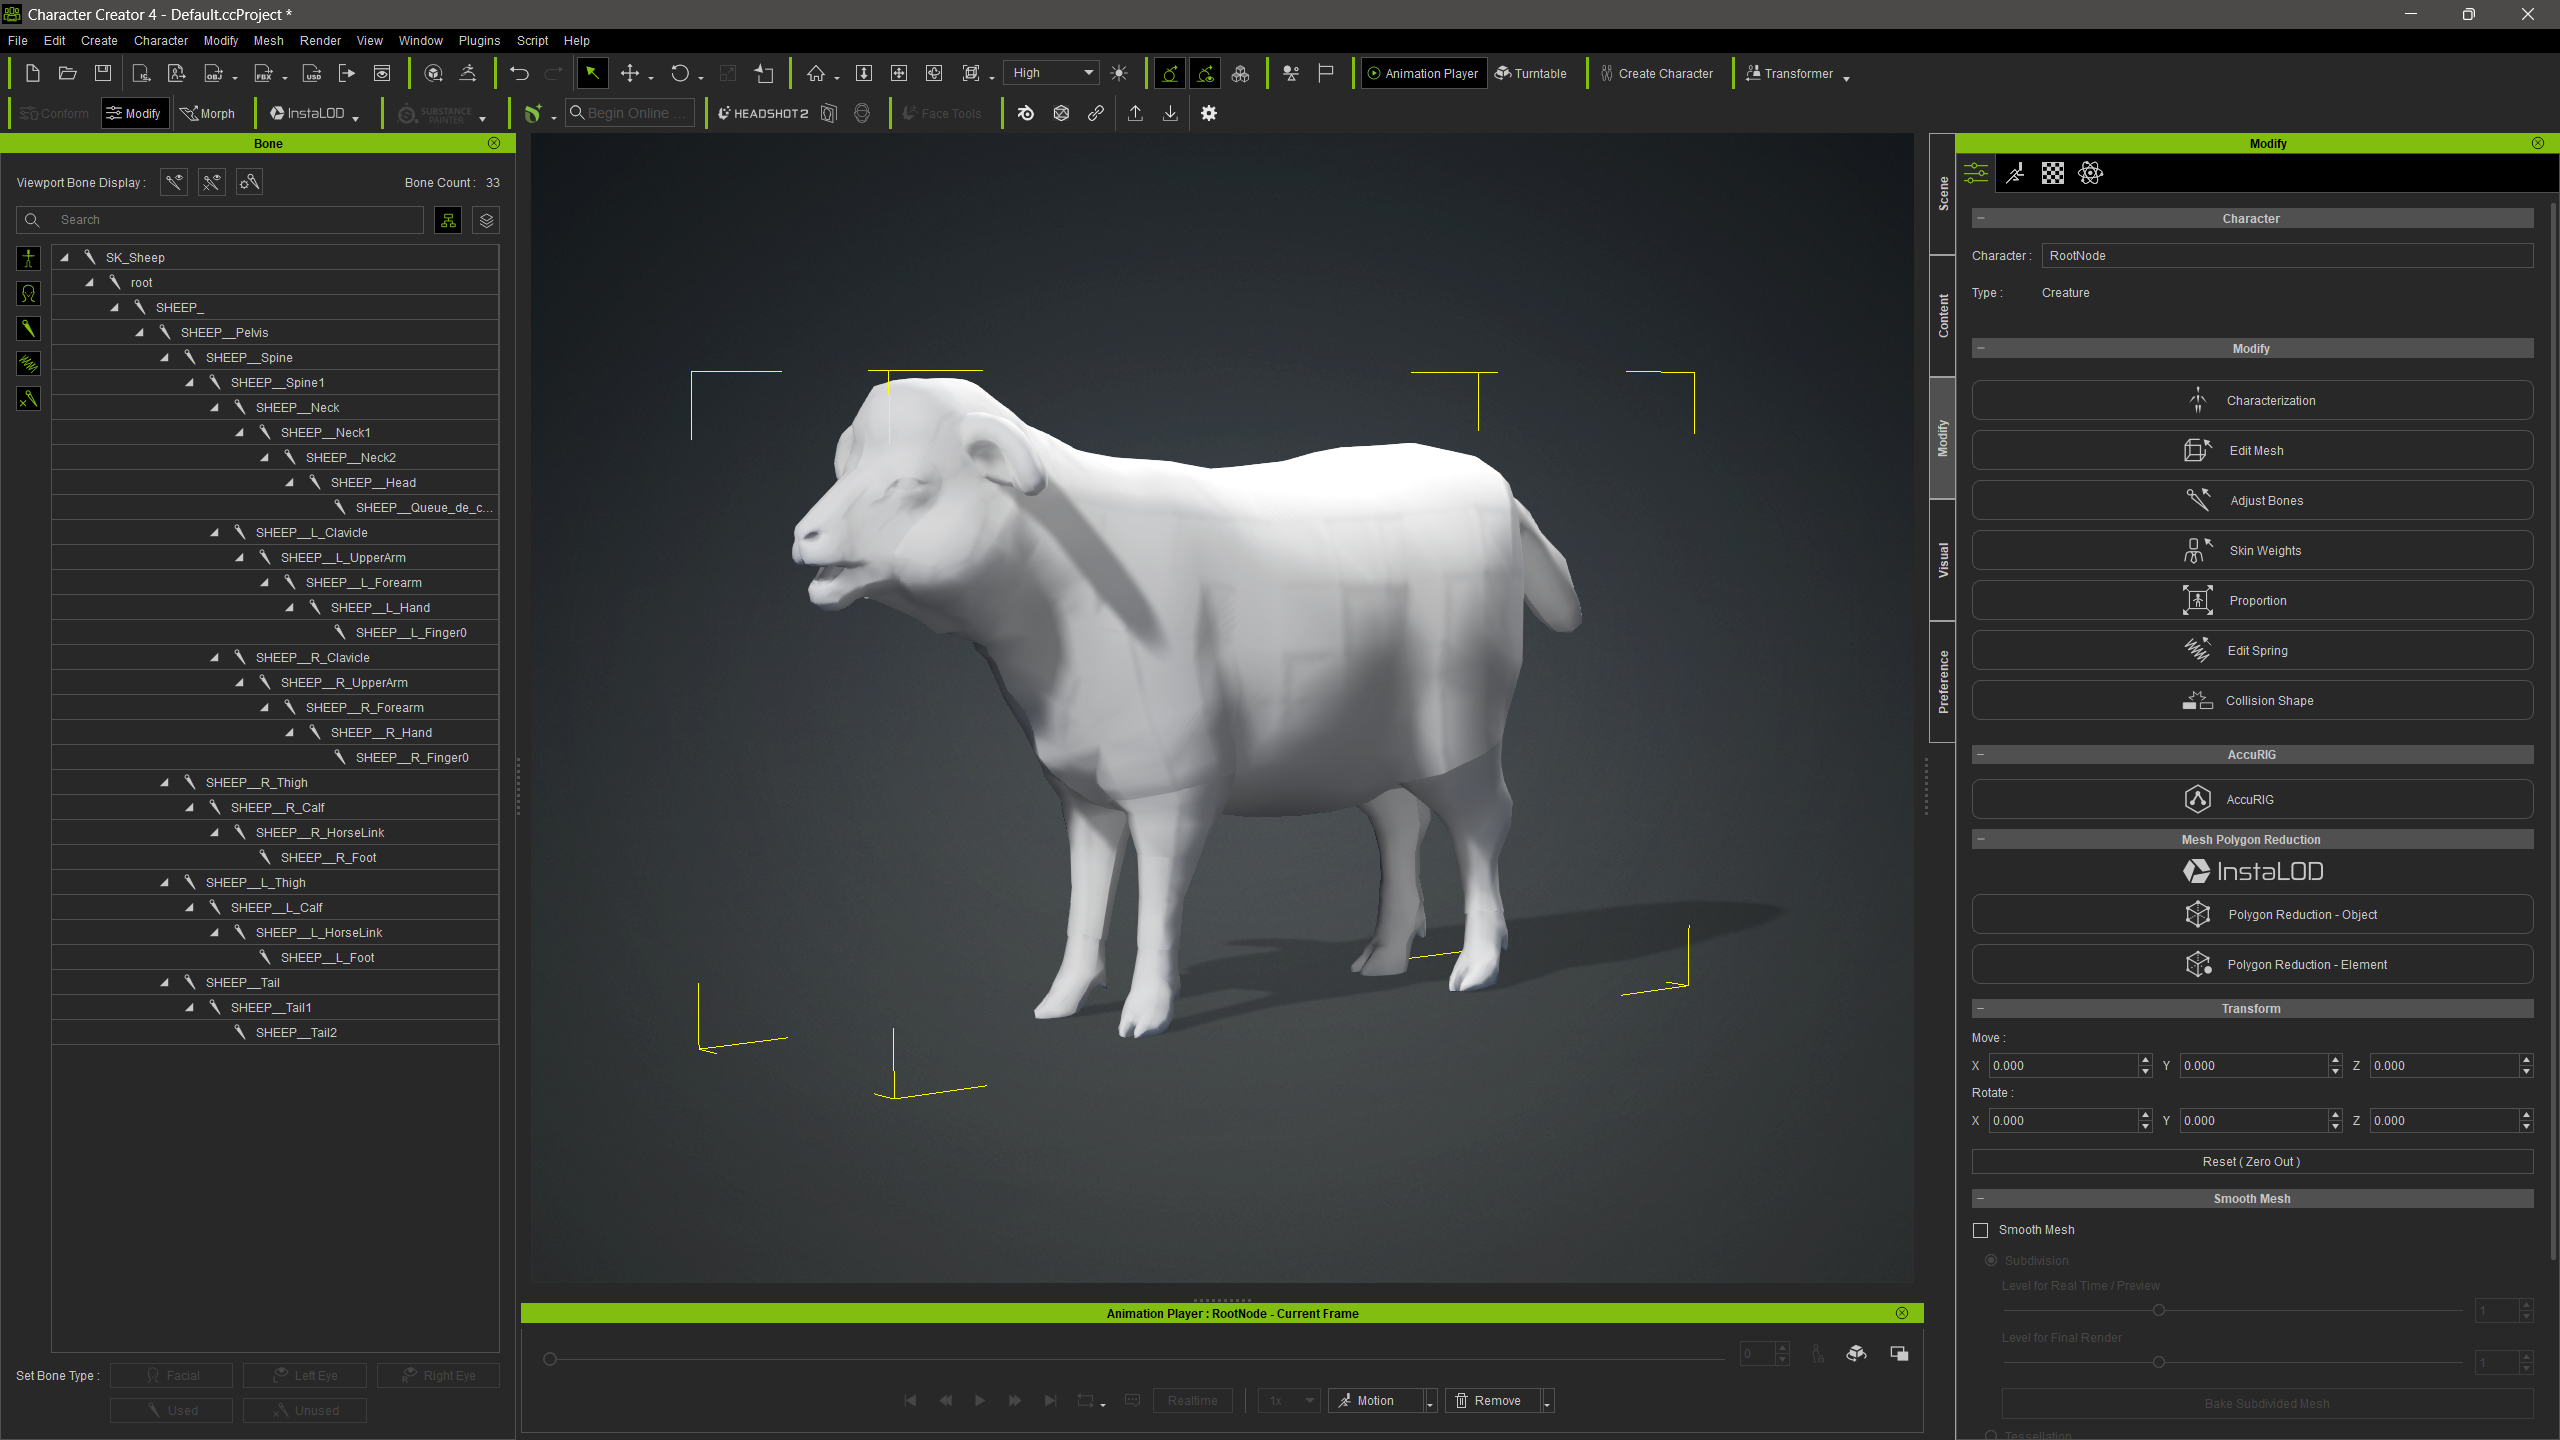
Now we should see our creature, albeit without textures. Feel free to set them up, I’m OK without them.
Next we’ll import all animations we’ve exported from UE. This will add them to this project, and also to the Perform List, which will let us preview each animation and come in handy in iClone in a moment. Head over to File – Import – Import External Motion, then multi-select all exported animations (or only those you’d like to use in iClone).
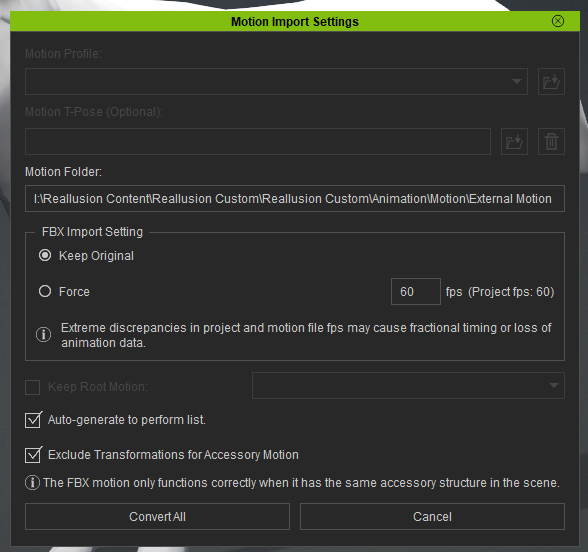
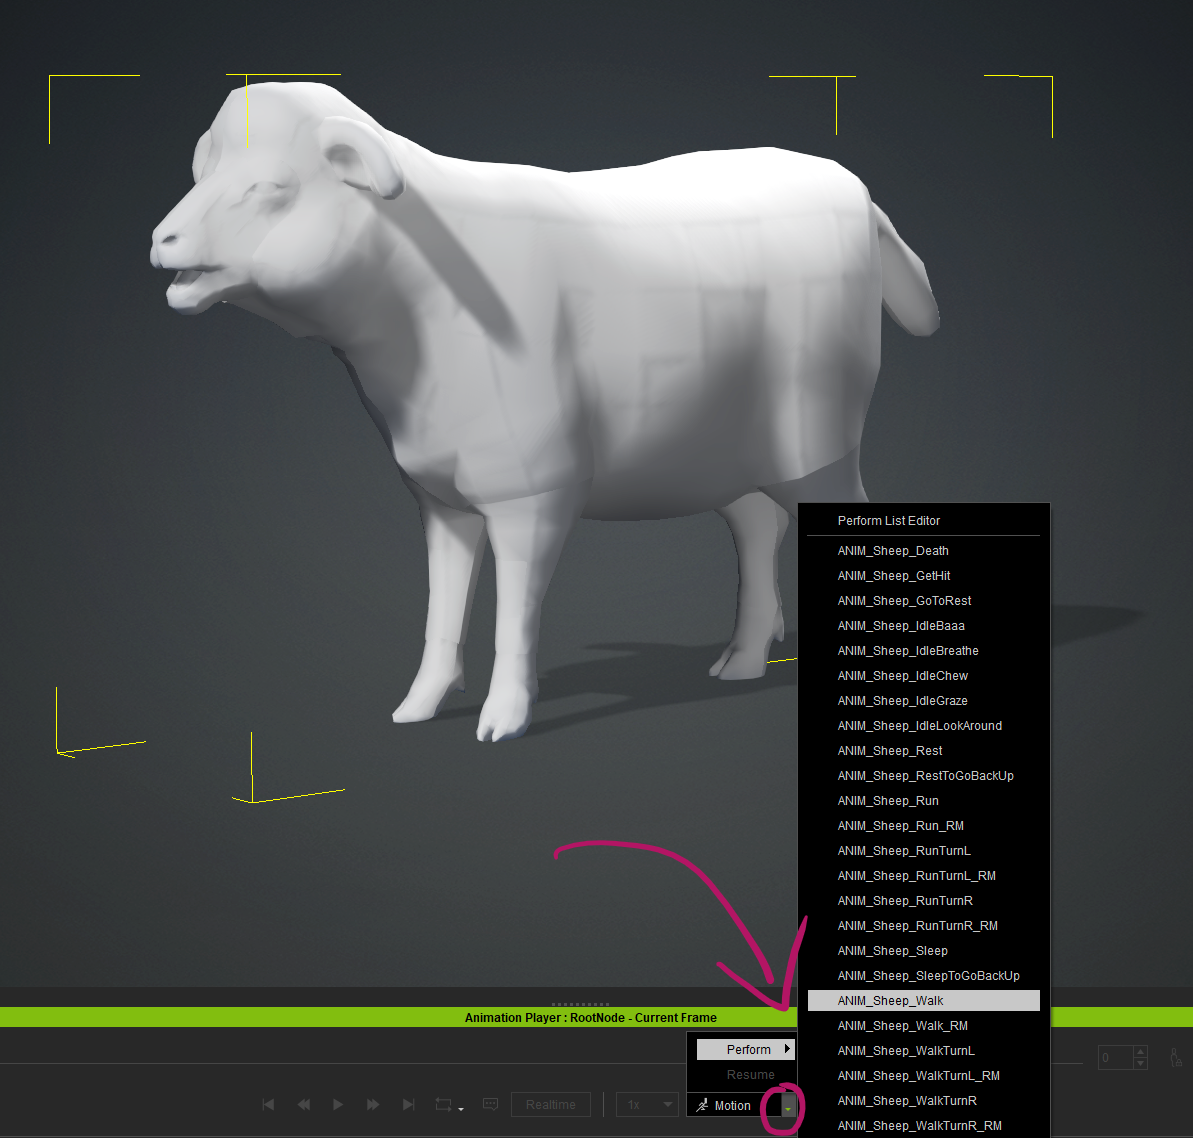
After selecting Convert All, you can use the Motion option at the bottom to preview an animation. Press SPACE BAR to play.
Animating in iClone
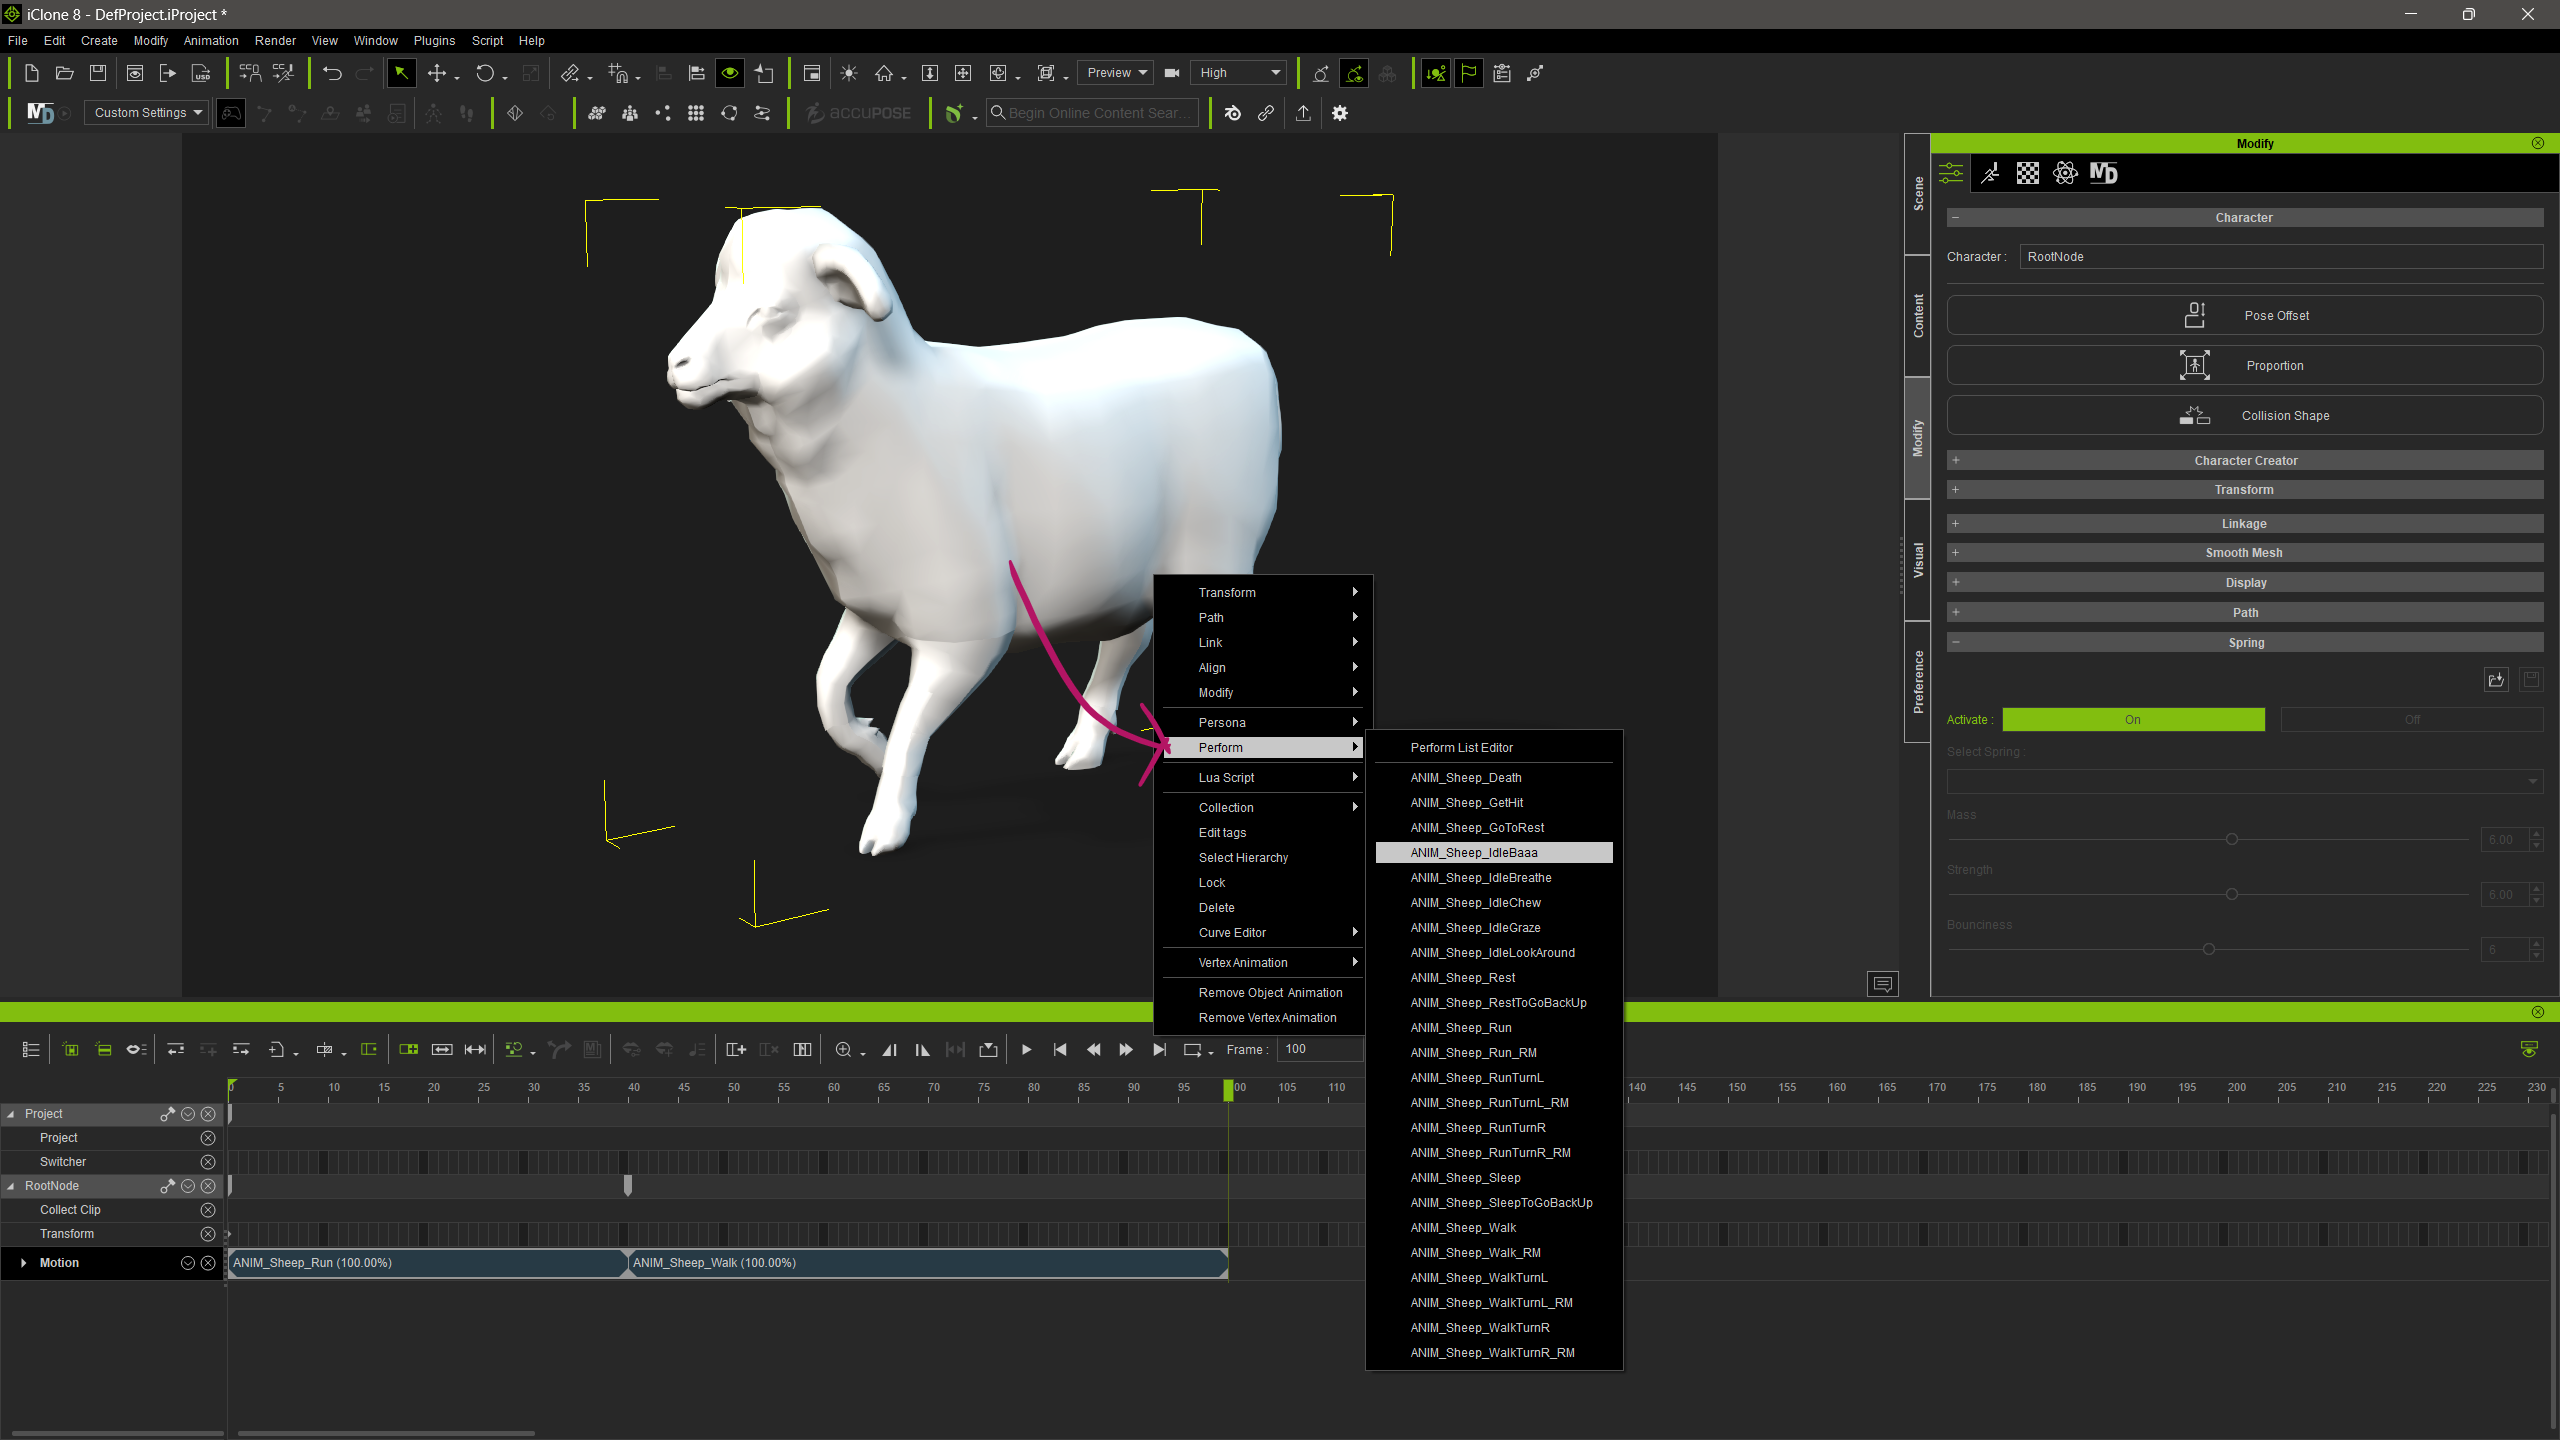
Let’s send our creature with animations over to iClone using File – Export – Send to iClone (or use the super tiny IC icon). This will open our creature so we can animate it. The easiest way to string animations together from snippets is to right-click the figure and choose Perform, followed by an animation of your choice. As you do, the blocks will be added to the timeline and play back until the end of the block.
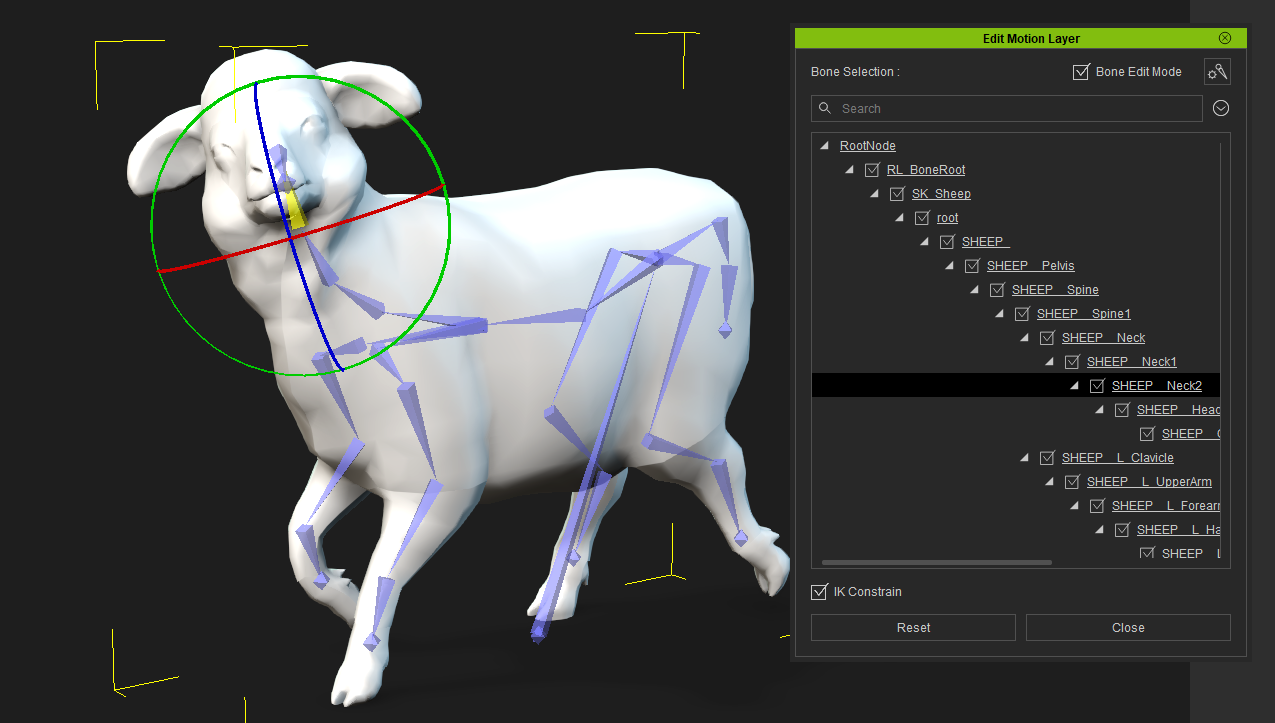
Now we can adjust and trim sections, blend as we see fit and even override motions with iClone’s Motion Layer tools. Note that we won’t have IK controls for non-standard characters, but we can animate the skeletal hierarchy if we wish.
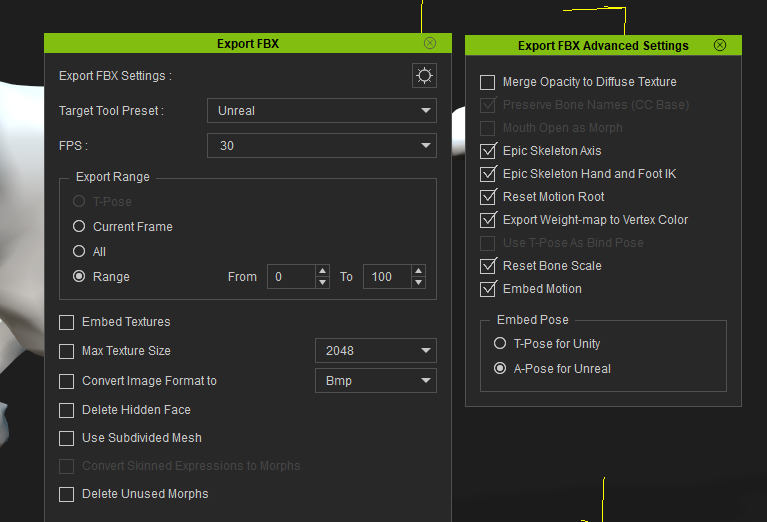
When we’re ready to export, adjust the current selection to the animation duration, then head over to File – Export FBX. Pick the Unreal preset, your desired framerate, and also note that there’s an additional menu hidden under the gear icon (shown are the default values). I’m not exporting textures to speed up the process, as we already have them in UE.
Import animations into Unreal Engine
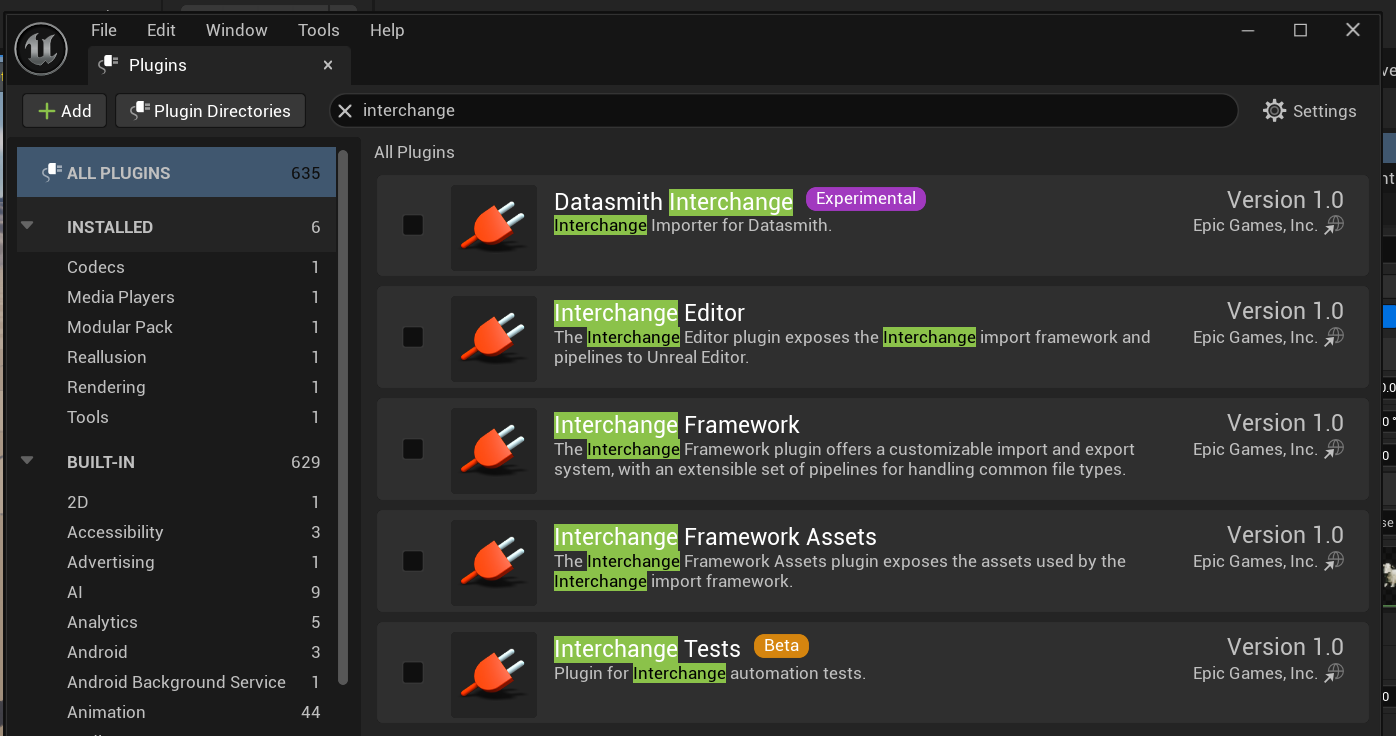
As of Unreal Engine 5.5, several plugins are enabled that “spruce up” the file import dialogue with additional options that… aren’t fantastic. They will no doubt evolve, but I prefer the simpler “legacy import” dialogue. To bring it back, I’ve disabled the following plugins (as recommended by Reallusion, and to avoid confusion) under Edit – Plugins – Interchange Editor/Framework/Tests.
This step is optional, but if you skip it the import dialogue window will look different, and the view resets when you make a change and it’s all… annoying, but still usable (although it will also break the FAB bridge, which is also annoying so no big loss for me).
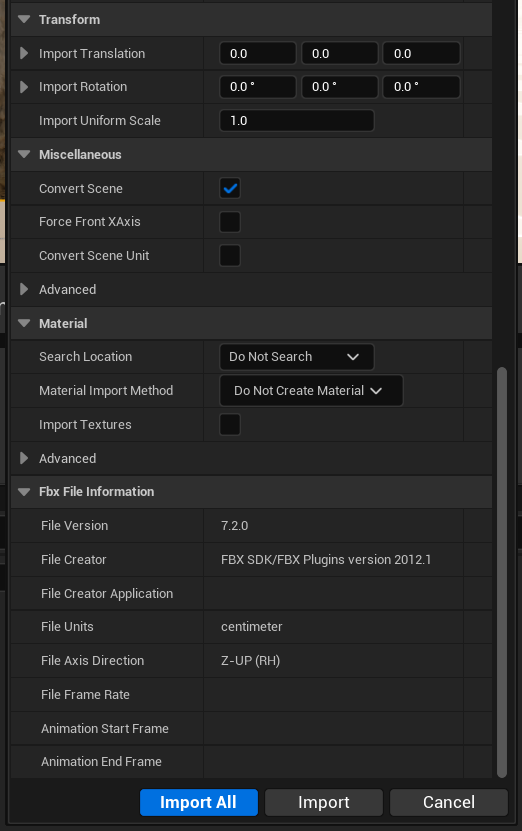
Restart UE and the old school import dialogue will be back to grace us as we bring in FBX files. Next, let’s import our iClone animations into the project. Right-click in the content browser, then choose Import. Pick only one animation for now, I’ll explain why in a moment. Also make sure “import animations” is actually enabled, and choose “animated time” under length.

It’s a long dialogue, here’s the rest of it (I’ve disabled texture search and material creation).
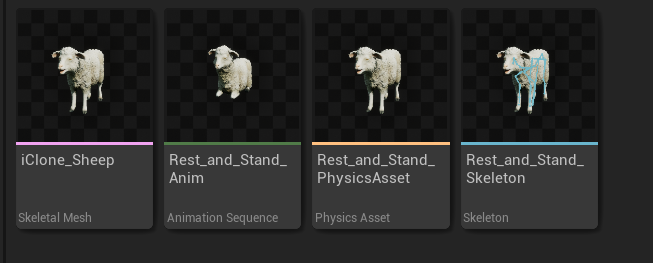
That’s it! After import, you’ll see a new skeleton that will work with your imported animation. You can also select the same skeleton for subsequent animations from iClone. On your new Skeletal Mesh, add the materials from the original mesh if they don’t already appear (it’s not an exact science – some assets need this step, others do not).
Skeleton and Live Link Considerations
Notice how we don’t try to attach the animation to the existing Sheep Skeleton that’s attached to the mesh we’ve exported originally. The reason is that iClone seems to do something weird to the skeleton, which confuses UE and it’ll suggest to “merge bones” on import. This operation is like a lottery: it might work on some assets, but not on others. Reasons are likely renaming of bone structures or somesuch. Not something that’s easily fixable.
Instead of gambling our sanity away with trying “just one more time”, let’s have UE import a brand new skeleton that matches our animation and be done with it. We can use it for subsequent imports of our other iClone animations (simply selected it in the import dialogue on your next import). I like to rename my initial import’s skeleton from “name of animation” to “iClone Skeleton” or something along those lines.
Note that this new skeleton is usually not compatible with the original skeleton or the animations that came with the asset, unless the “merge bones” shenanigans was successful (which I have seen happen, so it’s worth a try if you have spare time and patience). For my workflow it’s not a problem, as I can export the original animations thought iClone if I need them retargetet.
Also note that for non-standard characters, the Unreal Live Link plugin does not work. It does not recognise the skeleton or skin shader, which results in neither mesh/animation transfer nor live link option to work. For standard humanoids and CC characters it’s a great time saver, but for non-standard characters and props it’s a non-starter.
Further Reading
- https://tips.reallusion.com/2024/08/31/export-animations-from-iclone-8-to-unreal-engine-5/
- https://manual.reallusion.com/CC_and_IC_Auto_Setup_Plugin/ENU/CC_and_iC_Auto_Setup/1.0/02_for_Unreal/Importing_Character_FBX_File.htm
- https://www.immersivelimit.com/tutorials/export-animations-from-blender-to-unreal-engine
- https://www.fab.com/listings/21aae714-2d56-4fbf-b81a-2aa365b46520