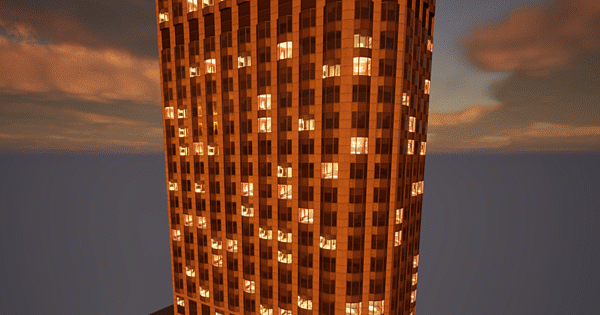
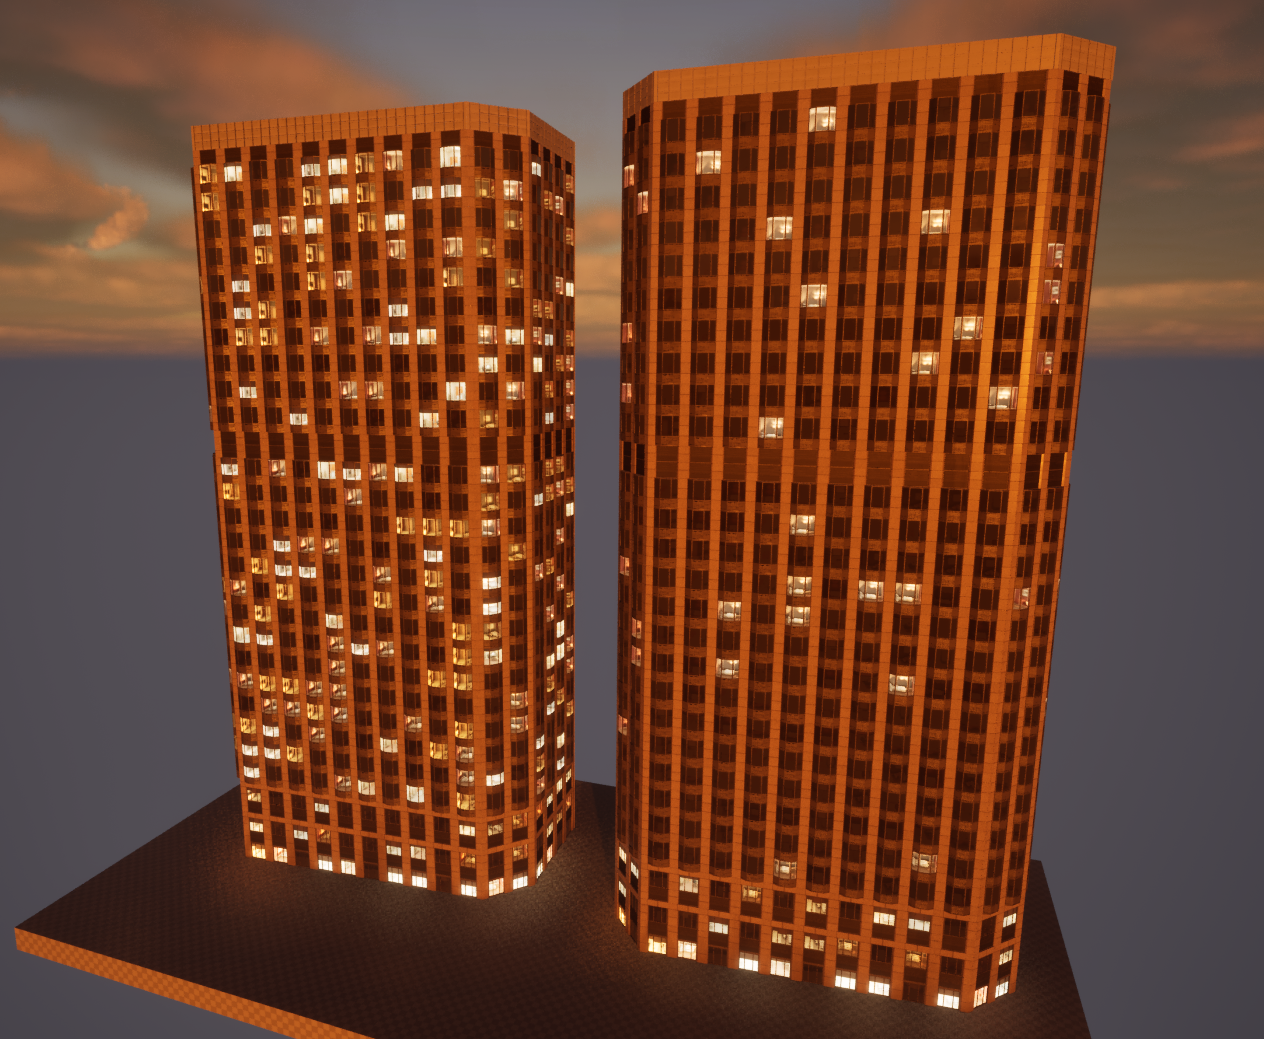
The nighttime buildings in EPIC’s City Sample Project are full of functionality. Did you know you can change how many windows appear lit in night mode? Me neither, had it not been for an anonymous reader who asked me about it. Fascinated by this myself, I took a closer look and here’s what I found out.
Randomness can be achieved in two ways: via material parameter, and also on the blueprint itself. Let’s take a look at both options, and a few setup notes too, so you can decide what works better for your project.
Building Setup
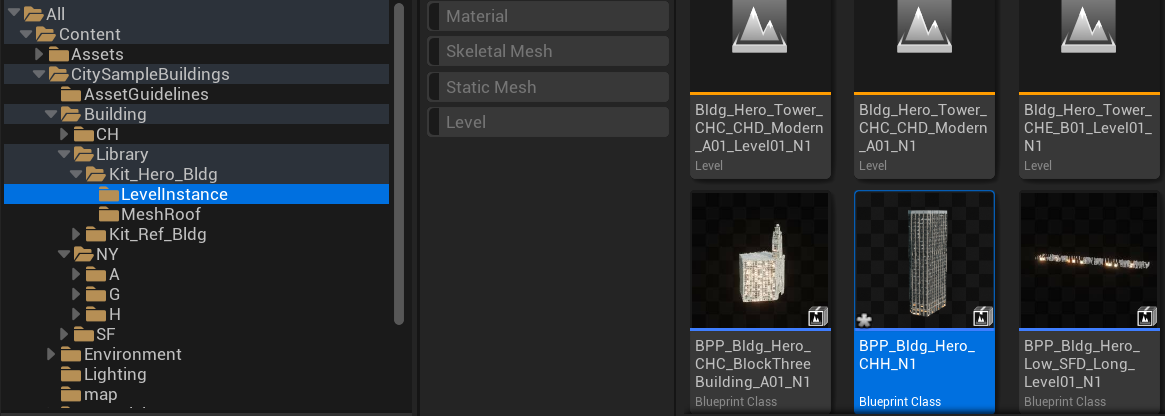
EPIC have set up their buildings as packed level blueprints. This means they behave like “mini levels”, but unlike a regular level actor, they can be instantiated multiple times within a master level. They’re available as part of the full City Sample Project, but you can also get the buildings as a separate asset pack for your projects.
I’ll make a new level and pick the CHH_N1 building for this demo, if you want to follow along. The exact name for components will vary for other building types, but the principle will be the same.
I’ll drag it into a new empty Open World level and select it.
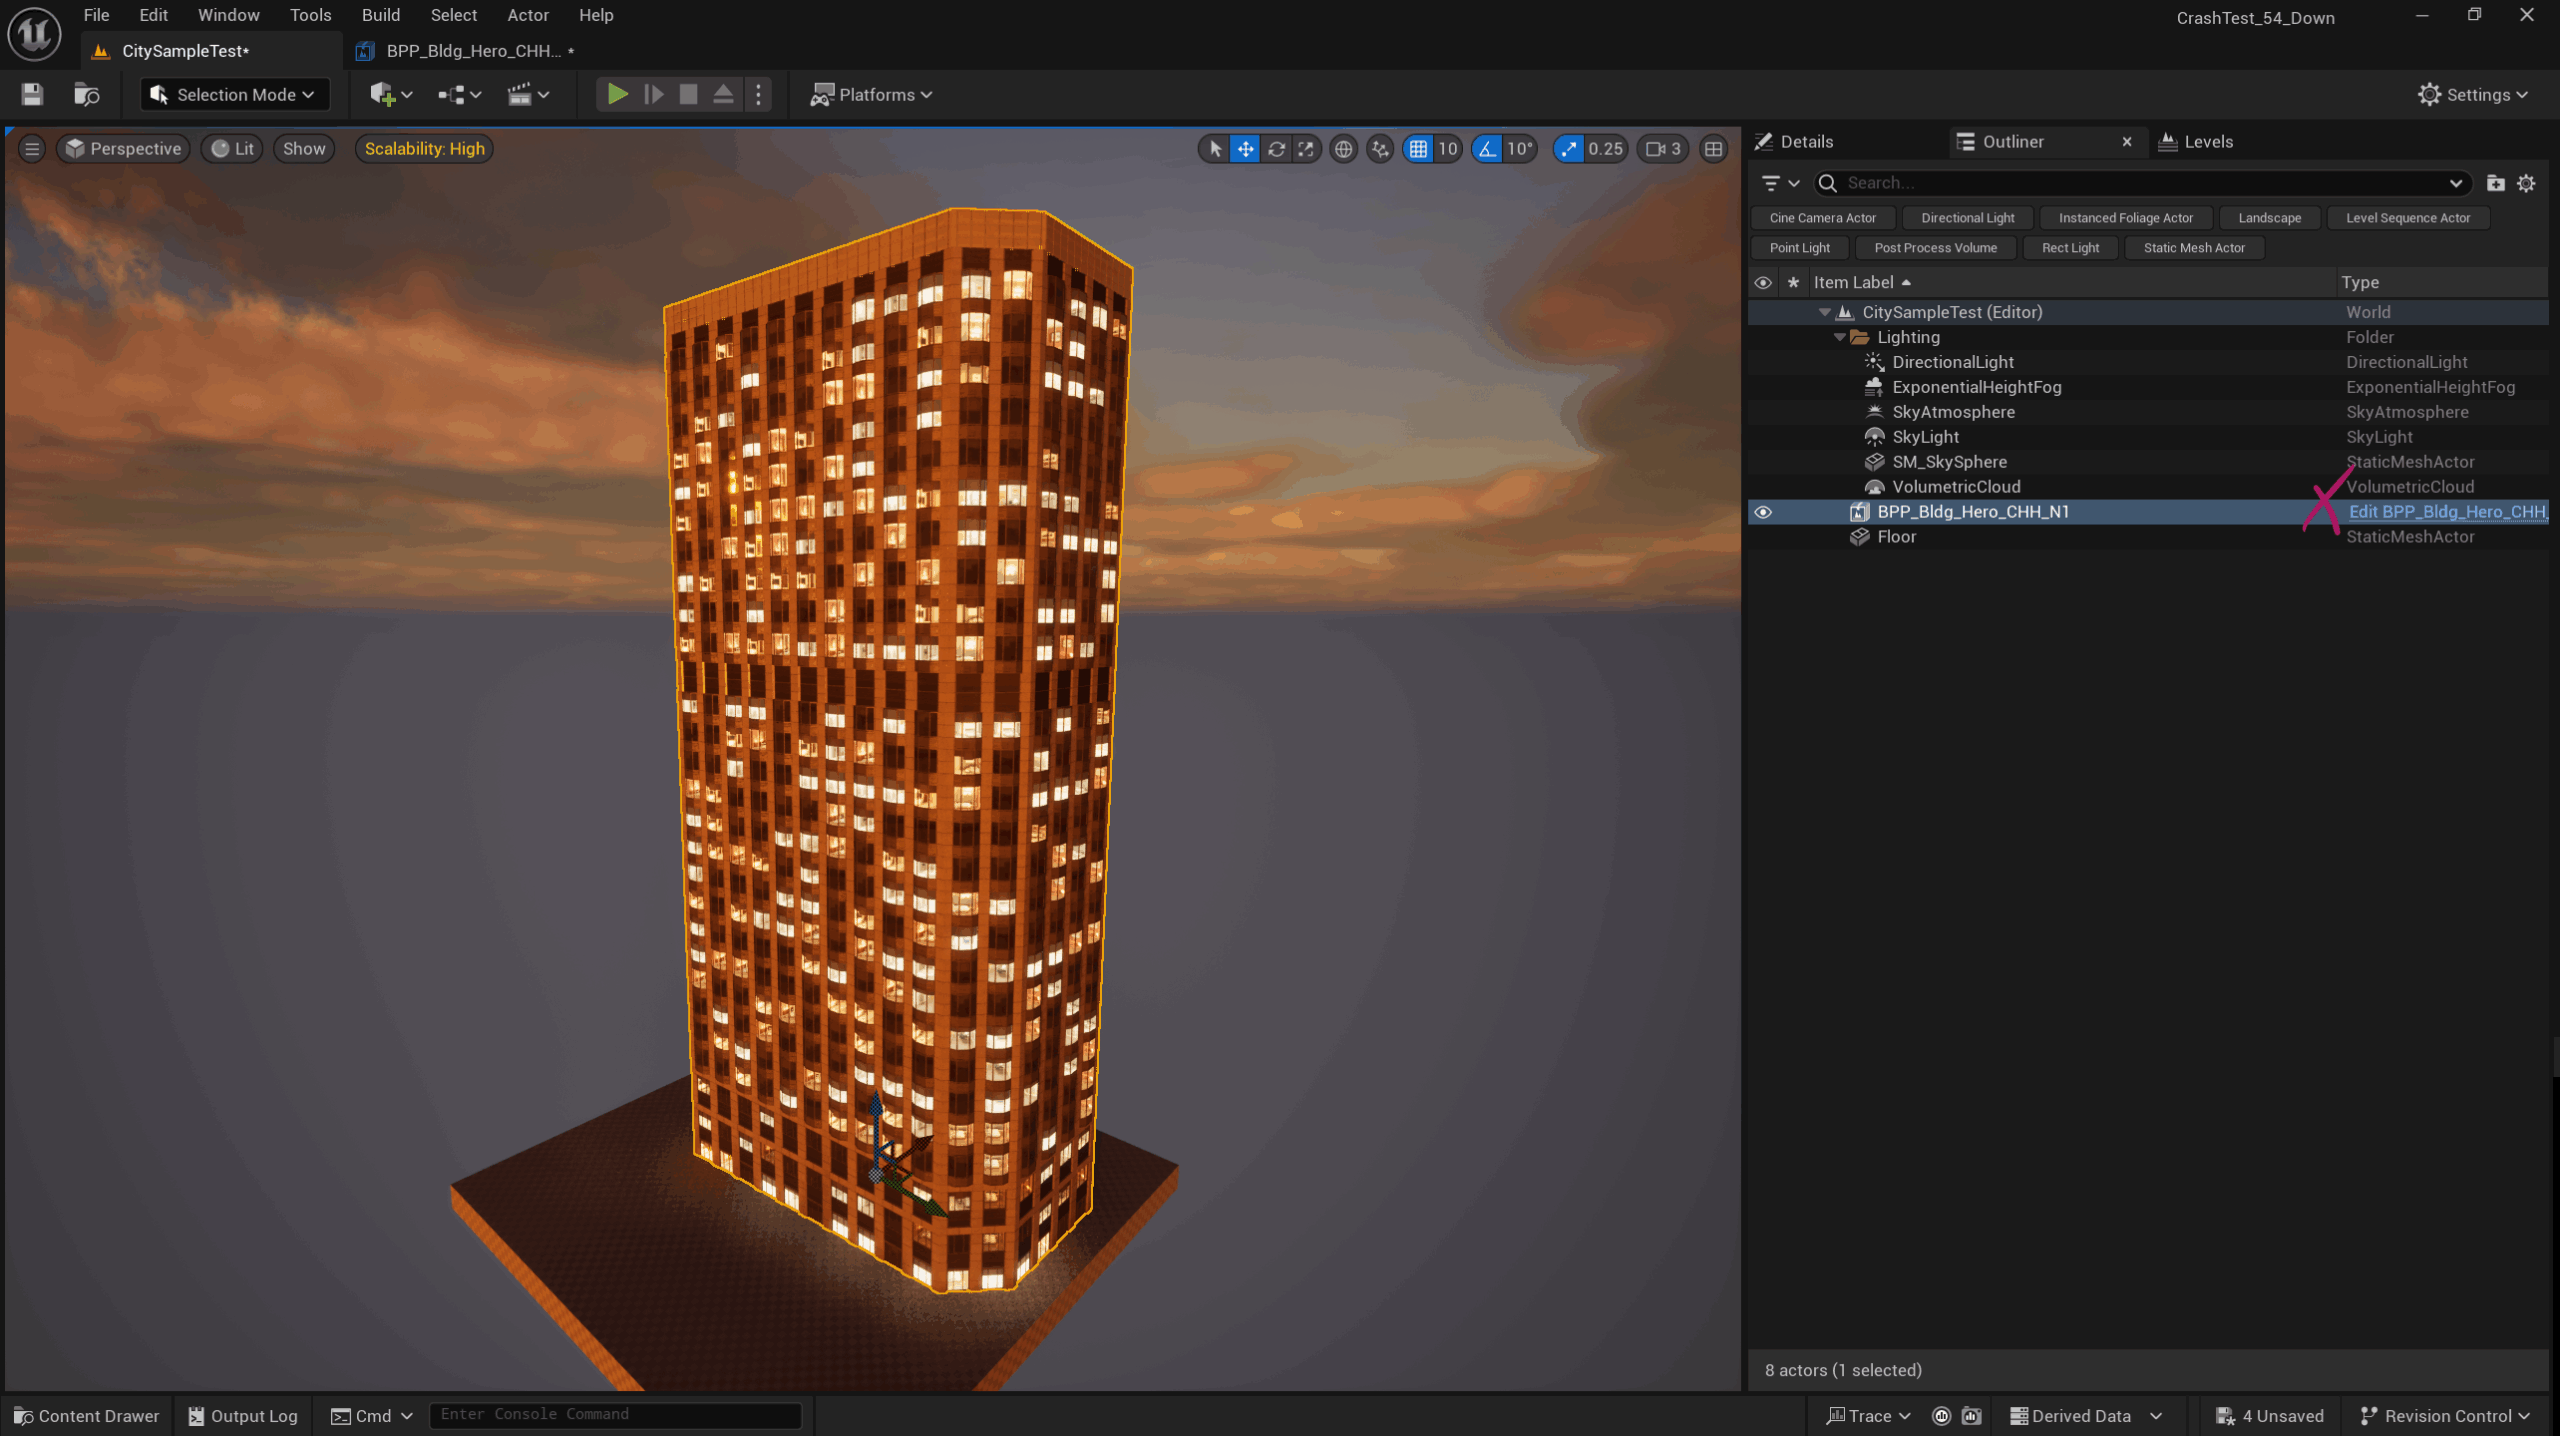
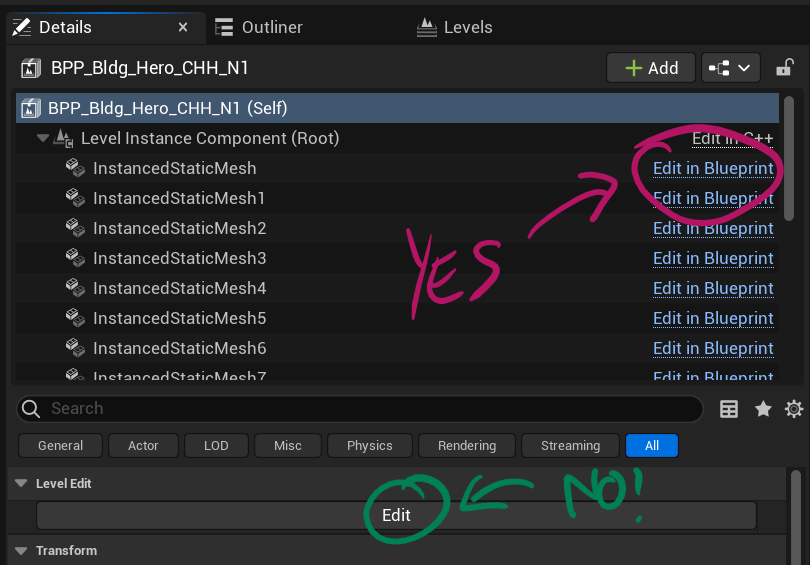
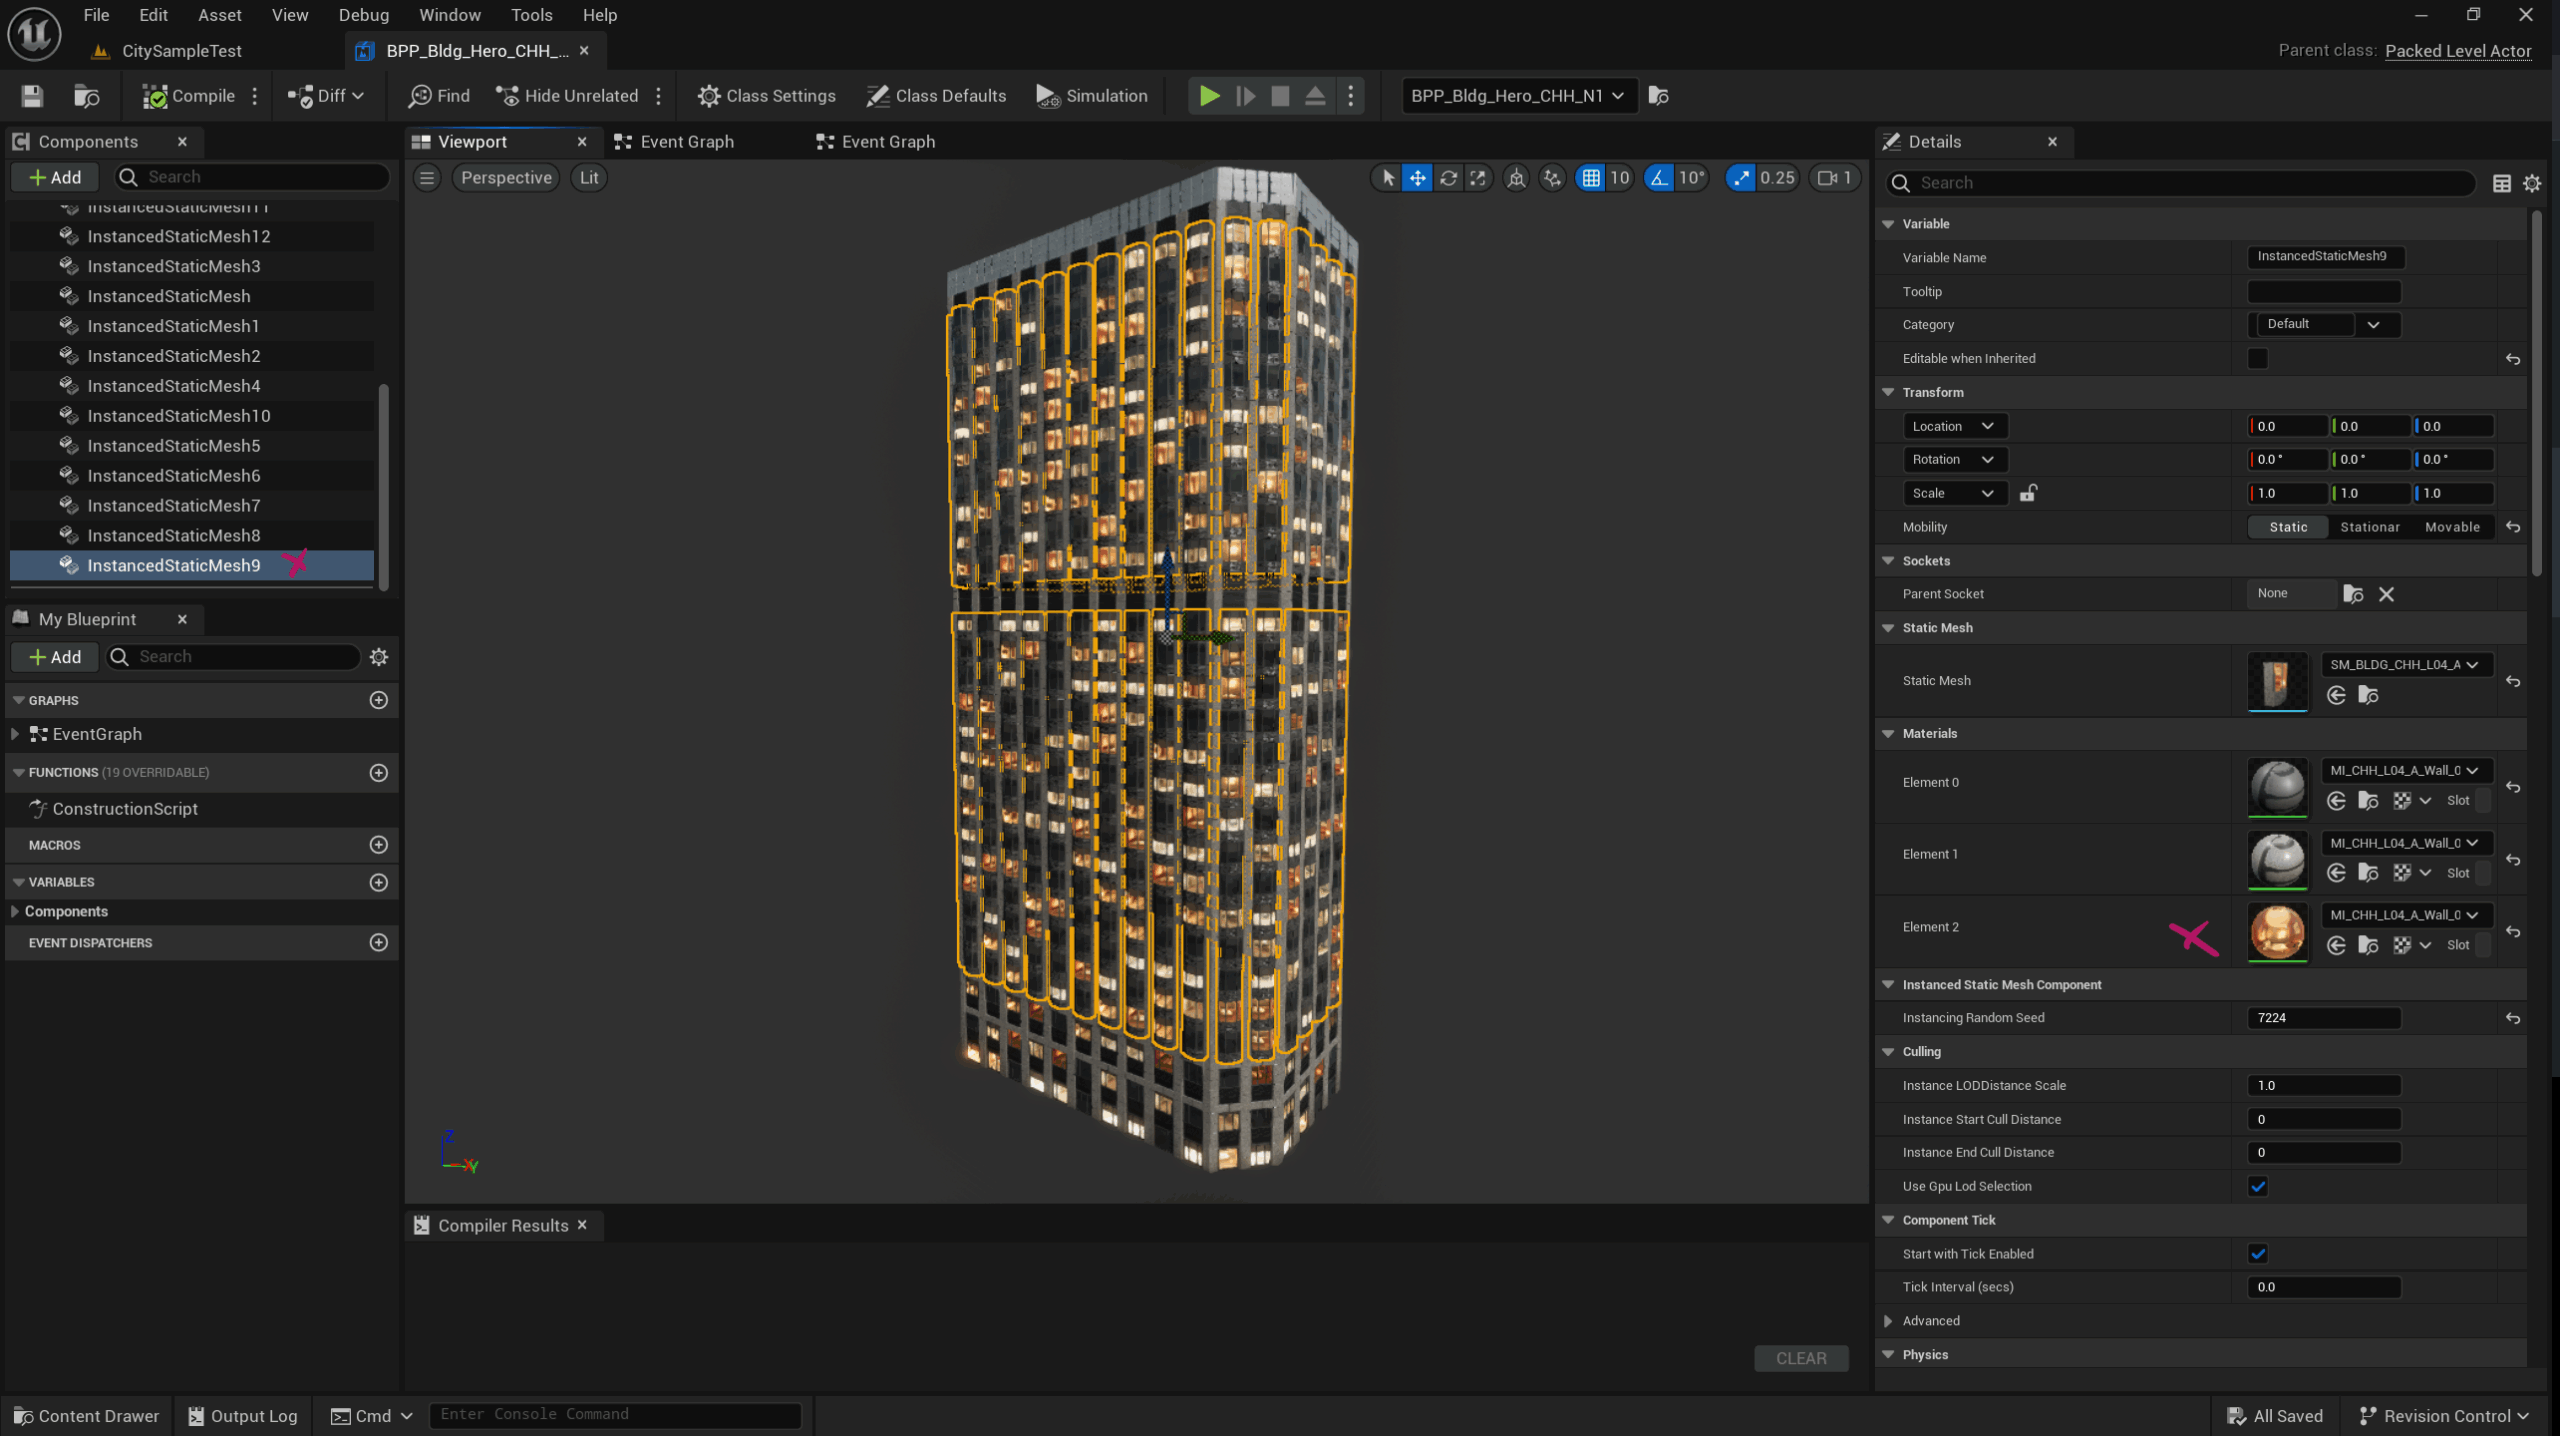
Note that we can’t override anything on this instance. You can hit Edit on the details panel and make changes to each single component that makes up the building, but that’s not what we want to do here. Instead, choose “Edit in Blueprint” in the outliner. This will give us a view similar to a regular blueprint, with override options for the whole building.
Lit Windows by Material Parameter
In blueprint view, switch over to the viewport and pay attention to these two components:
- Instanced Static Mesh 9 (most upper windows)
- Instanced Static Mesh 18 (bottom row of windows)
These two are responsible for the window meshes in this particular blueprint. If you’re using anything other than CHH N1, find the ones that correspond to the lit up windows (go through each component one by one and see what gets selected basically). Now find the material section and open the instance populating it. In my case, it’s element 2.
This is where the fun begins: the level instance has a ton of overrides, the most interesting of which is in the “03 – Randomziation” section. Find the “Amount Off” parameter and adjust it, while keeping an eye on your viewport. As you move the slider, the amount of lit up windows will change.
- 1.0 means all windows will be dark
- 0.0 means all windows will be illuminated
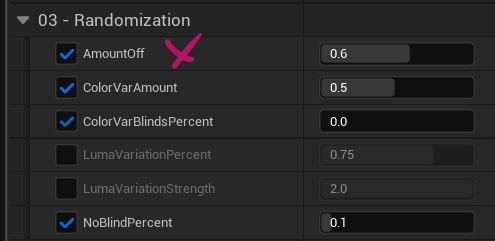
Check out the other parameters and have a play with them, for example
- Luma Variation Percent: changes the intensity randomly on lit windows
- Color Var Amount: changes how warm/cold the lit windows appear
- No Blind Percent: how many windows show the blinds drawn
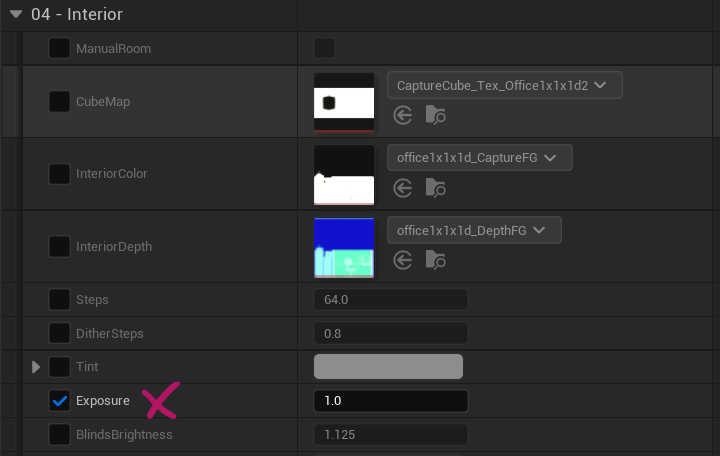
Something else you can investigate here is in material section “04 – Interior”, where we can override the overall brightness (exposure) of the windows. There’s also a tint value here for overall colour adjustment (makes the windows light up in pretty much any colour). These two are great for blending the illumination in with your scene’s lighting.
Lit Windows by Random Seed
Another way to achieve randomness on the packed level blueprint is by changing the Instanced Random Seed value. It’s just underneath the material section:

Although this works, I find it unreliable after changing the value a couple of times.
Locking these changes in
To make permanent changes to any of these values, duplicate the packed blueprint and corresponding material instance, apply your changes there, then drag custom buildings into the scene.
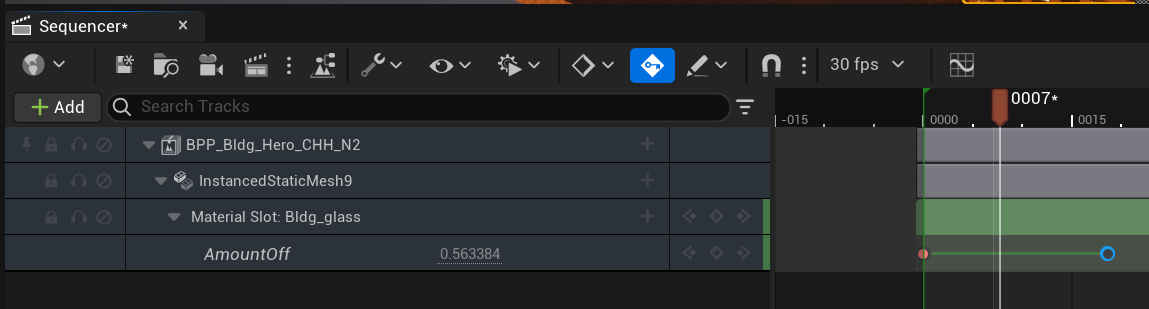
It stands to reason that both the random seed and material parameters should be overridable at runtime, or by changing these values in the Sequencer. The latter works by adding the building, then the component, then the material and finally the property on the instance you want to override. I’ve not had a chance to test this out for gameplay though.
I hope this helps, and good luck in Night City!