Extending a short part of a motion into a longer segment can be tough. Say you had a few steps recorded and you needed the character to walk like this for several seconds, while retaining forward motion and rock solid foot tracking. Thankfully iClone is the perfect tool to get the job done.
Of course it’s not intuitive or straightforward, Brian and I figured out how to do this on a stream yesterday and wanted to make a note of the process before it inevitably escapes my brain. Thanks for your help Brian!
For this demo I’m using iClone 8.7 and Rokoko Studio 2.5.11 (release).
Exporting from Rokoko Studio
The first thing we’ll do is to select a section we want to turn into a loop. This isn’t exactly obvious or intuitive, so I thought I’ll draw it out in the screenshot. See those darker sections in the timeline (well marginally darker anyway)? They’re super easy to miss as handles. Those can be dragged to mark the working area. Whatever lies between them will be exported (which is everything by default). Accuracy doesn’t matter here, we’ll clean it up in iClone in our next step.
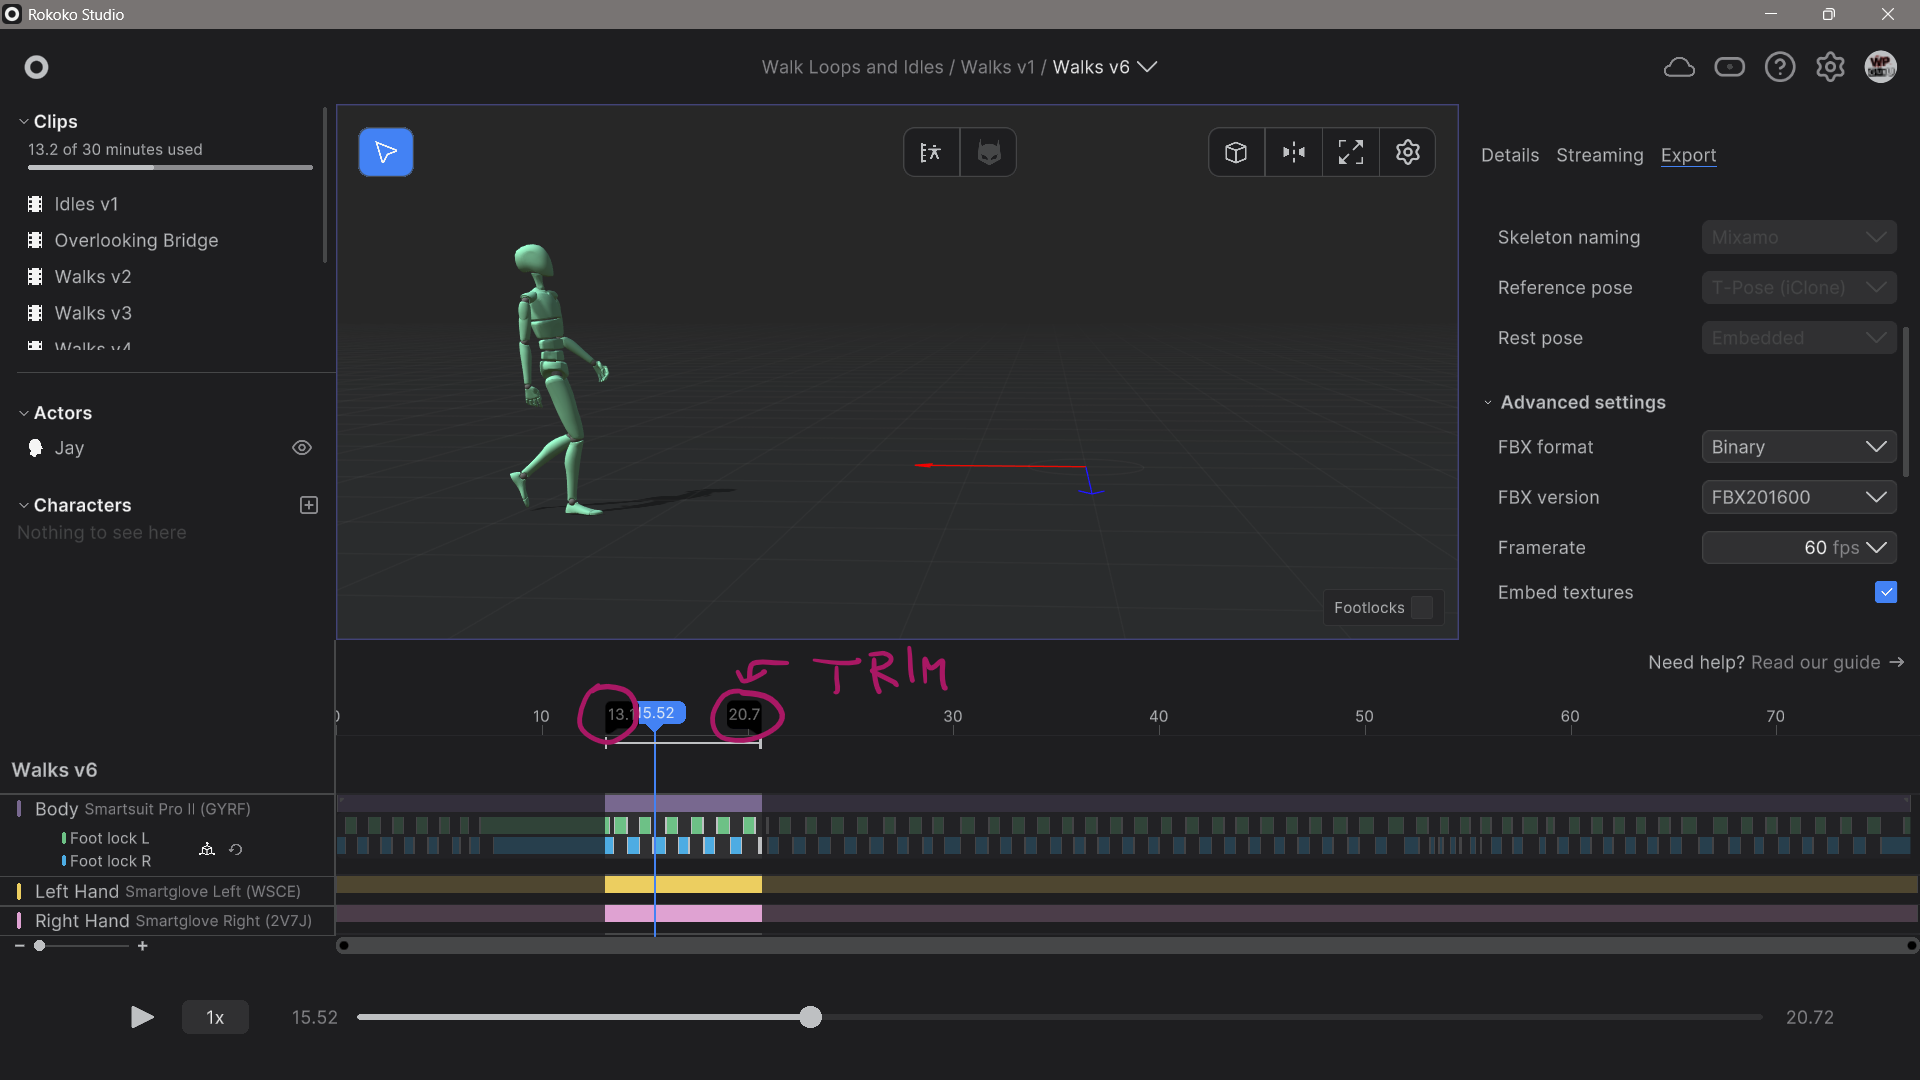
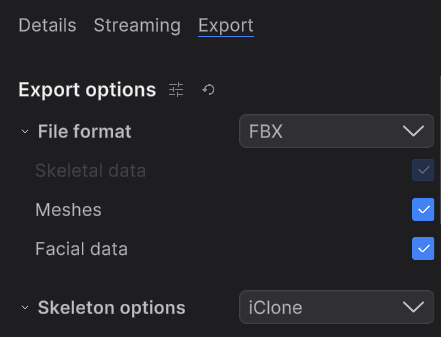
For export options, let’s choose the iClone preset. It works really well and should set everything we need, including 60fps as our frame rate.
Importing into iClone
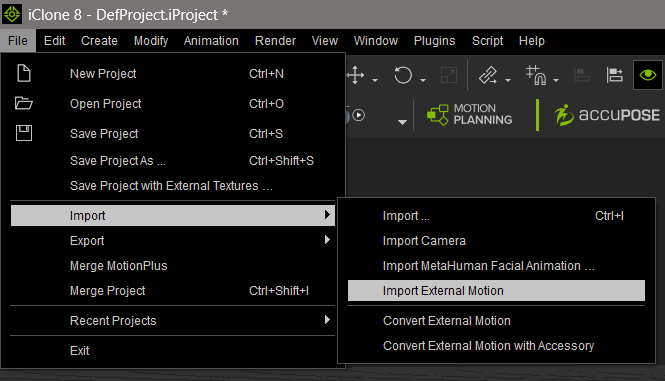
We must load a CC character before loading the animation so that iClone can do its automatic retargeting magic. It does this by using the T-Pose in the Rokoko export as a reference, which we get as the first frame automatically. I’ll choose Aaron here, then head over to File – Import – Import external motion. You can also drag the animation directly onto the character if you prefer.
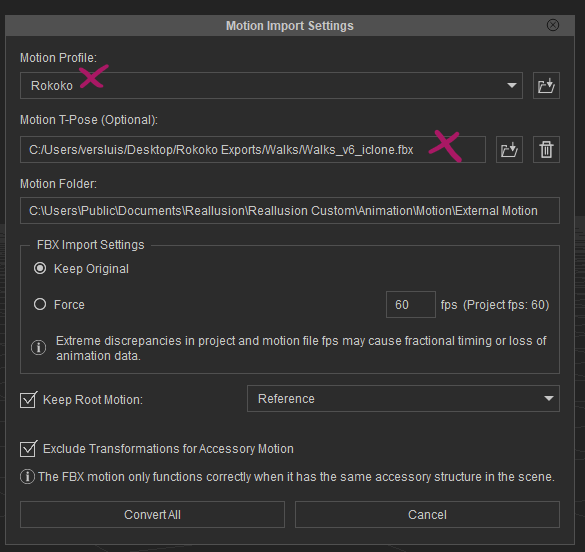
Another window appears asking us about the Motion Profile and an optional T-Pose. It typically recognises the import as Mixamo character, but if you take a look at the drop-down, there is a Rokoko profile that seems to work well. For the T-Pose, give it the same file as the animation you’ve just selected, then click Convert All at the bottom.
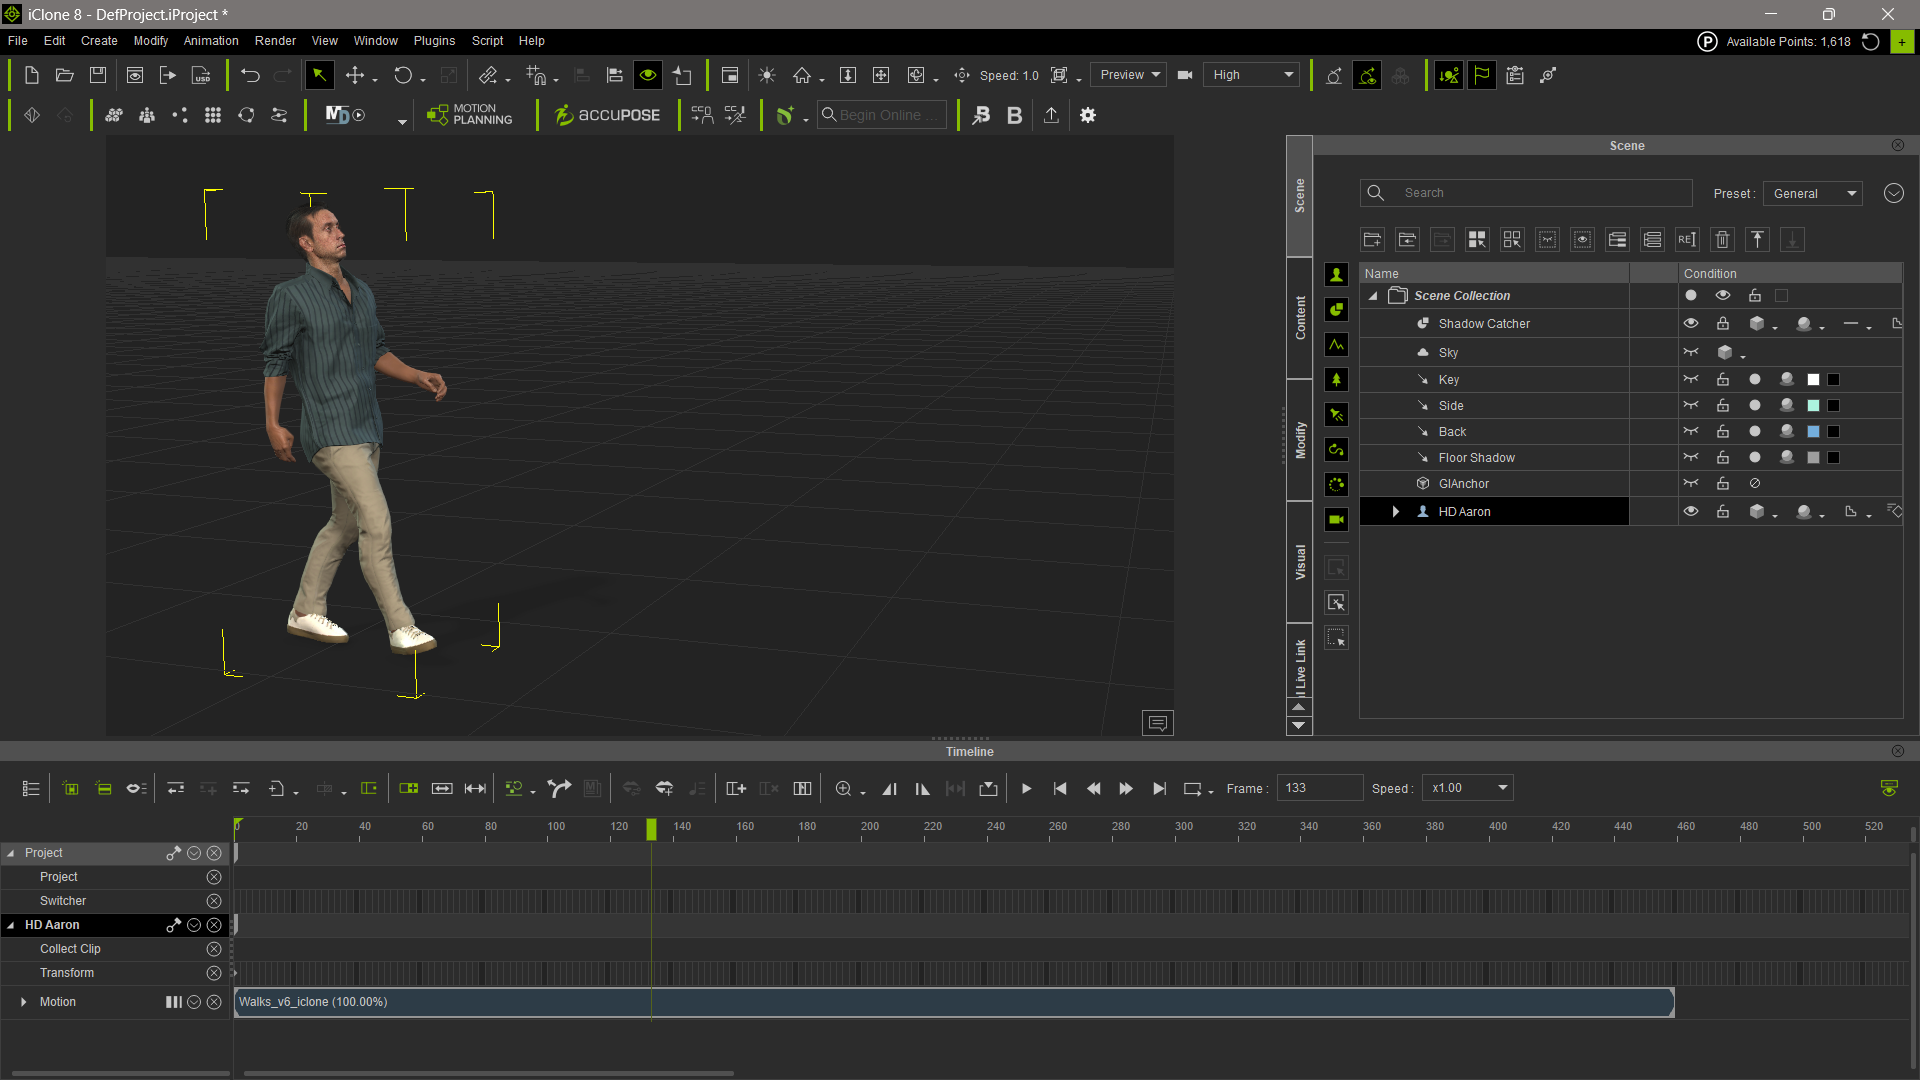
Aaron will be in the T-Pose on the first frame, but when you move the playhead, you’ll see him change position and spring into action.
Creating a perfect loop
Let’s find an in point and out point in his walk cycle that roughly matches up at both ends. In my case it seems to work out as he plants his right foot on the ground, while his left is slightly lifted. I’ll make a split at the beginning and the end using the Split Clip tool (CTRL+B).
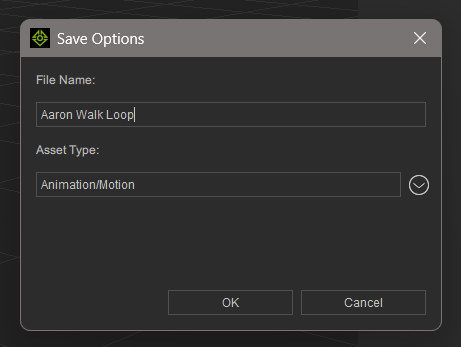
Next we’ll remove the loose bits at the start and end, then move the remaining middle clip to the start of the timeline. Let’s also set the start/end frame to the current selection and mark this area as a Collect Clip for good measure (not strictly necessary here, but a good habit to get into if you’ve made any Motion Layer adjustments). This allows us to save the motion to our library (as type Animation/Motion).
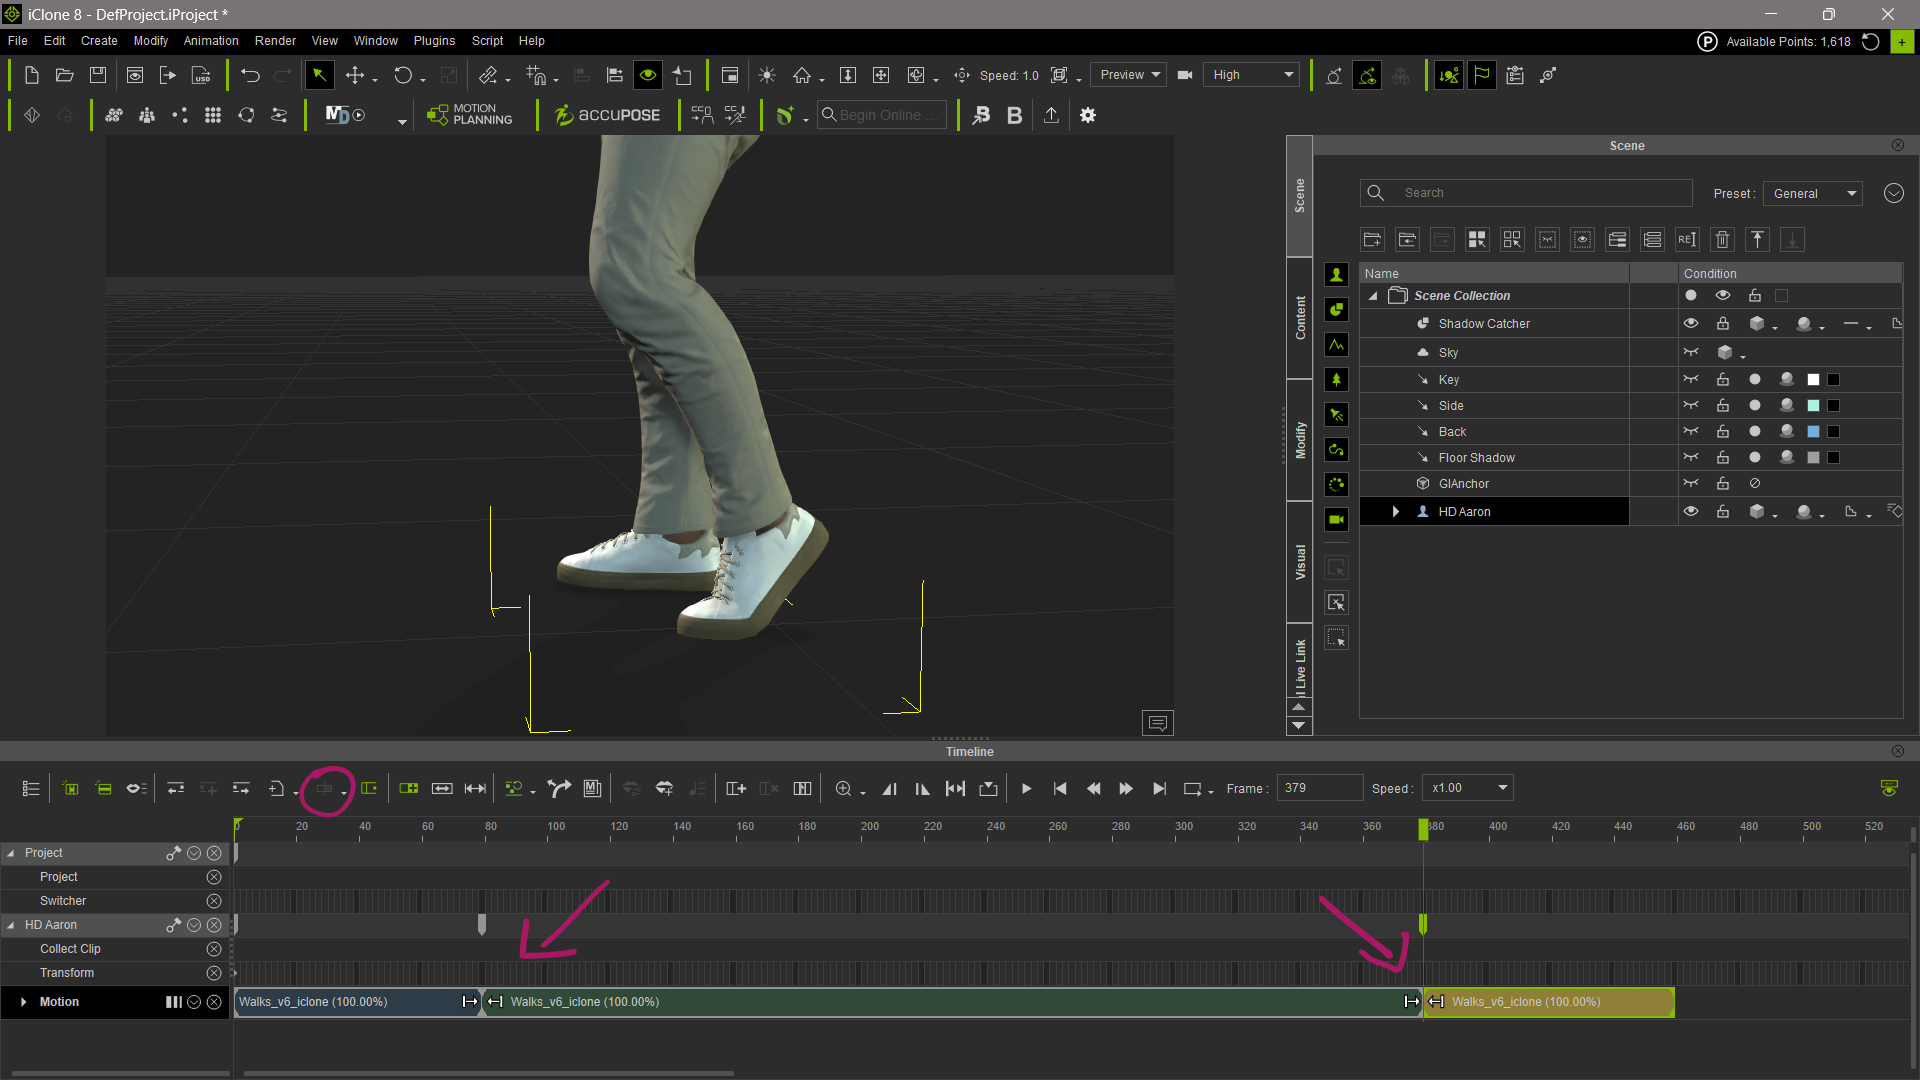
Now we’ll position our playhead at the end of the existing clip and add our new animation to the end of it. You’d think a simple copy/paste option would also work, but iClone does some magic when it applies a loaded animation by evaluating what’s currently on the timeline so it can continue the motion. That’s what we want, since I want my character’s rock solid forward motion to continue.
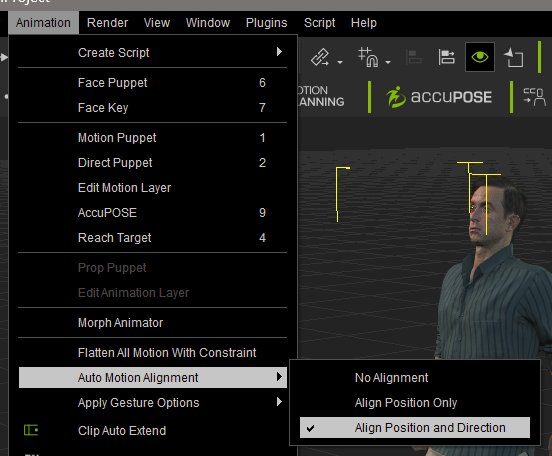
Before you apply the animation, check that the Position and Direction alignment is enabled (it is by default, but it’s good to check in case it’s not).
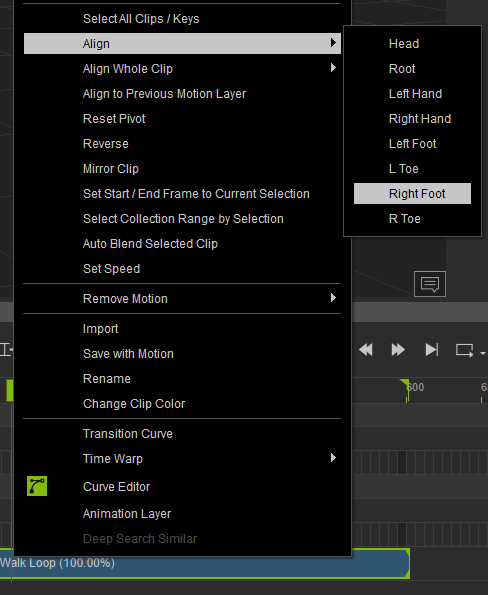
Now with two clips on the timeline, notice how Aaron jumps back to the beginning of his walk cycle as the second clip begins. This is because iClone doesn’t know what to align this clip with. To tell it, we right-click on the second clip, and in our case, we choose Align – Right Foot. Pick whatever is appropriate for your character’s animation here.
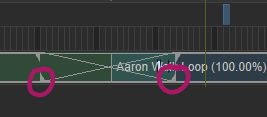
Now Aaron walks continuously, but we can still see a small popping motion in his body because the start and end poses aren’t exactly aligned. Thankfully that’s a super easy fix, courtesy of bi-directional blending. On the intersection, each clip can be dragged over into the other clip.
The position of the corners you drag plays an important role here: if you use the bottom corners of each clip, they drag out without changing the timing of the animation. Using the top corners would extend the whole clip, which would ruin the alignment of his foot placement.
Now our character walks in a perfect loop! You can add as many segments as you need, mix and match with other motions, make adjustments, and export the whole thing out for use in other applications.