If a 3D object is meant to follow the morphs and movements of a DAZ character, it needs to become an item of conforming clothing. This allows a garment to be fitted to a DAZ figure, following its movements and full body morphs (at least to a certain extend).
The procedure is called rigging, and DAZ Studio has a Transfer Utility to make this happen. Here’s how to use it.
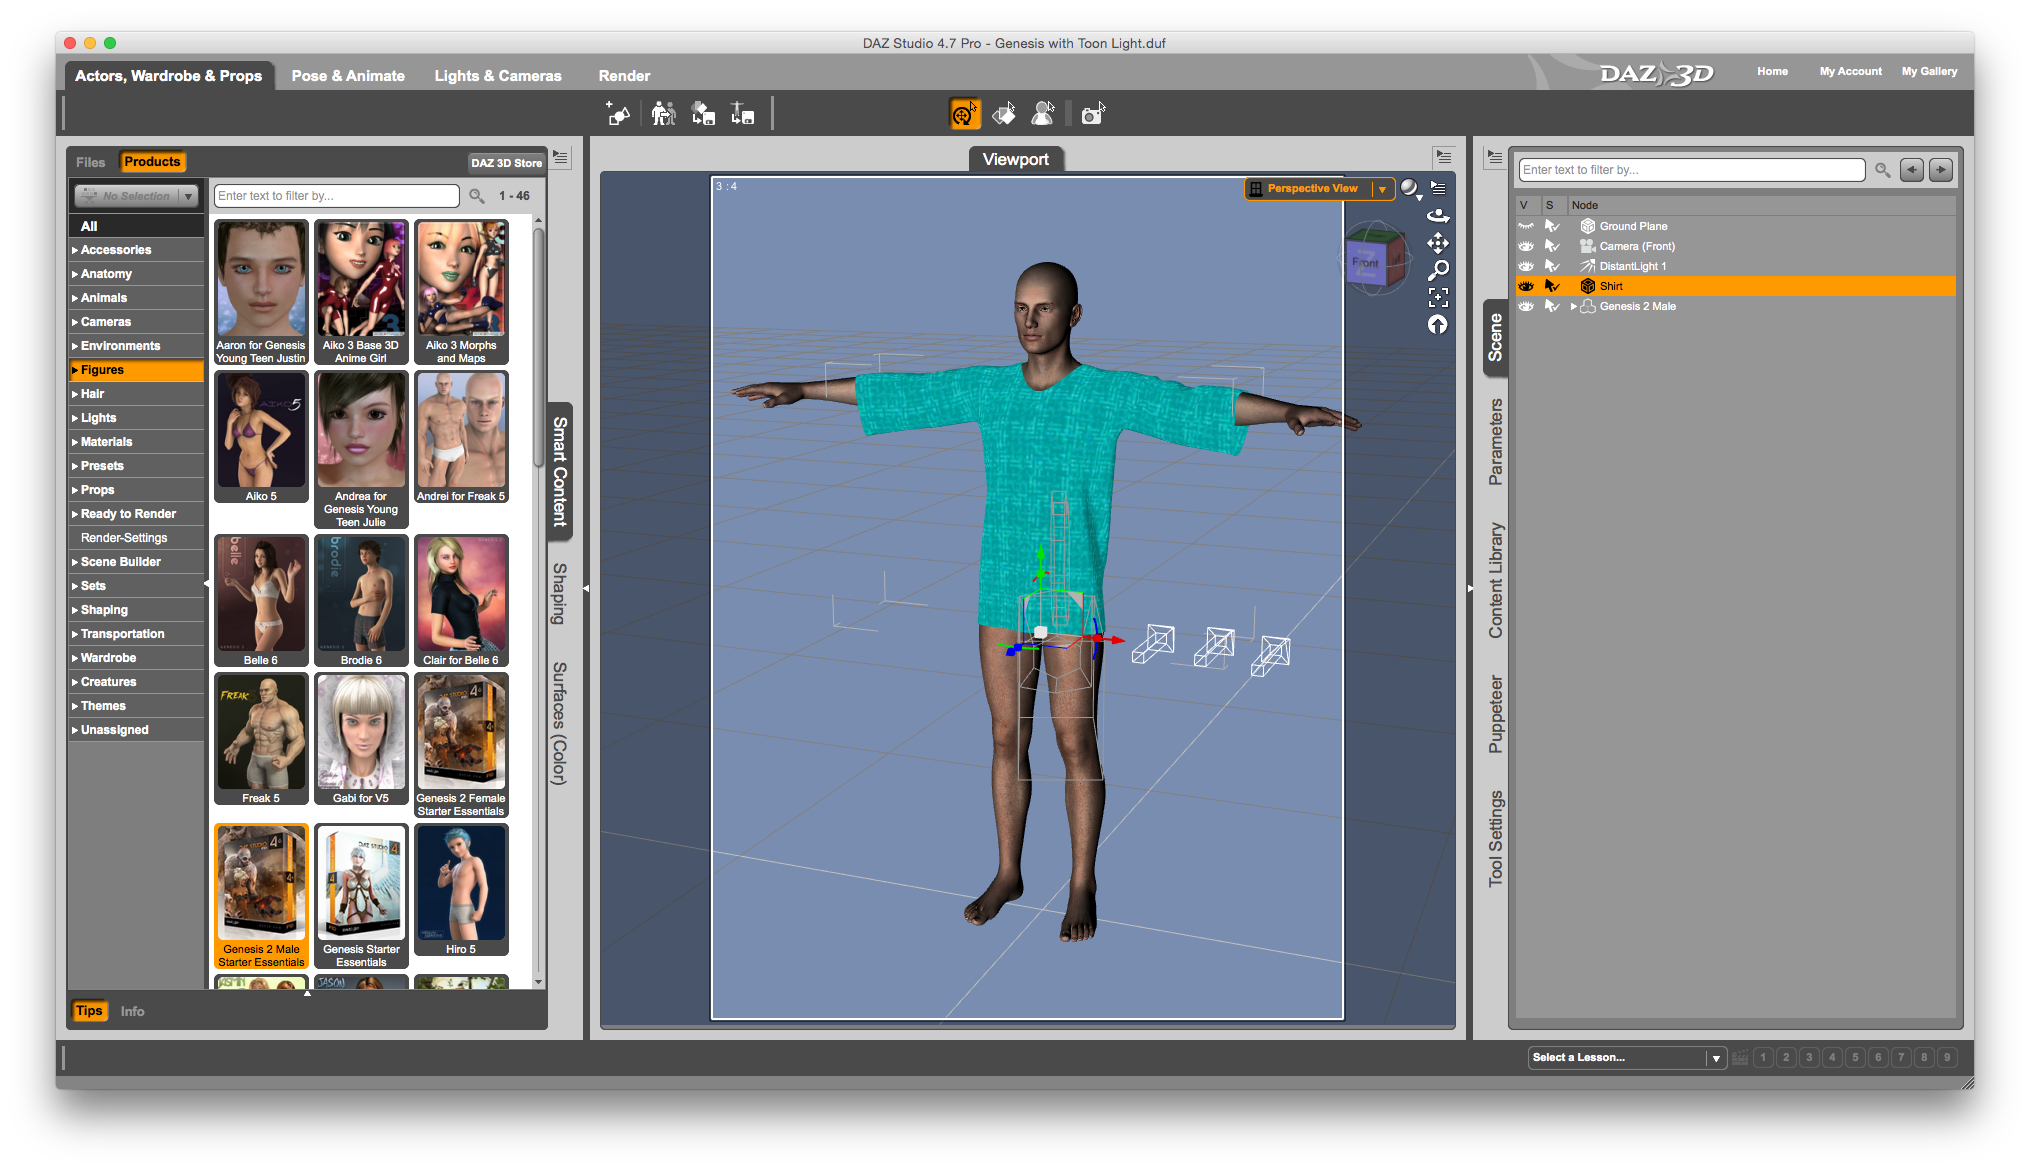
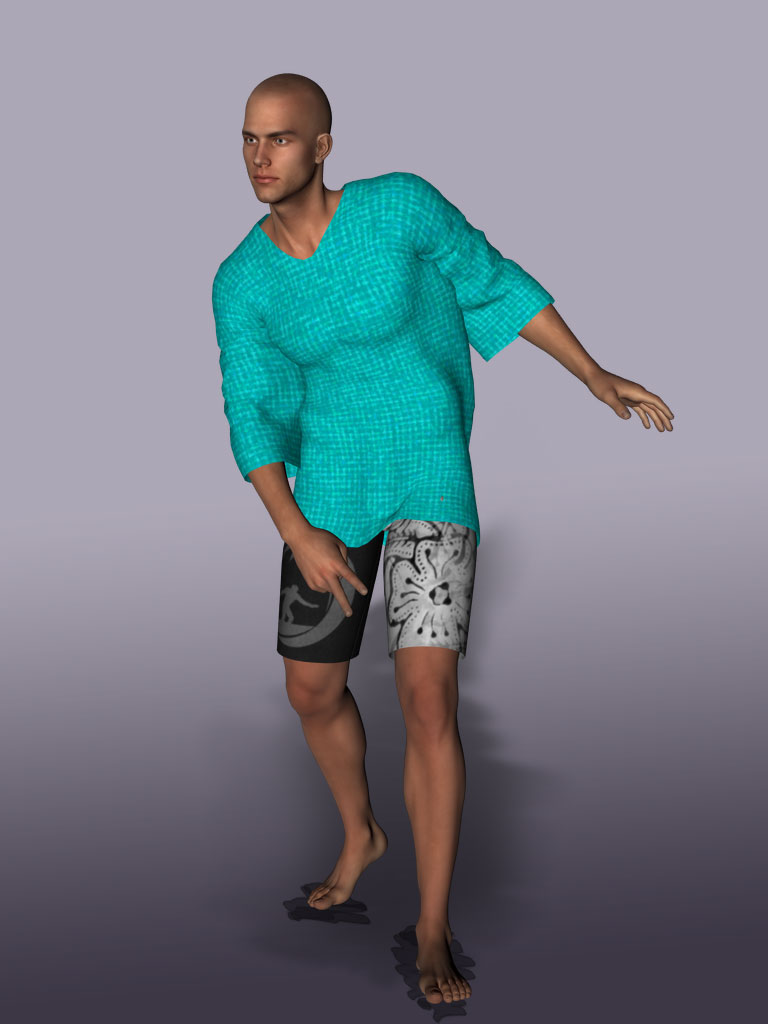
Load the figure and the item of clothing you’ve made into your scene. I’m using Genesis 2 Male and a shirt I’ve made in Marvelous Designer.
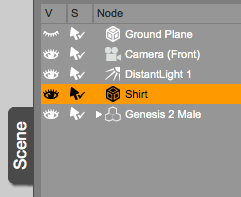
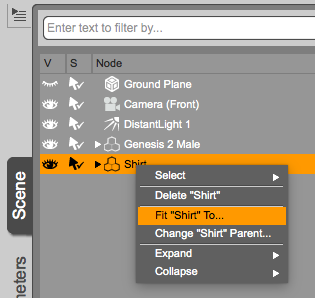
Notice that the shirt has a cube symbol in the Scene Tab, not the Q-Bert type symbol that a figure or confirming clothing has. This means it’s a prop. And no matter how hard I try, I won’t be able to fit my shirt to Genesis right now. This is why you pay companies like The Clothing People to do the mind warping and t-shirt logo ratio fancy stuff on the computer. Just remember that.
Still in the Scene Tab, find the little icon in the top right corner of the window, the triangle with four lines next to it. Click it to bring up a rather fascinating menu with several powerful options. One of them is the Transfer Utility.
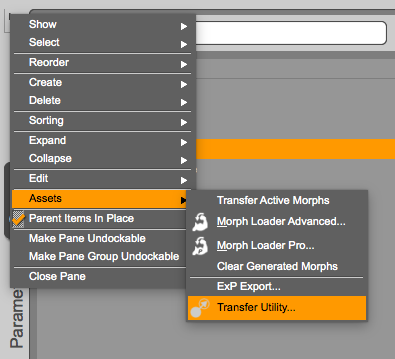
Select it to transfer morphs from one object to another. You can even click Show Options to bring up an advanced window that lets you select what type of information will be transferred in the process.
I want to transfer the Genesis 2 morphs over to my Shirt, so I’ll select Genesis 2 Male as my Source, and my Shirt as the Target. You can also choose what type of object you’re transferring morphs to using the Projection Template menu:
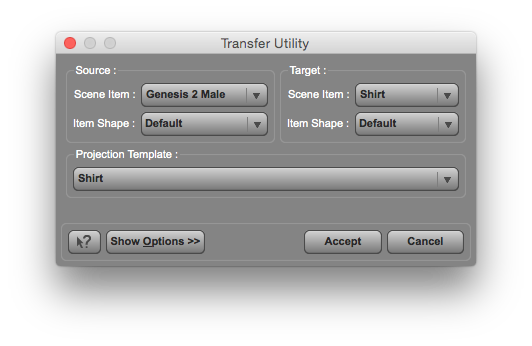 Hit accept and the tool will go to work. It will only take a few seconds to complete.
Notice that your original prop has disappeared from the Scene Tab: the tool has replaced it with a figure by the same name (Shirt in my case), featuring the Q-Bert logo. If you right-click the object, you’ll be pleased to see that it is now possible to be “fitted to” Genesis:
Try to pose your figure and see that the shirt moves too, just as it should. Eureka!
All that remains now is to save the new conforming clothing object: select your shirt, then head over to File – Save As – Support Asset – Figure/Prop Assets. You’ll be asked to complete the vendor information and pick a location for your .duf file.
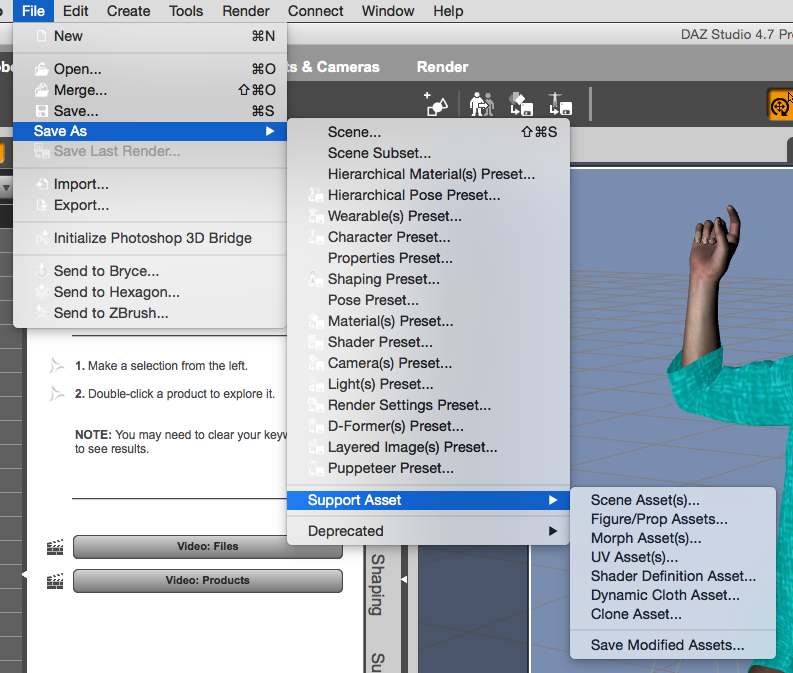
Now you can load it into other scenes using File – Merge.
I tell what: ‘you have made my day’!
I have these past few months struggled with tutorials on how to do this and that in Daz3d and now more recently Zbrush … but they already presume you know where the menu’s are in the first place .. now if I knew THAT, i wouldn’t be searching Google now would I?
Then i found your easy to understand and brilliant small tutorials on both those subjects where i needed a little bit of direction …. brilliant!
I’m off now to search your book and see if i can get it on my computer to read at leisure.
Well done to you and all the best at becoming one of the best authors … even with the little i have read, i would certainly recommend you!
Hi Thow,
what a wonderful thing to say – thank you for the kind words. Great to hear you found some helpful tips here. I too find that even the best software is worthless if nobody explains how it’s meant to work.
Enjoy the book – it’s not about 3D, but I’m encouraged to write more in the future. Perhaps when inspiration strikes, 3D could be a good topic.
All the best!
I’m only addicted to 3D at the moment but my love for ‘website building’ & even the technical side of computers has lasted years (Although I have to admit I’m still green)
So, I’m sure your book will teach me a few things .. thank you again
THANK YOU!!! I love you (in a purely platonic way!). Been going crazy trying to figure this out.
You’re very welcome, Kevin!
Hi Jay! I always do this with all my OBJs. Lately I have been playing with MD5 and have done some cool stuff in there but when I import the OBJ into DAZ (4.9) and do the fitting into figure, either the OBJ explodes or it is not smooth at all. And if I apply smooth, the garment separates and does not look good. Any advice?
I’ll write this again since I do not know where it go. First of all, thanks for the tut. Very informative. I do this process for all my OBJ imports. Recently I’ve been playing with MD5 and have done some pretty cool stuff there. However, when I try to fit the garment to the figure the mesh either explode or it is not as smooth as the original OBJ. If I add the Smooth Modifier, it breaks the garment apart into pieces. 🙁
Any suggestions on how to fix this?
Hi Joel, sadly I am familiar with the exploding mesh phenomenon. I have no idea why this happens or how we can avoid it. It certainly has something to do with the subdivision applied in DAZ Studio, but in my experiments, even without smoothing, meshes can explore for absolutely no apparent reason. Let me know if you find a workaround, I’d love to know a solution to this puzzle myself.
This would be an amazing thing if I could get it to work lol. I can load the obj file and I can do the transfer part, but when I do the transfer, the object drops to the floor at the model’s feet after the “fit to” part. I was trying to do it with a corset if that matters. Am I supposed to do something else before that?
Had the same problem and think I found a solution.
Before you do the transfer, export the object first as a .obj file to “DAZ Studio (1 unit = 1cm)”.
Then import it again, now it worked for me…
The transfer tool for the obj corset I wanna use only seems to be transferring everything from the hip down, it doesn’t take any of the morphs above the waist. I have my setup the same as in the pictures but I feel like I’m missing something.