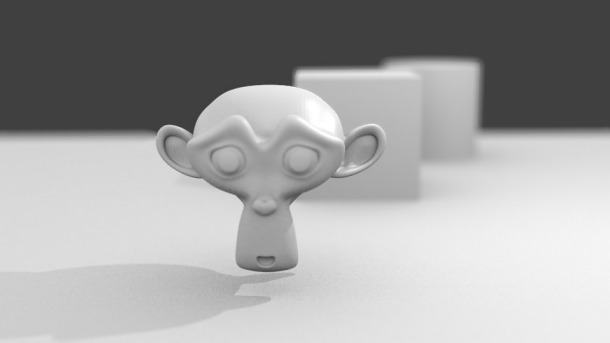
The Blender Render Engine uses postwork to create a depth of field effect, much like Carrara does. The advantage is that after a long and complex render, depth of field can be applied after the fact without having to re-render.
I must admit that rendering with depth of field in Blender is not for the faint-hearted – I thought it’s best to take some notes while I still remember how it works (using version 2.7.3). Note that this will only work for the Blender Render Engine, not for Cycles.
First we must ask our camera to use depth of field: select it in the scene, then head over to the Properties Palette on the right and click on the little camera icon.
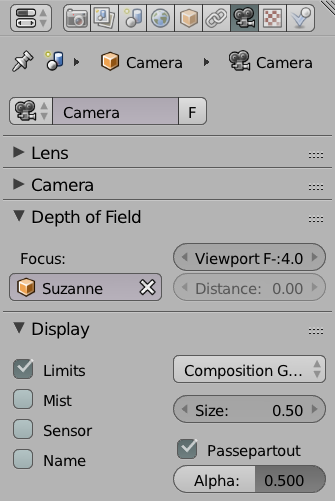
Under Depth of Field, either pick an object from the scene on which you’d like to focus, or leave the field blank and enter a distance instead. As a framing aide, consider switching on the Limits option (under Display): this will produce a small yellow square emanating from the camera along the focal line, indicating what you’re focussing on.
Note the F-Stop field: I’m not sure what it’s used for, but it doesn’t set the actual F-Stop of the depth of field effect. It doesn’t matter what you add here for the effect to render.
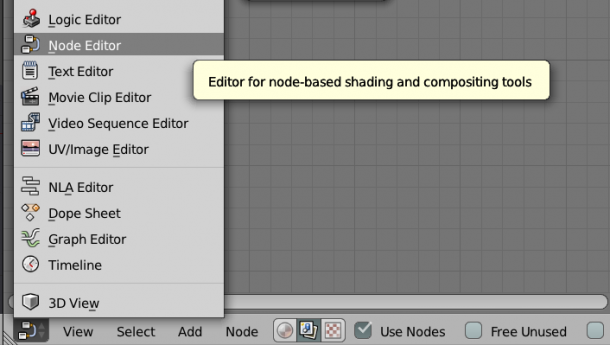
Speaking of rendering: if you press F12 now to do a quick render, you’ll be disappointed to see that no depth of field effect is being produced. For that we’ll have to get acquainted with the Node Editor.
Connecting your image to a Defocus Node
Create a new viewport (or utilise an existing one) and switch it to become the Node Editor. Do this by using the little icon on the left of a viewport. Once switched, make sure to check the Use Nodes tick box and select the middle icon that looks like it has two pictures on it. This will display Composite Nodes (the other two are Shader and Texture Nodes, in which we’re not interested in at this time).
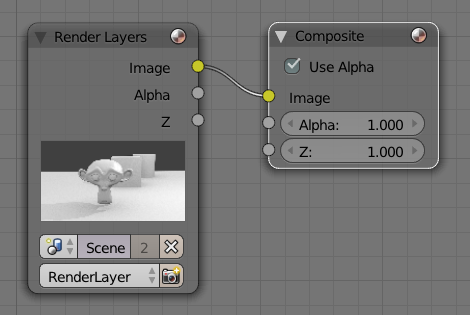
You’ll see two nodes in the editor: a Render Layer Node and a Composite Node. One is plugged into the other – similar to how the Poser Material Room works (I find Blender Nodes infinitely more friendly and understandable though). Think of this as the output of an image generator to the input of a monitor.
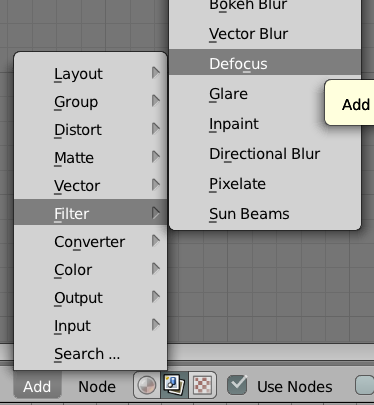
To create the depth of field effect, we’ll add a Defocus Node in between these two. You’ll do this by selecting Add – Filter – Defocus. The node will be stuck to your cursor until you move it somewhere nice and click once to set it down. Feel free to position it wherever you like. I find it makes most sense to place it in between the other two nodes as it will represent the signal path.
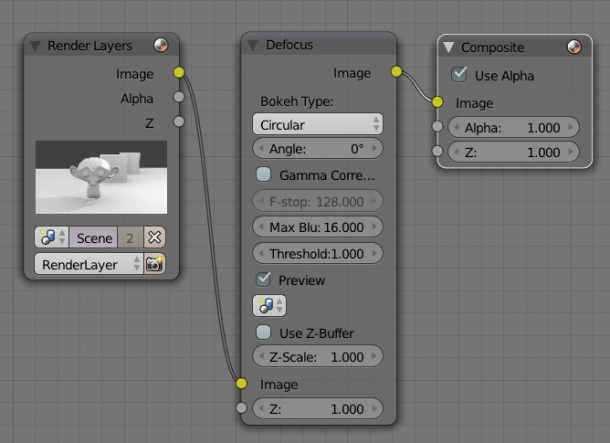
Now “unplug” the Image Output of the Render Layer Node and plug it into the input of our Defocus Node. This usually snaps into place as soon as you move the Defocus Node on top of the current connection. If not, just click and hold either end of the “cable” and move it as shown in the screenshot below.
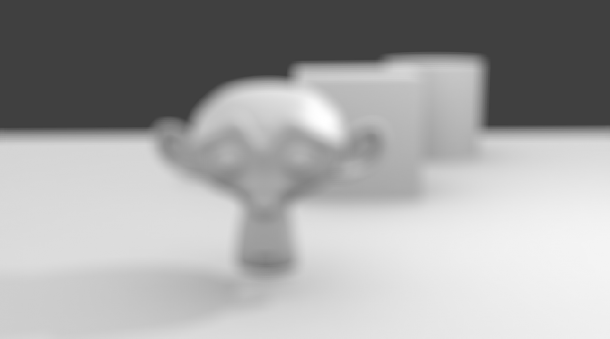
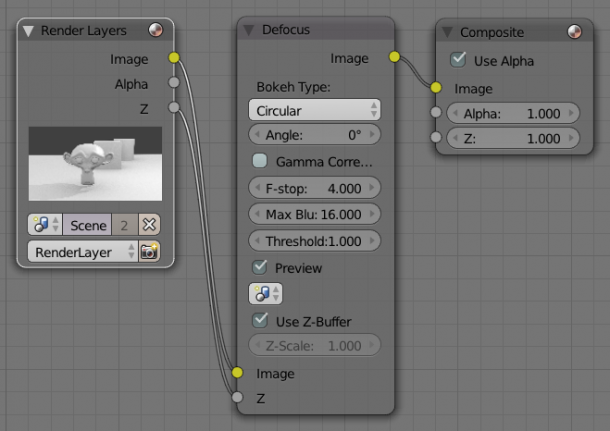
We still don’t have depth of field – but we’re getting there, trust me! Right now the image still hasn’t changed – but it will as soon as you select the Use Z-Buffer option: your entire render turns blurry. In fact, set the F-Stop value to something lower 4 and the image will get even more blurry.
What we need to do is to tell the Defocus Node that we’d like to use the camera’s depth value – which thankfully is provided as a Z value. Connect the Z-output of the Render Layer node to the Z-Input of the Defocus Node, and after a few seconds the correct depth of field will be applied to your existing render.
Here’s what the final node setup looks like:
Feel free to change the values to tweak the defocus effect a bit: Bokeh Type specifies how the “grain” is created, while the F-Stop value works like a real-life camera (lower values generate a shallower depth of field, and vice versa). Max Blur softens the effect, and Threshold sets how far away from the camera the defocus starts to take: higher values start applying the effect deeper into the scene.
Imagine the other possibilities of node based editing, and check out all those other nodes you could plug between your render and your final output!
It’s like this whole process is no longer necessary. I tried it out but it couldn’t work out in blender 2.75 but I found another way to get it done using cycles render engine.
Good point Viv, Cycles works totally different to Blender Render – I should have mentioned that’s what I was using. I’ll update the article 🙂