There’s a feature in most game engines that adjust the exposure automatically as we walk through a scene. When we look at the sky it makes sure the highlights aren’t clipped, and when we walk into a dark cavern it brightens up the shadows for us dynamically.
In Unreal Engine, this object is called the Post Process Volume. It comes up as a Visual Effect in the Modes Panel. Some demo scenes have enabled already, in which case take a peek in the World Outliner.
To adjust how much this exposure adjustment takes place, select the object in your scene and take a look at its Lens properties.
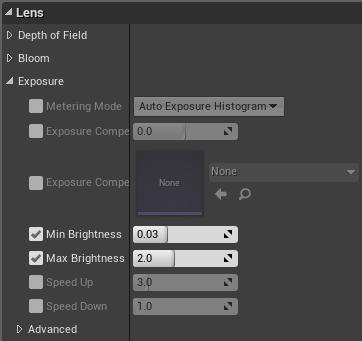
The Min and Max Brightness values let you pick how much compensation should be applied, while the Speed Up and Down let you adjust how fast either compensation should happen.
Disable exposure compensation completely
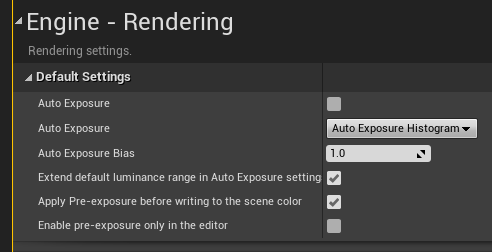
You may notice that some scenes don’t have a Post Process Volume, yet they still compensate the exposure as you move around your viewport. Turns out there’s another option hiding under Edit – Project Settings. Search for “exposure” and find a section in which to disable it golbally for your project. It’s under Engine – Rendering.
Further Reading
- https://docs.unrealengine.com/en-US/Engine/Rendering/PostProcessEffects/index.html
- https://medium.com/code3100/post-processing-volumes-in-unreal-engine-4-5fb0831044a2
- https://forums.unrealengine.com/t/disable-freaking-auto-exposure/105773
- https://docs.unrealengine.com/4.26/en-US/RenderingAndGraphics/PostProcessEffects/AutomaticExposure/