Swimming mechanics are a tad tricky to get going in Unreal Engine. I’ve pieced this information together from various cowboy tutorials on YouTube, in the hope that I’ll be able to reproduce the principles without having to watch them again. In this article I’ll make the Third Person Character swim, letting him slowly drift up towards the surface. The ingredients to this puzzle are:
- a Character
- a Physics Volume acting as our body of water
- at least two Swim Animations (I’m using the ones from the Phoenix Anim Pack 3)
- a new one-dimensional Blend Space
- an Animation Blueprint
- several cups of coffee
This is a devilishly complex undertaking, so I’ve split this series into three posts:
- Part 1 is about the principle and getting the animations working
- Part 2 adds some camera and character tweaks
- Part 3 discusses other stuff
The Principle
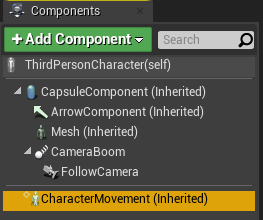
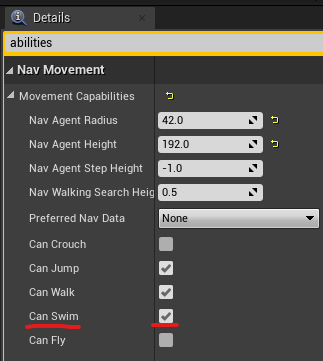
Let’s start at the very beginning and see what functionality is already built-in and ready to use for us. Our character has a Movement Component. This is inherited and sets up many of the character properties, like walk speed and abilities. For example, it is here that we set if he is able to swim. By default he is, although he cannot crouch or fly.
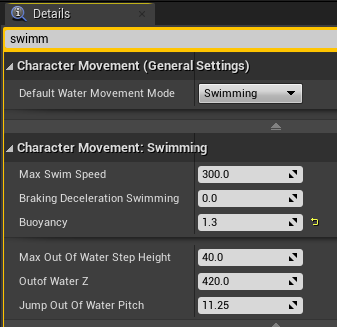
There’s a dedicated swimming section here, worth having a look at. Notice the Buoyancy parameter. By default it’s set to 1, which means when in water the character doesn’t move up or down automatically. Setting this higher will make him float up, while lower values will make him gradually sink to the ocean floor. I’ll set mine to 1.3, giving him a slight upward motion like humans would perhaps have. Also make a note of the Max Swim Speed, we’ll need this value later. Feel free to override it if you wish.
These parameters will be observed when our character meets a water volume, so all we need to do is to immerse him in something.
Setting up our scene
I’ll make a small modification to my default level by scaling the stairs up a bit. I’ll do this so that we have a slightly deeper pool. Feel free to do this as you see fit. Next I’ll add a Physics Volume to my scene and centre it. I’ll scale it up so that it fills my interior section, turning it into a swimming pool. I’ll call it Water Physics so I’ll remember what it is. I’ll also move my Player Start up a bit so that my man doesn’t start underwater.
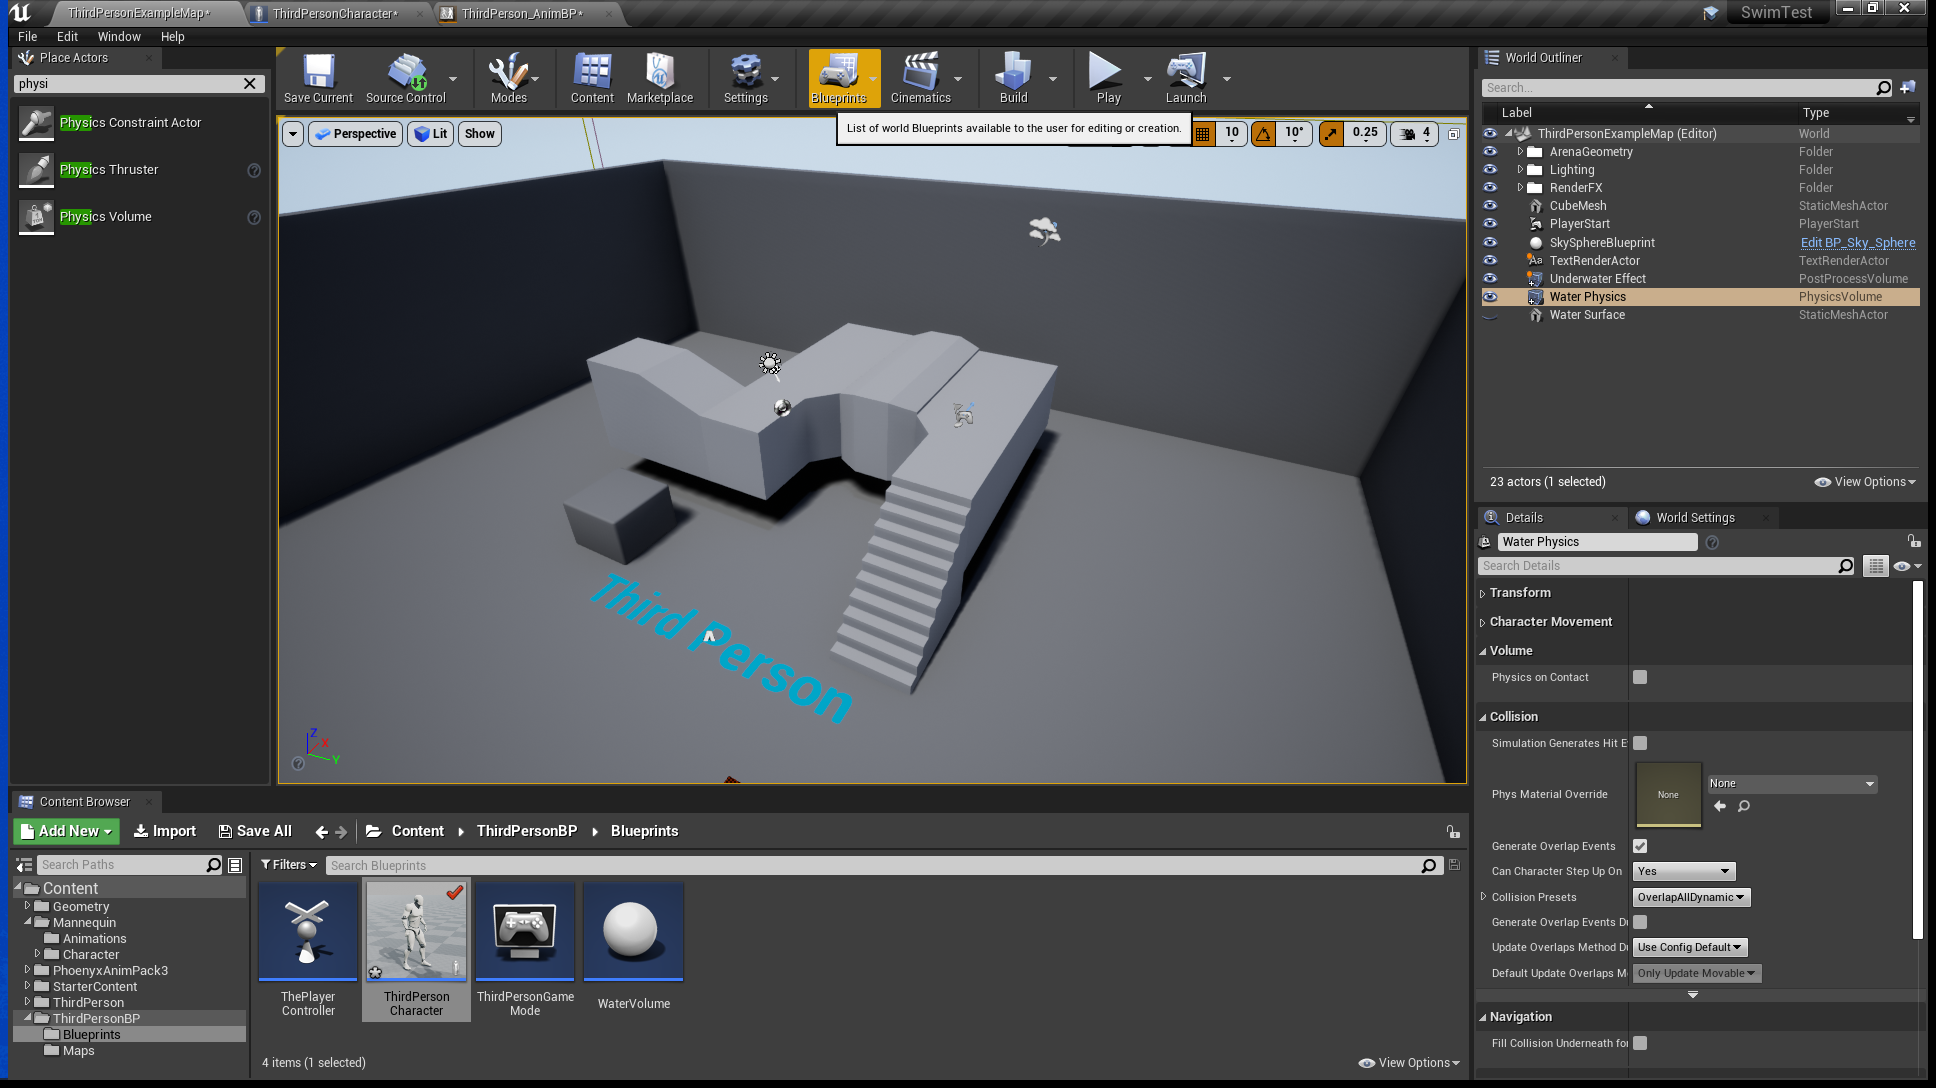
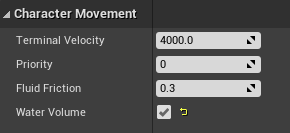
Select the Physics Volume and make a single change: let it be water with just a single tick box. You’ll find this setting under Character Movement.
For eye candy I might also add a regular plane to my scene that will serve as my water surface. I’ll scale it up to the size of my water volume, make it level with it and give it the Ocean shader that comes with the Starter Content. Any water shader will do of course. It’ll help us see the character and the water in context.
If you play the level now you should see the character behaving a little more sluggish when he jumps in the water. That’s a good start, but he still walks and behaves very much like he always has. This is caused by the fluid friction set under Character Movement. Let’s make our character behave like a swimmer in the next step.
Retargeting Animations
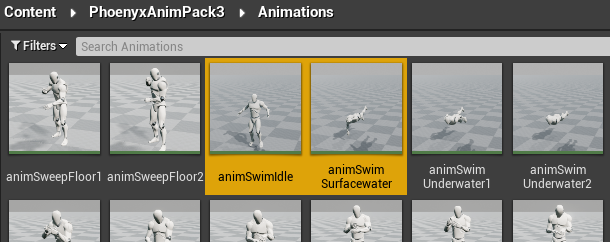
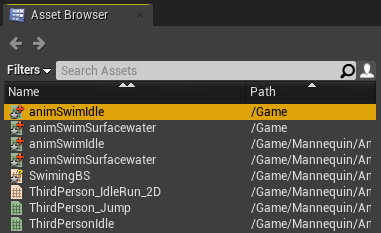
Although the Phoenix Animations that I’m using fit our current skeleton perfectly, they still need to be retargeted, otherwise they won’t show up in our animation. I’m not sure why this is, perhaps an identical file with a different name is classed as a different asset. The set comes with four swimming animations, but I’ll only use the first two: Swim Idle and Swim Surface.
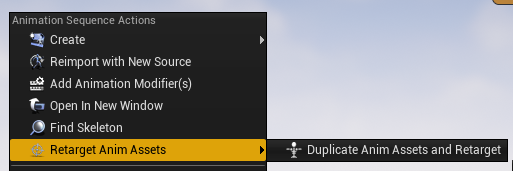
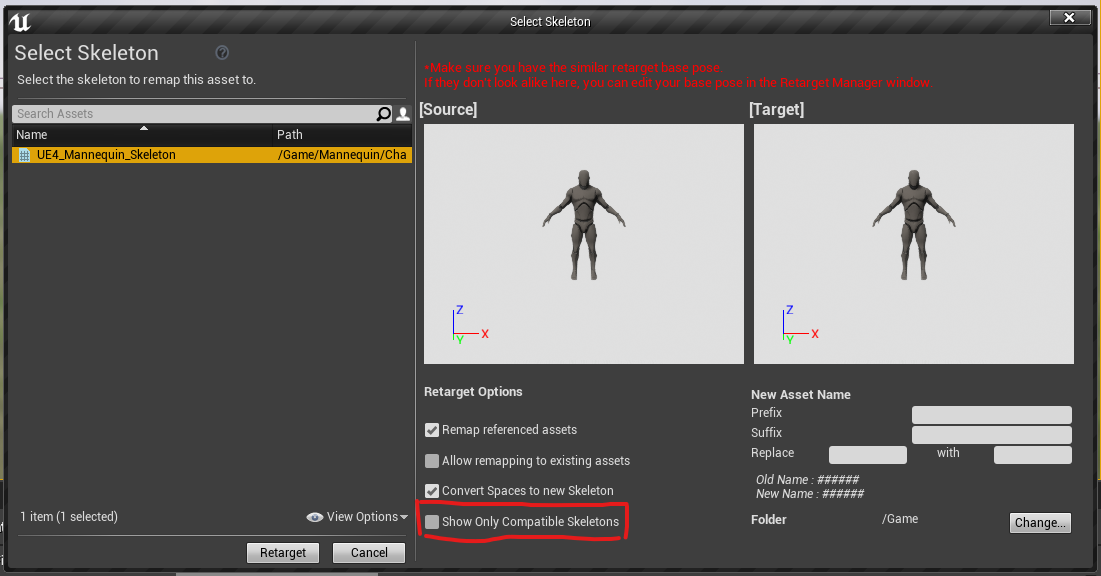
Right-click and select Duplicate and Retarget.
This brings up a fun window, in which by default only one skeleton shows up. De-select the option “show only compatible skeletons” and pick the one that shows up in the list on the left (namely ours). Under Folder – Change (bottom right), pick your existing animations directory to keep everything neatly together. For the template project it’s this:
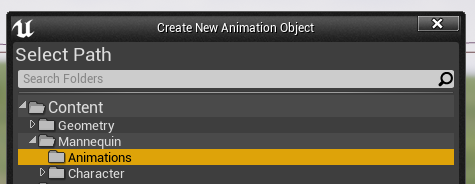
Now select Retarget and the swimming animations will be copied over. Huzza!
Setting up a new 1D Blend Space
The neatest way to blend the idle and swimming forward animations together is by way of a Blend Space. It’ll be a simple one so we can choose a one-dimensional version. Navigate to your animations folder, right-click inside an empty space and choose Animation – Blend Space 1D.

Pick the first skeleton in the list that appears (or rather, pick the one you’re currently using, NOT the Phoenix/source skeleton) and call this file SwimmingBS. Let’s open it and set it up.
Inside the Blend Space, Find the Asset Browser on the bottom right. There’s a large grey empty space underneath the viewport, with a little green dot somewhere in the middle. Drag the idle animation over to the left, and the swimming forward animation onto the right slot, as shown below.

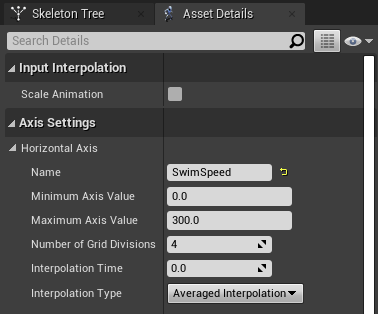
All we need to do now is to set our maximum swim speed under Axis Settings. For our default character that was 300 if I recall. We’re saying that the animation on the left will be used when our speed is 0, and the one on the right is used when our speed reaches this maximum. Everything in between will be interpolated by the Blend Space. Once set, you may save and close this file.
Setting up the Animation Blueprint
In this next step we’ll create a new state for our character to which he can transition when he’s in the water. This state will use the above Blend Space and our current speed to determine how to animate the character. Animation Blueprints are a little difficult to understand (and navigate for the untrained eye), so I’ll try my best to shed some light on the topic. Mine is called ThirdPerson_AnimBP, found in the Mannequin/Animations folder. It should look something like this:
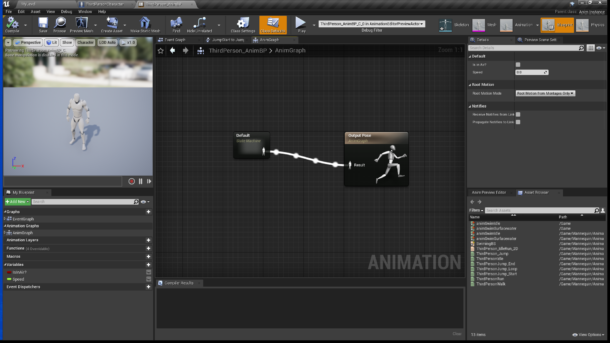
If yours does not look like the above (it may be showing other nodes instead), take a look at the breadcrumbs menu at the top of the graph. Select AnimGraph to get to this view, which shows the Default State Machine connected to the final pose. Double-click that State Machine (small node on the left) to see something like this:
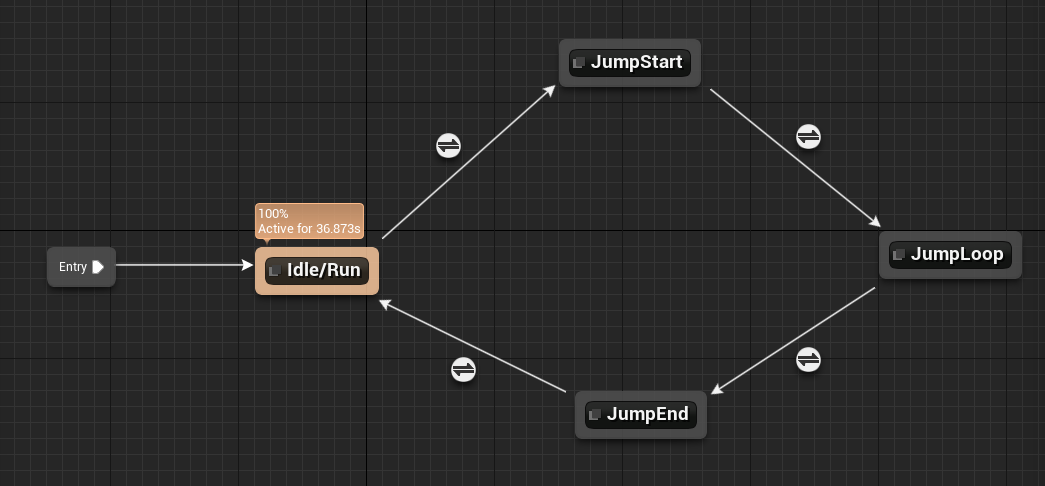
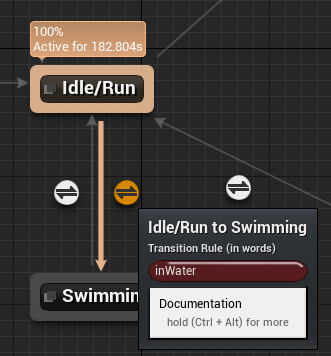
Here we have an entry point on the left and several animation states that can be reached via connections with attached conditions. The orange Idle/Run position is what’s happening currently. We’ll create a new state called Swimming and attach two conditions that define how our swimming state can be reached. The idea is very simple: when we’re in the water, enter the swimming state. When we’re not in the water, go back to idle.
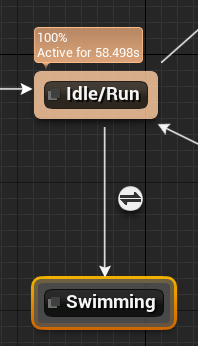
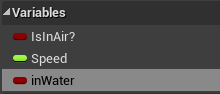
Left click and drag off the Idle node and create a new State. Call it Swimming. Now drag back from the Swimming Node to the Idle node to create a second condition. That’s all we need. The conditions (little white nodes) can test local variables, which we’ll need to set up for this. Let’s create ourselves a new Boolean and call it inWater (on the left).
Now we’ll double-click on one of the white nodes and test this condition. The wire running from Idle to to Swimming should test if inWater is true, while the wire running back should test false. Observe please:
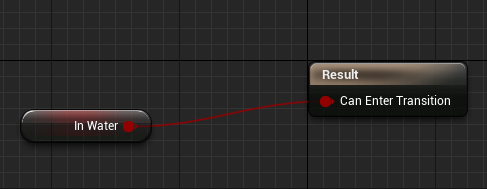
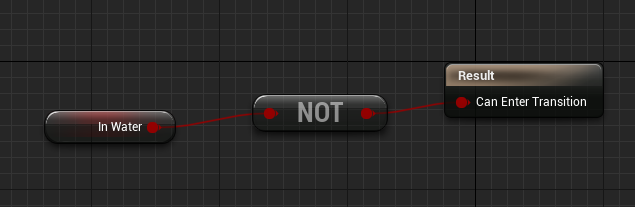
You can verify your connections by hovering over each white node and see something like this:
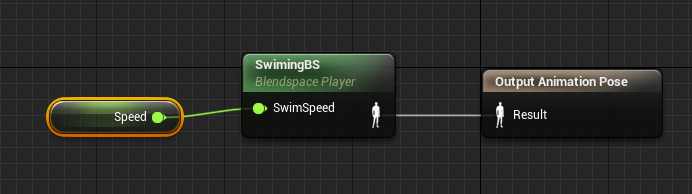
Now we need to tell our State Machine what to do when we’re in the water. Double-click the Swimming node and you’ll see a lonely disconnected Output Animation Node. Drag in the Blend Space we’ve created in the earlier step (I believe we called it SwimmingBS), then connect it to the Output Node. We also need to tell it how fast our character is swimming, so drag the Speed variable into the graph and connect it to the Blend Space. The end result should look like this:
We’re nearly done in our Animation Blueprint. All that remains is to extract the most important bit from our player character, namely when he’s actually in the water. OUr local variable is not set by anything up to this point. To do that, we need to switch over to the Event Graph at the top and do some coding. Here’s what it looks like, a slight amendment right at the beginning of the existing graph:
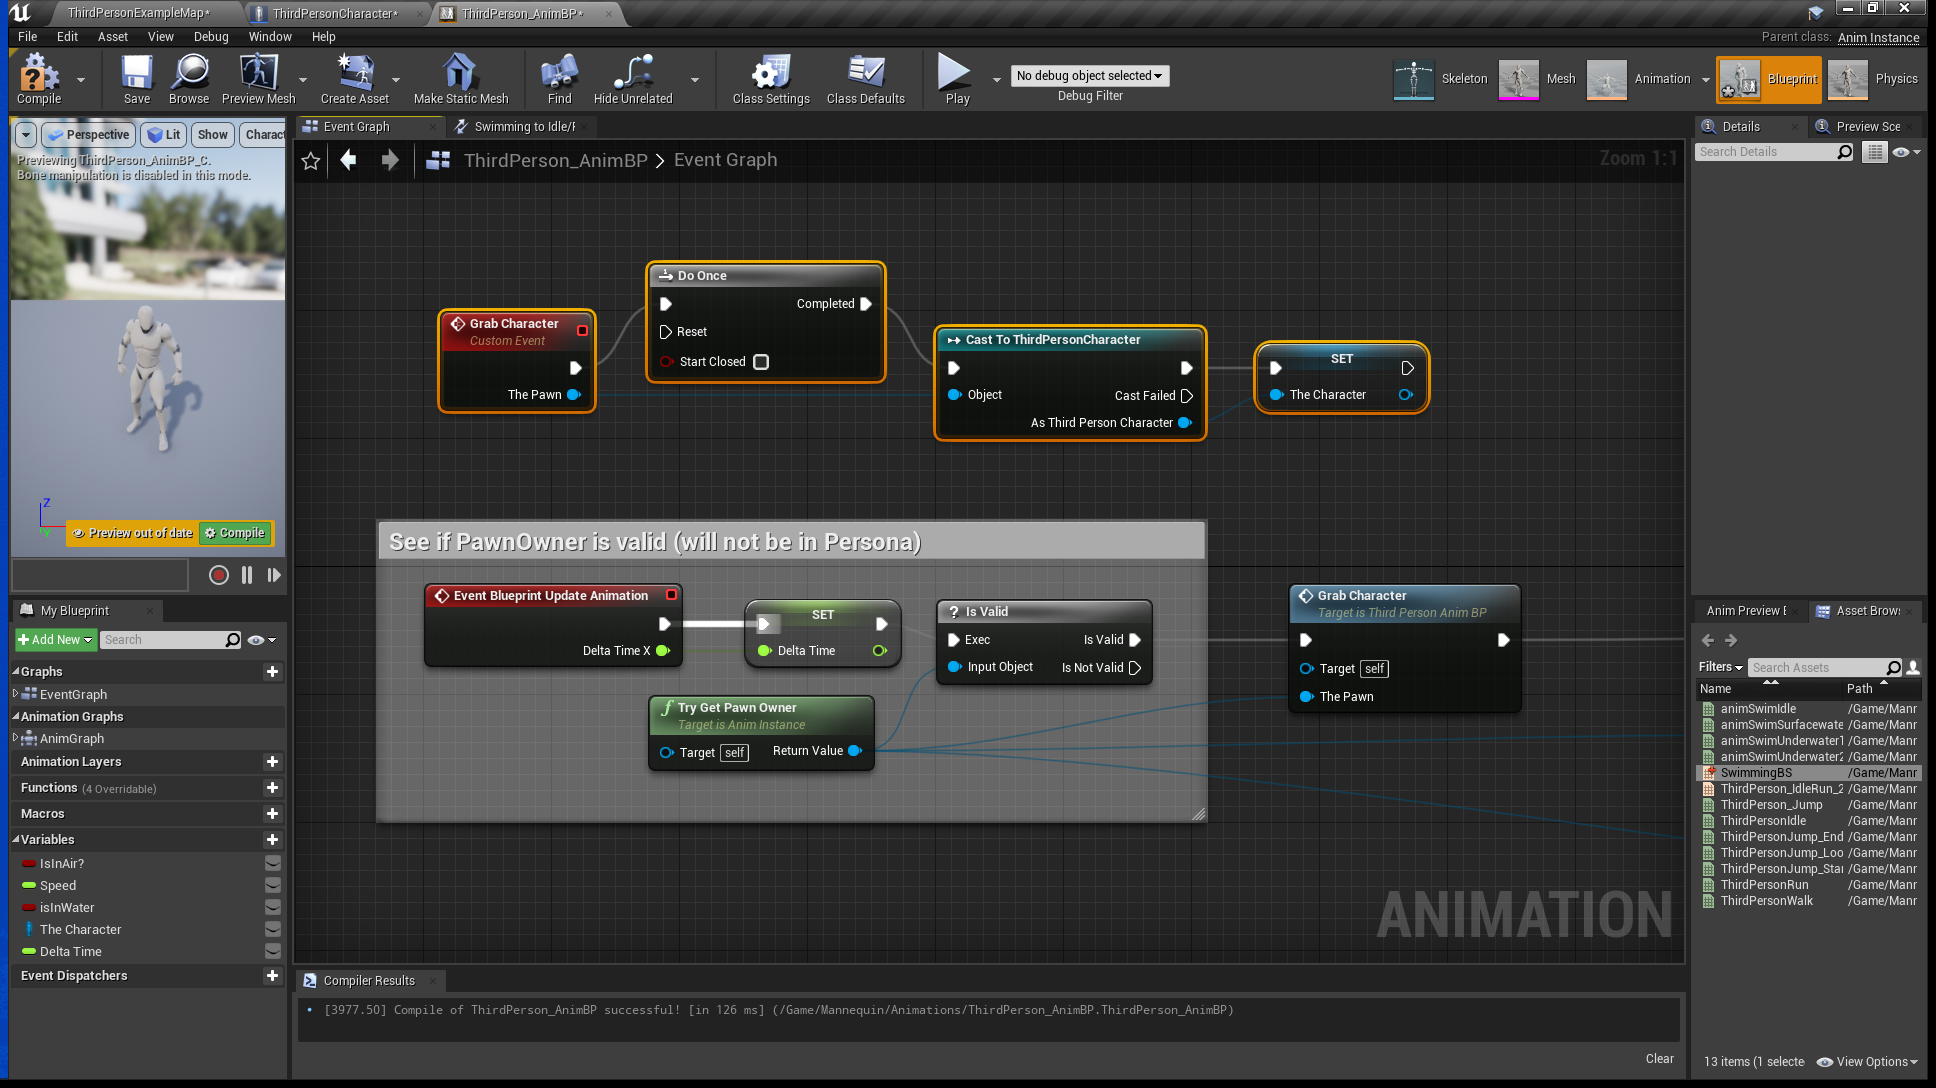
The Event Blueprint Update Animation node fires on every tick, so we’ll create a custom event that fires only once and extracts a reference to our player character. This is for performance reasons, so that we don’t cast on every tick of the game, grabbing the character once for later use. To call our custom event, we’ll smuggle it into the beginning of the existing node graph and let it continue as if nothing had happened. Don’t forget to connect the input (The Pawn).
I’ll also need a reference to the Delta Time right at the beginning for an embellishment later, so I’ll set that here too. Saves dragging out a super long wire in a moment.
At the very end of the existing Node Graph, we’ll set our inWater variable. Here’s what it looks like:
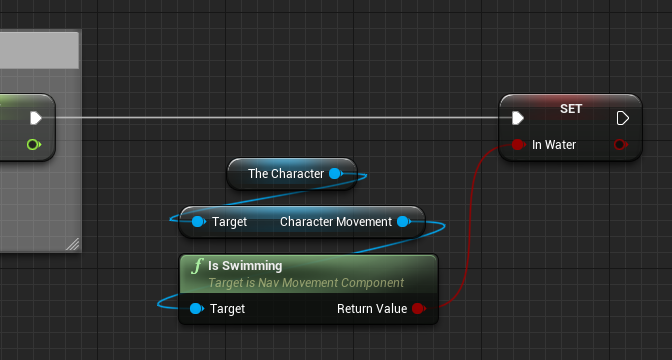
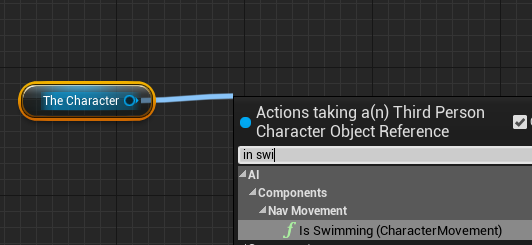
The easiest way to get this is using our character reference, then searching for Swimming. Unreal Engine will conveniently grab the relevant interim references and present us with an is Swimming boolean we can plug in to our existing local variable.
Try to compile and run your project. The basic swimming mechanics are now implemented. When the character enters the water volume, he should start swimming. When he gets out, he starts walking again.
Congrats if you’ve made it this far! There’s a little more we can do to help the character out of the water, and let him swim deeper down (and further up again). We’ll tackle these challenges in the next article.