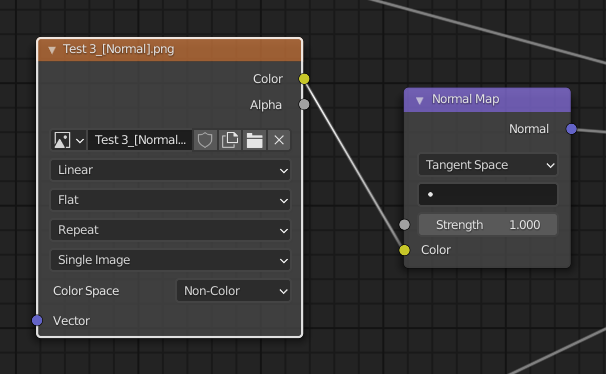
Normal Maps contain data rather than colour. Even though we can see something like an image, and it’s technically a picture, the RGB values of each pixel are not treated as visuals by the render engine.
To use a Normal Map in Blender’s node editor, do the following:
- create a texture node and open the map
- on this node, switch the Colour Space to Non-Colour
- connect the Colour output to the input of a Normal Map node
- connect the normal output to the Bump input of your shader node
Ideally the node also requires an input vector from its source object. You can set this up like so:
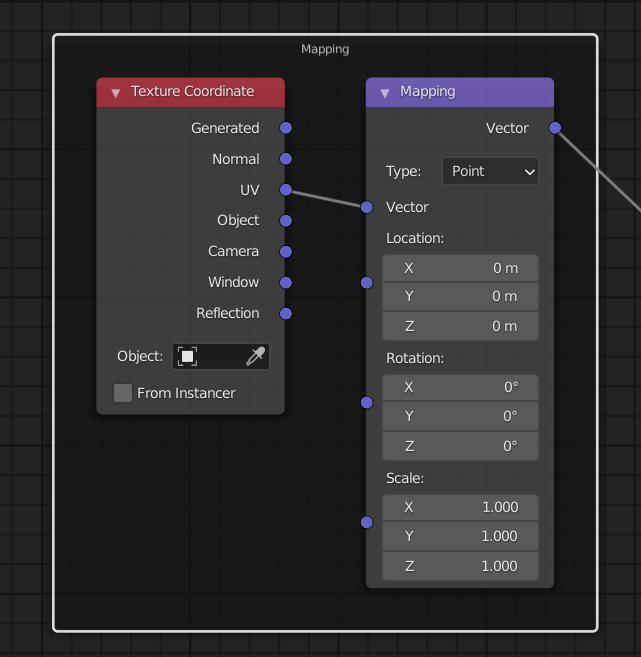
Thankfully Node Wranger can set this up automatically for us. I’ve explained how to do that in my previous article.
Hey i found this website that gives you free normal maps to test for all kinds of hd textures: https://withpoly.com/
And it happens to be your website, what a find indeed! Thank you for sharing 🙂