I’ve recently tried my hand at using ParticleShop with Photoshop, and it worked out of the box after installation. This was not the case with PaintShop Pro though, where an additional step is required (but they don’t exactly tell you this in the installation).
Here’s what we need to do to make it work:
Head over to File – Preferences – File Locations. Navigate to Plug-ins and click the add button on the right. I would have drawn a nice circle around it, but after my fresh Windows Installation that wonderful snipping tool is now borked and unusable. I was lucky to give you a screenshot…
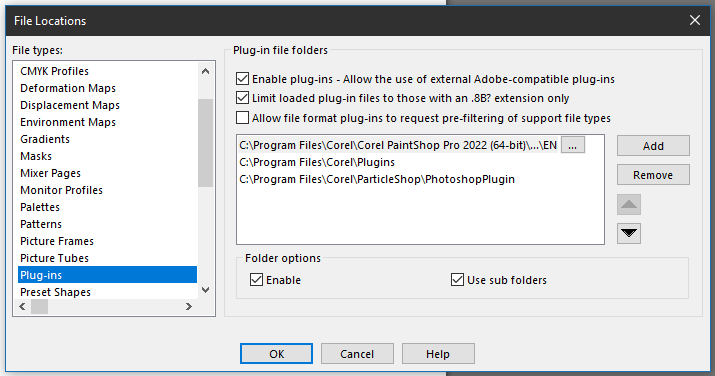
We need to browse to the actual Particle Shop location. The path is shown in the above screenshot:
- C:\Program Files\Corel\ParticleShop\PhotoshopPlugin
While this sounds counter intuitive to point at the Photoshop location and like a recipe for disaster, this is indeed the correct procedure.
How do we use Particle Shop
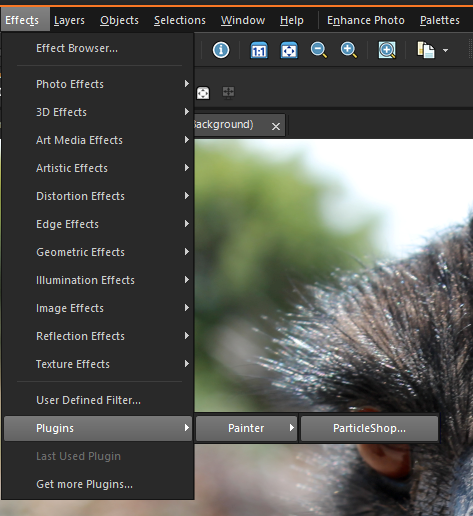
Make a duplicate of your layer. This assures that Particle Shop can bring over just the brush strokes. Select the duplicate (top) layer, then head over to Effects – Plugins – Painter – ParticleShop. The app will launch and let you work some magic. It’ll also show as the Last Used Plugin in the effects list at the bottom when you’ve used it once in this session.
When you’re done, hit Save at the bottom right and your magic brush strokes will be sent back to PaintShop Pro. You get a choice if you’d like to send the whole picture (not recommended), or just the brushstrokes. Back in PaintShop pro, your duplicate layer is now replaced with the brushstrokes.