The retargeting process has completely changed in Unreal Engine 5. It appears we can now use a system of IK chains that make animations from one skeleton usable on another by way of an IK Rig and IK Retargeter. It took me a while to comprehend this, but I’ve successfully managed to use this system for the regular Synty characters (without attachment modules).
We’ll use a live fit-suit method that’s very similar to how we can convert Genesis characters: essentially the UE5 mannequin will wear the Synty character and update joint rotations on the fly.
Before I forget, let me make some notes here. The steps are as follows:
- duplicate the existing IK Rig from the UE5 mannequin
- correct bone chains
- create IK Retargeter and match poses
- add Retarget Pose from Mesh to Animation Blueprint
- invisibilise default mannequin and make the fit suit follow
Prep Work
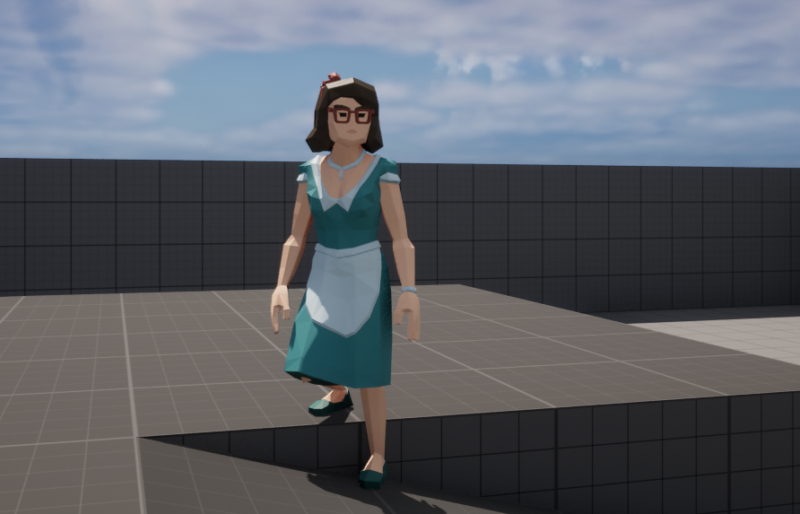
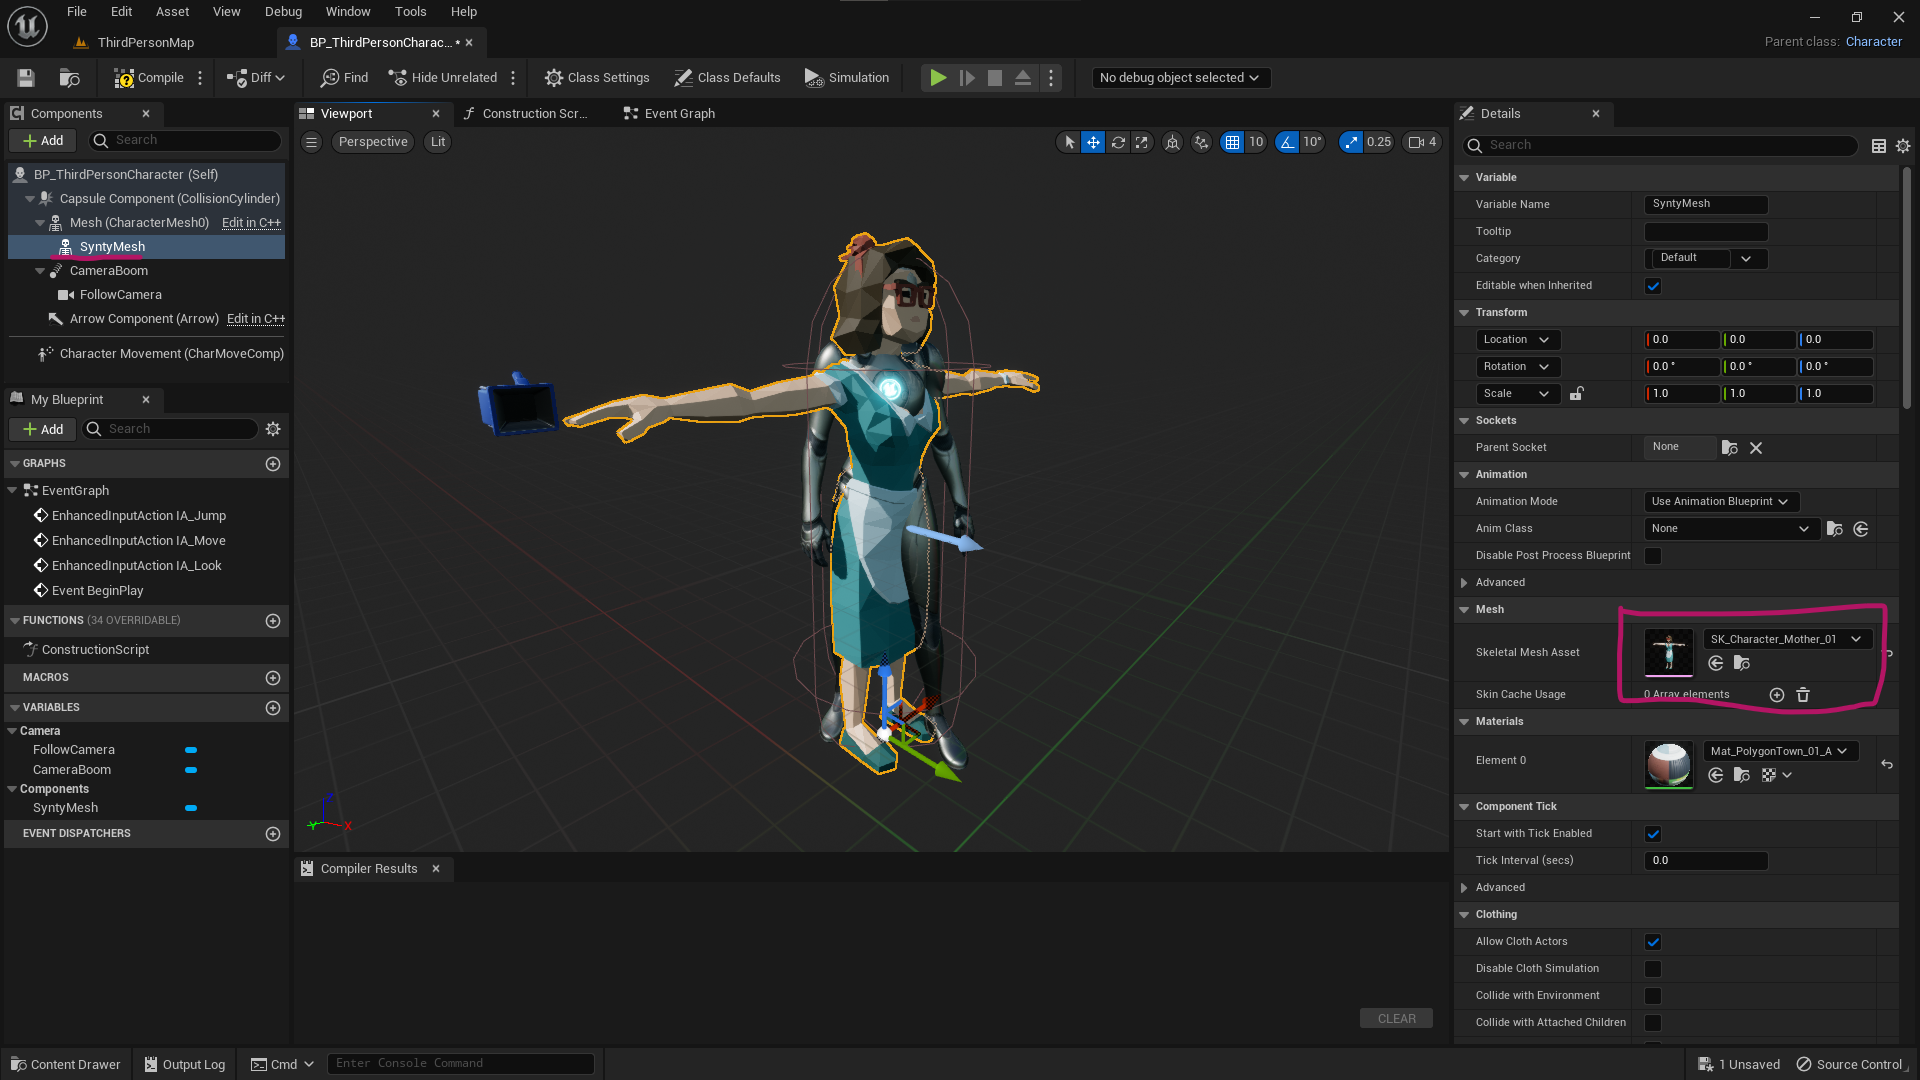
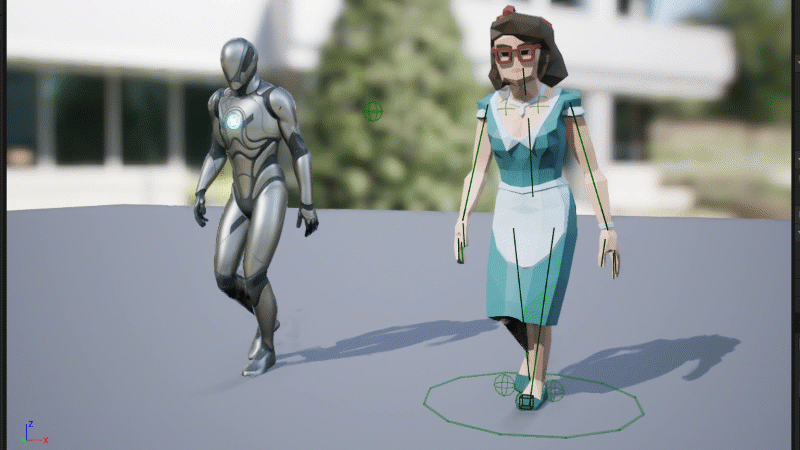
I’m starting with the 3rd Person template in UE 5.1, as there are minor differences from 5.0, with the Polygon Town Pack. Let’s put all our assets in the existing ThirdPerson – Blueprints folder. We’ll find the BP_ThirdPersonCharacter in here. Let’s open it up and switch to the viewport, and say hello to Quinn! Instead of replacing her, let’s add a Skeletal Mesh underneath her and add our preferred Synty character to it. We’ll see two people overlapping. Yuck!
Setting up the IK Rig
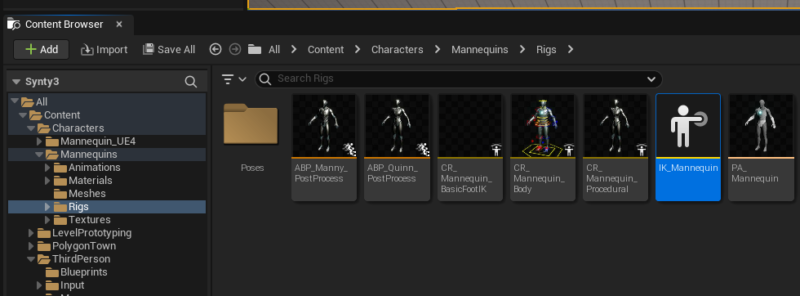
Return to the content shelf and find the IK_Mannequin rig under Characters – Mannequins – Rigs. Drag it over into our Blueprints folder and call it IKRig_Syty, then open it.
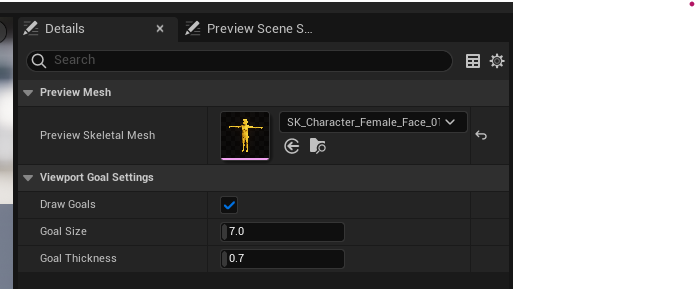
You’ll see the default skeleton in the viewport, but we’ll change it to our Synty character. To do that, find the Details Tab and change the Preview Skeletal Mesh. I’ll change mine to the mother, but pick any character you like.
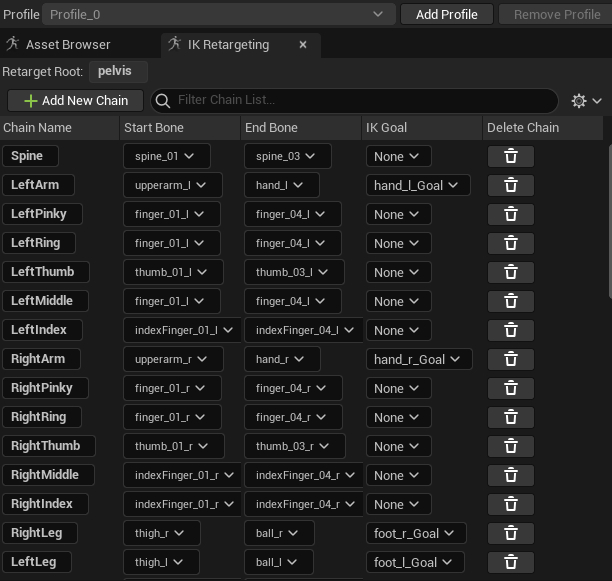
See these yellow objects floating underneath the arms? Those are IK Chains that we can set. EPIC have explained this in more detail here, and we’ll go tweak some of them now. The relevant section for us is at the bottom right, where we can tell UE how to build those chains on the current skeleton. Since we’ve copied an existing template, it assumes the bone names exist on our character, most of them do yet some of them do not.
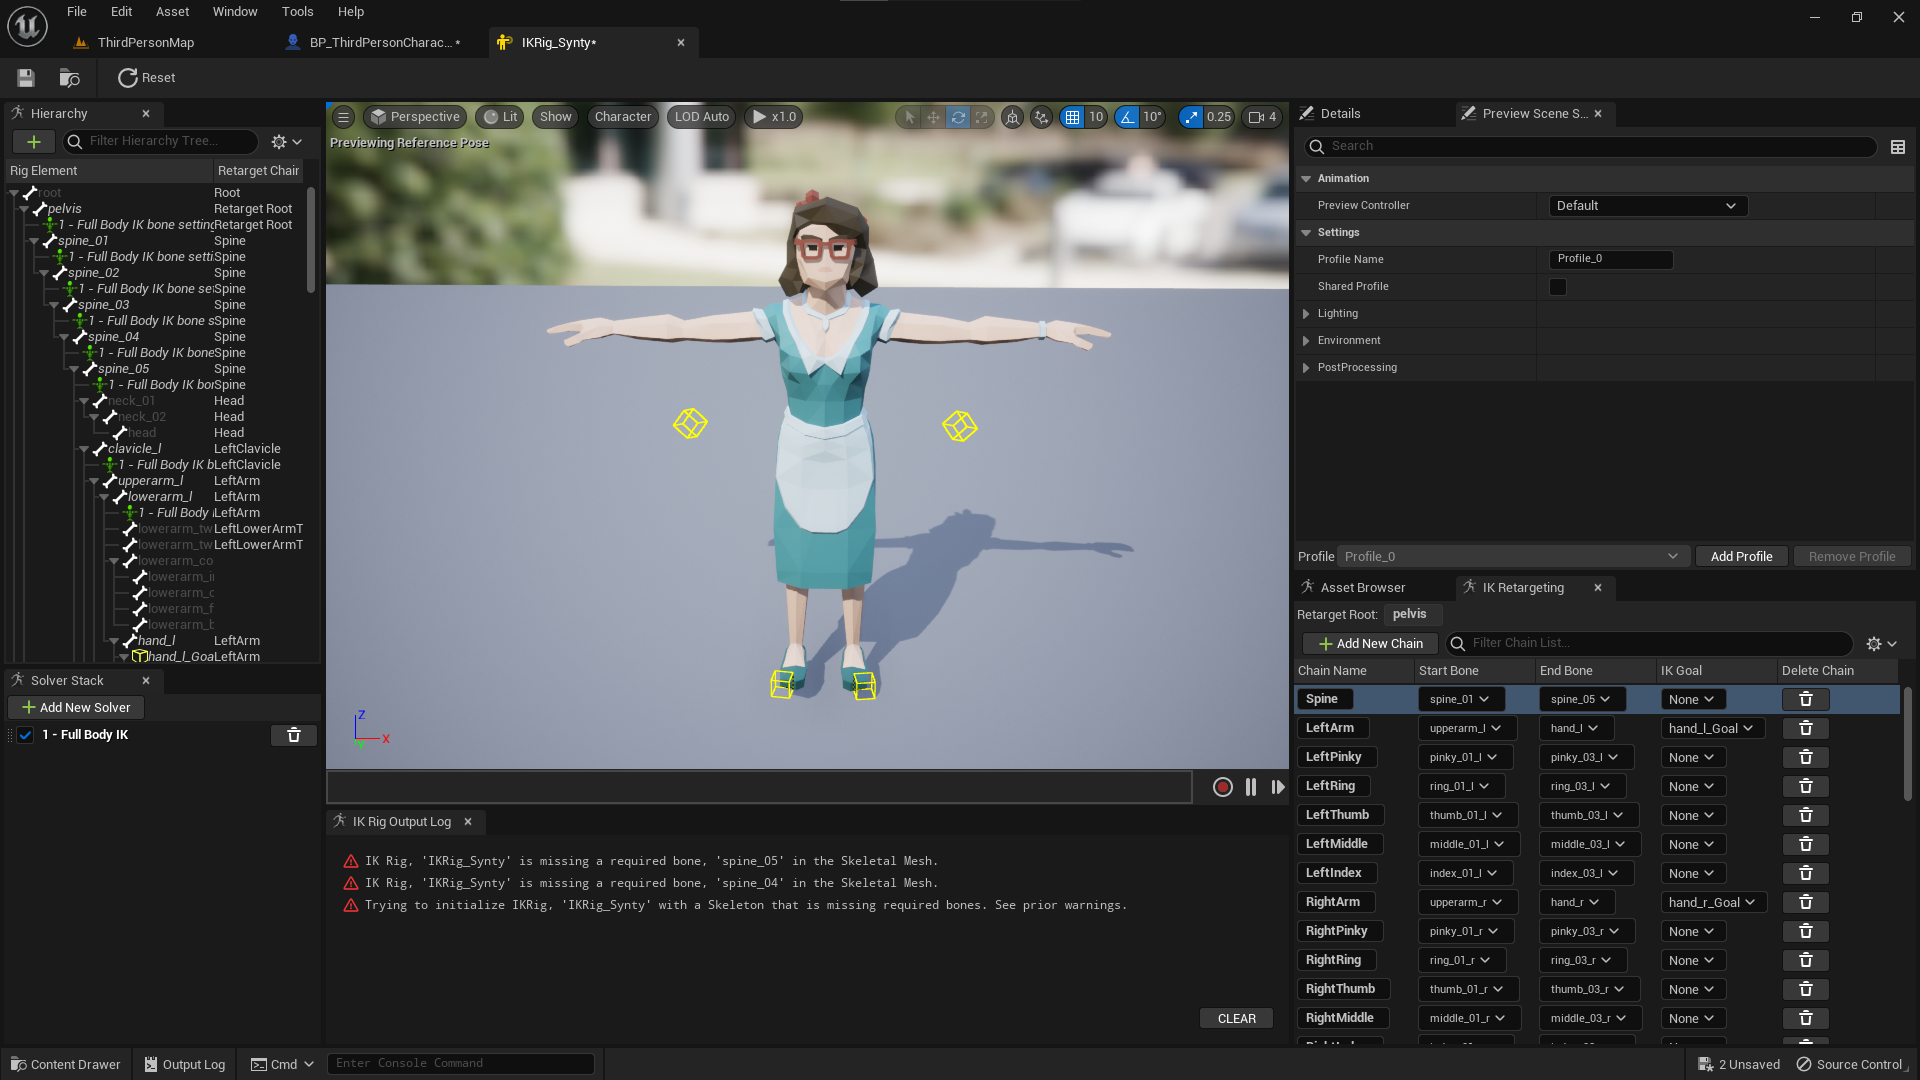
For example, the Synty spine only has three segments instead of 5, so we need to change the end bone on the spine chain to the last segment. Likewise, the Synty hand only has three fingers so we need to tweak the chains for the pinky, ring and middle finger to be “finger01” to “finger04”. Close this file when you’re done.
Creating the IK Retargeter
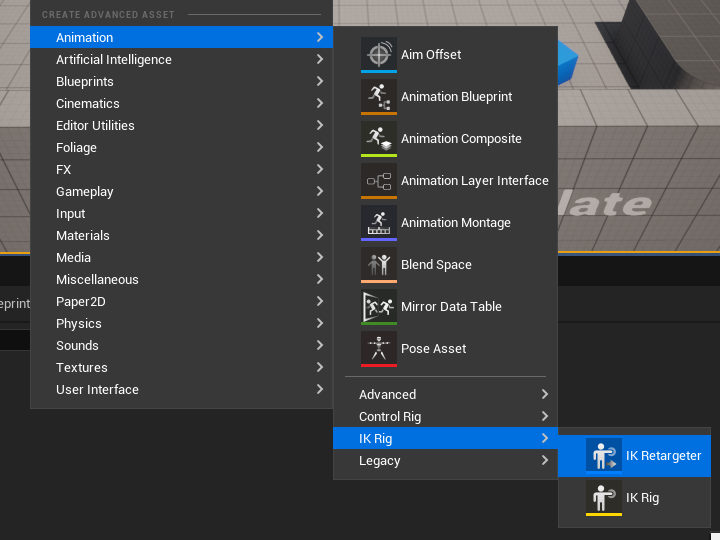
We need to create a new file that will allow for the translation between the two skeletons. This is done with an IK Retargeter. Right-click in our Blueprints folder to create one and call it IKRetarget_Synty.
It will ask you to provide a source skeleton rig, so we need to select the one from our donor figure IK_Mannequin (do not choose the Synty Rig, as that’s our destination). Now open up the file and marvel at the silver new UE5 mannequin. It may be a little large, so zoom out if necessary. At the top right of our window we’ll see options for the source IK Rig and Preview Mesh, as well as the Target IK RIg and Preview Mesh. Set the latter to the Synty Rig and your preferred mesh and you should see something like this.

Again two people on top of one another. This is handy to change the pose of our target rig to match our source rig, but we can also use the Target Mesh Offset option to put some space between the two. We’ll do that in a moment. For now, put the Synty character into an A-Pose that matches the UE mannequin. In UE 5.0 we could use a bone selection tool, but that’s been disimproved in UE 5.1, where we now need to pick the bone from the hierarchy window on the left. It’s actually a little easier to select.

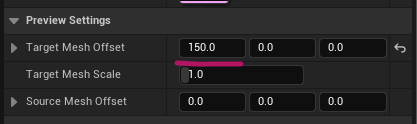
Enter Pose Edit mode (top left) and choose the Upper Arms and bend them down by 50 steps. Now bend the lower arms forward by 40 so that they’re in roughly the same position as the UE mannequin. When you’re done, click the Edit button again and click off the figure to show the offset option. I’ve moved my character over by 150 to see them side by side instead of overlapping.
Now you can pick an animation from the browser on the button right and see how any of the available animations are working. As if by magic, our characters should now walk in sync. Huzza! You can close the retargeter file, we’re done with it.
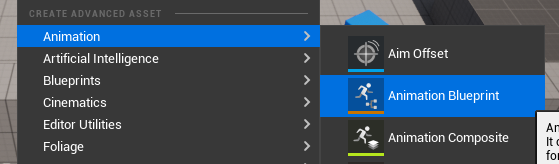
Creating the Animation Blueprint
We need a new animation blueprint for our Synty guys. Create one by right-clicking on the content browser.
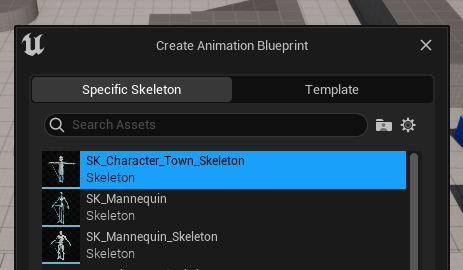
A dialogue pops up from which we need to choose the our relevant Synty skeleton. That’s the one provided with the asset pack (SK_Character_Town_Skeleton in my case, but the name will vary depending on the pack). I’ll call mine ABP_Synty and open it.
All we need to hook up here is a new node called Retarget Pose from Mesh (right-click on the node graph and search for it). With that node selected, pick the Synty IK Retargeter we’ve made earlier. That’s all we need to do here.

Setting up the Live Fit Suit
Now for the piece de resistance: let’s go back to our character blueprint and hook up our new animation blueprint for the Synty Mesh we’ve added/parented to the UE character mesh earlier. Try playing the game now and you should be able to walk around with that weird amalgamation of two characters in the same place. It’s a start!
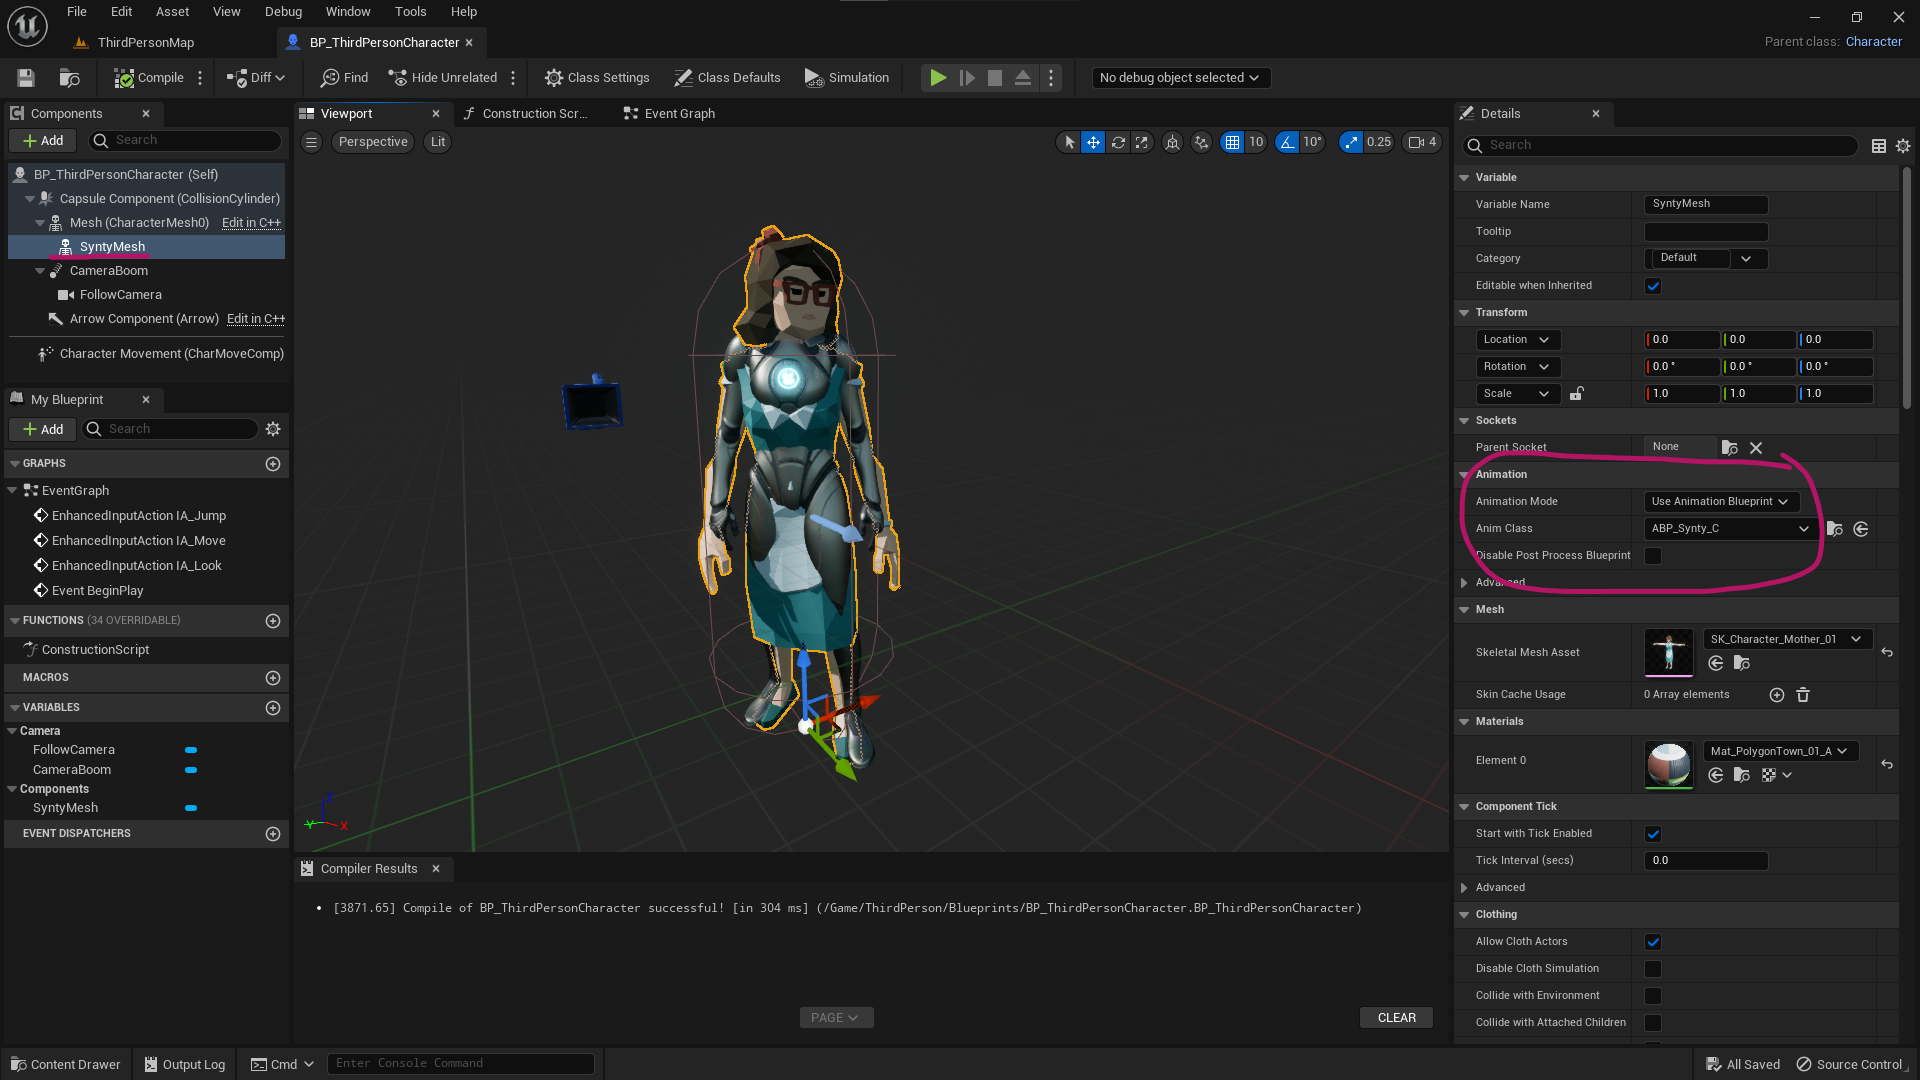
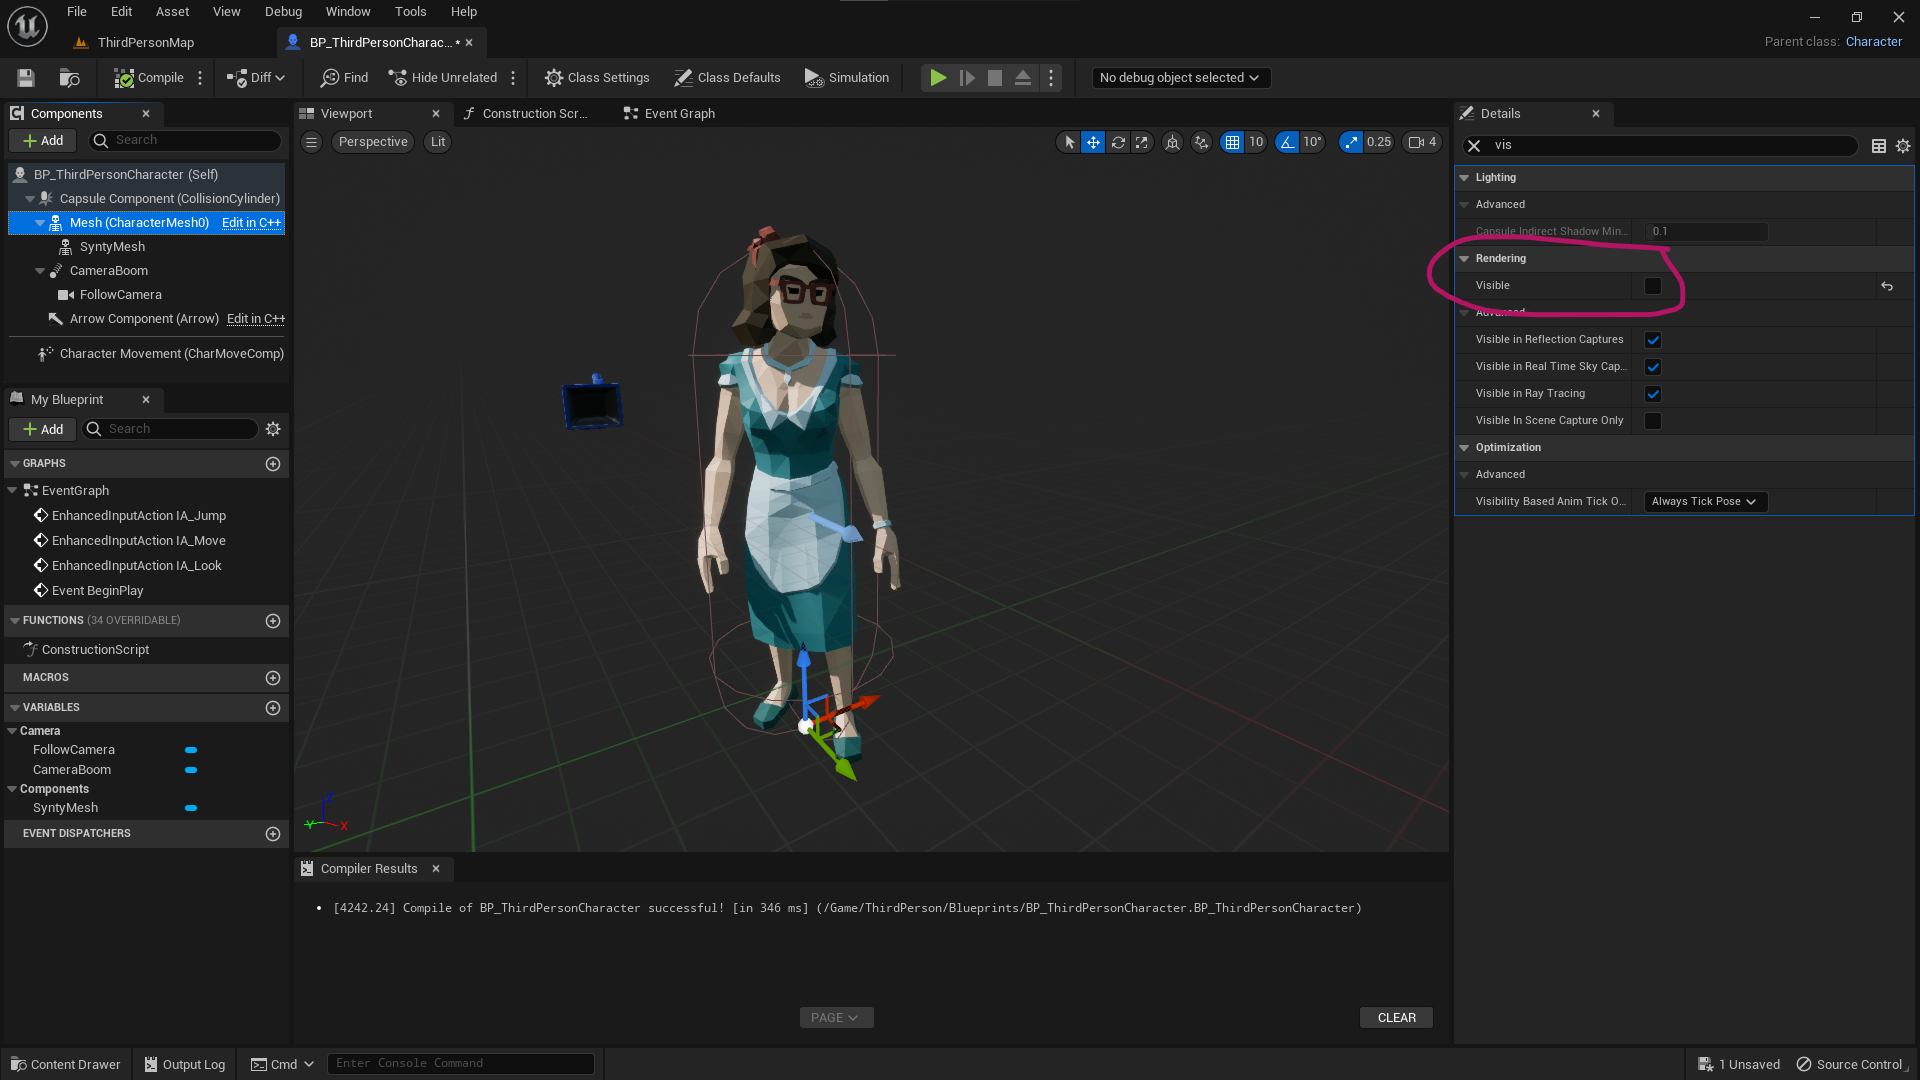
The last piece of the puzzle is to make the UE mannequin disappear, without actually deleting it. We need it so that it can do the live interpolation and drive our visible Synty character. Select the UE mannequin mesh and turn off visibility in the details panel. I like using the search option to whittle all those parameters down.
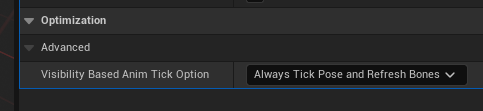
While this looks great at first glance, you’ll notice that as soon as you compile, the character isn’t moving anymore. To fix that, find the Optimizations section and switch from “Always Tick Pose” to “Always Tick Pose and Refresh Bones“. Now playthe game again and you should see a single Synty character running around, complete with new super rad foot IK!
Production Credits
This was a huge puzzle for me, and I couldn’t have worked this out (or written it up) thanks to the excellent efforts by AngelV, TC Mabe and Jobustu on YouTube. Thank you so much for sharing guys!! Links to their fine works below.
Also thanks to Synty Studios for giving us these super inspiring cute low poly assets. I’m hoping to figure out how to make those hair and beard attachments work one day, not to mention those expression face plates. Watch this space, and thanks for reading!