I’ve often wondered how these “endless runner” type games are made under the hood. Julia and her team have recently released a project like that called Dash and Splat that was made in Core, and I wondered if I can make this work in Unreal Engine. After some research and tinkering, here’s one way to make it work:
- create a loopable environment block with collision volume at the end
- when the player runs into it, spawn a new block
- after the block is spawned, wait a moment and destroy it
It’s incredibly simple but can be used with great effect, not just for endless runner games. Let’s take a look at this step by step.
Make the player run forward forever
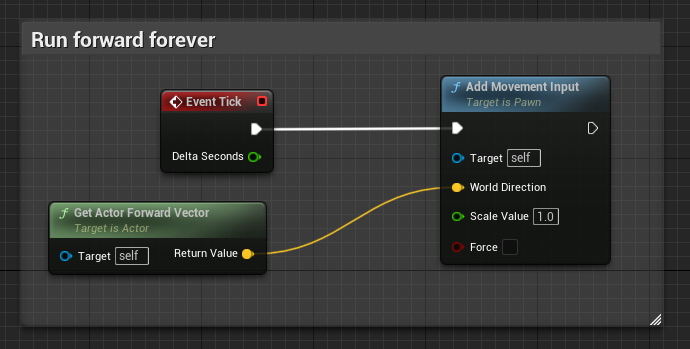
Often there’s no need to collect player input for the forward action. In Temple Run and Agent Dash, the character just runs, and all we do is make them move to either side, jump or dodge. Endless running is a continuous automatic input to the forward motion, so we can apply it on the Tick Event. If we use a delayed block destruction on a timer, this is a good way to avoid for the player to go back to tiles that no longer exist.
Loopable environment block
An environment block should fit seamlessly onto the next, no matter how much variation it has. It is customary to have multiple variations of a block with options like left/right branches, but for the basic principle something like the following will work just fine. It’s a road with side walk tiles, and in my case 400 units in length. Any length will work, just make a note of it so that the next block can be spawned at the correct location later.
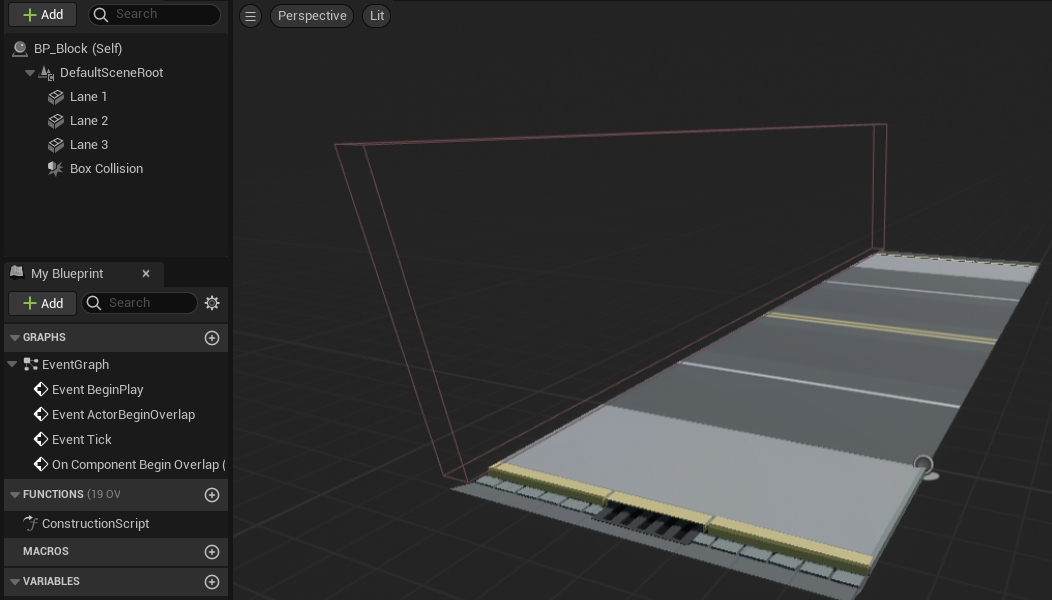
Notice the Box Collision at the front. We’ll use this to determine when it’s time to spawn the next block using the Begin Overlap event. We’ll leave the actual block spawning and tracking up to the Game Mode rather than this block class, but we can trigger the spawn event from it like this:

On overlap, we’ll make sure it is our player that’s colliding and not something else, then cast to our game mode and spawn the new block. Now we wait 2 seconds and destroy ourselves. That piece of road didn’t live long!
Initial blocks and spawn event
Meanwhile, our custom Game Mode class can be in charge of providing a number of starter blocks when the game starts. I’m using 10 in my Number of Blocks variable. That way, our player can stand and run on a good amount of tiles. A regular loop can take care of this. All these will disappear automatically as we run through the collision volumes.
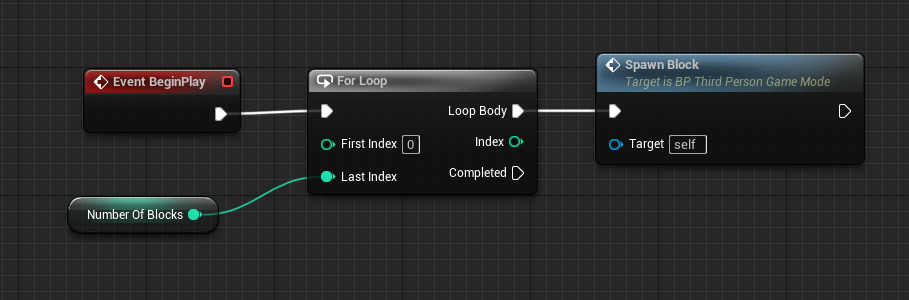
Here’s what the spawn event looks like. This is probably the most difficult to comprehend, yet super simple in its logic: we use an integer index called Last Block to keep track of how many blocks we’ve spawned. When it’s time to spawn the next block, we multiply that index by the length of our tile, then spawn it where the previous tile ends. Finally we increment the index ready for our next spawn.
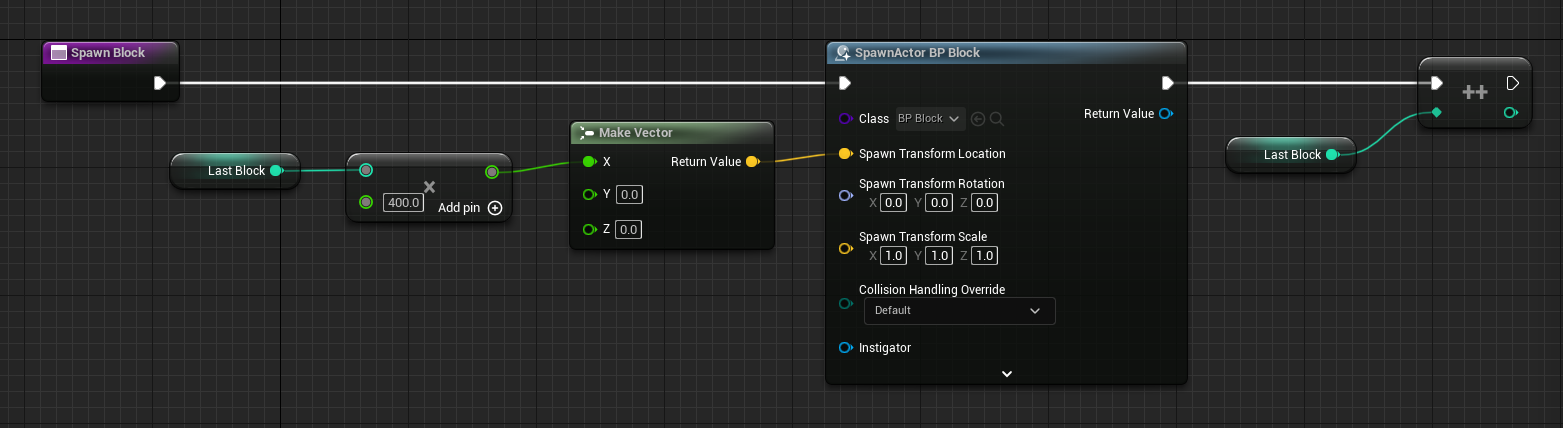
The two small bits to note here are that Spawn Actor from Class takes a Transform rather than a location. Right-click the pin to split the struct to break it into a location/rotation/scale values. Also note how the Last Block is an integer, but the multiplication node outputs a float. You can use an automatic conversion node for this instead, or right-click on the output pin and convert the output to float.
That’s the whole secret! To hide the tile spawning process, add a bit of fog in the distance. We can spruce this up with spawning a random tile variation, or even use multiple collision volumes on all sides of our tile and generate random environments as the player explores a level.