Any object in iClone can be attached to a Motion Path, whose position in turn can be animated with a percentage slider on the Timeline. This can be used to make lights, cameras as well as characters follow a path. If we apply an in-place motion to the character, it appears as if said figure is walking along the path.
Here’s what we need to do to make it happen:
- create a path and load a character
- pick the path on the character
- load an in-place animation
- set the animation percentage on the first and last frame
- optionally change the interpolation curve to linear
Let’s take a look at this step by step.
Creating a Motion Path
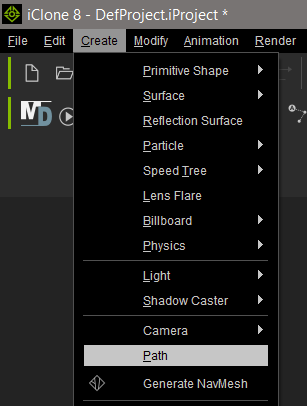
Head over to Create – Path, the click a point in the viewport to start drawing out the path. Keep clicking to add points to the path, and eventually double-click to end the path. We can also load pre-made paths from the content library (some of those are quite fancy).
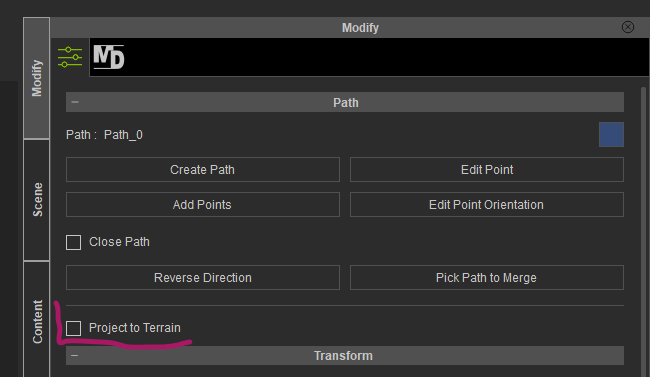
Paths can be created in three dimensional space, which is neat for cameras and lights. We can project paths to existing surfaces like uneven landscapes, or project uneven paths to flat surfaces. It’s done with a little tick box under Modify.
Binding the Character to our Motion Path
With our character selected, on the Modify Tab, scroll down and find the Path section. use the eye dropper tool to pick a starting point on the path and no matter where the figure was located, it will snap right to it.
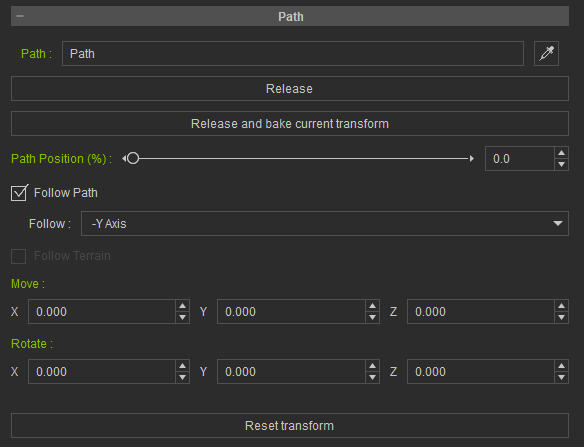
Note a couple of settings here. One is Path Position, then other one is Follow Path and the Follow Direction. The first will show where on the path our figure is currently located. If you’ve picked the first path point, this will read 0% – but you can pick any location on the path, and the further down you pick, the higher the percentage value will read. Make a mental note of it.
Follow Direction should be set to -Y for the character to face and move along the path forward, but it can be changed to whatever is necessary (Y would mean the character is facing the opposite way).
Animating the Character
Let’s apply a running or walking animation to our figure, make sure it’s in-place. We don’t want movement in it as we’ll attach that with the path animation now. Move the playhead to the last frame of your animation, then return to the Path Position value and set it to a higher value. This will set a keyframe and our figure will move forward to this spot.
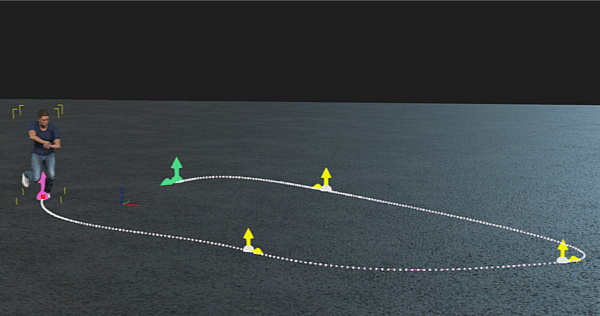
In my example, Kevin starts at 0% on frame 1, and ends at 100% on the last frame, thereby traversing the whole path. Without an animation applied, he would just slide in a static pose, but with an in-place animation, we’ll see him walking along our path. Super neat!
There’s just one last thing we have to change: currently, the character starts slow, speeds up, then slows down again towards the end. That isn’t helping out foot sliding issues, which are probably bad enough unless we teak the animating/path speed timing. To change this to linear, let’s take a closer look at our Timeline.
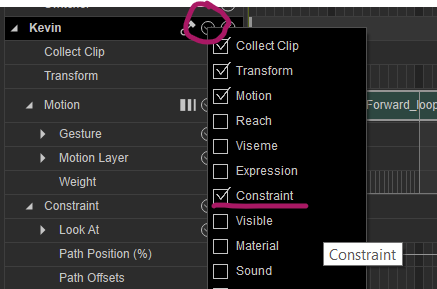
We need to open up the Constraint section of the Timeline, otherwise the keyframe set by the Path Position won’t show. Enable it, then find the keyframe at the end position and right-click on it (make sure to click on the actual keyframe, not the triangular green marker above it).
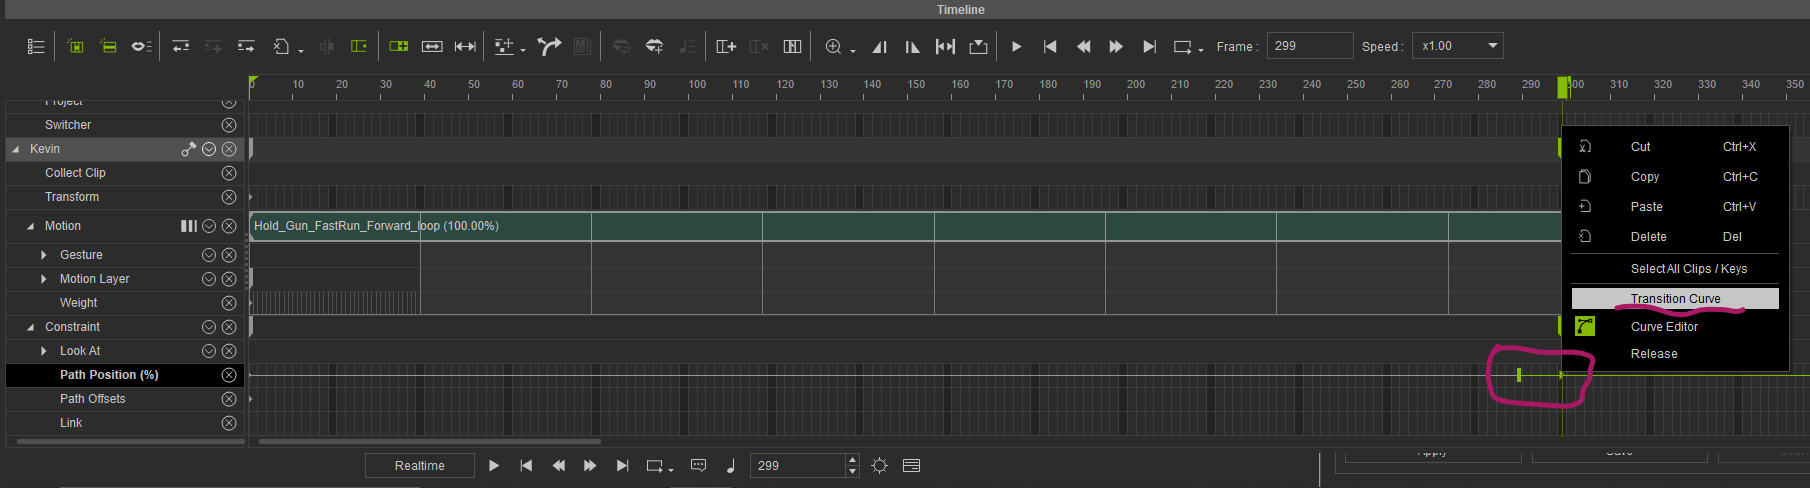
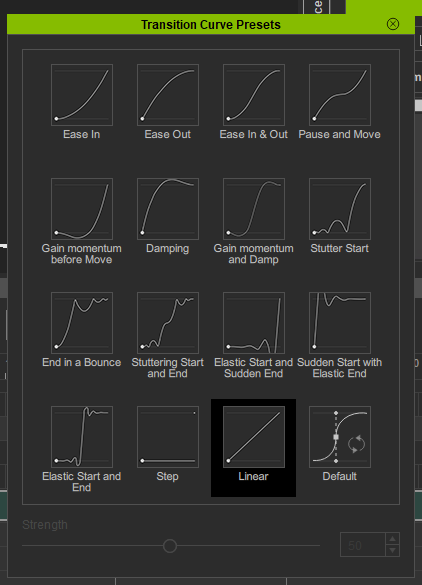
Choose Transition Curve, then pick Linear.
Hey presto – Kevin is walking along our path at a constant speed now. This is great! If you experience foot sliding, adjust the timing of the animation and/or the length of the path, then use Motion Correction to lock in his feet perfectly if necessary.