I’m using a live-retargeted CC character with regular locomotion in my project, using a standard combined skeletal mesh from Character Creator. I wanted to add a subtle facial animation to the character at runtime, something that could change depending on game play, without having to split off the head from the body. Thankfully there’s a way to do this in Unreal Engine, although it’s a little complicated. I’ve worked it out, and here’s how to do it. We need to
- create an Animation Montage for the expression
- add our animation to a custom slot
- use Layered Blend per Bone in our animation blueprint
- then queue the montage
Let’s take a look at this step by step.
Animation Montage
A montage lets us add various parameters to an animation, such as notifies and sections, as well as slots. These slots let us combine multiple animations into one object, then call what we need. For our example we’ll keep it simple use a single animation in a new slot.
Find the facial animation you want to use, then right-click on it and choose Create Animation Montage. Open it and create a new Slot Group (let’s call it “Facial”), and inside the group a new slot (let’s call it “Facial Slot”). This is done with the Anim Slot Manager, just in case it’s not open already at the bottom right, you can find it under Window.
Next switch to the Asset Browser (also at the bottom right) and drag the animation into the montage timeline. Line it up to start at the beginning, then change the slot from DefaultGroup.DefaultSlot to Facial.Facial Slot. UE has had a bug for about a decade in which the animation doesn’t seem to update in the viewport, but we can ignore that (or move the animation a little to make it play again).
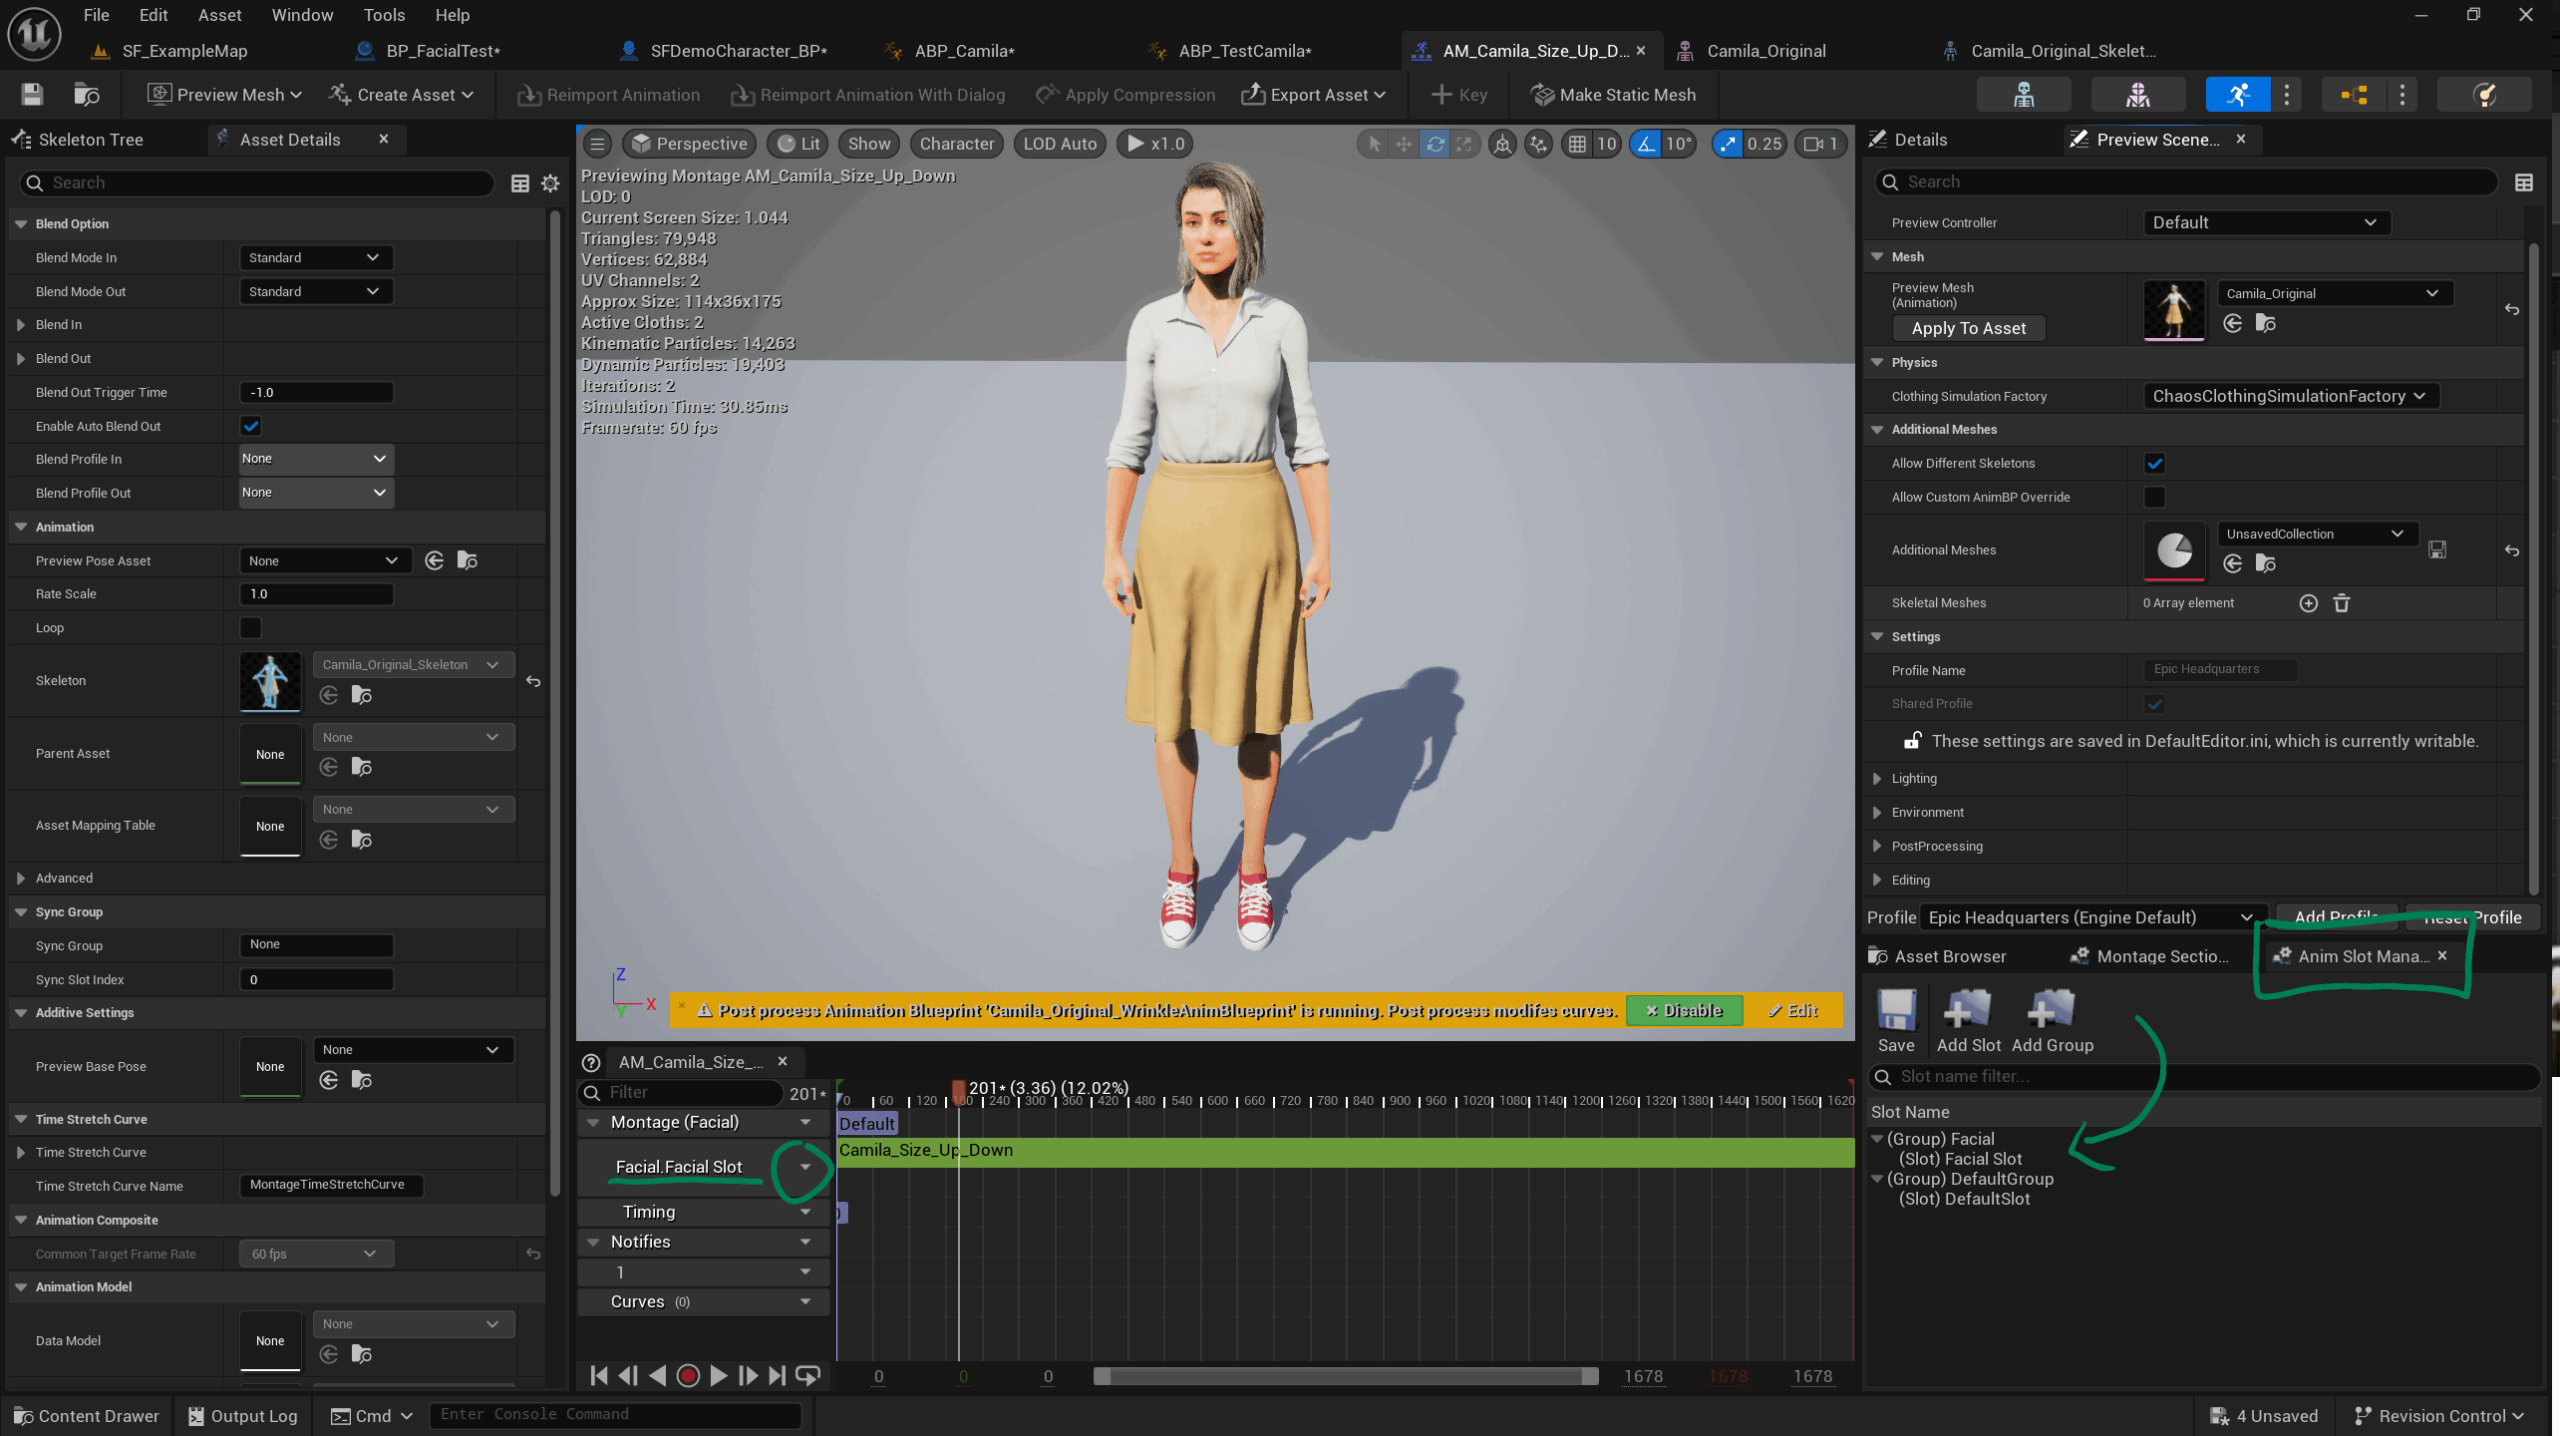
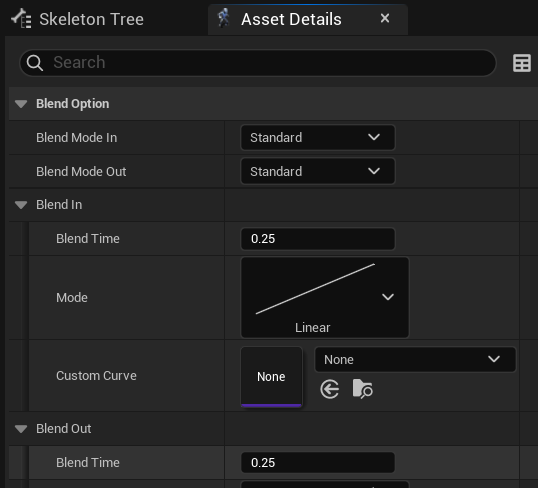
Something of note here is the section about Blend In and Blend Out timings on the Asset Details panel. Change these values to something higher or lower, depending what you need to play. A gun shooting montage might have to be played without a blend in time so that it happens immediately, while my facial animation will benefit from the default value or something longer.
Animation Blueprint
We need to add the slot information to our Animation Blueprint, and we need to tell UE what part of the body this animation should play on. We need two nodes for that, as shown below.
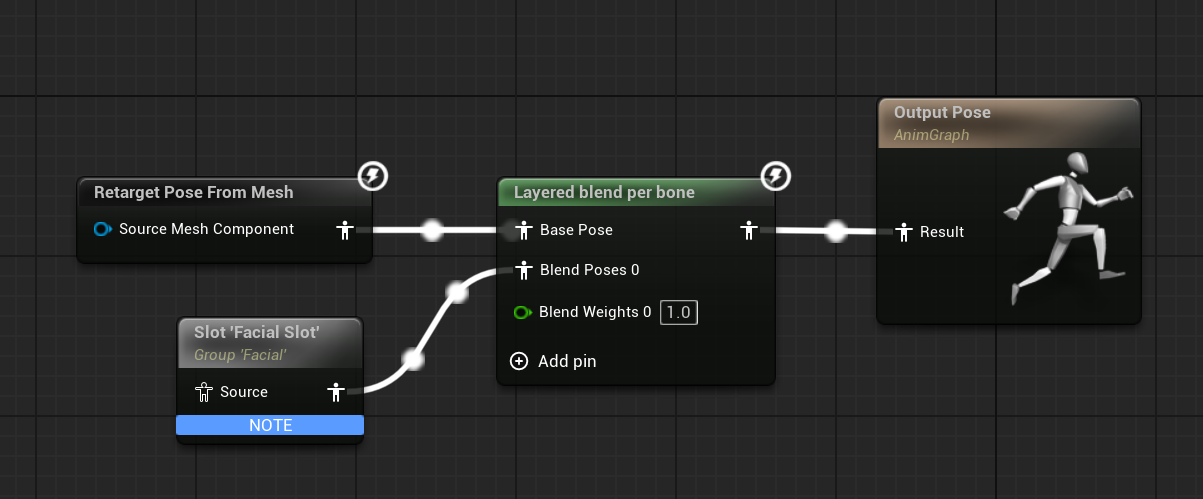
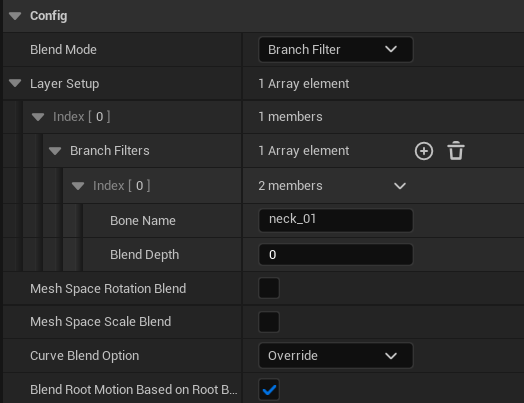
Layered Blend per Bone will keep playing the top animation, and replace anything from the selected bone upwards in the hierarchy with the bottom animation (which in turn comes from our Montage Slot). On the Layered Blend per Bone node, we need to setup a Branch Filter and add an item to the list, Under Bone Name we can specify the bone from which to replace the animation data (it’s typically head or neck, you’ll find out by investigating your skeleton).
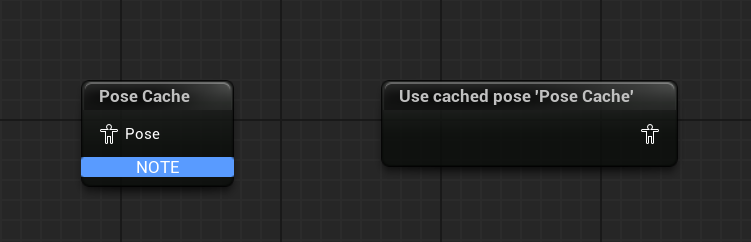
I’ve seen tutorials that recommend the pose to be cached, but haven’t needed this for my project. Just in case this comes back to haunt either of us, these are the nodes we can use (essentially cache the Retarget Pose from Mesh, then use the cache to feed the Layered Blend by Bone node instead of a direct wire).
Playing the Montage
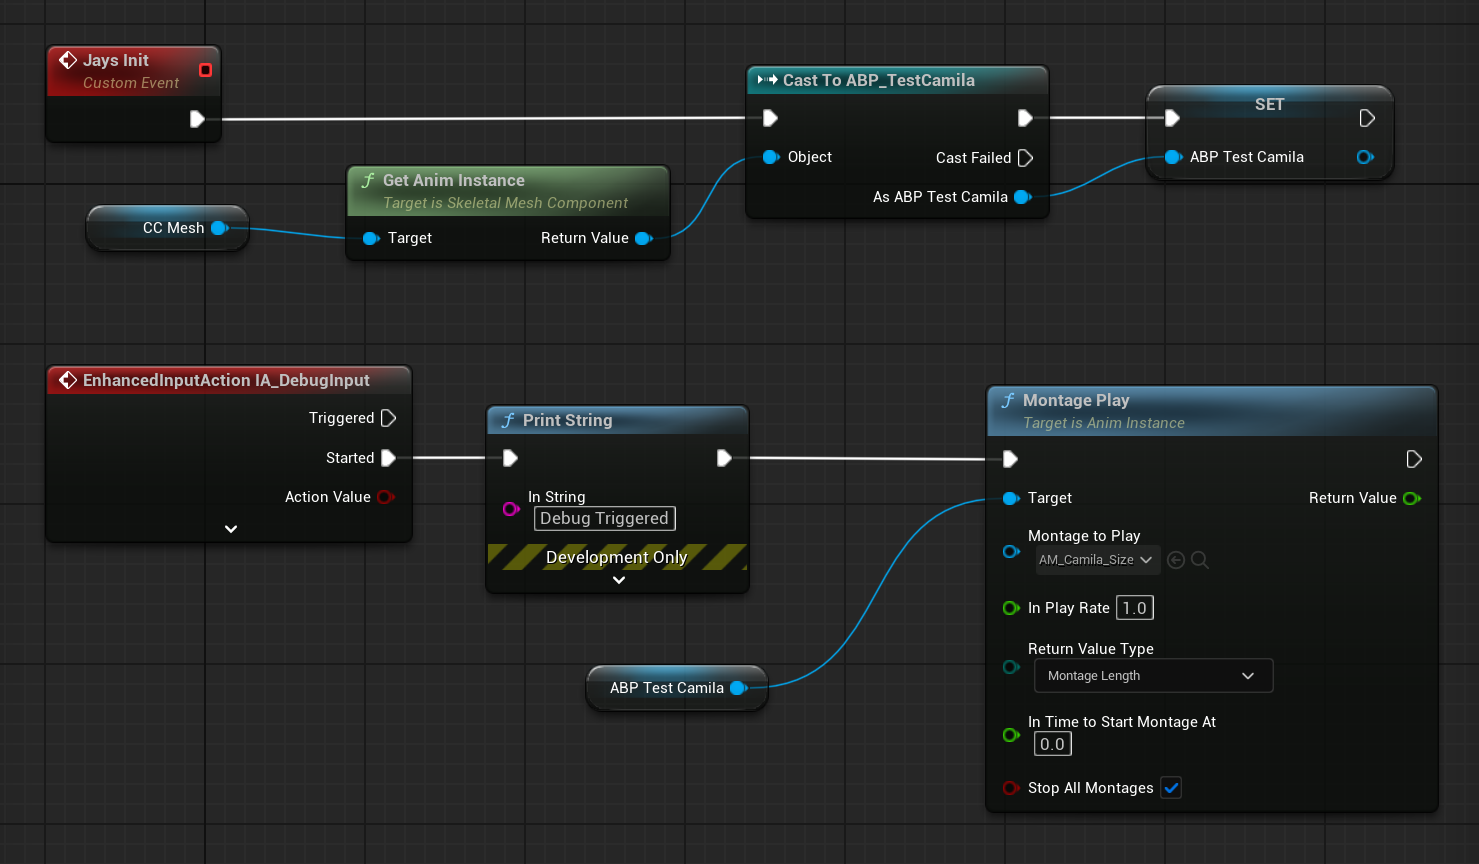
From our Player Controller or the Pawn, we can reference the skeletal player mesh, extract the Animation Blueprint from it, cast it and play the animation like this:
That’s it! A little convoluted, but works like a charm. Thanks to PrismaticDev and Stephen Ulibarri for putting me on the right track here.