Multi-pass rendering is a bit of an adventure in Unreal Engine. Here are some notes on how to get this working in Unreal Engine 5.5, using the layers system. Results are not quite what I had expected, but we can work around that. Let’s take a look at everything that’s involved.
Project Settings
In your Project Settings, under Rendering (or search for Alpha), enable Alpha Holdout. Without this, no transparency will be rendered. This setting has been greatly improved with the release of 5.5.
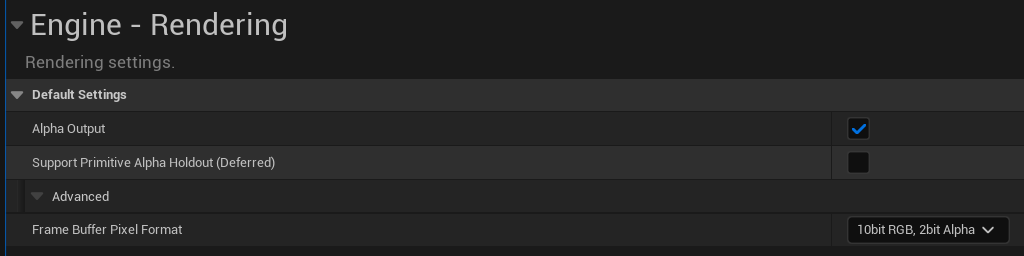
In UE 5.4 and below this setting looked slightly differently and was experimental. It also required an engine restart and shader re-compilation, so yey for that being fixed. For posterity, the setting used to be called “Linear Color Space”.
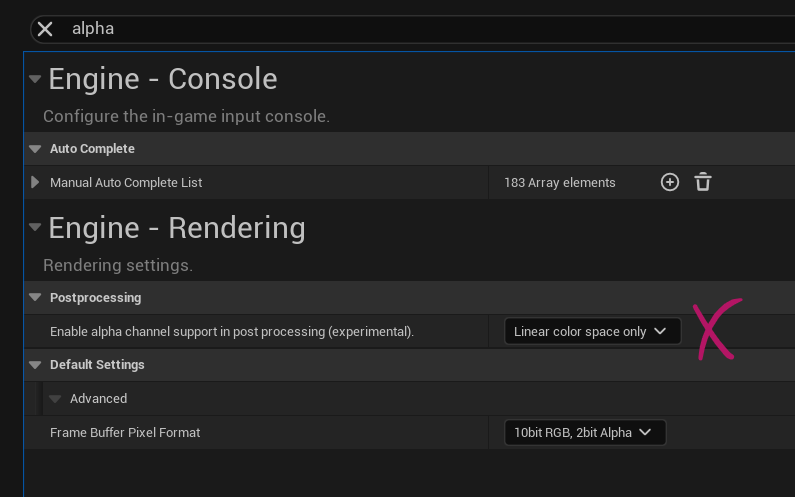
Another option was “through tonemapper”, but the tool tip suggested this would degrade the quality of your renders. No longer an issue since Unreal Engine 5.5.
Plugins
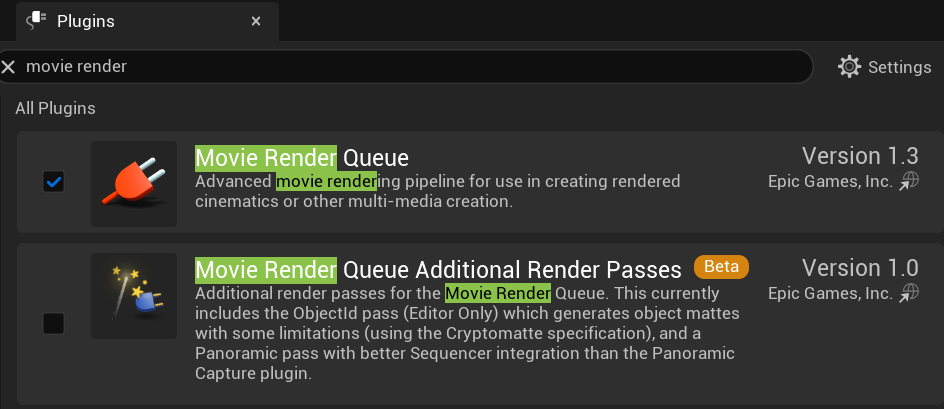
To make this work, we’ll need Movie Render Queue enabled. There is an option to use the additional render passes, but it’s not essential to render separate layers. It does however give alternate options we don’t get without.
Adding objects to Layers
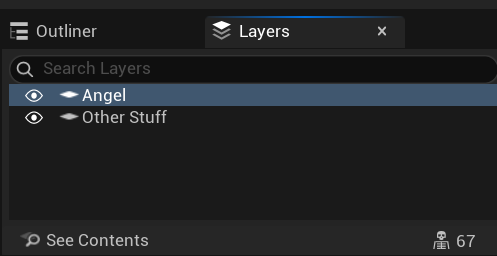
The Layers system is the key to separating a bunch of objects out so we can turn them into a separate pass. It’s an often overlooked feature in Unreal Engine and allows us to group objects together and make them all invisible while we work, without having to deal with Outliner organisation (although that is of course highly recommended to keep on top of busy scenes).
Open the Layers panel (under Window), then Select the objects you want to see on a separate layer in the viewport or Outliner. With this selection active, right-click in the Layers tab and choose “add selected objects to a new layer”.
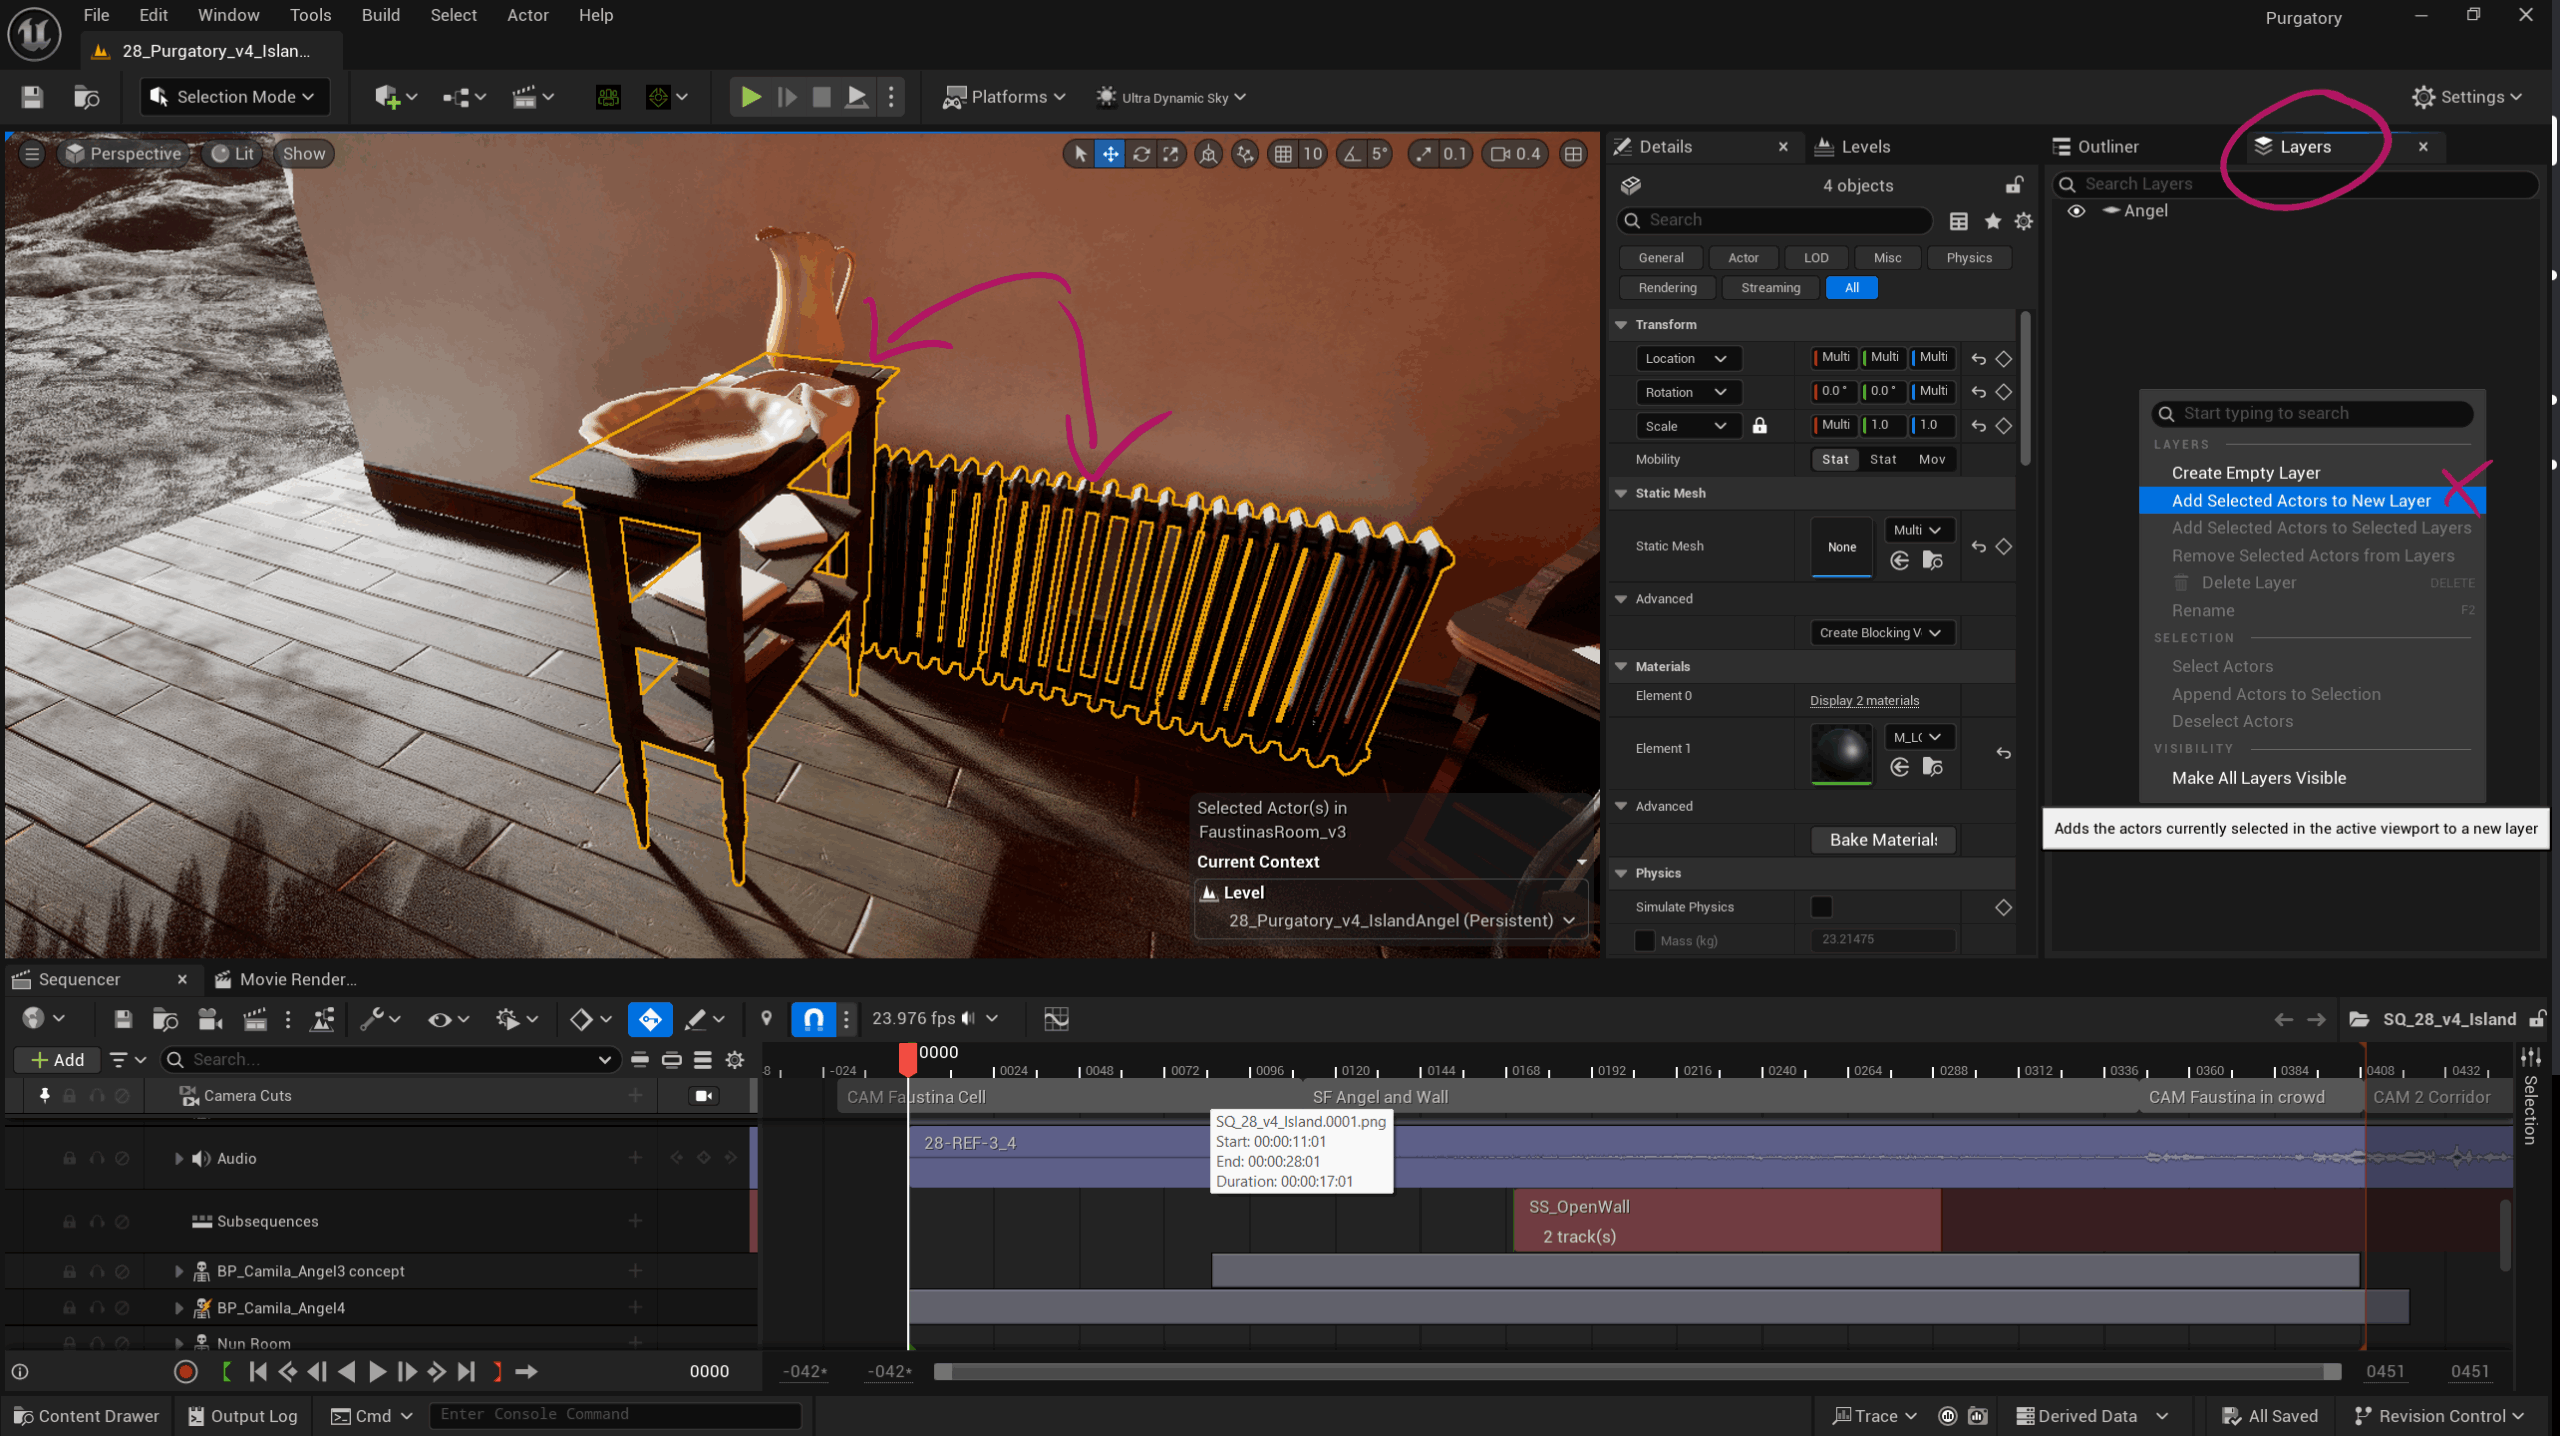
Objects can be in multiple layers at the same time, and whatever is on a layer can be rendered as a separate pass with MRQ. Layers can do other cool tricks too: we can make all objects temporarily invisible using the eyeball icon, or we can double-click a layer to select all items that are part of that layer.
We can also see how many objects are on a layer (bottom right), and we can select “see contents” to see all objects in a mini-outliner type view in the same window. From there it’s easy to make selections without having to wade through all objects in your level. Layers don’t get enough credit for how useful they can be.
Enabling Passes in MRQ
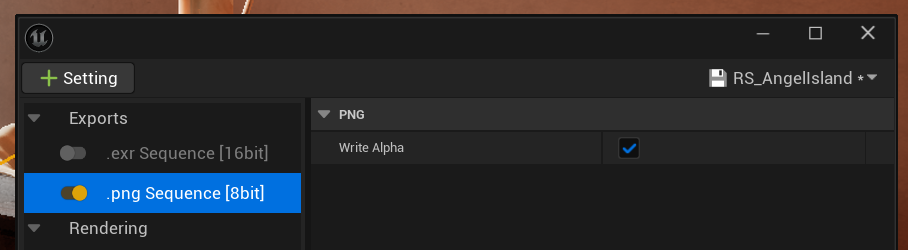
We need to render either PNGs or EXRs to get transparency out of Unreal Engine. While multiple passes are possible with JPGs, they won’t contain transparency for obvious reasons. For PNGs specifically, we’ll need to enable “write alpha” for transparency to work (EXRs do this automatically).
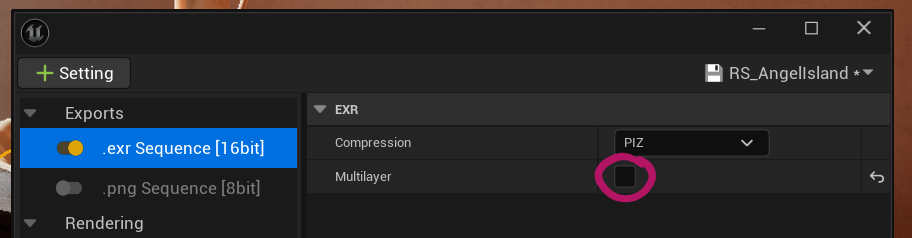
This may seem counter-intuitive (like may Unreal Engine features), but you may want to disable multi pass rendering when working with EXRs. Ideally we’d have one file with multiple layers, each of which makes up a render pass. However, depending on the compositing software you use, those EXR layers may not show up. Nuke likes them, but Photoshop does not (or rather, not always).
With this option disabled, UE will render a separate sequence for each pass, which I find a little easier to handle and organise. Probably a good idea to test what works best for your workflow.
To render a Layer, head over to the Deferred Rendering section and add a layer to the Actor Layers array. You can add as many as you like, and UE is kind enough to auto-append the layer name upon rendering if you do nothing else. The defaults will work and will render a combined version of your scene and a separate pass for each layer.

If you don’t need the combined pass, feel free to disable it. This will cut down on render time. You can also enable the “add default layer” option, which will add everything that is not part of a layer to a pass without it. So technically the “Default Layer” plus any custom layer combined will become the “main pass”.
Tragically though, the Default Layer will contain a hole where your custom layer content is, which makes it not entirely useful for compositing. You’re better off rendering a main pass with your layer objects hidden, then another pass just with your layered objects and combine that. It’s personal preference though.
Layers vs Data Layers
If you’re wondering what the difference between Layers and Data Layers is, let me briefly go into this here. Unreal Engine 5.1 has introduced the concept of World Partitions and related features, which is a direct replacement for Levels. So your scenes either use Levels or World Partitions. In smaller scenes the two don’t make a difference, but in larger scenes (think open world games), World Partitions make more sense because they let UE stream smaller tiles as they are needed.
Layers are to Levels what Data Layers are to World Partitions. I prefer Levels for cinematics, however if your scene uses World Partitions, then Data Layers replace Layers. Hence we have both available in MRQ.
Anti Aliasing
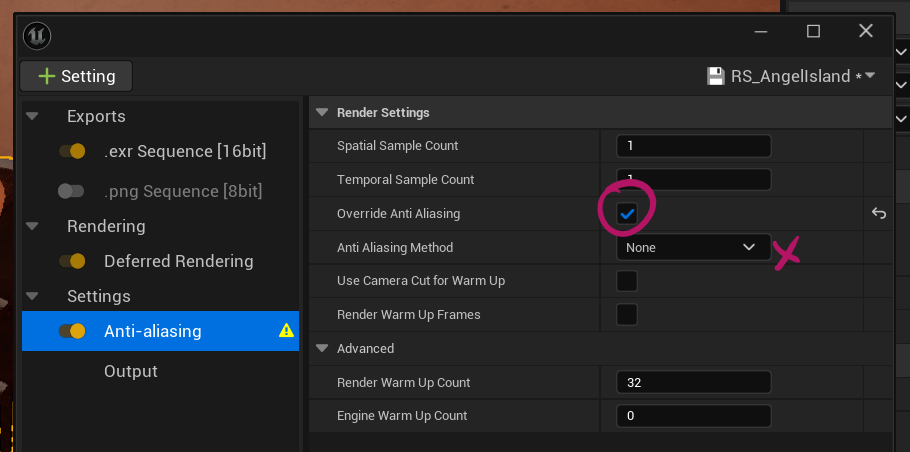
Typically you want to enable Anti Aliasing with at least 8 sample counts for combined renders. However, this seems to lead to bad results for multi-pass renders. Hence (and sadly) we’ll have to switch this off. By that I mean, override with “none” and set the samples to 1. Any other settings will give you black rather than transparency.
You’ll get a little warning along the lines of “what are you thinking”, but it can be safely ignored.
Rendering
Last but not least, we need to render our subsequence out. The Output section will let us specify an output directory, size and custom render range among several other things. We can even override the frame rate here if we want.
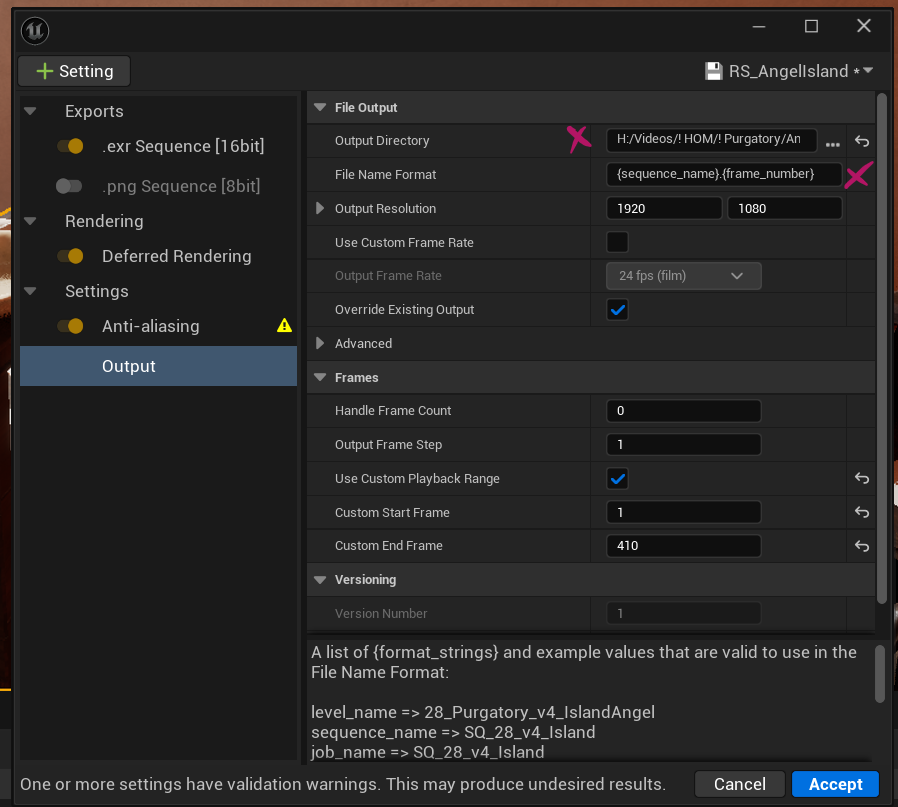
Take note of the File Format field. This will let us specify how each frame is rendered. By default it’ll include this:
- {sequence_name}.{frame_number}
It will result in a sequence such as this, all in the same folder:
- SQ_MySceneLayer.0001.png
- SQ_MySceneLayer.0002.png
- SQ_MySceneLayer.0003.png
While this works, the layer name is automatically appended here. We can add other options to this list and separate each layer out into its own folder by using this:
- {render_pass}/{sequence_name}.{frame_number}
The parameter in brackets is called a Token, and there are qutie a few of them. This link shows all available Tokens in MRQ.
To render your sequence out, hit Accept in the settings window, then find the two options at the bottom of the MRW window. It shows two render buttons.
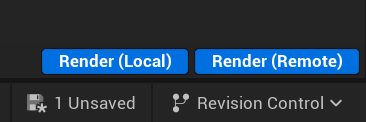
Render Local will use the currently open project, switch it into cinematic mode and start rendering. You’ll see a preview window doing its thing and can keep an eye on UE while it’s doing it, but the app will be blocked from doing other things while it’s busy rendering. It sounds crazy, but this is currently the only option that works reliably.
Render Remote will leave the current project untouched and open another instance of Unreal Engine from the command line and start rendering. This is clearly a good idea because it doesn’t block the current project (even though “remote” suggests it renders on a computer other than the one you’re using, but that’s not the case by default – even though it can be configured that way).
Sadly though, this option does not produce usable or reliable multi-pass renders and hence should be avoided. It’s been broken for years and EPIC clearly have man other (half implemented) ideas and have probably forgotten to fix this. So yeah, do NOT use the Render Remote option.
That’s it for now! I hope this points you in the right direction for multi pass renders in Unreal Engine. I’ll update this article as I’ll learn more.
Further Reading
- https://dev.epicgames.com/documentation/en-us/unreal-engine/cinematic-rendering-image-quality-settings-in-unreal-engine
- https://dev.epicgames.com/documentation/en-us/unreal-engine/cinematic-rendering-export-formats-in-unreal-engine
- https://dev.epicgames.com/documentation/en-us/unreal-engine/movie-render-queue?application_version=4.27