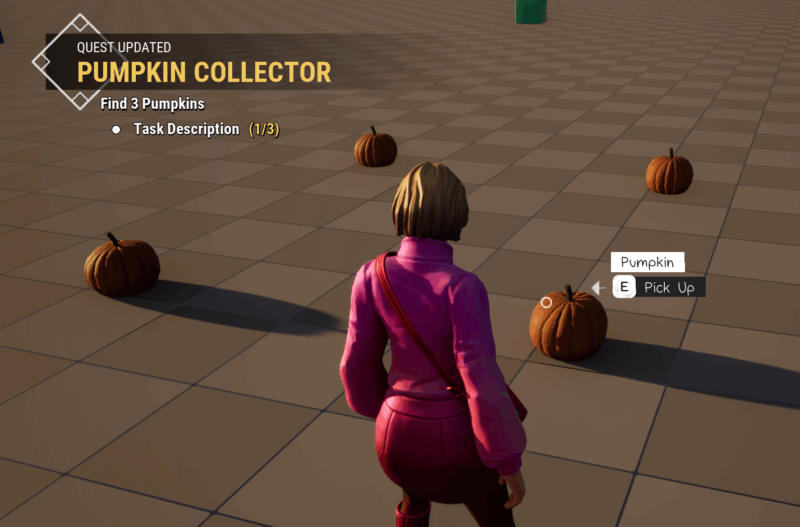
Narrative Tales and Pro have some basic tasks built-in that can be used as part of the Quest System, such as “reach location”, “play dialogue” and of course completing/failing quests. We can design our own custom tasks for things like collecting items, but there are plenty of pitfalls to get it right. Let’s take a look how to do this step by step.
Creating a Task
To create a new custom task, right-click in the content browser and choose Narrative – Task. There are actually two to choose from: the regular Task (which is the one we’re using, a Blueprint Task that lets us execute custom logic), as well as a Data Task. Let’s not worry about the latter though. I’ll call my task BPT_FindItem and use it as part of a fetch quest.

Open it up and populate the Class Settings so that it appears nicely labelled when we use it in our Quest. Give it a name under Blueprint Display Name and a description. Also note the Blueprint Category here: this will be the section in the list of tasks and makes it easy to find when we’re setting up our Quest.

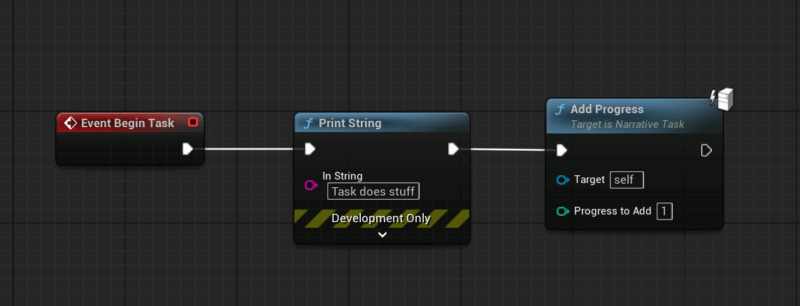
In the Task Event Graph, let’s override the Event Begin Task. If you’re familiar with AI Tasks, this will seem very familiar. At a minimum, a Task needs to begin and add progress so it can report back to its owner (the Quest). We’ll flesh this out in a moment. For now, let’s setup a Fetch Quest so this makes a little more sense.
Setting up a Custom Location
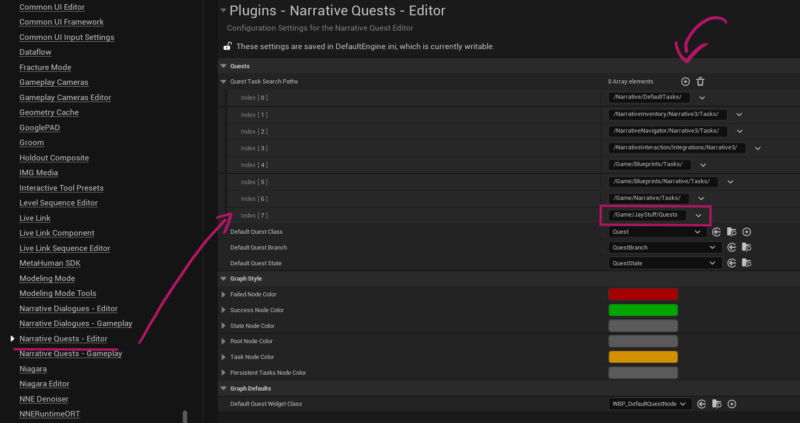
For our Custom Task to show up in the list of Quest Nodes, we need to tell Narrative where to look for custom tasks. This is coded for performance reasons so that Narrative won’t have to search through potentially thousands of folders and files. Head over to
- Edit – Project Settings
- Plugins
- Narrative Quests – Editor
Open the Quest Task Search Path and add an entry to the array, then paste your Tasks directory (mine for example is in /Game/JayStuff/Quests).
Creating our Fetch Quest
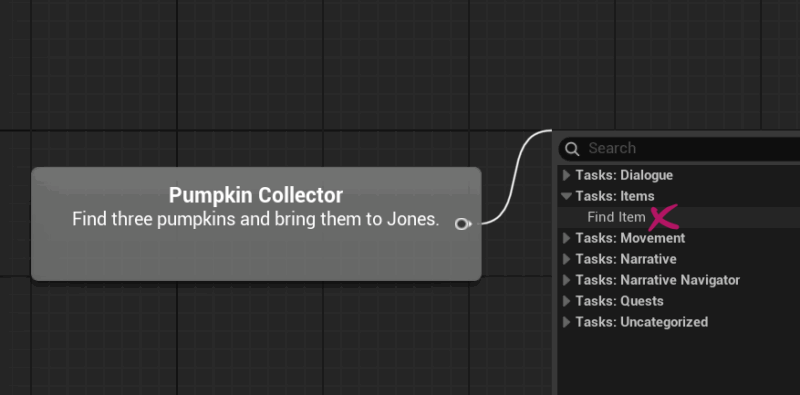
I’ll have my player collect a bunch of pumpkins, so I’ll create a new Quest by right-clicking in the Content Browser, then choose Narrative – Quest, give it a name and a description. In the Quest Graph, I’ll drag out a new node and sure enough under Tasks: Items I’ll see my Find Item task. It’s there because of the “items” category we’ve setup earlier (without it, it would just have its Blueprint name under “uncategorized”).
I want my player to find 3 pumpkins, so I’ll specify the Required Quantity. I can also give my task a description under Details. Lastly I’ll add a “succeed quest” node to the end to finish the quest. While this will work, it won’t do anything yet because we haven’t coded the task logic yet. Let’s do that next.

Giving our Task something to do
We want our Task to report feedback when the correct item has been added to our inventory. Details will depend on your specific project, but the easiest way to have our task react when something is added to our inventory is by way of an Event Dispatcher. I’m using Story Framework and have added one right after the Add Item to Inventory code (in SFInventoryManager_AC):
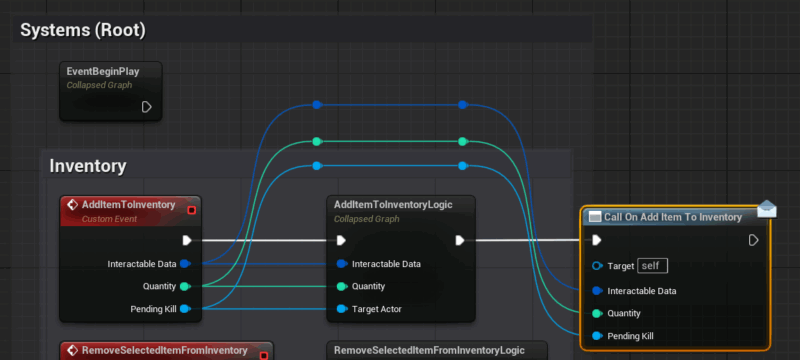
This means than whenever something is added, I can bind an event to On Add Item to Inventory and check if the item was indeed a pumpkin. If so, we’ll tell our Task to Add Progress, which in turn will inform our Quest about the quantity added.
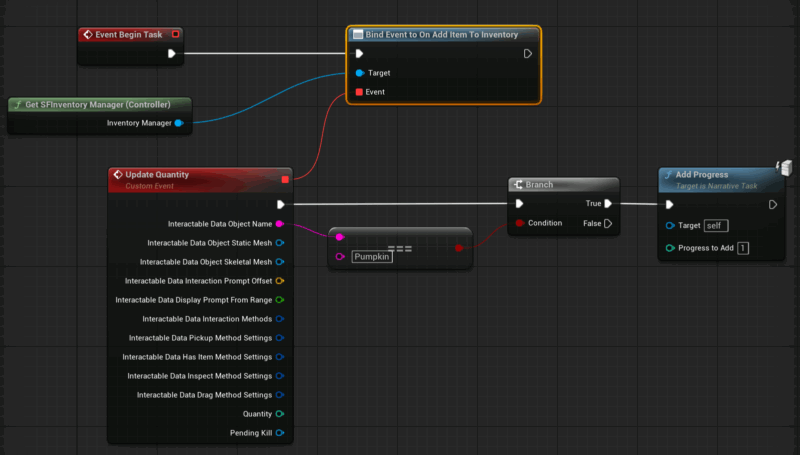
To keep this task more versatile, we can pass variables from the Quest into the Task. Instead of hard-coding “Pumpkin”, I can instead use a string and re-use the task for other fetch quests.
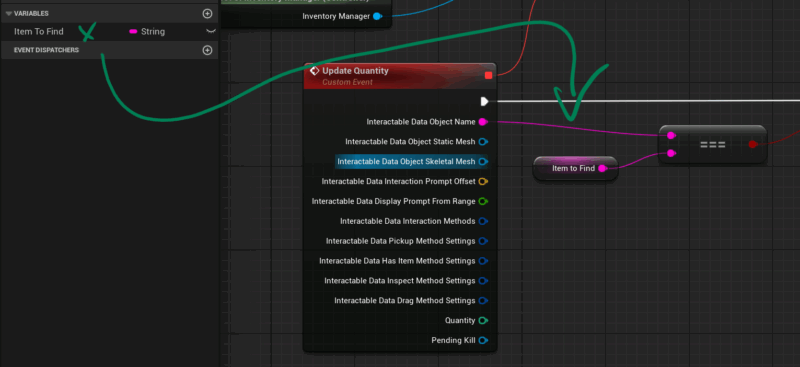
Then from the Quest, I can pass in a value.

Edge Case: handling found items before the Quests begins
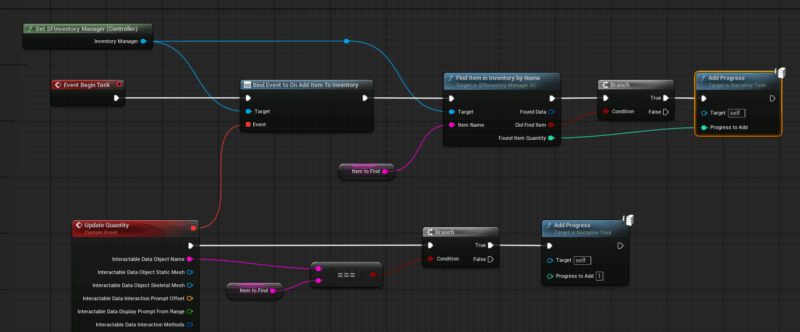
We need to add a little more logic just in case the player has items in their inventory before the quest begins. Right now the task does not check this, so it will wait for three items to be collected, however they may no longer exist in the world.
To implement this, we’ll check if the item to be found is already in inventory, how many there are, and add progress for each one of them. Again this will depend on how your project handles inventory, but sticking with my Story Framework example, we can do something like this:
That’s all I have for now! Reuben explains this and more in this video.