
I wanted to add a character to a GASP project that was made up of multiple pieces using the Character Builder Component. I didn’t quite know how to handle this at first, but thanks to the vendor and EPIC’s documentation I could make it work. Before I forget, here’s how that worked.
For reference I’m using the Jun Stylized Modular character by Lab3 Studio in Unreal Engine 5.5. Here’s how I’ve made her work with GASP.
Live Retargeting Setup
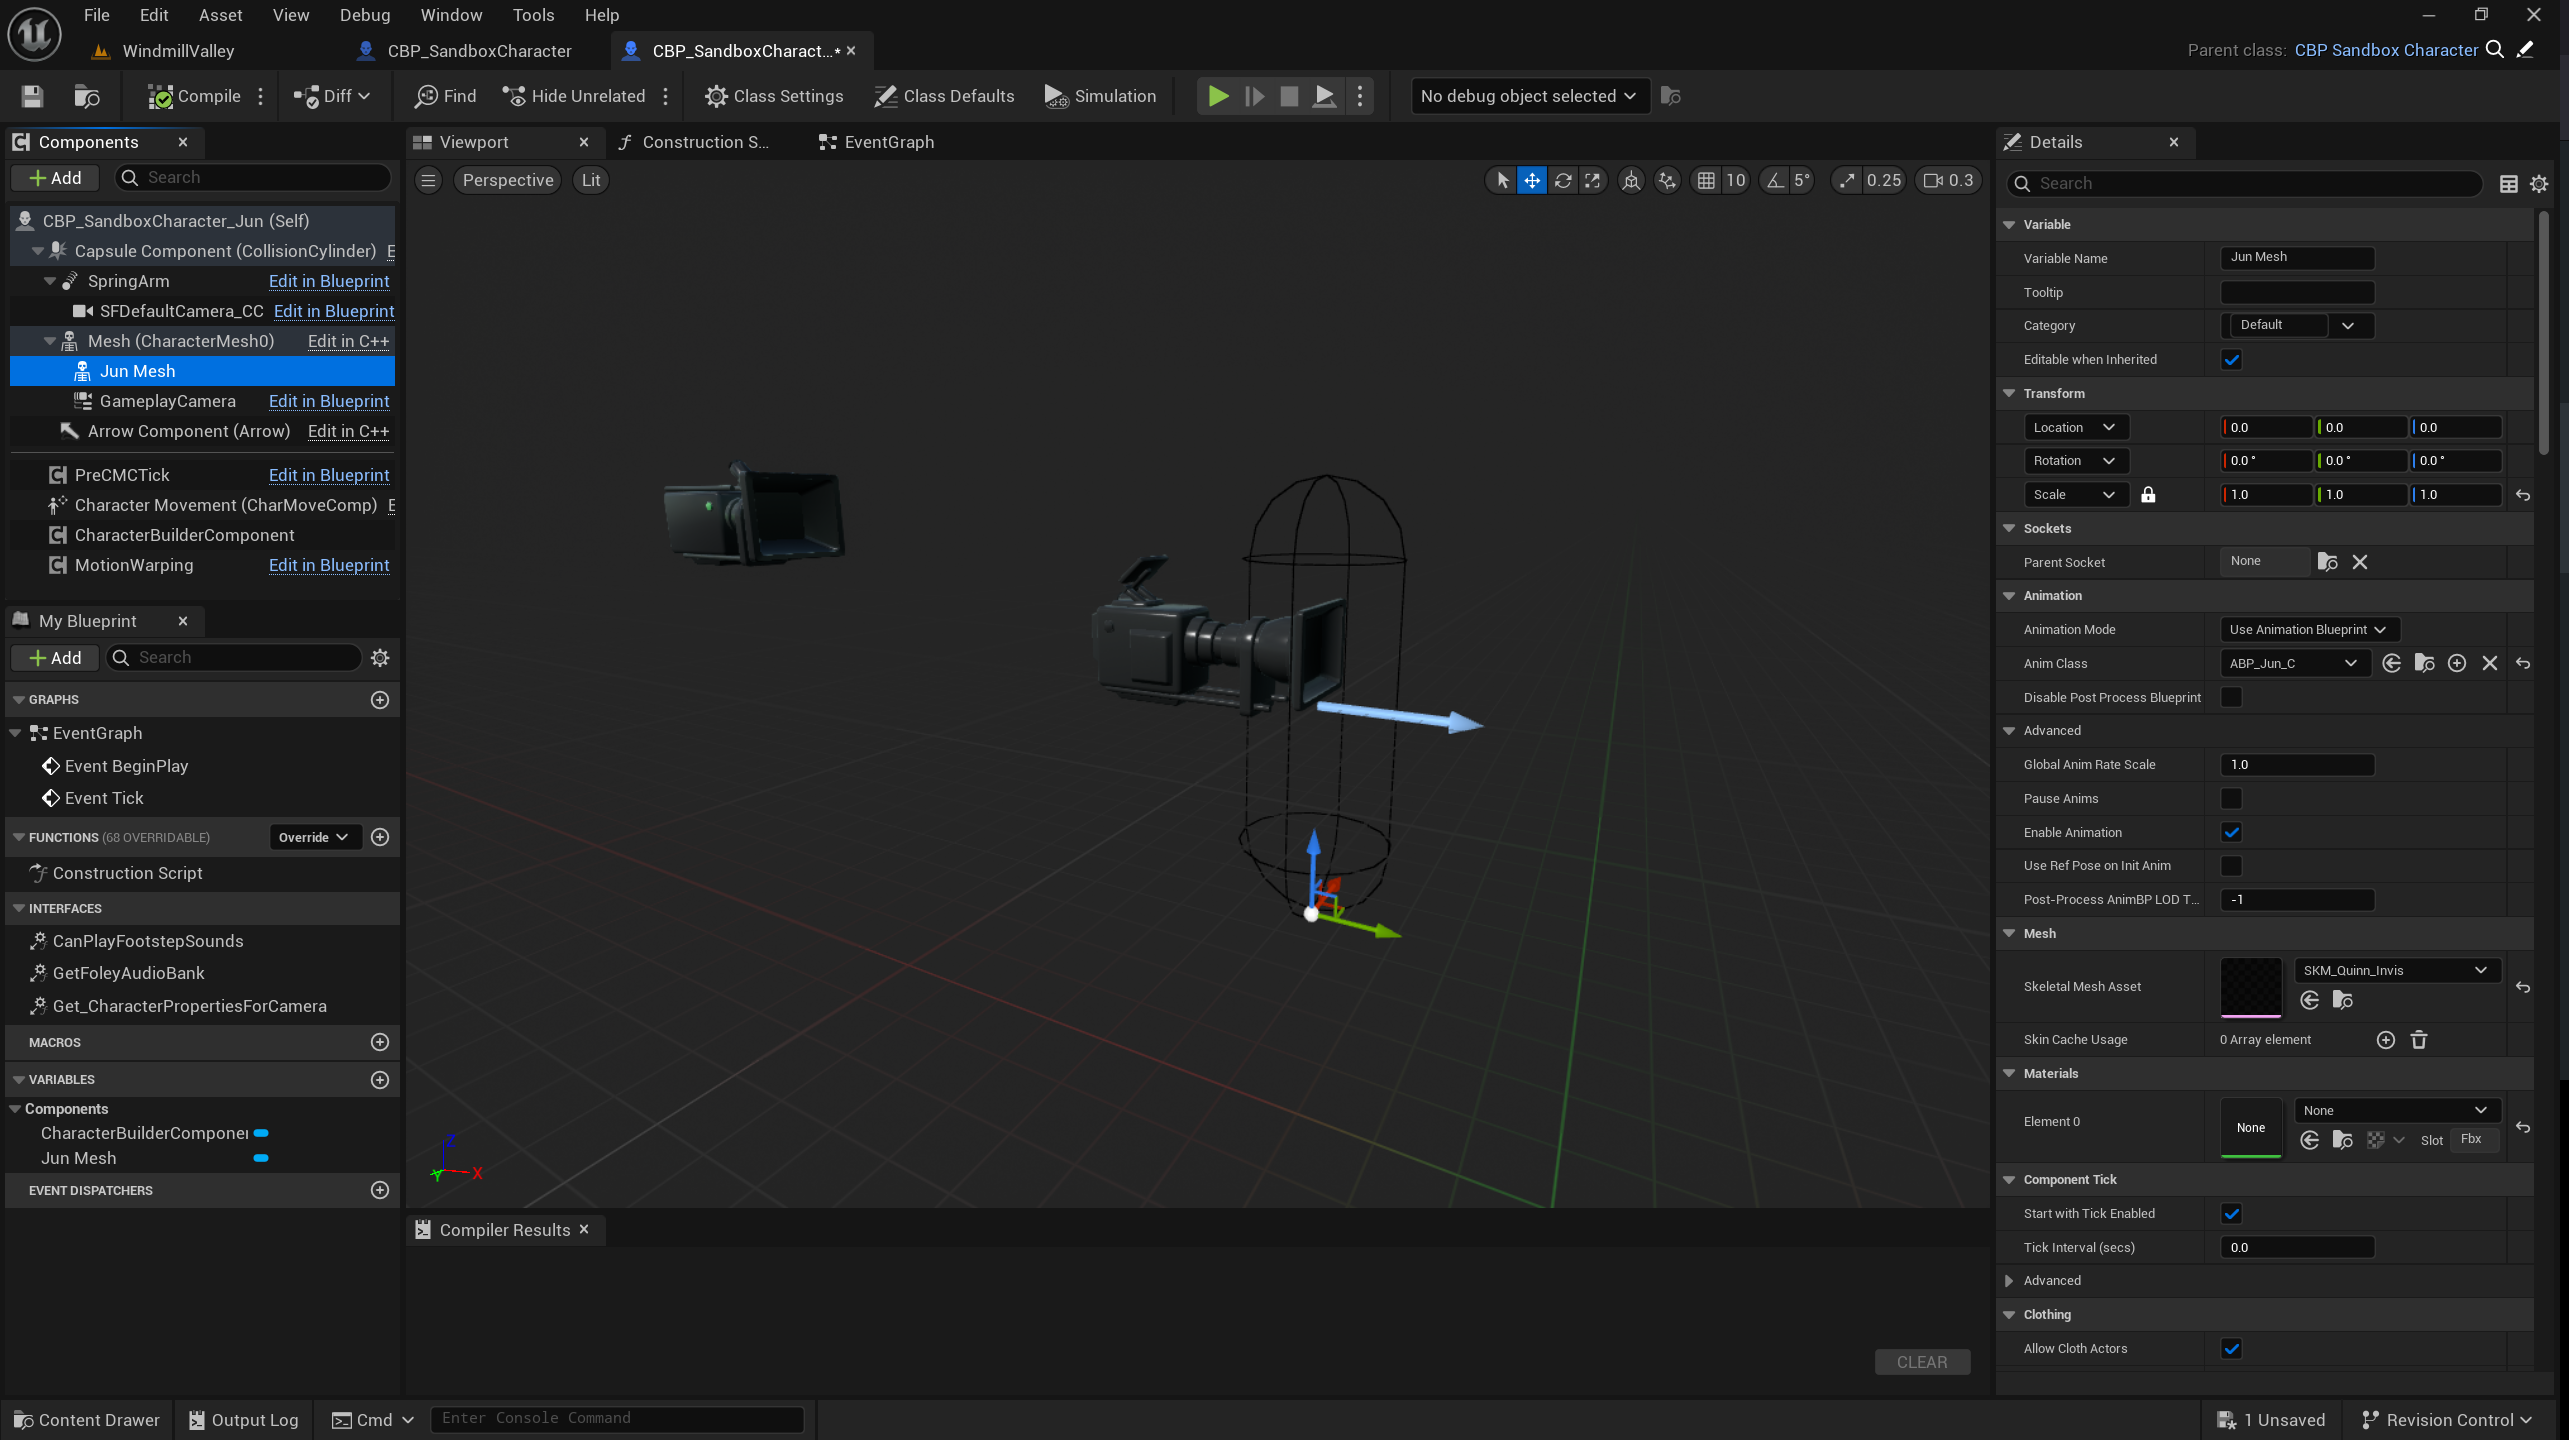
The first thing I did was to subclass the CBP_SanboxCharatcer Blueprint. That way I can make my changes without ruining the working GASP character. We need an invisible non-modular character as Live Retargeting target so that the source can drive it. Thankfully Jun comes with an invisible Quinn skeleton that that I could use, but if yours does not, then a cohesive version of your modular character will work just as well.
While you can’t see anything in the viewport (the target mesh being invisible and all), here’s what my setup looks like (click to enlarge).
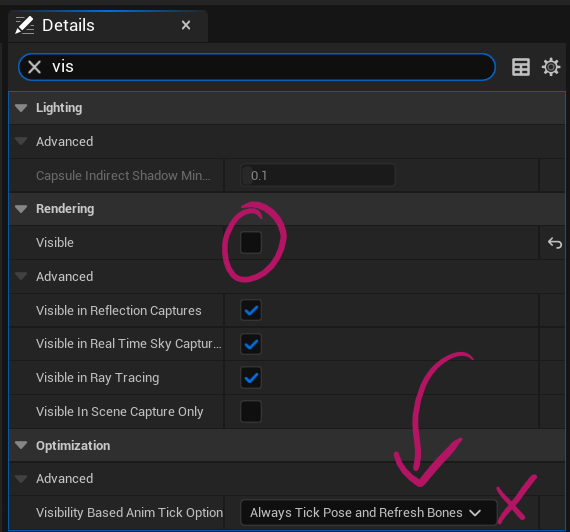
For the source mesh (just called Mesh here), make sure to set it to invisible and adjust the Visibility Based Anim Tick Option to “Always Tick and Refresh Bones”, otherwise the target skeleton won’t be driven properly.
You’ll also need a retargeter of course, but I’m assuming here you know how live retargeting works already (if not, I have several videos on my channel that explain it, one of which is this one).
Modular Character Setup
Next we’ll load the components of our character at Begin Play in our subclass. I’ve adapted this code from the example that came with Jun, with the all important addition of the parent call to Begin Play (super important in GASP).
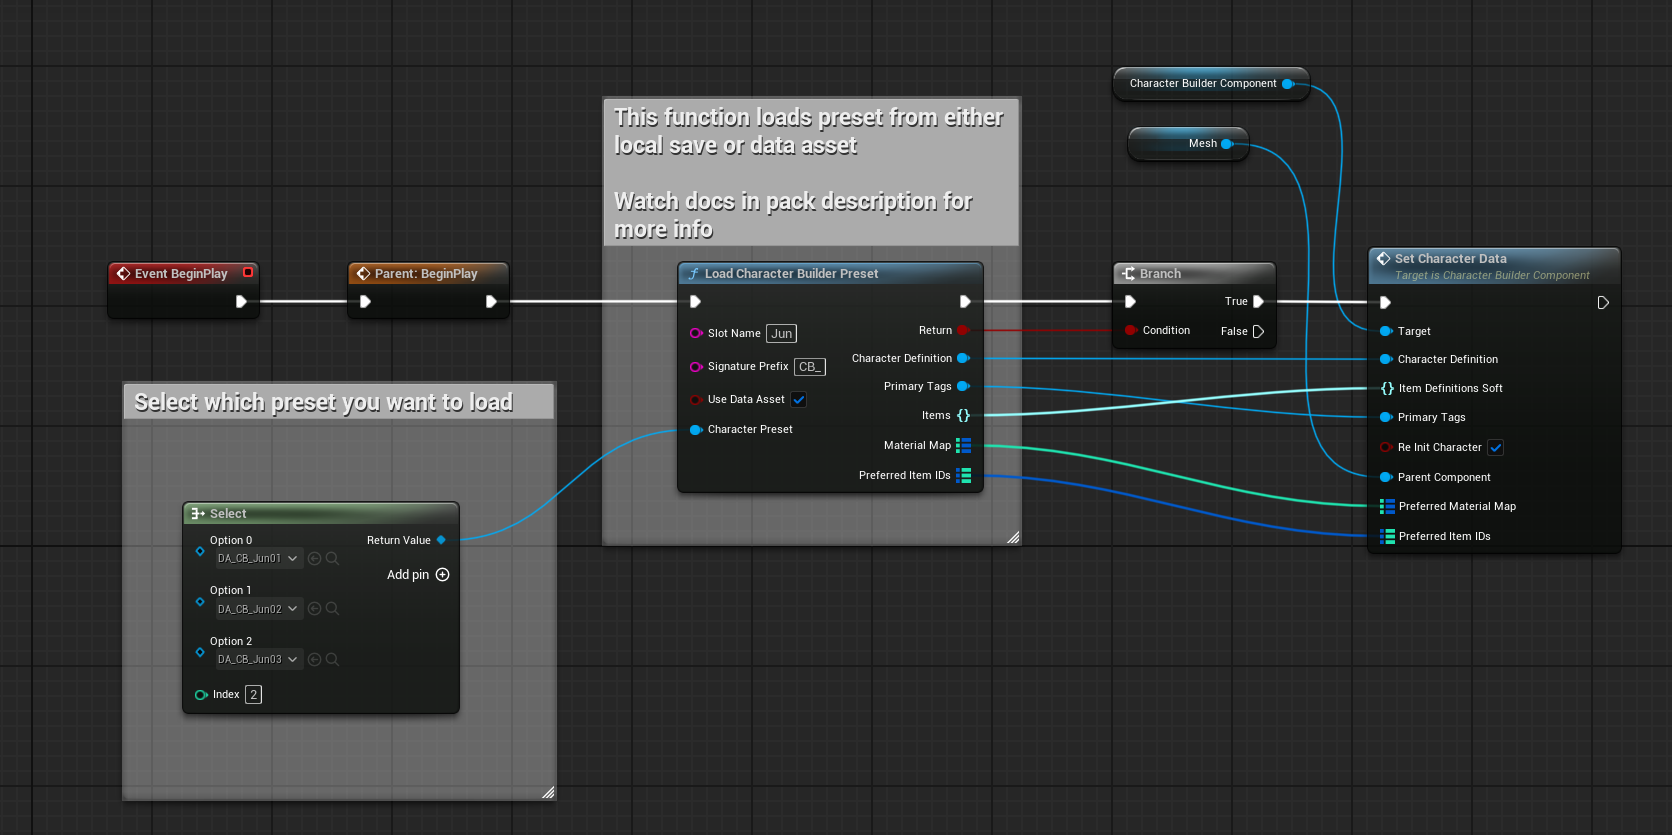
Here we essentially use the Character Builder Preset, using pre-defined values from a select node. Feel free to pick whatever preset is needed, then set the Character Data on your mesh with a reference to the Character Builder component. These values can be changed at runtime too, so if you want your character to change outfits, that’s possible with the same logic.
Note than when the game loads for the first time, it’ll take a few seconds for the character to become visible. In a packaged game we need a delay for account for this or a basic check of the mesh is valid.
Defining Meshes and Materials
The components themselves are stored in Data Asset files, each of which defines the tags per slot that the character should be made up from. Thanksfully this is already setup for my Jun character, but it helps to know where what is in case you want to override it or even build your own modular characters from scratch. Here’s an example of everything that defines our character. This would be one of the Character Presets.
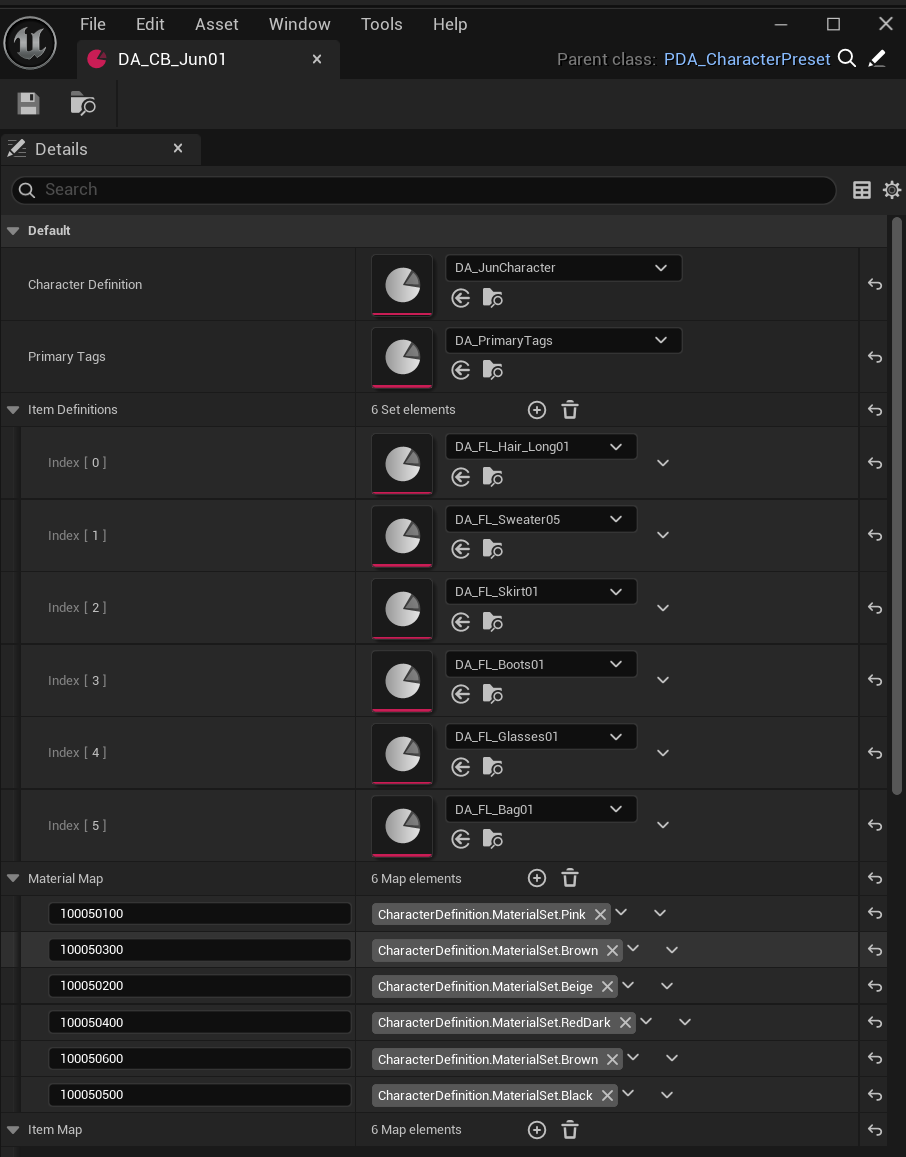
Note the material maps at the bottom, defining what each component should look like. So in addition to say “Hair Long”, we can also define what material should be used by tag (Pink in the case of our hair).
Below this is defined what type of component we use.

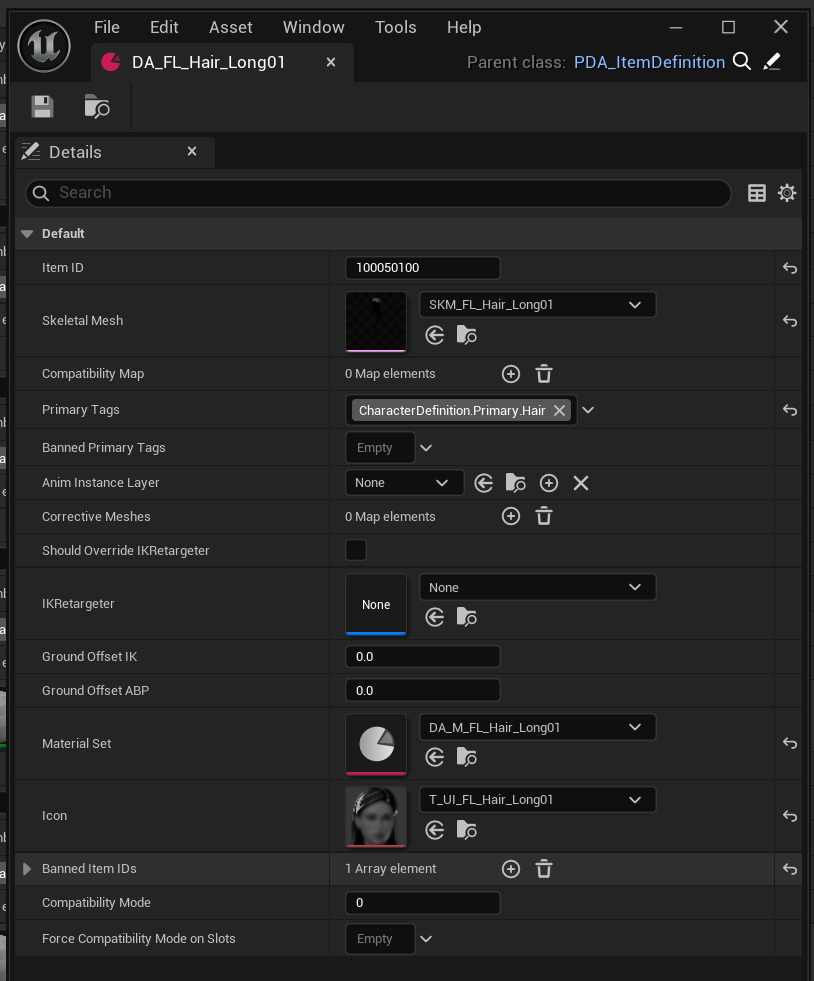
Drilling deeper into the hair as an example, it too is defined with a Data Asset. Here we set the exact mesh, what type this mesh is (Primary.Hair) and even what material/icon combo we want it to be displayed as. This can be pulled in at runtime in a character switcher for example.
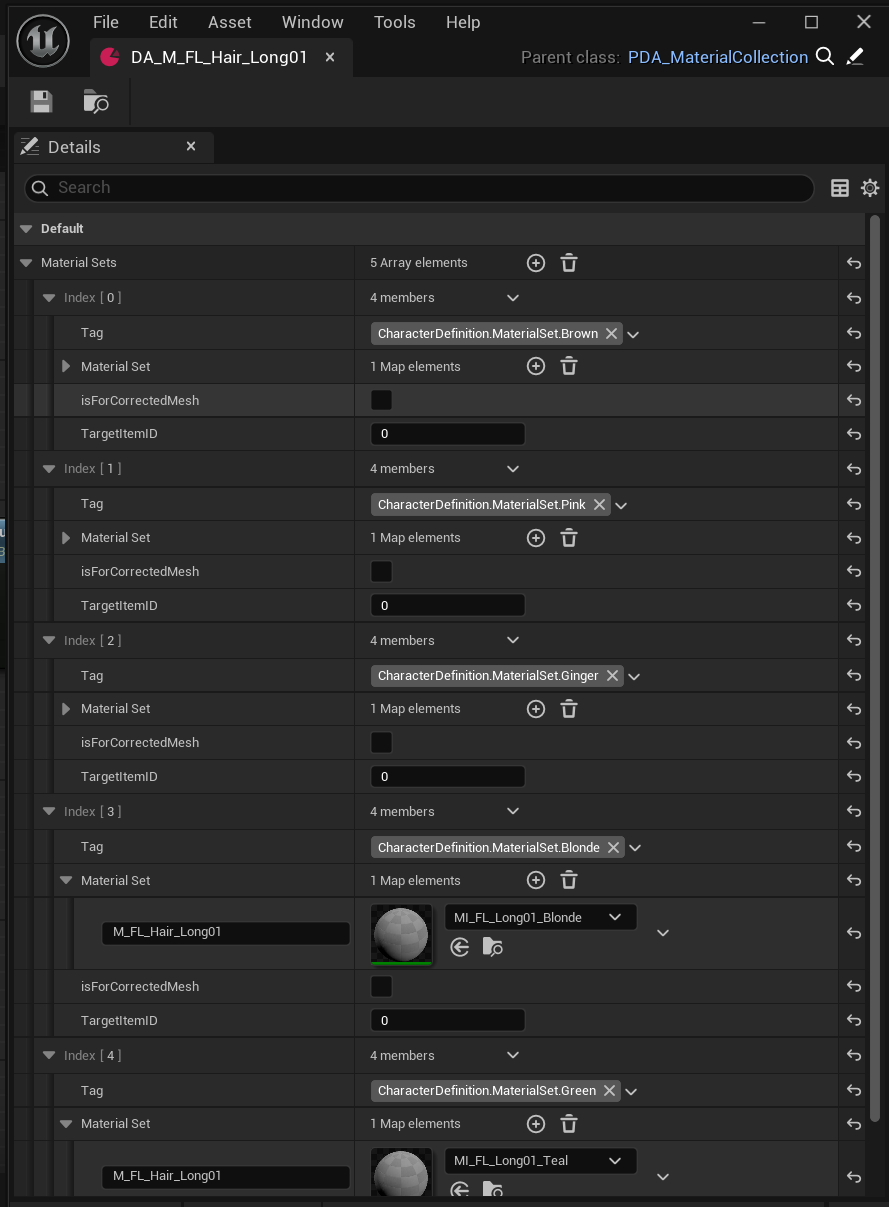
And finally, if we wanted to define which material should be used for each colour, we can take a look at yet another Data Asset that sets the materials. This is where we define a tag/material relationship.
And that’s all there was to it! I knew nothing about using modular characters when I tried this out, and even less about how to make it work for GASP projects, but it was easier than I had expected.