Everyone loves a good UI change for absolutely no reason, and the total waste of time that goes with finding where your everyday features have been hidden. Because EPIC can’t be asked to tell us what’s moved where, I thought I’ll compile a list for us so we can sleep a little easier at night. It’s a work in progress, and it’s in no particular order.
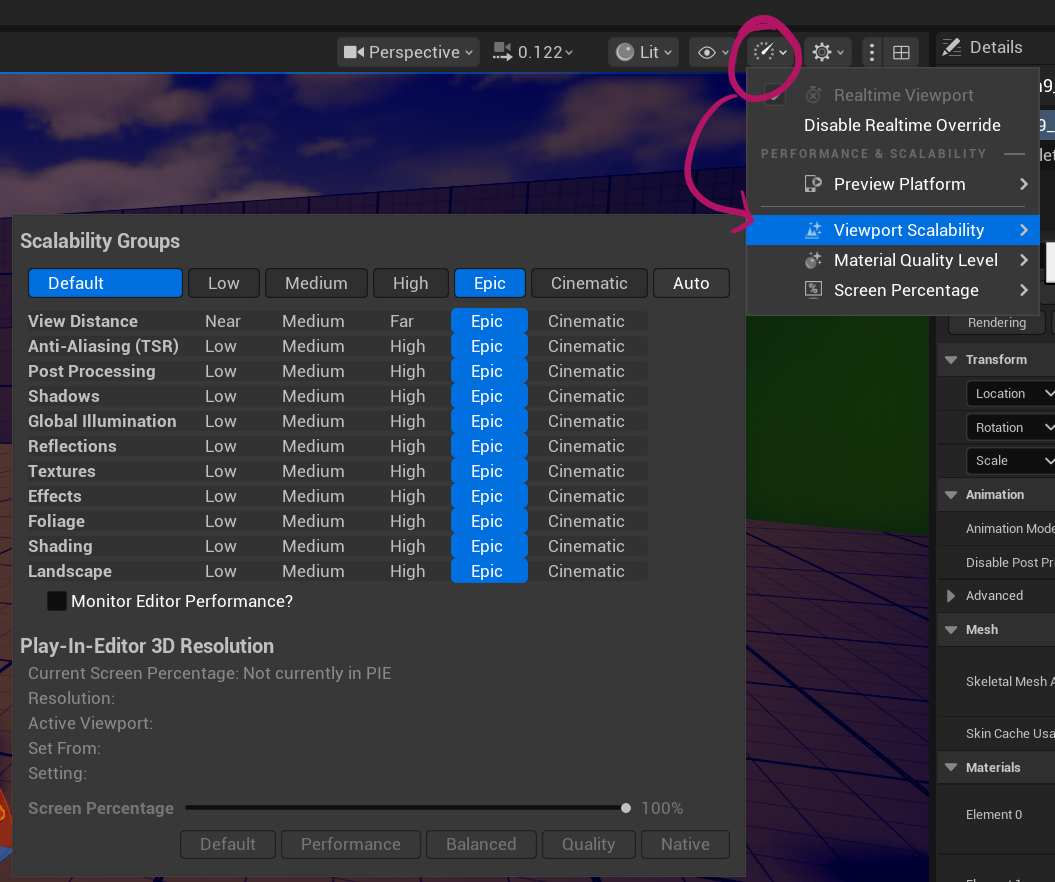
Engine Scalability Settings
The one that tripped me up the most, this setting has moved from the Settings section at the top right to the little speedometer icon. This is also where the Disable Realtime menu option has moved to, although CTRL+R still works as a shortcut. Note that we now have a more granular way to adjust viewport settings for material and screen percentage rendering, which is a nice addition.
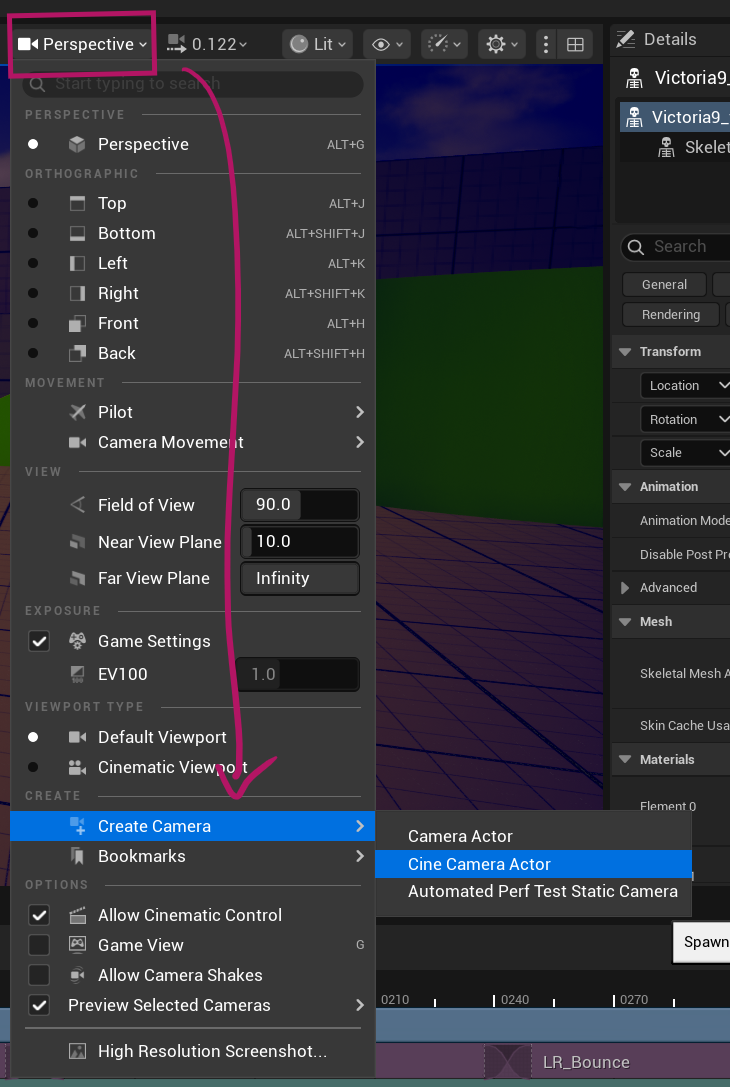
Create Camera Here
A super convenient feature that lets us turn the current viewport into a tangible camera. Previously on the hamburger icon at the top left, it’s now under the Perspective option, with which we can change the camera and orthographic views. Quite a LOT of stuff has been put into this menu, like the the High Res Screenshot option for example, Game View toggle and several other options. It’s a good place to start looking if you’re missing something.
We get the previous choice of a regular or cine camera, and a new arrival called the Automated Perf Test Camera. What does it do I wonder?
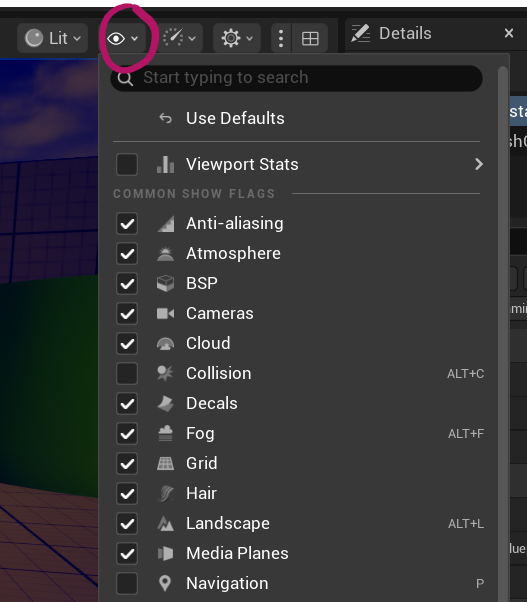
Choose what objects are shown in the Editor Viewport
UE has a handy feature that lets us disable things like cameras, particles and other nasty stuff that can get in the way of work and/or performance. Where previously we have the Show menu, we now have a little eyeball icon that has this list. Disable what you don’t want to see, and re-enable when you’re ready (this does not affect rendering or gameplay, just the Editor preview).
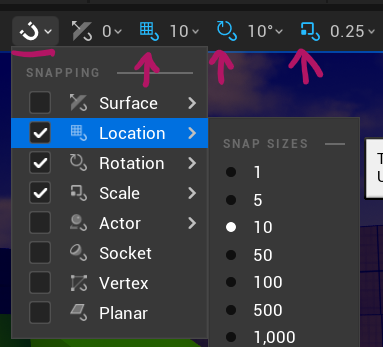
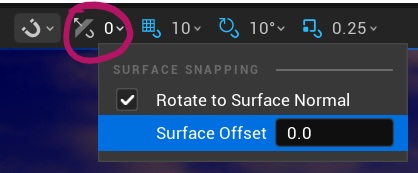
Snapping Controls
Snapping used to be part of the transform/rotate/scale manipulators at the top right. Those have been moved to the top left, with cute little abstract-ish ultra modern icons next to their respective values. Functionality is the same, even though my dyslexic brain doesn’t easily recognise it as such.
Note that we have an additional menu now for several other types of snapping related operations under the horseshoe/magnet icon.
While we’re on this subject, there’s another new option that lets us specify if surface snapping should align itself to the surface normal with offset.
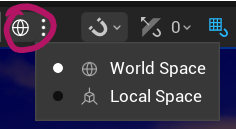
Switching between Local and World Space
This function has also moved from the previous right to the left, retains the same icon, and it’s still a toggle. It’s also now got a (perhaps more intuitive and cohesive) drop-down to the right of itself, complete with menu fly-out.
Group Selection and Gizmo Options
We used to have a Settings menu at the top right with which we could allow all grouped items to be selected at once. This option has been amalgamated with several other gizmo related options into a new menu at the top left. Aside from the previous Group Selection setting, we can also pick what gizmo to choose (much like we can with the other three icons next to it, as well as a world/local space change.
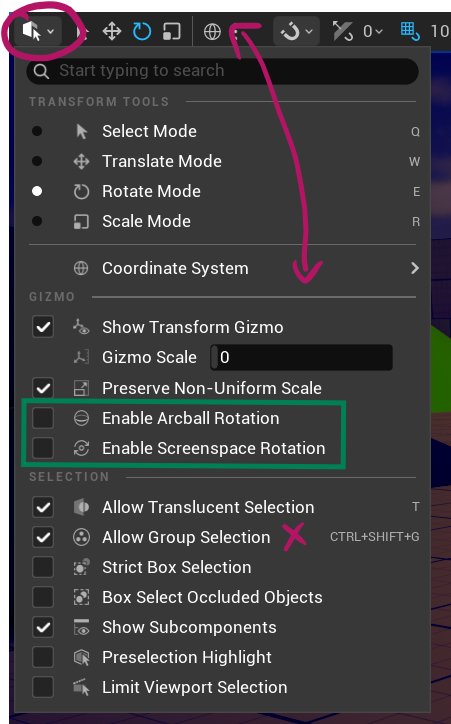
Note the other two interesting additions we simply didn’t have before, highlit in green: Arcball and Screenspace Rotations. These come in handy when you want to adjust the joint rotation in a skeletal mesh.
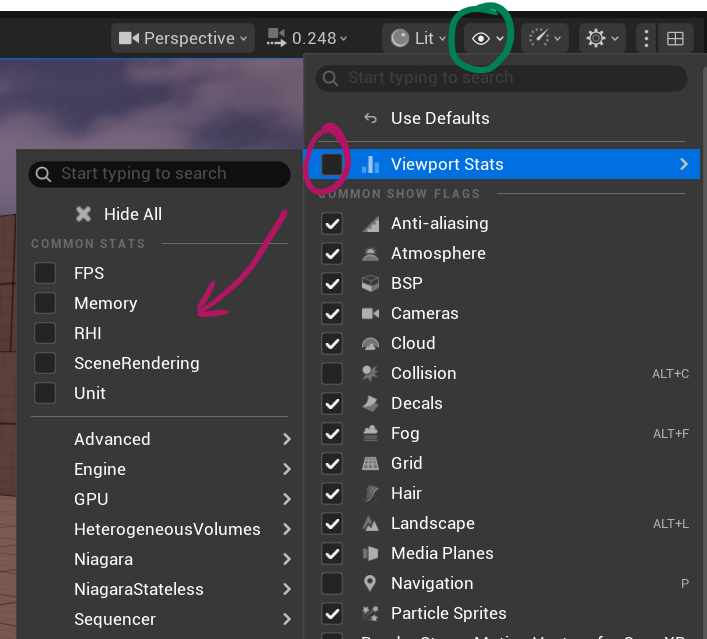
Display Stats like FPS
This has also moved to another place, namely to a sub-menu of the little eyeball icon. Click it, then choose Viewport Stats, enable it, then pick what you’d like to have shown. There’s quite a few additional options here, and it makes more sense to have them displayed like this.
That’s all I have for now! I hope this helps find your bearings in Unreal Engine 5.6 and above.