Blender isn’t exactly well known for its video editing capabilities, but rumour has it there’s a very capable editing tool included with Blender since forever. While I might not be brave enough to use it for YouTube just yet, I was in need of a quick video I needed to assemble from a rendered PNG sequence. All I had available on this system was Blender, and it worked a treat. Here’s how to do it.
Switch to the Video Editing workspace. It’s not showing up at the top, so create a new one with the plus icon.
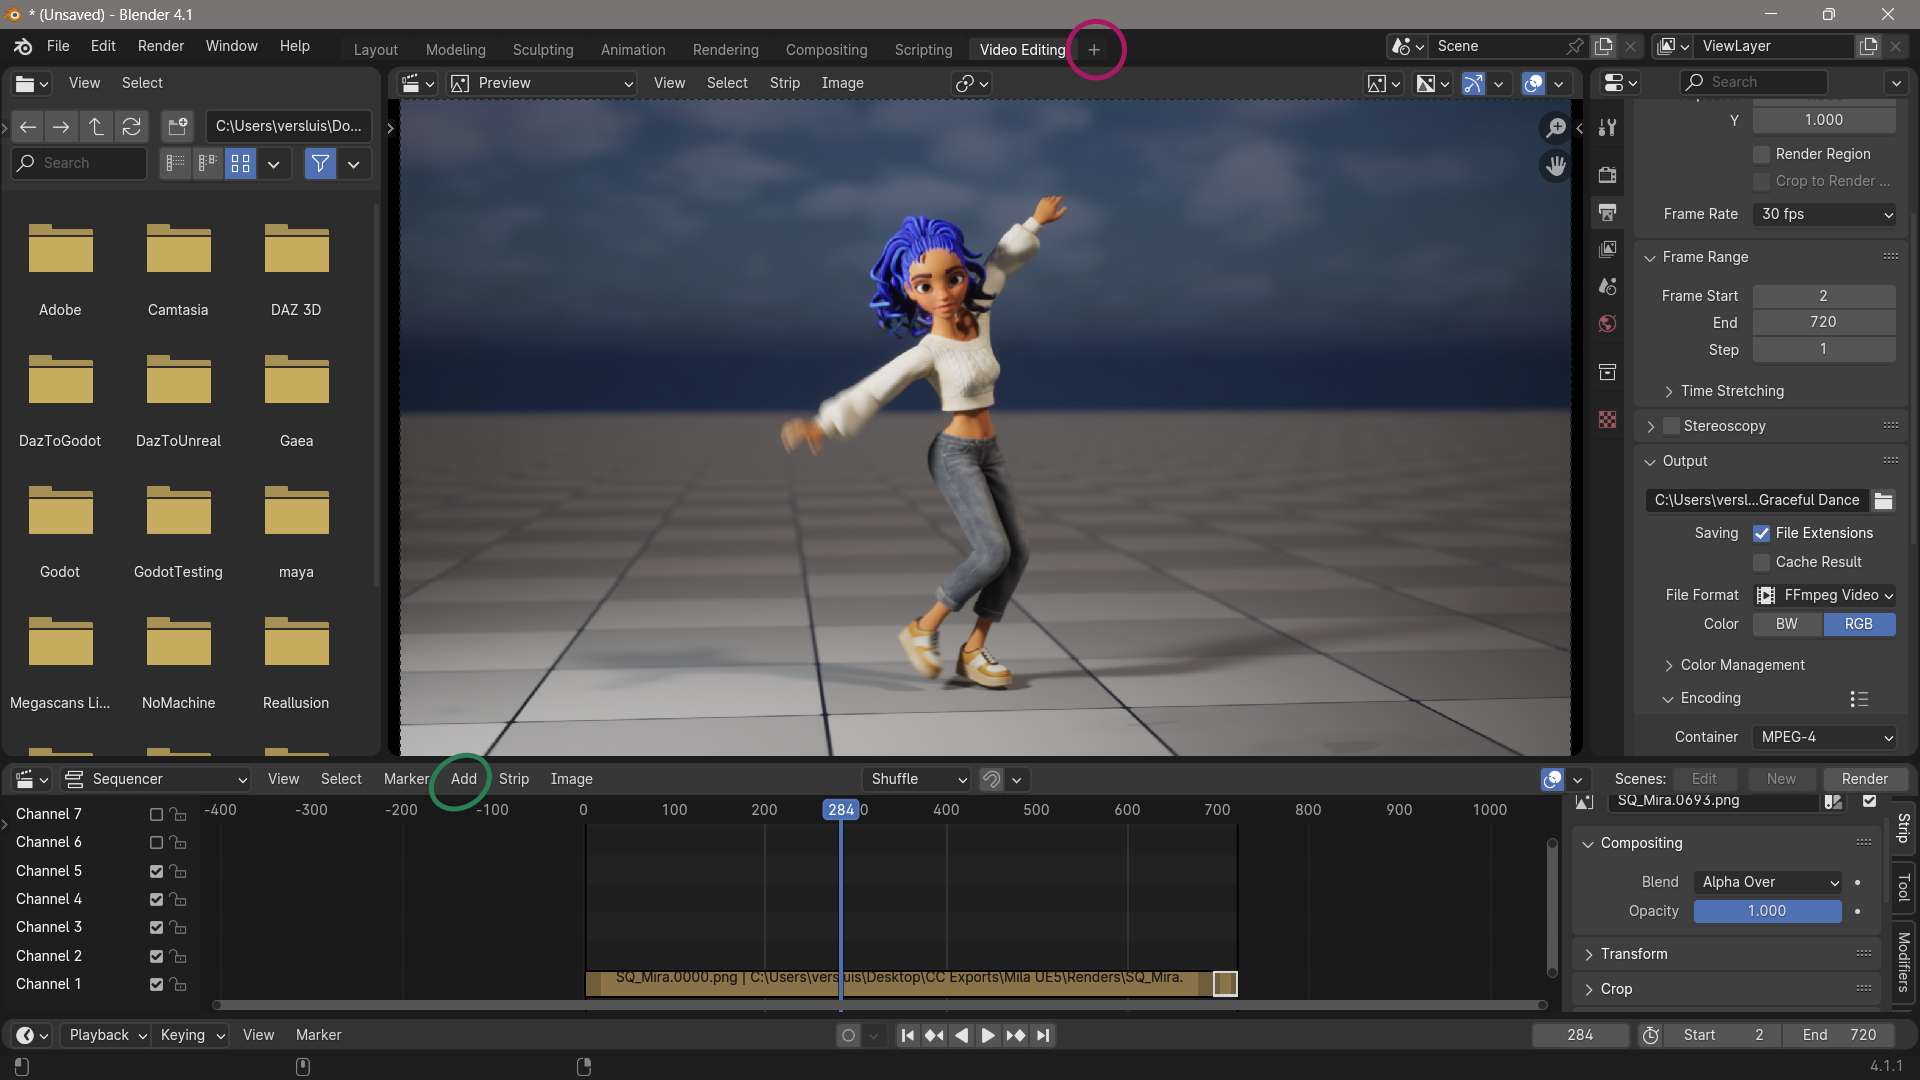
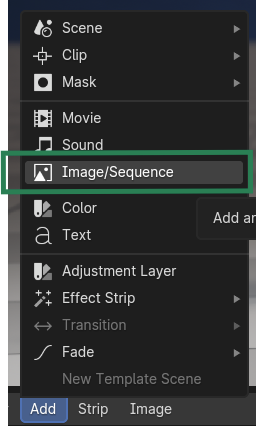
To import an image sequence, a single image or even a video file, use the Add option above the video timeline.
Now select all images in the directory, and provided they’re sequentially numbered, Blender will be able to play them back on the video timeline. Under Fit Method, choose Original Size to get the accurate aspect ratio and resolution of your source footage.
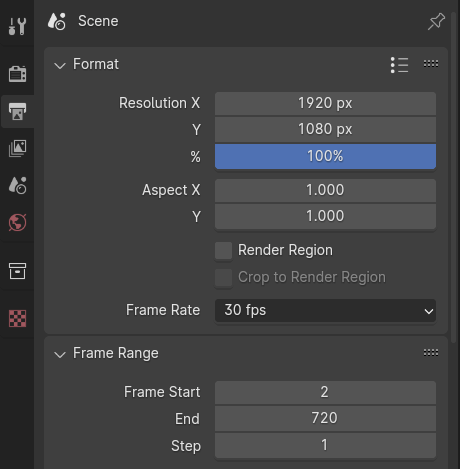
I won’t go into making edits on the timeline here, but it’s something I’d like to investigate. Right now I’m only concerned with creating a video file. To do that, we’ll “render it out” like we would normally do with an animation. On the Scene Tab, specify the frame rate and the total duration of what you’d like to render out.
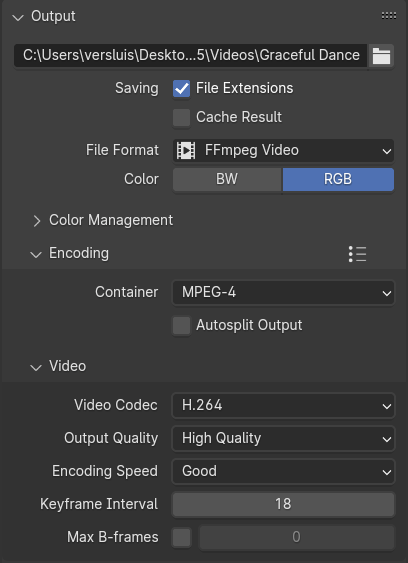
Further down under output, pick your destination directory and give your video a name. Under File Format, choose FFmpeg Video, then choose a Container (MPEG-4 will create an MP4 file). You can also set the video codec and quality in this section.
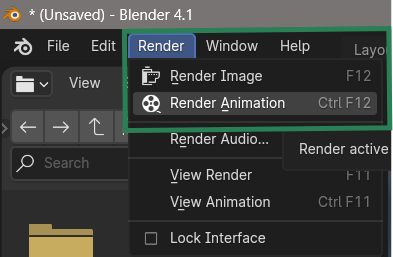
When all all of that looks good, head over to the top left and choose Render – Render Animation (or hit CTRL + F12).
That’ll do the trick! Your video file will be assembled and saved, so you can close the new window that opens.