Object IDs are masks defined by the 3D objects that make up a 2D render. This means that compositing artists can mask out areas after a render is complete and make adjustments. Imagine re-colouring a coffee cup, darkening the sky and all kinds of other things. The big advantage of this workflow is that a scene does not have to be re-rendered, and adjustments can be made much faster.
Typically these passes are rather large with scenes that have hundreds of objects, so it makes sense to extract the exact mask you need, making it easier to work with. Blender can do that from EXR source footage, thanks to its Compositor. The footage does not have to originate in Blender. Here’s how the setup works (click to enlarge):
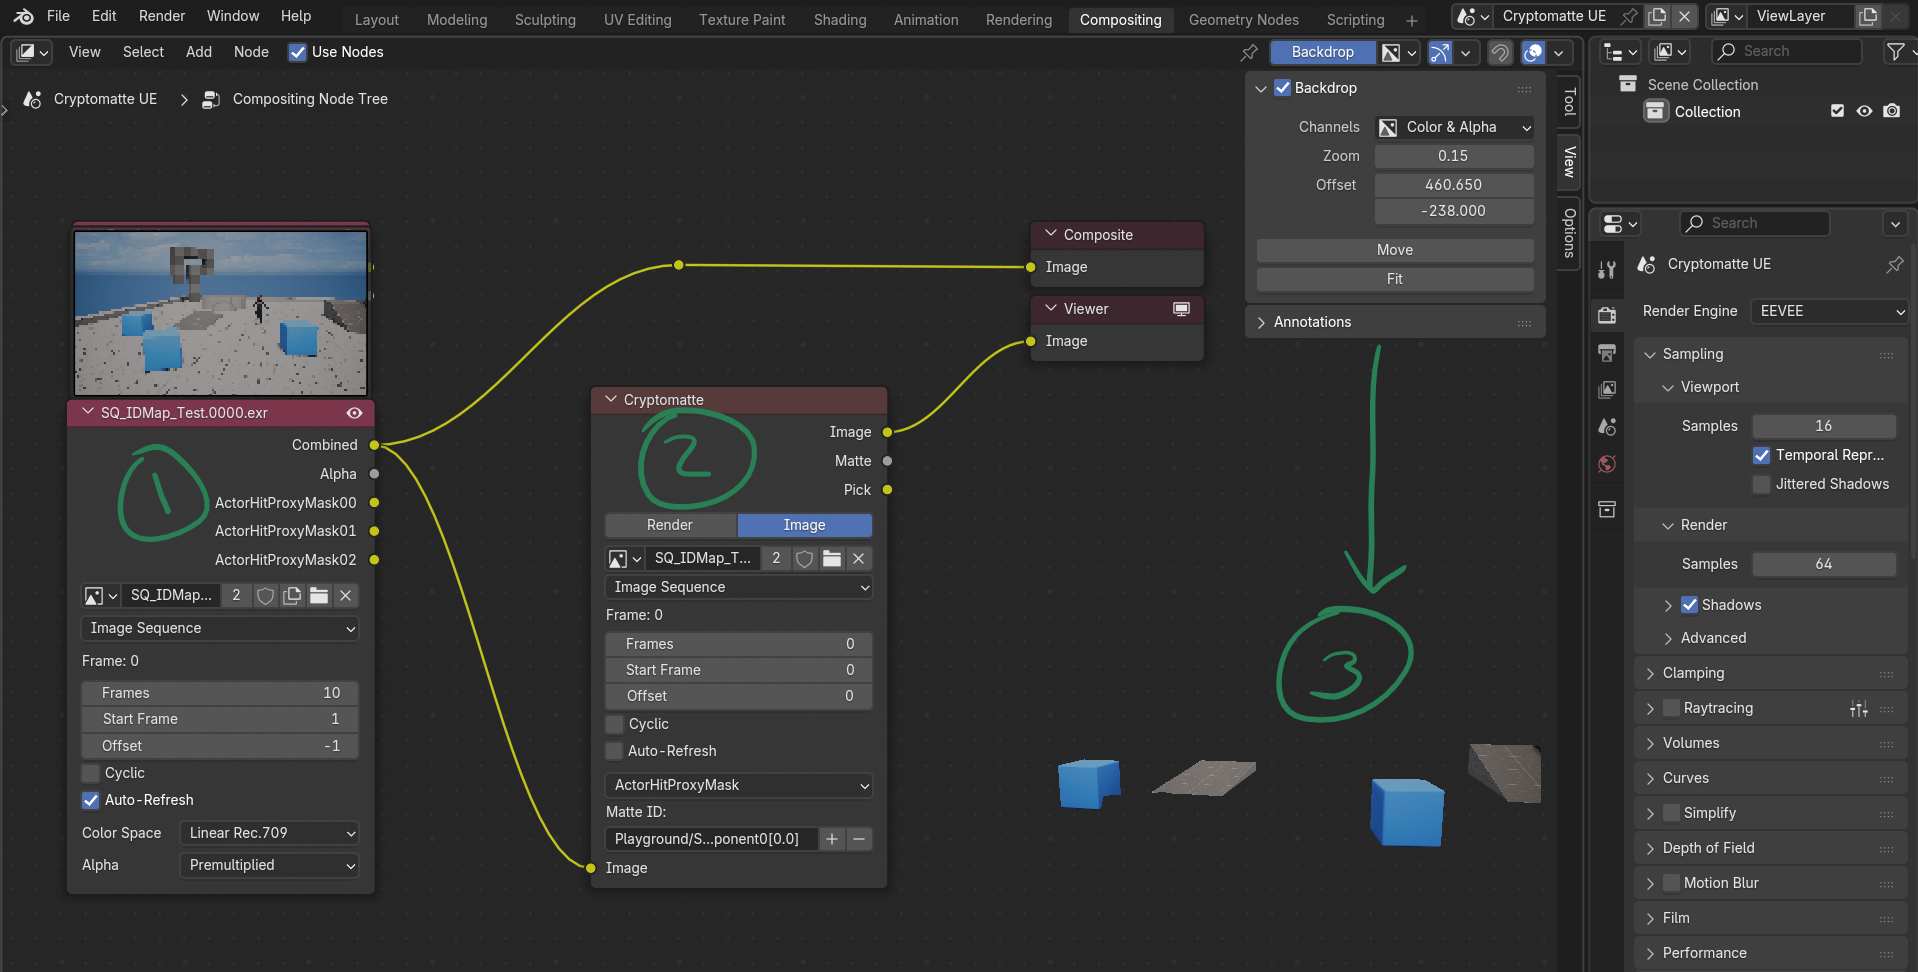
First of all, switch to the Compositing workflow tab and enable “use nodes” at the top of screen. This will show the composite and viewer nodes. Those are your output and previews (the latter being shown in the bottom right corner here).
Add an Image node and open your footage (1). I always forget how to do this part. Once loaded, you’ll see a preview of your image above the node, like shown in the screenshot.

Next connect the image output and connect it to a Cryptomatte node (2). There are two options, one being a “legacy” node. Both work, but the non-legacy one seems to be easier to work with.

Our input EXR has potentially hundreds of layers. To pick the objects we want to include in our mask, we can use the Pick output. Plug it into the viewer node (3), then enable Backdrop in the side panel to see the output overlaid in the Compositor. I find that a little distracting, feel free to make the preview smaller and move it with the options in the side node. This will show you a random coloured output of all masks in the source footage.
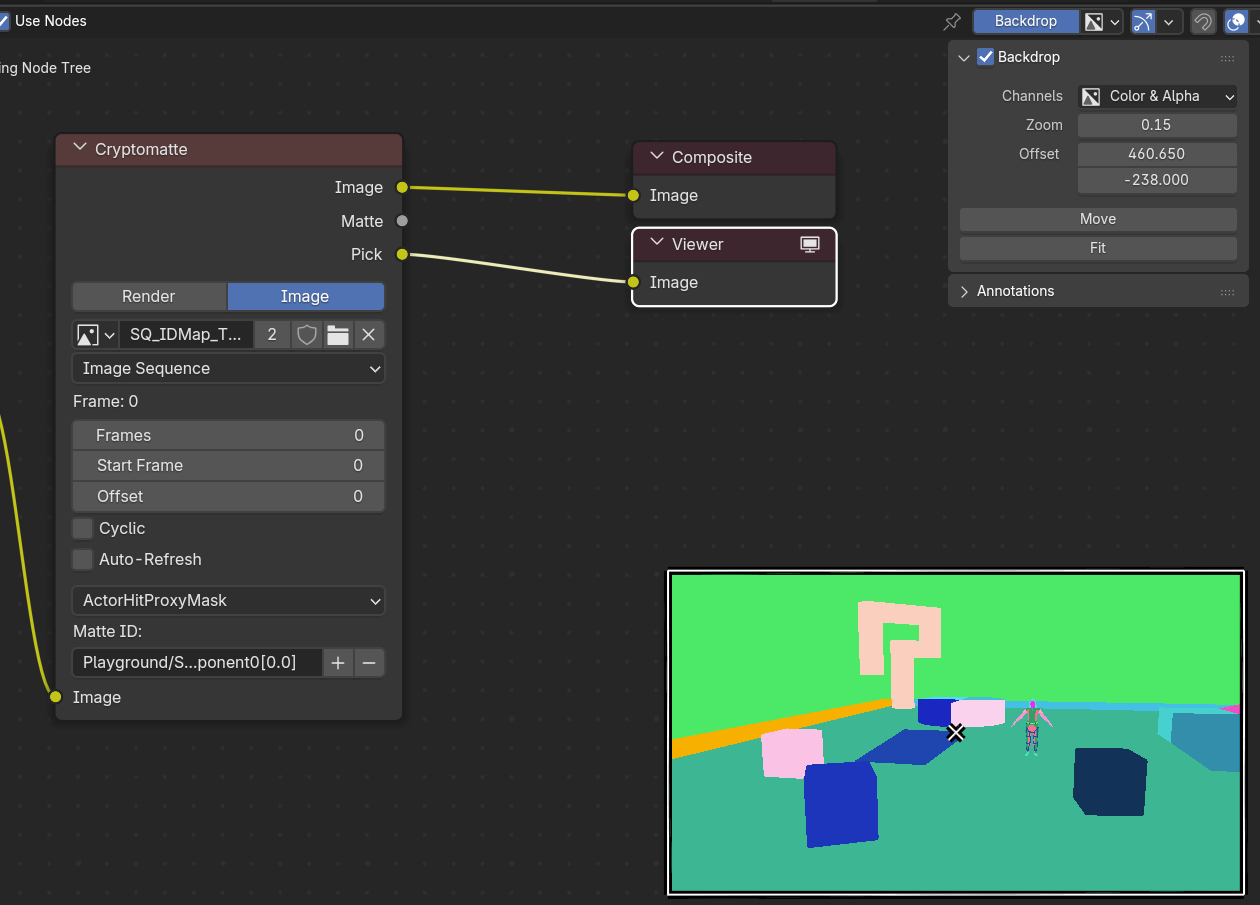
Under Matte ID, use the plus icon to pick objects in the preview you’d like to include. Pick as many as you like, and remove them with the minus option. Meanwhile, the Image output will show only the objects you’ve selected, and transparency for everything else. Switch the output to check in the preview.
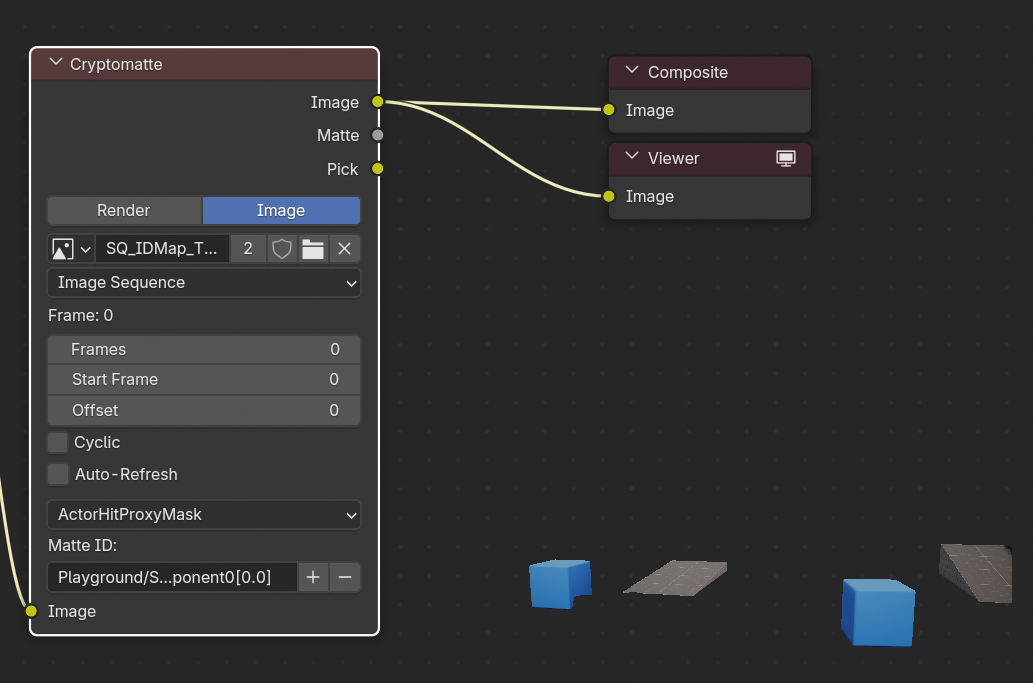
I’ve picked two cubes and two ramps from my UE scene. Now we can render out as usual in Blender, and only the selected objects will be exported. You can use them as a mask or independent foreground pass for compositing.