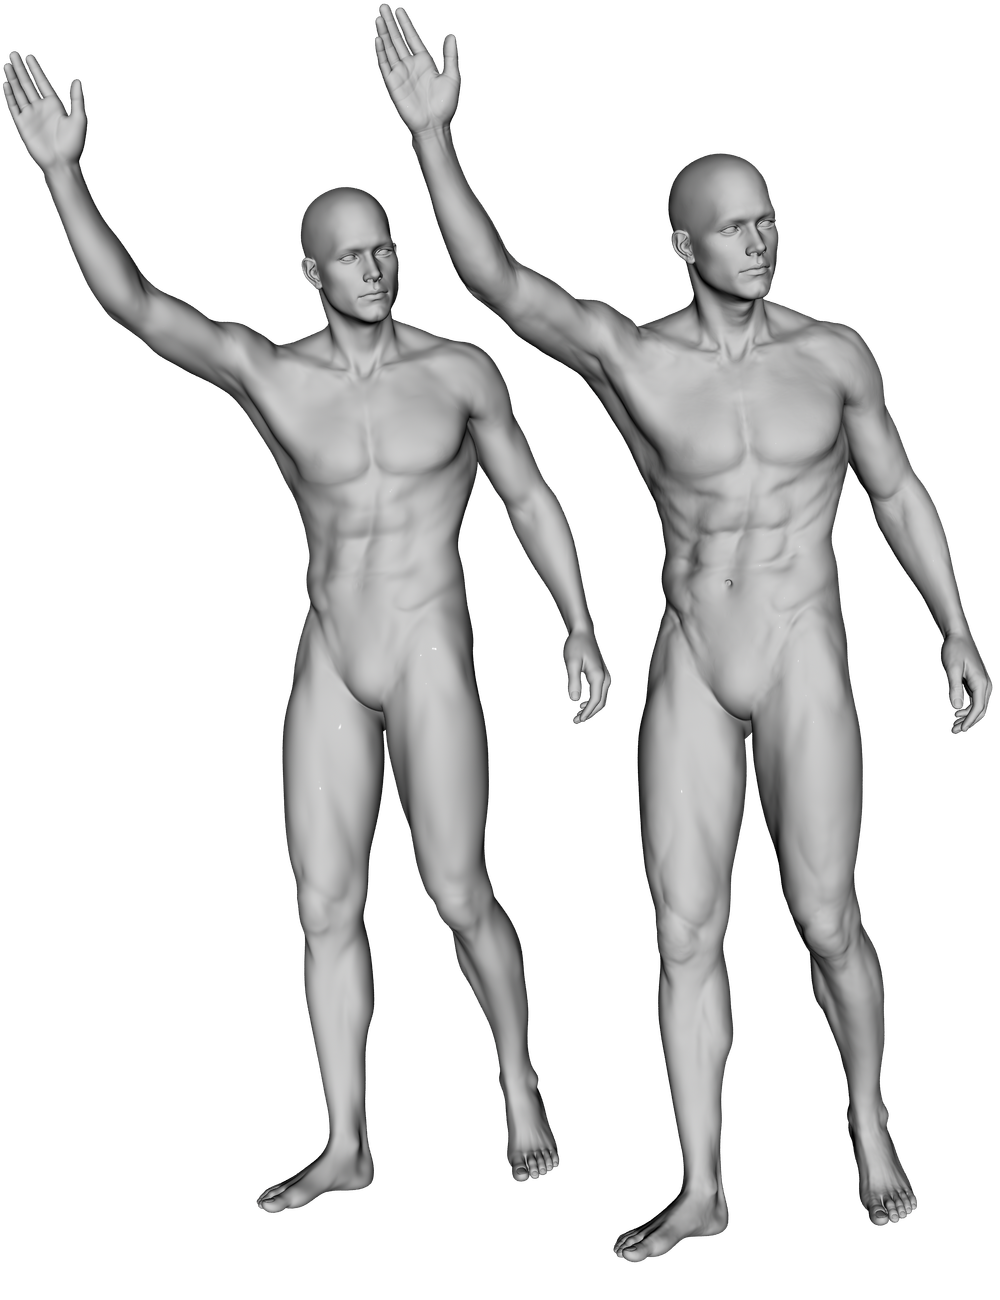
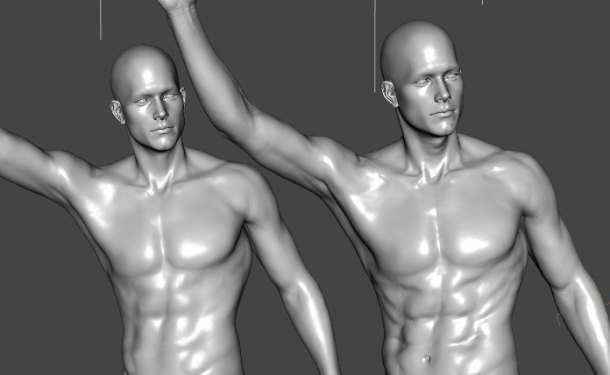
In the above picture we have a render of Michael 6, the standard version on the left and the HD version on the right. Zooming in closer we can see that his abs and knees for example have a lot more detail – as we’d expect from an HD version of a model.
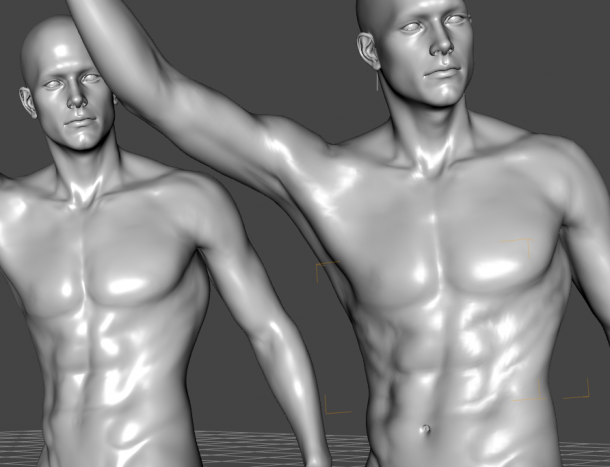
Comparing the two Michaels in our viewport instead of the render however, we can barely make out a difference. Both figures look nearly identical (except for the belly button indentation perhaps).
So why is that, and how can we preview those HD details before we render them?
The secret lies in our viewport’s subdivision levels.
How do HD Morphs actually work?
At first I thought that additional detail can only be achieved by a higher level of polygons – which means that Michael and Victoria HD would be four times the size of their SD counterparts. But that’s not the case: the number of polygons is the same on both versions of the model.
In fact, if a HD version of a model is installed, you don’t even need to load it to apply the higher level of detail: simply hunt for a value called “Michael 6 HD Details” and set the value to 1. Now even SD Michael will show HD detail.
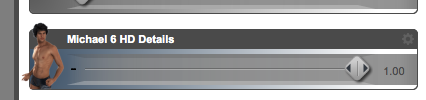
This value exists for both head and body, both of which are being switched on by the above slider. The only difference in loading the HD version of the model directly is that this value is applied, and a different texture is loaded – but that’s just a material.
Making more detail show up on lower resolution geometry is done by the magic of subdivision. 3D Modelling Apps often make use of this technique by “implying” more geometry than there actually is. Smoothing works the same way, by calculating polygons that aren’t actually there, giving us much less edgy results in the preview.
So how can we preview the HD details in the viewport?
To see every level of detail, our figure needs to be shown at the same level of subdivision in the viewport as in the final render. This can be set independently, and usually it’s set higher at render time than for the viewport – to conserve resources. Lucky for us we can set this independently for every object in the scene, so our poor computer won’t crash due to information overload.
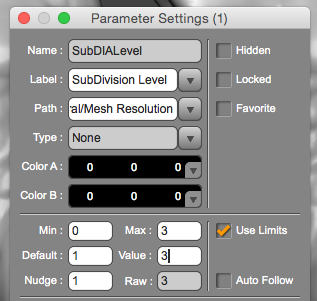
To do this, select your HD model and under Parameters, search for a value called SubDivision Level. Not to be confused with Render SubD Level (minimum)!
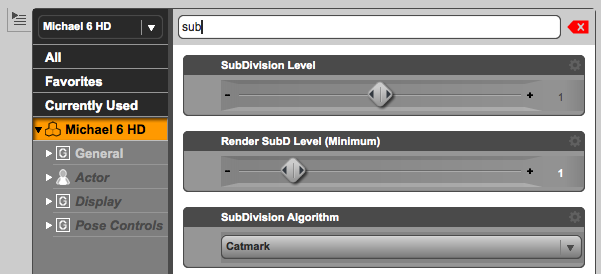
The default value is 1, and the highest we can go is 2. That’s not enough to make those HD details show up, and 3 is really what we need here (something to keep in mind: 2 will apply one further level of subdivision to the figure in the viewport, making it 4x as memory intense – 3 will do the same again, making the figure 16x as large in memory).
To lift the limit, click on the little gear icon to the right of the slider and select Parameter Settings. This is where the slider’s limits can be set. Enter 3 as Maximum and Value, then accept to close the window.
Now your computer will go to work applying two extra levels of subdivision to your figure, and a few moments later you should see a noticeable improvement to your HD figure’s appearance.
Can I create my own HD Morphs somehow?
While you can create HD morphs in ZBrush and apply them either via a higher resolution model or with the use of maps, there is currently no way to inject HD morphs into low-resolution figures like DAZ and PA’s do. It appears there is some proprietary technology available that can do this, but it has not been released to the likes of you and me.
You can check out this (slightly political) discussion on the topic of creating HD Morphs.