The final stage of this colour process – known as C-41, commonly available as your only option at the mini lab – takes away all the silver and leaves you with pictures purely made up of colour pigments.
I mention this here because technically the films are more or less made of the same ingredients, so if you’d like to experiment, why not develop your colour film in black and white chemicals. It works great, and the results are rather cool.
There’s an entire Flickr group dedicated to this processing technique – check it out.
Light Leaks
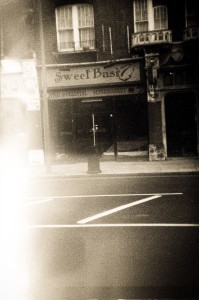
Whenever you get accidental exposure in your pictures – mostly unwanted – it’s called a light leak. Faulty or improperly attached camera backs can cause that, some cheap cameras are prone to it and of course spooling the film in to the daylight tank can happen in less darkness than we think.

Don’t be afraid of Light Leaks though: they can turn out quite charming, if they don’t completely ruin your pictures. Holgas have a reputation for having light leaks, but I can’t confirm that. It’s usually the absence of a gate that causes weird reflections.
Step 4: Scanning
Once your films are dry, you need to get them across to your computer and share them with the world. The best thing here is to trust your scanner in auto mode and do manual colour and contrast corrections later in Lightroom or Photoshop.
Good scanners come with great software for scanning, like Silverfast AI. It performs a pre-scan for every picture so all highlights and shadows get captured. Comes bundled with the Epson Perfection V750 – I can highly recommend it.
Summary: How to get The Grunge Look
Here’s your 100% completion list of what it takes to get The Grunge Look:
- Use a high-ISO film, 400 ISO or more
- Overdevelop by 3 stops or more, see what happens. The longer you develop, the higher the grain.
- Stick to the “traditional grain structure” if you can, like Ilford HP5 or Kodak Tri-X (rather than Ilford Delta or Kodak T-Max).
- Try a roll of colour film and develop it in black and white
- Shoot pictures outdoors in strong sunlight for best results. Indoor light without flash can be a disappointing experience.
- I find that The Grunge Look works better with black and white pictures, but that’s just me.
- Add your own thing: “accidentally” open the camera before you develop to fog the film. Light Leaks can be funky!
But most importantly: Have fun and try out new things 😉
[nggallery id=41]
Great post, you have pointed out some fantastic details , I besides believe this s a very good website.