If a 3D object is meant to follow the morphs and movements of a DAZ character, it needs to become an item of conforming clothing. This allows a garment to be fitted to a DAZ figure, following its movements and full body morphs (at least to a certain extend).
The procedure is called rigging, and DAZ Studio has a Transfer Utility to make this happen. Here’s how to use it.
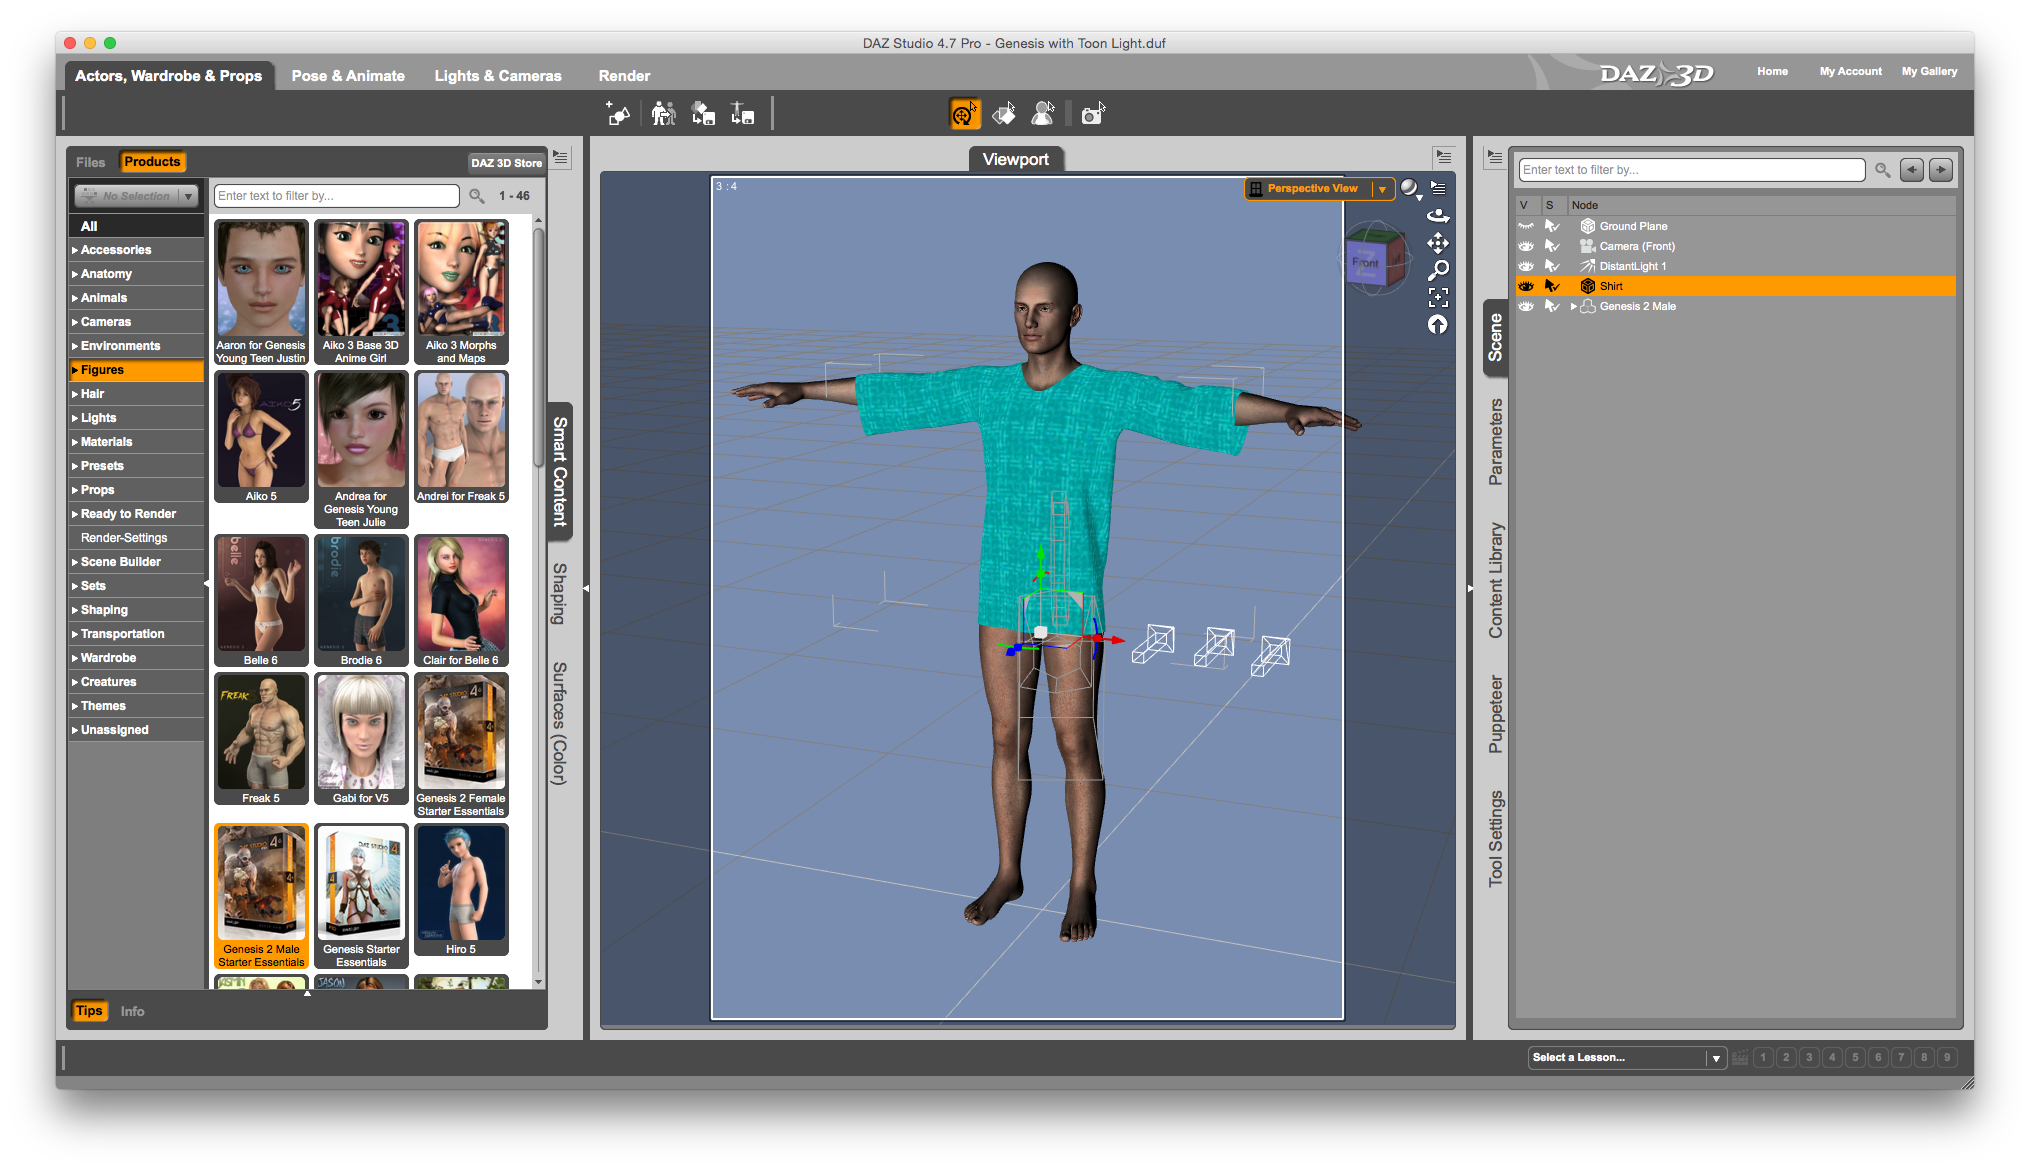
Load the figure and the item of clothing you’ve made into your scene. I’m using Genesis 2 Male and a shirt I’ve made in Marvelous Designer.
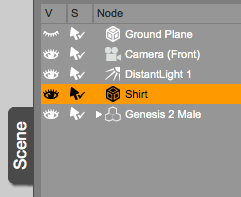
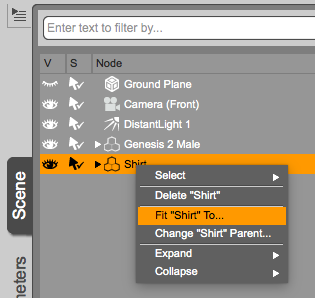
Notice that the shirt has a cube symbol in the Scene Tab, not the Q-Bert type symbol that a figure or confirming clothing has. This means it’s a prop. And no matter how hard I try, I won’t be able to fit my shirt to Genesis right now. This is why you pay companies like The Clothing People to do the mind warping and t-shirt logo ratio fancy stuff on the computer. Just remember that.
Still in the Scene Tab, find the little icon in the top right corner of the window, the triangle with four lines next to it. Click it to bring up a rather fascinating menu with several powerful options. One of them is the Transfer Utility.
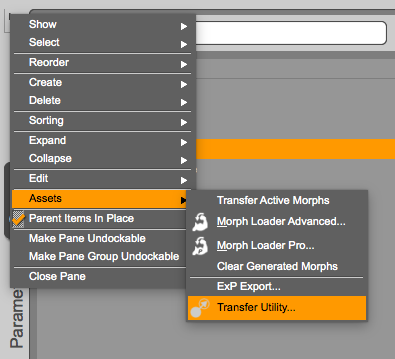
Select it to transfer morphs from one object to another. You can even click Show Options to bring up an advanced window that lets you select what type of information will be transferred in the process.
I want to transfer the Genesis 2 morphs over to my Shirt, so I’ll select Genesis 2 Male as my Source, and my Shirt as the Target. You can also choose what type of object you’re transferring morphs to using the Projection Template menu:
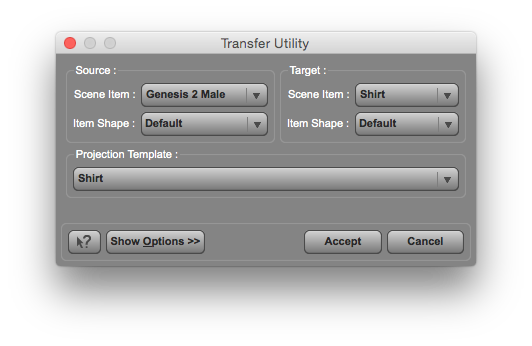 Hit accept and the tool will go to work. It will only take a few seconds to complete.
Notice that your original prop has disappeared from the Scene Tab: the tool has replaced it with a figure by the same name (Shirt in my case), featuring the Q-Bert logo. If you right-click the object, you’ll be pleased to see that it is now possible to be “fitted to” Genesis:
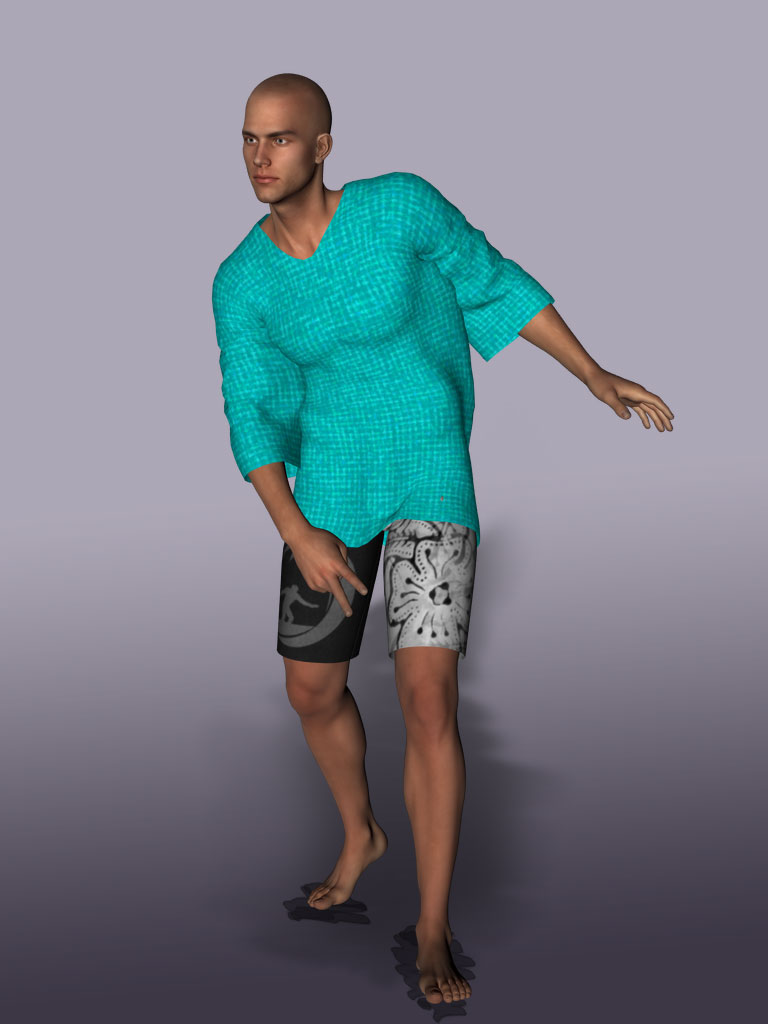
Try to pose your figure and see that the shirt moves too, just as it should. Eureka!
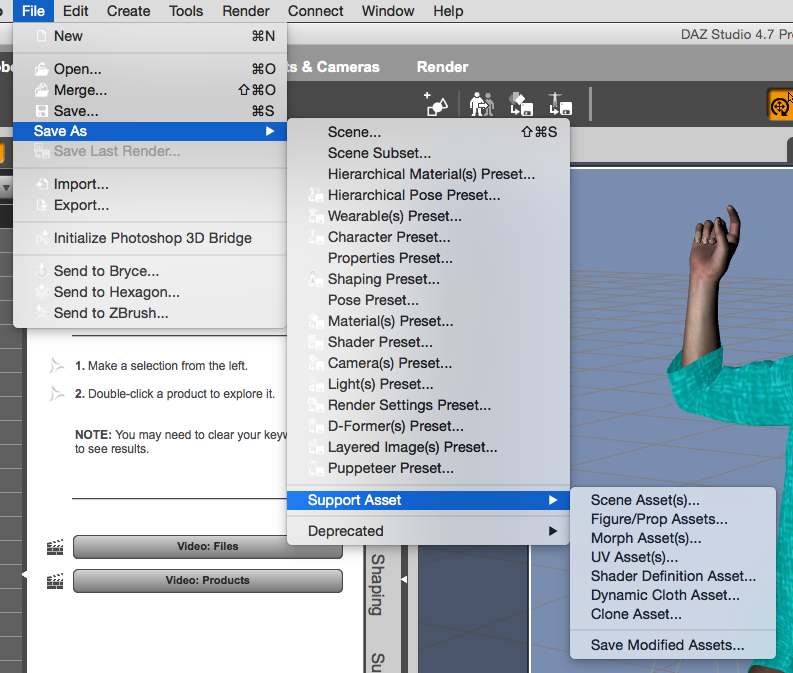
All that remains now is to save the new conforming clothing object: select your shirt, then head over to File – Save As – Support Asset – Figure/Prop Assets. You’ll be asked to complete the vendor information and pick a location for your .duf file.
Now you can load it into other scenes using File – Merge.