Reference images are helpful for modelling objects or to add simple backgrounds to scenes. There are at least two ways in which we can add them in Blender.
Adding Background Images
One way to do it is via Background Images. On the tab next to the Properties Palette (expand it with the little plus icon on the top left), find the Background Images tick box.
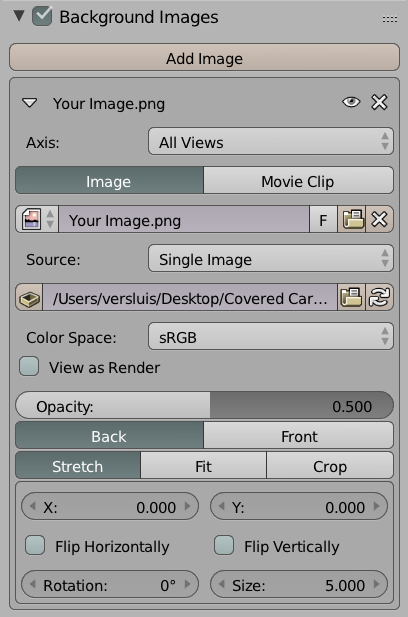
Open an image of your choice and select the relevant changes, such as opacity, stretch/fit/crop, and select which axis you’d like this image to appear on. Blender does not allow you to select more than one image at a time, so you can’t add all views of an object. But as you load more images, Blender does remember them in the image list, so you can pick a new one from there instead of loading it again.
Note that such images will only show up in orthogonal views, not in perspective views. To change your current view, select View – View Persp/Ortho.

Loading images as planes
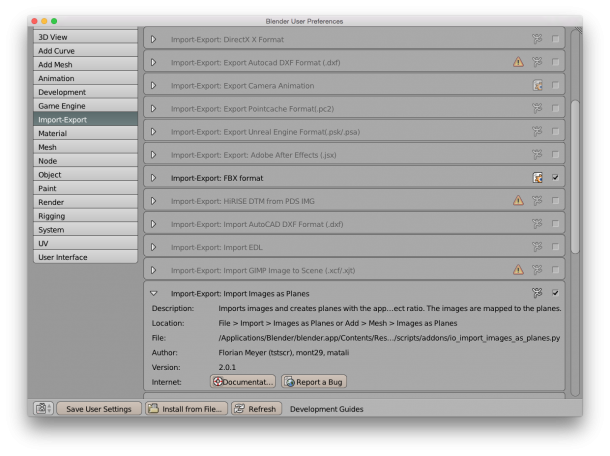
Another option is to import an image directly as a plane. It’s a shortcut of creating a fully UV-mapped object into your scene and position it just the way you like it, preserving the aspect ratio of your image. This is an add-on that’s installed by default with Blender, but it needs to be activated to be used.
Under File – User Preferences, head over to the Add-Ons tab. Select the Import-Export section and find Import Images as Planes. Tick the box to the right of this option and it’s activated.
 Now head over to File – Import and select Images as Planes. Pick an image and you’ll see a new plane object in your scene.
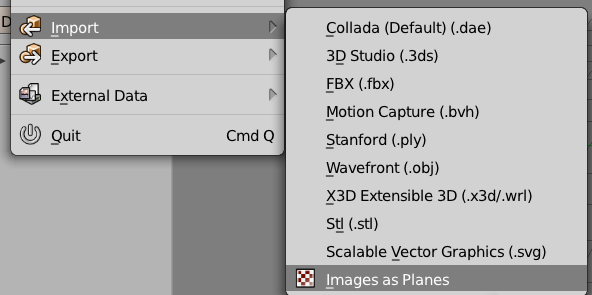
View your scene in Textured, Material or Rendered modes to see your image.
I appreciated this tutorial very much. I’d spent quite a lot of time trying to figure out how to establish a background image. So thanks for providing such a clear explanation.
You’re very welcome, Peter 🙂
I am so thank you for this, you save time
Glad I could help 🙂