Blender has an excellent Sculpting Mode that works very similar to Sculptris and ZBrush. It’s very easy to sculpt on a mesh – let me show you how.
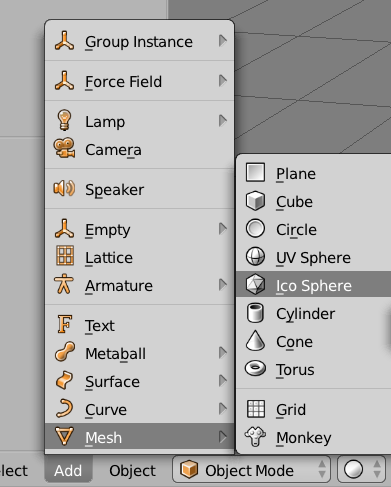
Create a Mesh Object with a decent amount of topology for sculpting. For example, use Add – Mesh – Ico Sphere.
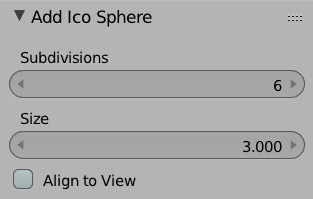
In the init menu on the left, set the amount of subdivisions to 6 and a size you like – I’m using 3. Your object should be selected already, but just in case it isn’t, right-click on it.
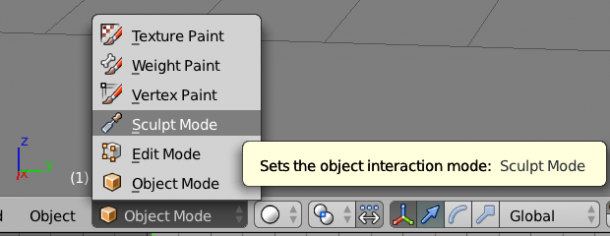
At the bottom of the screen where it says Object Mode, click on it and select Sculpt Mode. Now you’re ready to sculpt on your object.
Notice the options on the left hand side change into sculpting tools. Make sure you’re on the Tool Tab – it’s selected by default and it contains a variety of goodies.
Try making a stroke on the model and see what happens. You can change the size of your brush with the Radius setting, and how much affect it has using the Strength slider. Press the F Key to increase/decrease the stroke size. SHIFT + F will change the falloff, and CTRL + F let’s us change the rotation of the brush (useful if you have a texture applied).
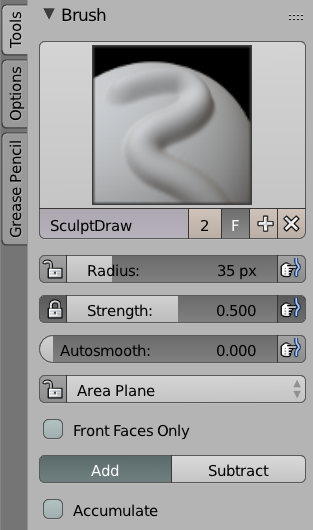
Notice the little “finger against a blue line” icon: when enabled, this will activate pressure sensitivity for Wacom tablets. It’s nice that we can switch it on and off at the touch of a button.
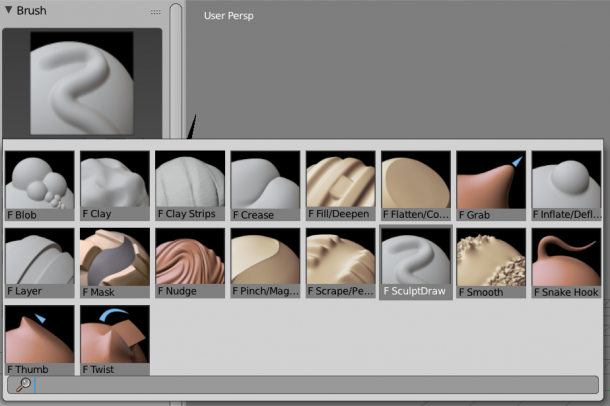
To modify the type of stroke you’re making, click on the large stroke preview icon. This will bring up a selection of other brushes you can use.
To invert your current stroke, hold down CTRL key – this is the equivalent of holding down ALT/OPT in ZBrush.
To use a smooth stroke, hold down the SHIFT key – it works just like in ZBrush.
I haven’t found any masking brushes yet – but I’ve only just discovered Blender, so this option may be hiding somewhere 😉
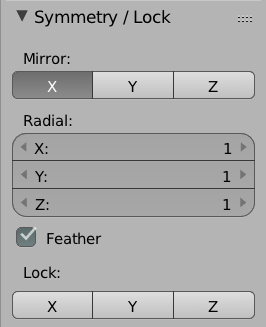
Enable symmetry under the Symmetry option: click on the disclosure triangle to open it up and add what you need – including radial symmetry.
Modifiers can be added during your sculpting session: this lets you add more subdivision detail without actually increasing the resolution of your mesh. A nice one to use with a low-poly object is the Multiresolution Modifier.
Don’t forget to explore all the other closed options that are hiding in this menu, including Dyntopo, Texture (to apply alphas), Stroke and History. There’s a LOT to discover here!
Thanks.