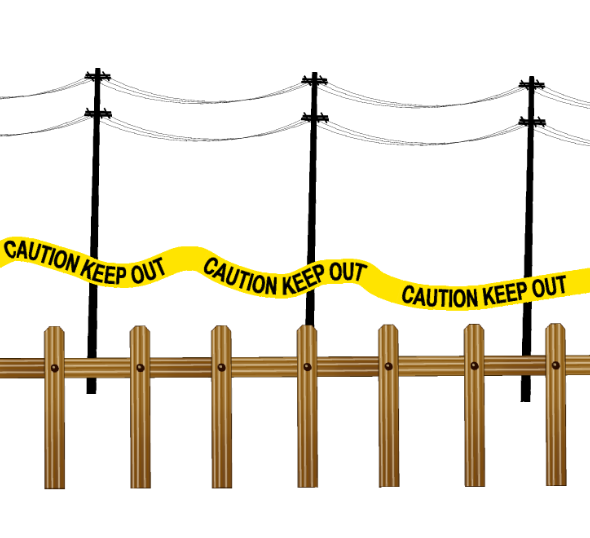
 Manga Studio (or Clip Studio Paint as it’s now called) has a very versatile brush engine. We can customise our own brushes too, so that we can “paint” with our own images – just like the ones above, all of which come with the app.
The process is less than intuitive, but once you’ve done it a couple of times it grows on you. I tend to forget how these things work pretty much instantly, so here are some notes on how to create a brush from a seamless tiled image in Manga Studio.
Let’s start by opening a seamlessly tiled image and register it as a new material. TO do that, head over to Edit – Register Image as Material…
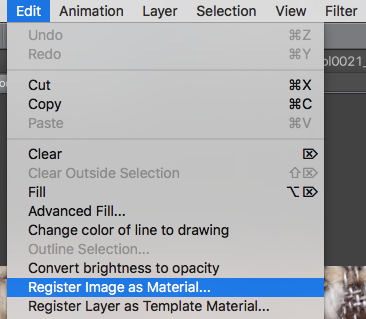
This will open a rather scary looking dialogue – but all we have to worry about is the tick box that reads “Use for Brush Tip Shape” and select a category from the menu system. Since I want mine to be a brush, I’ll add it to the Image Material – Brush (but it’s totally up to you where that image goes). You can even add personal search tags in the box. Those will come in handy as your library grows.
Click OK and close your image, we won’t need it anymore. It’s now saved as a “Material” in the endless depths of Manga Studio’s database. You can indeed delete the image from its current location – just thought I’d mention it.
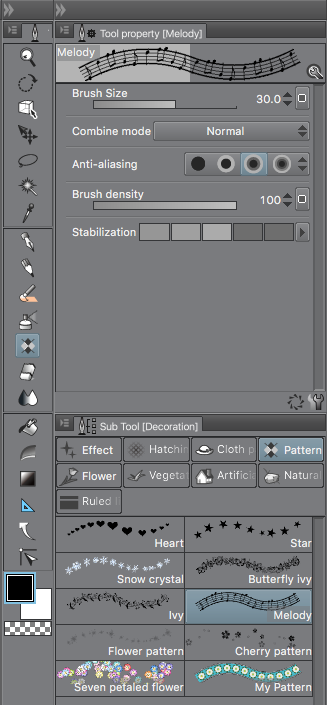
Open a new document so we can test the brush we’ll be creating next on the fly. Select a Pattern Brush and pick one that’s similar to the one you’d like to create. I’m using the one called Melody.
Finding the Pattern Brush may be the hardest thing, as the icons change depending on which category you pick a brush from. In my case it’s the pattern icon (in between the spray can and the eraser) – but if I had picked a brush from say the Cloth Preset category, it would appear as a little hat.
To copy the current brush, take a look at the bottom of the Sub Tool window. There’s a super tiny icon next to the trash can that looks like a fresh piece of paper. Click it to copy the currently selected brush.

When you do, a dialogue box appears. Give your new brush an appropriate name and pick a category in which it should appear. I’ll leave mine in the Texture category for now. Click OK and your copy appears underneath all the other brushes.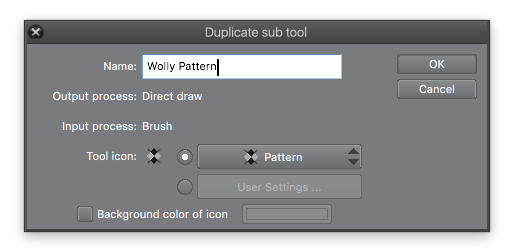
To edit your new brush, take a look at the Tool Property window. There are two icons at the bottom, one looks like a sun and one looks like a wrench.

Click the wrench icon and an even scarier dialogue box appears. This is where you can tweak all settings of your new brush. We’re particularly interested in replacing the image with which it draws, so head over to Brush Shape – Brush Tip.
We have a choice of Circle and Material, the latter of which we can select from the drop-down right underneath it (the one that currently has the vertical musical notes highlit). Click it. Don’t panic.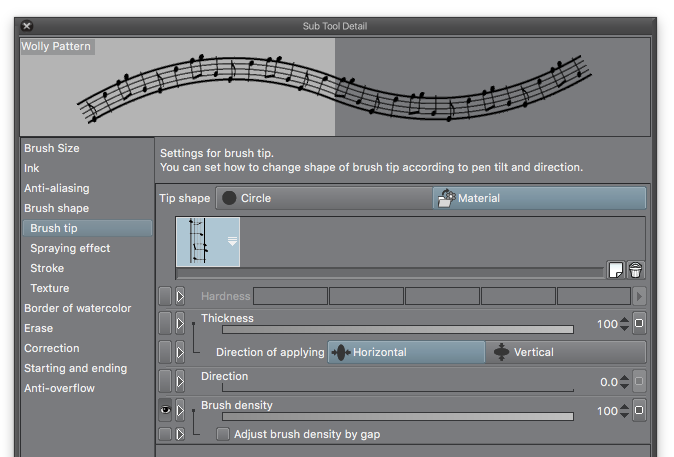
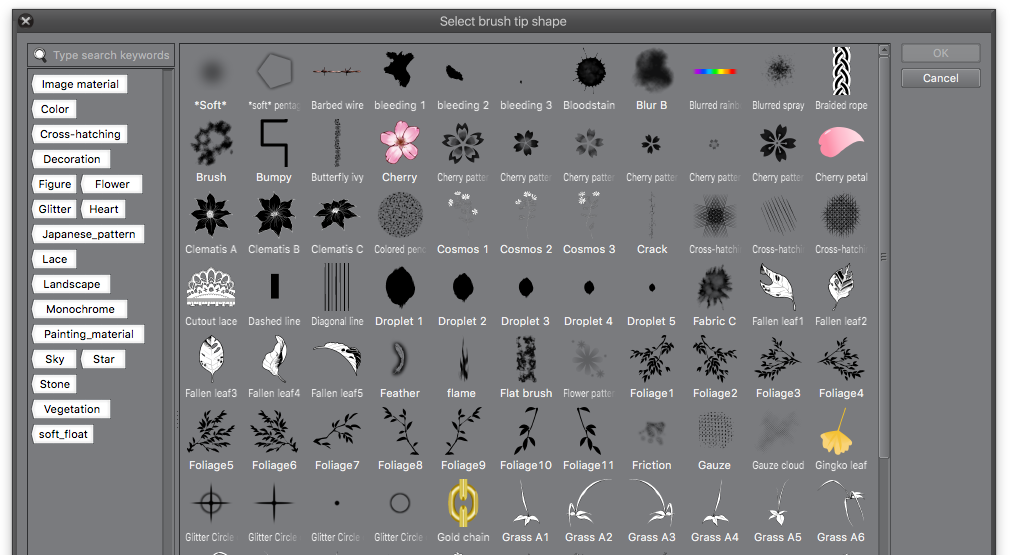
An extremely scary dialogue box with every image in the database appears. This is where search tags really come in handy, as they allow you to filter the images and only show a subset at a time. Good luck finding the image you’ve saved earlier 🙂 They’re all sorted alphabetically. That certainly helps a bit. Mine is called Woolly Fabric.
Select your material image and click OK to return to the brush settings dialogue box. Feel free to play around with any of those brush options – anything you change can be previewed on the canvas immediately.
There’s no OK button to save your settings, they’re all applied immediately “on the fly”. Close the window and your brush is ready for use.
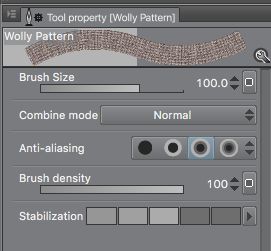
To change the size of your brush, use the two square bracket keys, or the Brush Size option in the Tool Property window. Sizes are saved per brush, so if you select something else and then come back to your home made brush, your brush size won’t have changed.
Have fun with your new creation on Raster and Vector Layers alike 😉
Thanks for the info. Instead of deleting the brushes from the brush palate, how do I uninstall brushes that I registered to the library. I made a couple test brushes and materials and now they are filling up my brush library and it taking me a long time to scroll through them to find the ones I need.
Hi Kay, I’m afraid your only option is to delete your unwanted brushes one by one. If you want to get rid of some of your imported images, you have to do those one by one as well. At least that’s the only way I know how to do it. Also, when creating brushes, make use of the search tags function. It’ll let you find particular brushes easily even if you have thousands installed.