 When I decided to narrate my book BROKEN BOWELS for publication through ACX, I had several ideas for the workflow.
In essence, and after many tests as to what would yield the best quality, I did the following:
- record to my Mac using Quicktime
- transcode the resulting native AIFC files into Apple Lossless M4A using Finder
- edit in Adobe Premiere
- bulk-transcode to MP3 files with ACX specifications using Adobe Media Encoder
I’ve tried various other workflows, but the above seems to work great for me.
Let me share my reasoning and experiment with you here.
Microphones
I have several microphones, both good and bad, not to mention the built-in ones in many devices. I have two clip-on mics for field work and the odd YouTube session, as well as the excellent sounding options that are connected to headphones – including Apple’s own Ear Buds mic. They all have analogue 3.5mm TRRS connectors.
All of those, as well as the built-in mics in iOS and Mac devices don’t sound bad. In fact, for what they are, they sound quite spectacular. But of course they’re not on par with the quality of a good studio microphone.
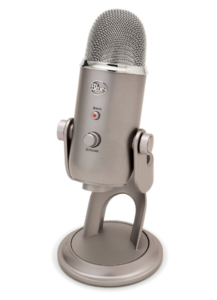
Most of the time I use a rather heavy Blue Yeti USB microphone (silver edition). It stands on my desk next to me, capturing my voice very well for most of the YouTube videos I’ve been doing in recent years on my WP Guru channel.
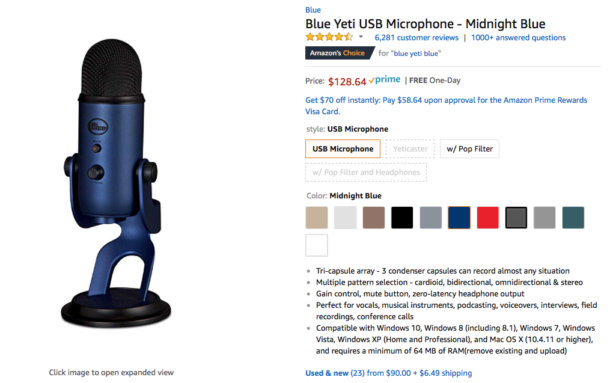
When it came out it was $199, but nowadays you can get it for a lot less. I remember having had the platinum edition since 2013/2014, which was then the only edition there was. I sold it, thinking my Ear Bud mic does an adequate job for what I did at the time, but regretted it and bought myself a new silver one in 2016.
Today you can get all kinds of colour options, take a look at these:
The sound quality is terrific, and the mic has lots of built-in options for the type of recording you can make with it:
- mono directional (i.e. one person facing it)
- stereo (i.e. a band or orchestra)
- omni-directional (i.e.from all sides)
- or two parties facing each other, like in a radio studio
It also has a knob to adjust its output levels, and even features a built-in 3.5mm TRRS headphone socket, so you can listen to audio output from the computer through the mic, complete with mute button and audio output level control. You can connect shorter headphones to it, without having to plug them directly into the Mac or PC.
At the back, you can select the type of recording you want to do, as well as the output levels the mic shall deliver.
Seriously cool. Oh, and it looks amazing too 🙂
You can pick one up on Amazon.com (US) or on Amazon.co.uk (UK).
Microphone Stand
The Blue Yeti has a heavy desk stand, so I simply placed it on two large cardboard boxes next to me. That worked OK, but I felt that for an even better sound experience, the mic should be closer to my mouth – not too close mind you.
The obvious solution would be to invest $20 into a proper microphone stand, for which the Blue Yeti has a dedicated screw hole on bottom. Being seriously skint at the moment, having to focus on paying off the last three years worth of medical debts, I though that perhaps there is a better way to use items closer to home.
Julia suggested that maybe my gravity infusion pole could be useful. It’s an extendable pole that I used since 2015 to infuse several medications such as antibiotics into my body intravenously. The poll can go as high as 10ft, but is collapsable and adjustable to any height. At its top it has two curly prongs to which saline bags can be attached.
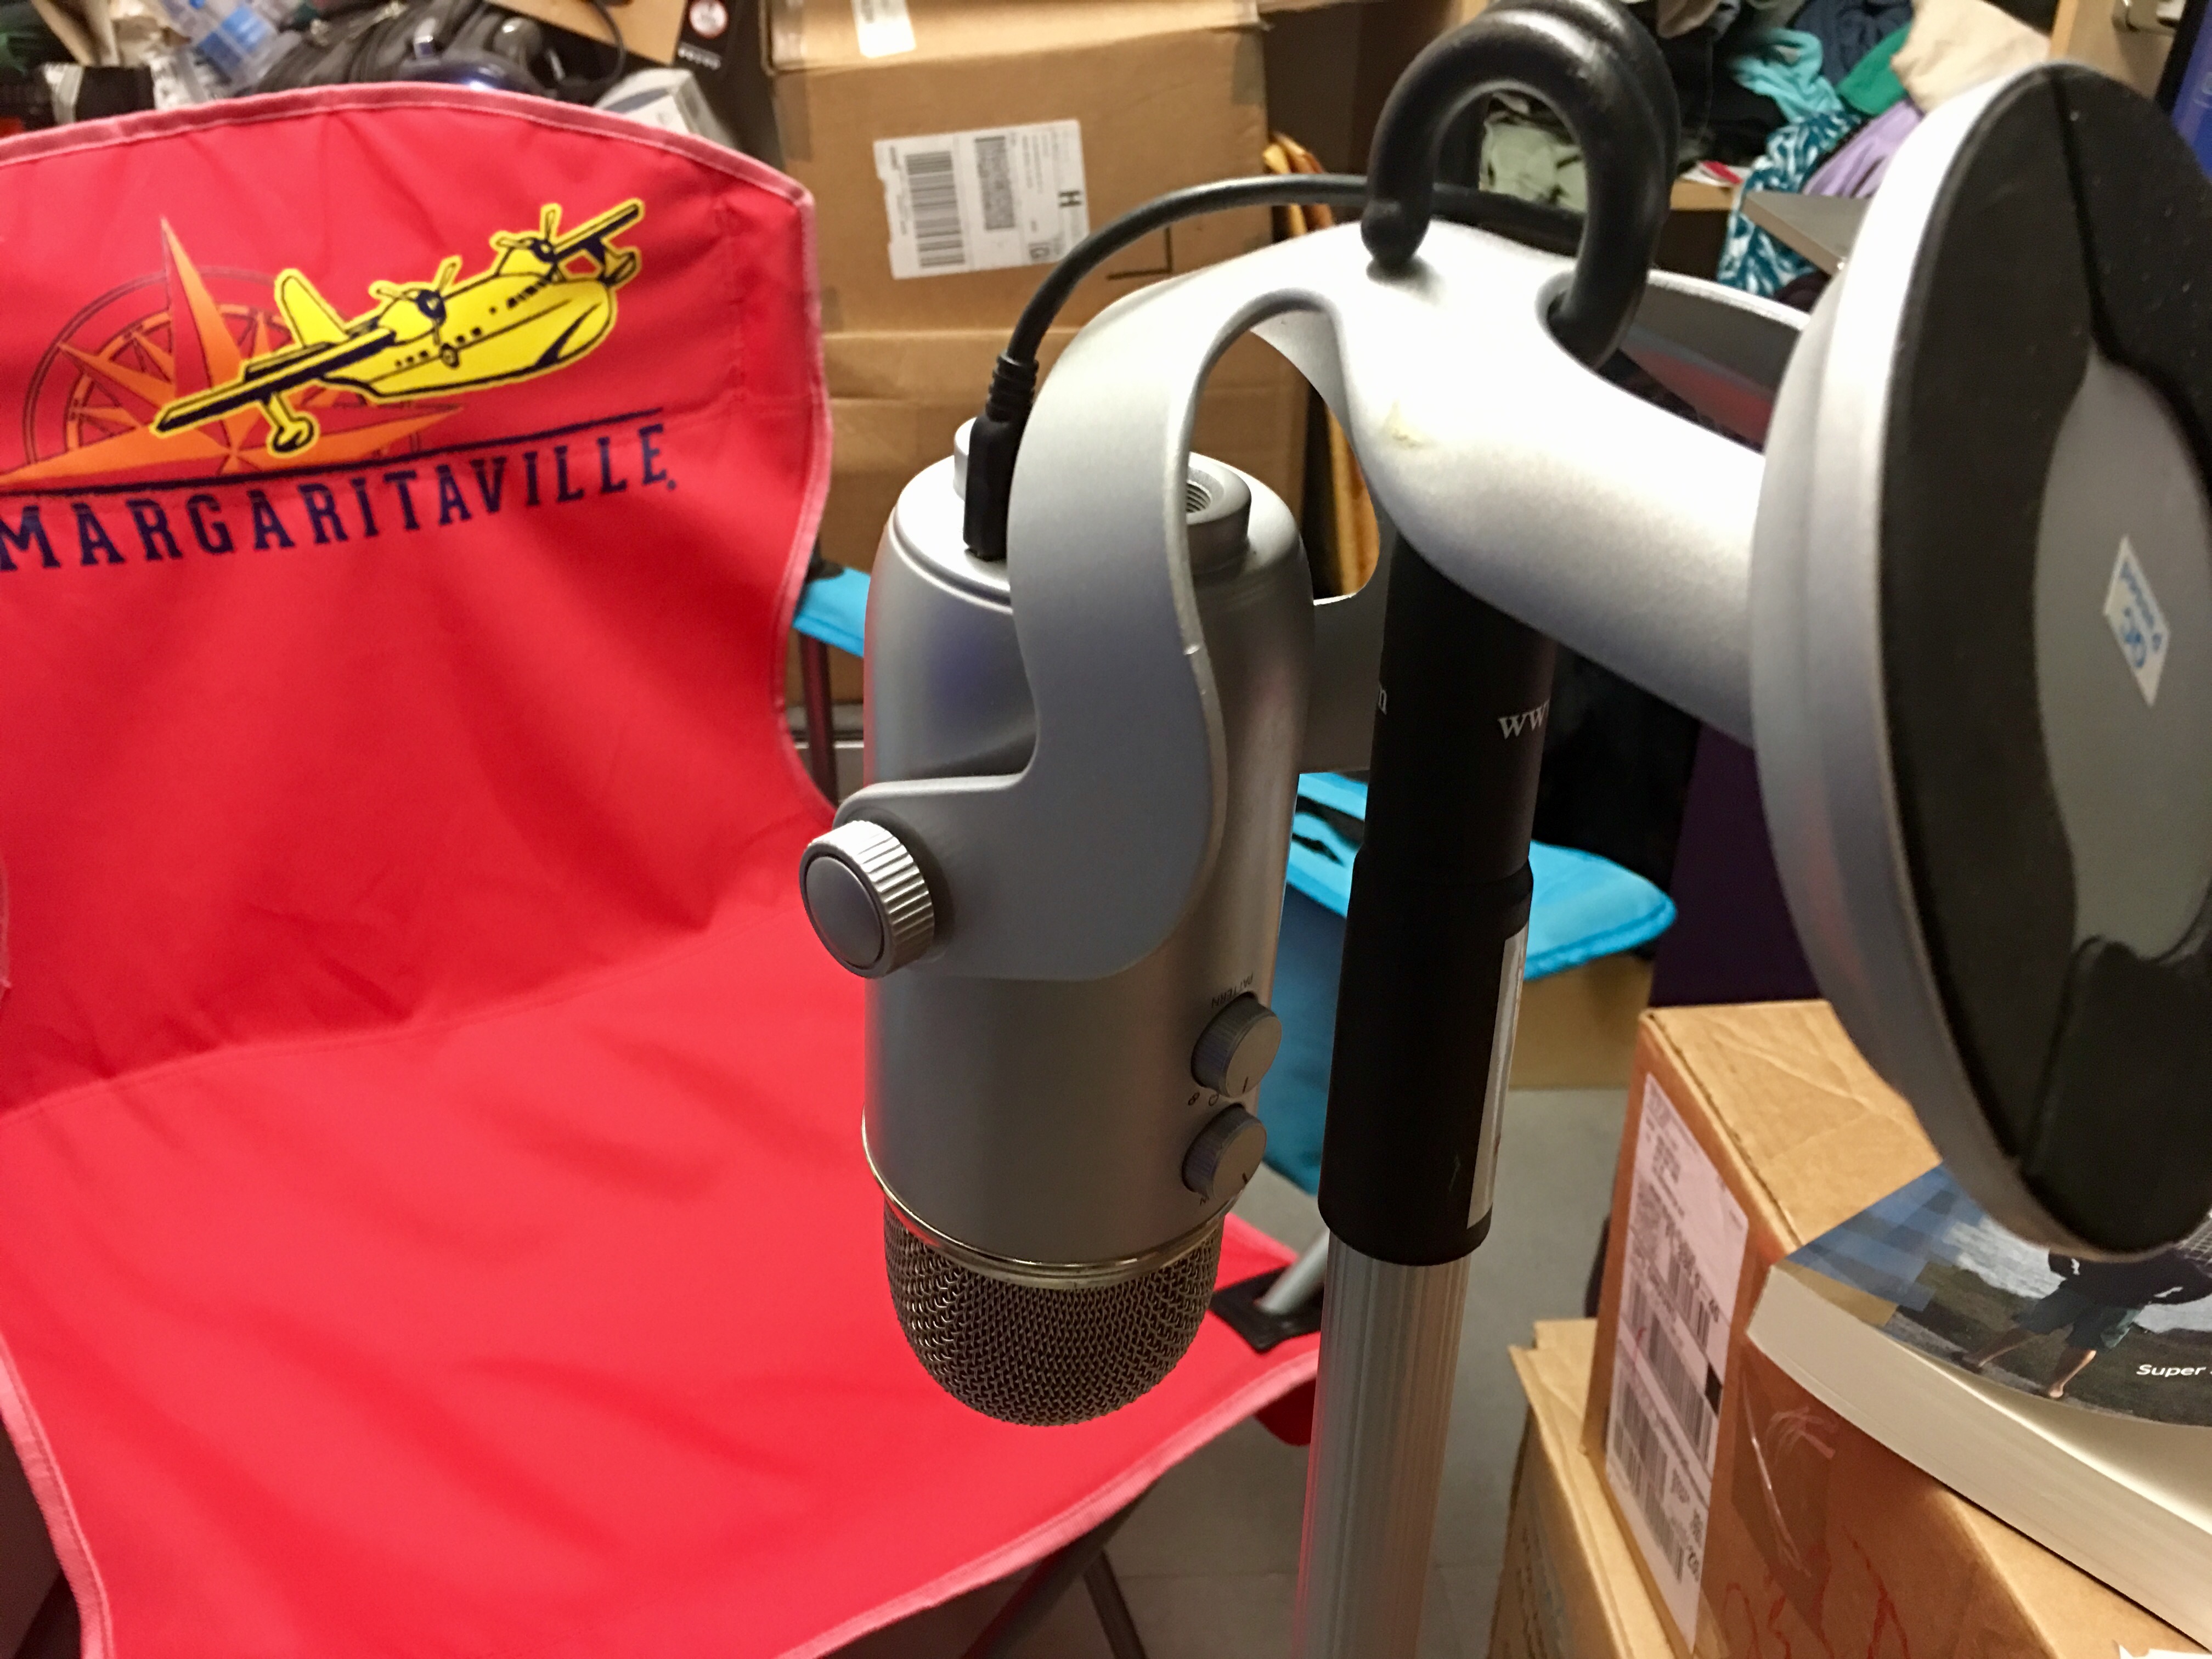
That was an ingenious idea, and exactly what I needed! Thanks to the Blue Yeti’s design, I could simply turn the mic upside down, attach the desk stand the other way round, and hang it on the prongs at the top of the infusion pole.
Now I can slide it as close as it needs to be, and it sounds terrific.
While looking into the microphone stand, I briefly considered buying a pop filter. There’s one made particularly for the Blue Yeti, and it’s less than $20. But because the mic is not directly in front of my mouth, thanks to the gravity infusion setup, I never tend to breath into the mic. I don’t hear any popping issues, so I dismissed the idea as another unnecessary expense.
Sound Booth
One issue in our apartment, and in Miami Beach in general, is the level of ambient noise in our neighbourhood. We don’t have double-glazed windows, which is part of the issue – but not a moment goes by between 8am and 10pm, during which some idiot outside has a desire to play with a jackhammer, blow away several gigatons of leaves for many hours, or drive a seriously loud motorbike up and down in front of our house.
It greatly sucks.
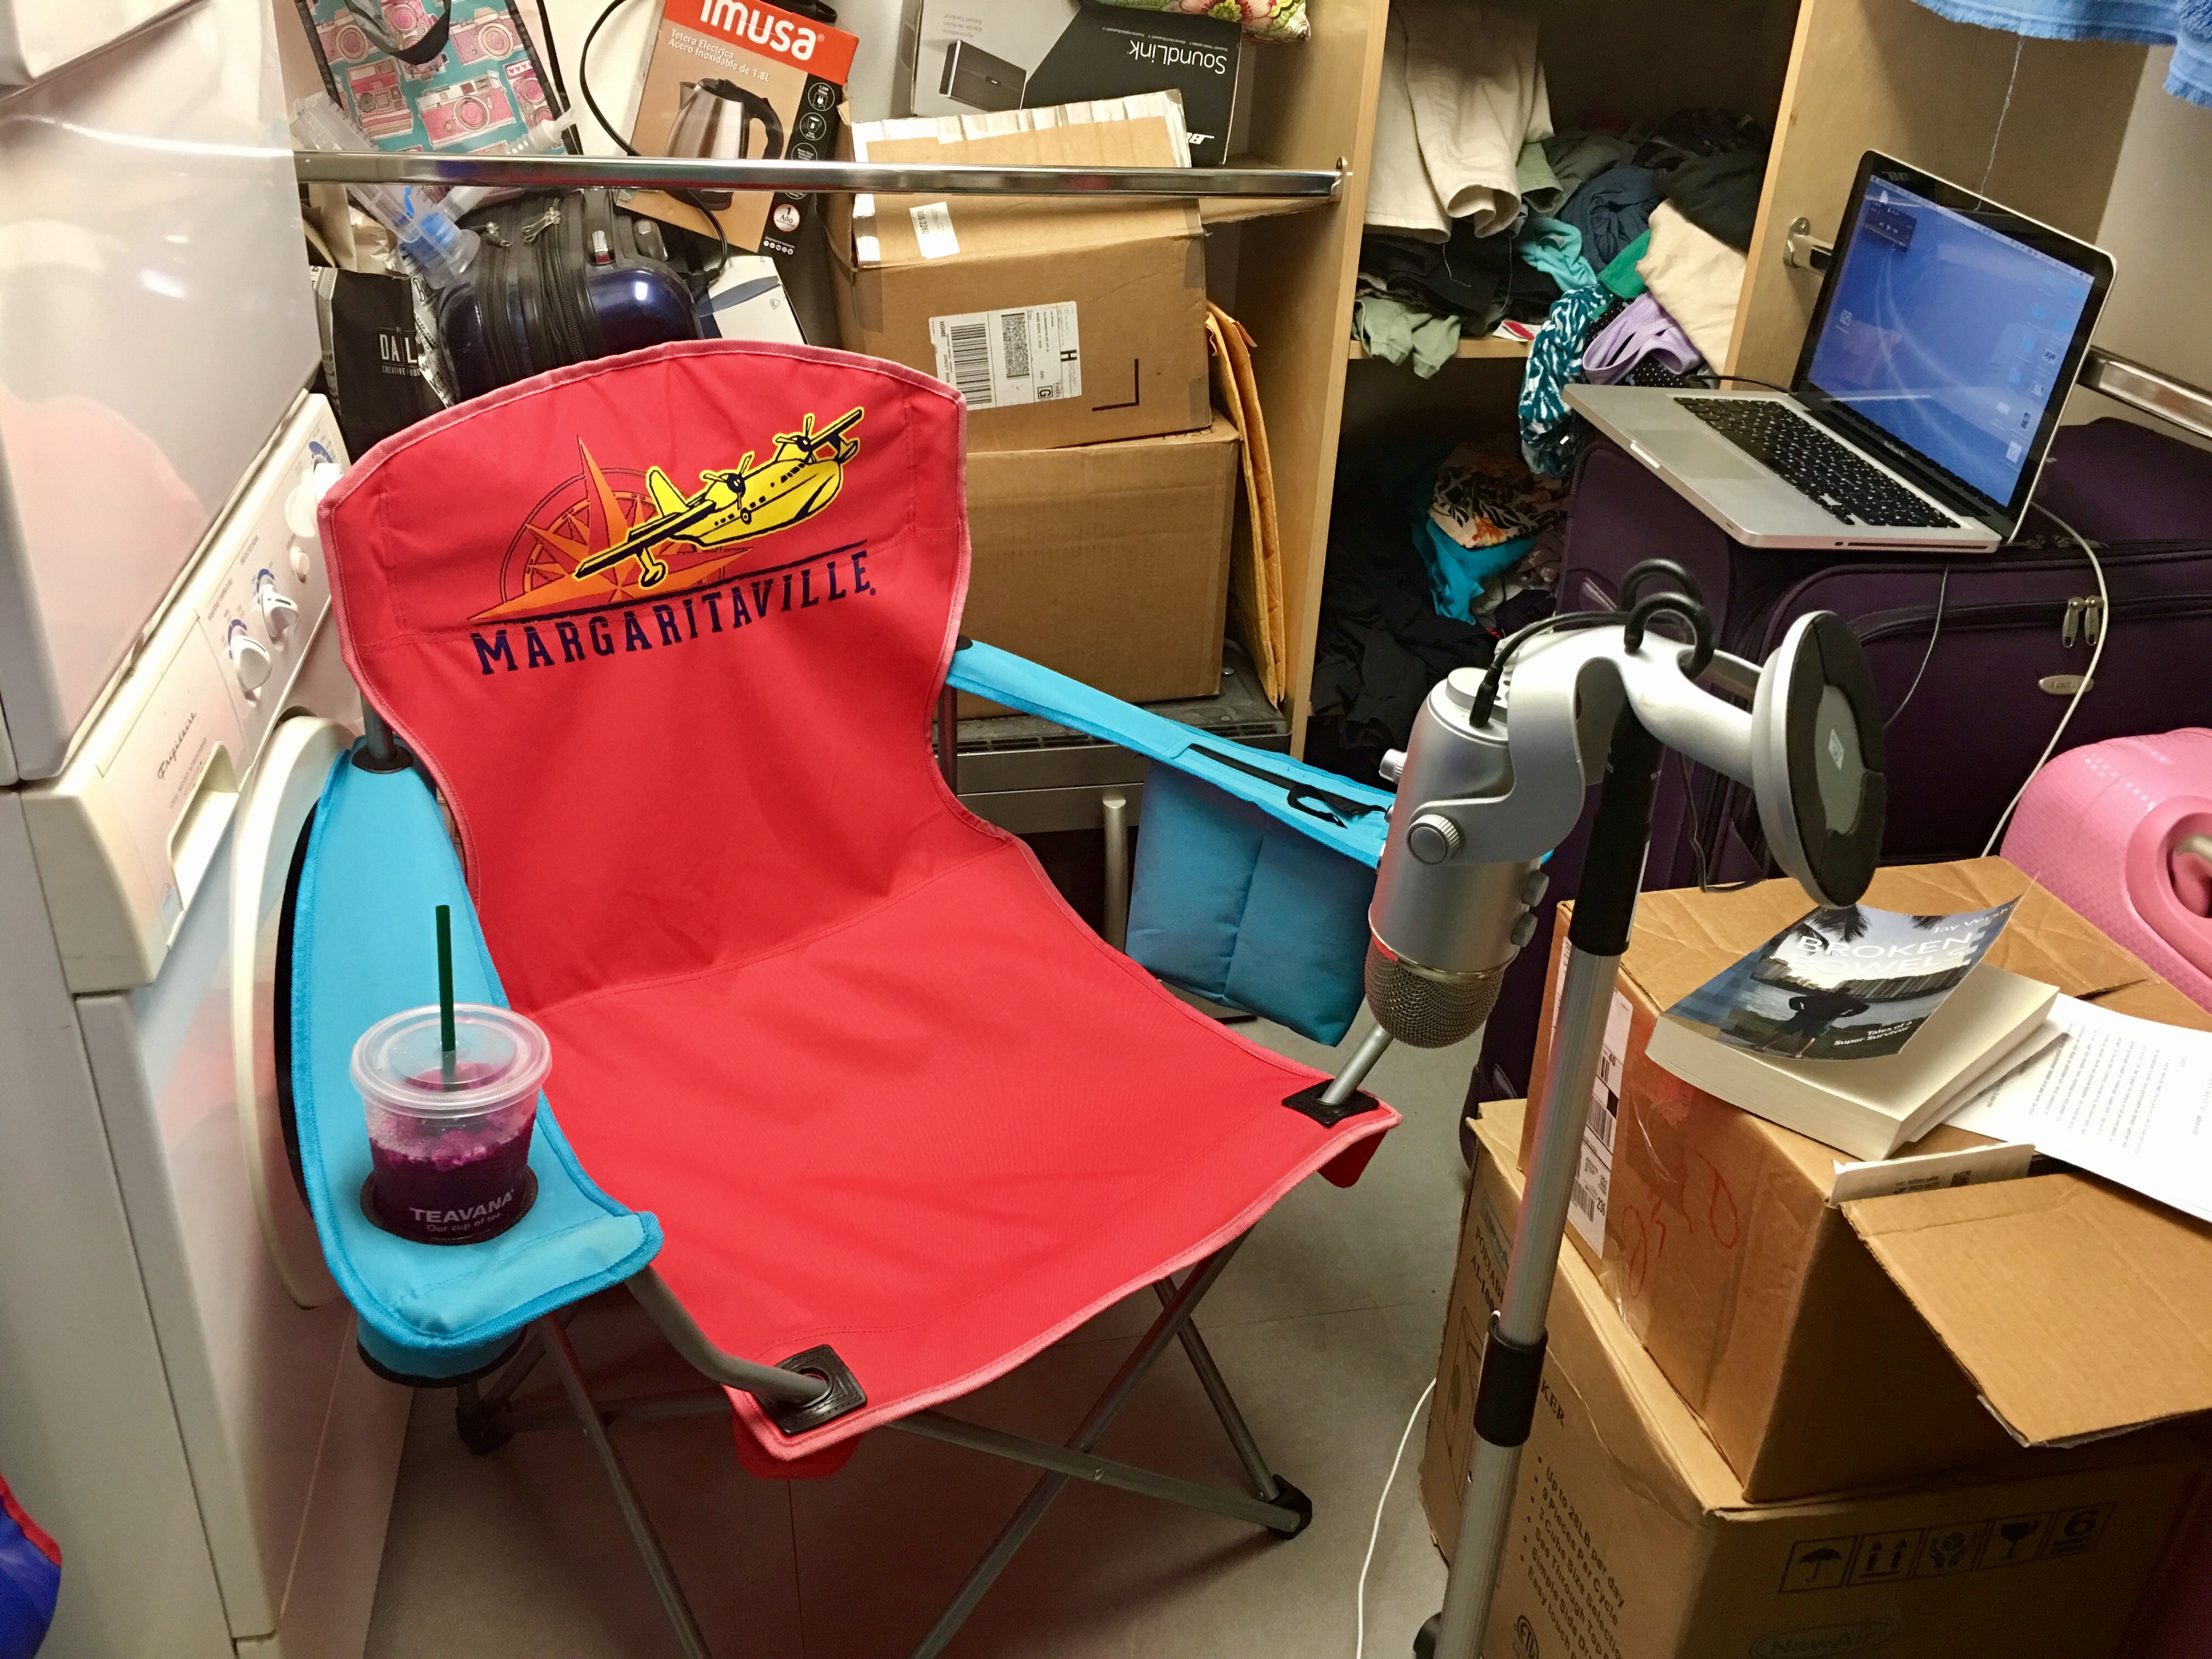
I discovered that the quietest “room” in our apartment is what we call The Warehouse. It’s more like a walk-in closet, which is home to most of our clothes, the washer and the drier and all the other stuff that needs to be stored away, like suitcases and boxes.
It’s the ideal room to use for voice recordings 🙂
All I needed in there was a foldable beach chair, complete with cup holder for a drink, some power for my Mac, and of course the Blue Yeti on the gravity infusion pole. It’s a great setup: I can close the doors leading to it, it mutes stray sounds and it’s quiet in there, drowning out all those annoying ambient noises that Miami Beach is so proud of.
Here’s what it looks like:
Capturing Audio on macOS
 The best tool I have to edit the final audio together is Adobe Premiere Pro, CS 5.5 to be exact. I can’t afford the Creative Suite prescription for $50 a month, and CS 5.5 has been doing a fine job since 2011, never letting me down yet. There’s no reason to replace it with anything else.
I’ve been using Premiere for 20 years, I know the tools, it can handle 4k video – so editing a few audio clips together should be child’s play.
Logic would dictate that perhaps I should record straight into Premiere and keep it all in the same application. As I found out, that’s not the best idea.
Sure, it’s perfectly possible and would make editing really quick and easy, but as it turns out, Premiere uses a great deal of CPU power for recording audio. I have no idea why. It’s not an issue for my hardware, my MacBook Pro captures it brilliantly, but in doing so the fan comes on full blast after only two minutes. That’s a tad noisy, and with the laptop being so close to the microphone, there is a chance of this spoiling the otherwise great quality of what I’m capturing.
Quicktime on the other hand records an audio file completely silently. Hence, recording with Quicktime is the way to go (using New – Audio Recording).
Transcoding Quicktime Files into editable M4A Files
One issue with Quicktime however is its native file format. It’s Apple’s own Audio Interchange Format, creating AIFC files. That’s a losslessly compressed audio codec, which is sadly not accepted by my version of Adobe Premiere. Those files will have to be converted to something Premiere can understand.
Quicktime does offer the option to export a file as M4A, which works great in Premiere, but as it turns out, during the export process, a lossy compression is applied to the audio. I didn’t hear any artefacts in my early tests, but just the thought of there being an additional compression involved before I even edited and transcoded the files made me cringe.
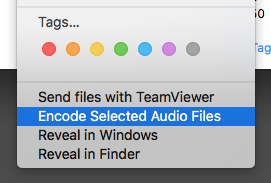
Although Quicktime does not offer any options during the Export process, the Mac’s trusty old Finder does! You simply right-click on an AFIC file, then select Encode Selected Audio File(s).
Now you get a context window in which you can select what type of compression is applied, and Apple Loessless is one of them. I’ve written a whole article on how to do that over on The WP Guru. Go check it out for more details if you’re interested.
Capturing Audio on iOS
One of the alternatives I considered was to record audio not onto my Mac, but instead use an iOS device. Perhaps an iPad, perhaps an iPhone or an iPod Touch. There are plenty of recording apps available that do a good job to capture audio. Voice Memos for example, or Tape Recorder.
As of iOS 12, Voice Memos even has an option to record clips without compression – ideal for editing.
The trouble was not the recording hardware or the software, but the microphones themselves. All my 3.5mm connection mics worked fine, but I had already ruled them out in favour of the Blue Yeti, which had a USB connection.
As it turned out, Apple’s Camera Connection Kit comes with a USB adaptor, and when the Blue Yeti is connected to that, it is recognised as an audio input device by iOS! Recording with it on my iPad works a treat and offers several advantages over recording onto my Mac.
There’s never going to be any fan noise for example. It’s also easier to setup an impromptu home studio very quickly, or take the setup into the field because it’s a little lighter. Thanks to external battery packs, power should never be an issue either.
I haven’t use this workflow when I recorded BROKEN BOWELS, but it’s something I’ll keep at the back of my mind for a later occasion.
Editing
I intended to do the editing in Premiere on my desktop, so all the files I’ve recorded using the above were stored in Dropbox. As soon as I hit save, the files start uploading in the background, and automatically download on my desktop Mac. By the time I make my way over there and settle in, all files are available on my other machine.
Here I transcode them and start editing in Premiere, taking all the false starts and page turns out. Thanks to Premiere’s Workspaces, a dedicated audio editing setup can be configured so that when I go back to editing video clips. That way, I don’t have to re-jig all the windows and panels.
In my audio editing workflow, all I’d like to see are the Audio Mixer, Program Mixer, the Timeline of course, and some file info.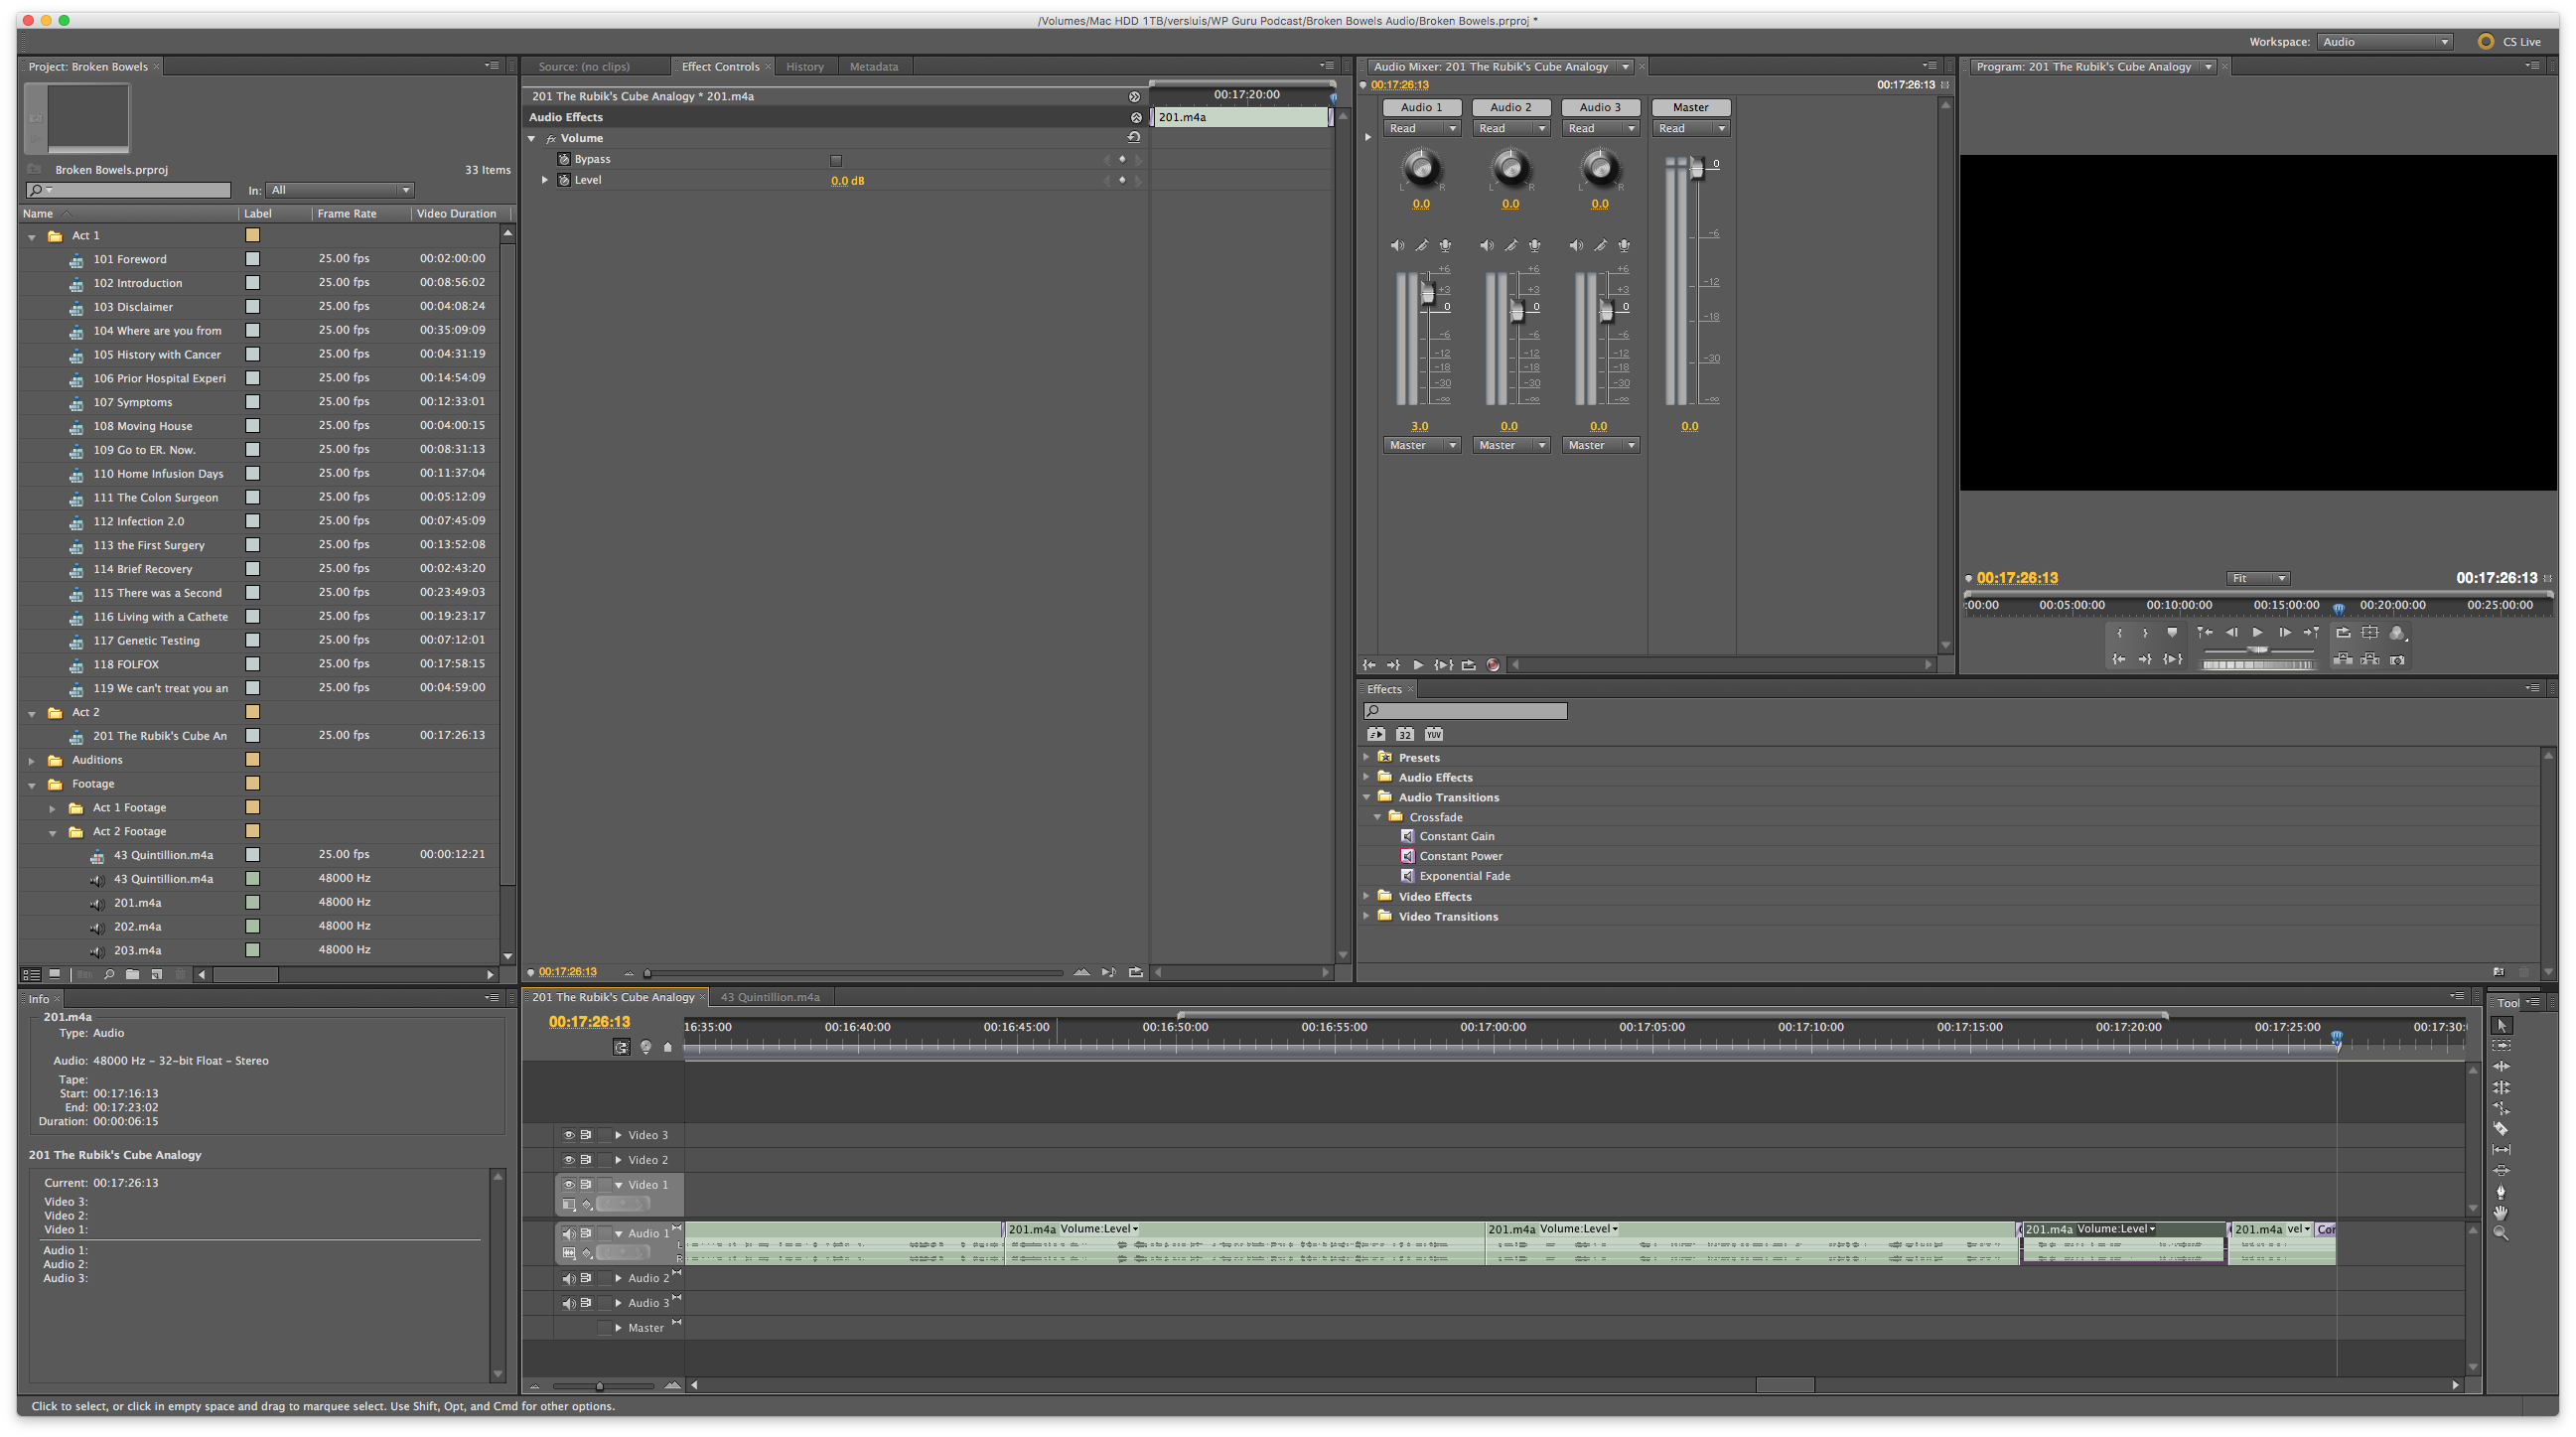
The best way to edit audio files is using the Razor and Ripple Edit Tools (shortcuts C and B respectively). Occasionally the Rolling Edit Tool (N) comes in handy, and of course the Move Tool (V).
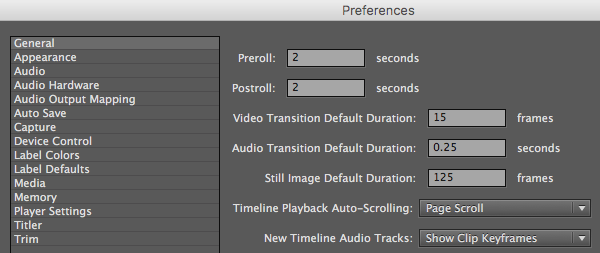
Oftentimes a straight cut sounds good, but there are occasions when the wave ends at the top and starts again at the bottom, which leads to an audible tick sound. In those cases, a very short Constant Power Crossfade transition works a treat. Because the transition needs to be applied rather often, it’s best to change the default duration for audio transitions in Preferences to 0.25 seconds.
Transcoding to ACX specs
ACX requires MP3 files, in 44.1 kHz, either mono or stereo, in 192 kpbs or higher. This format will be used to create all the other relevant file formats needed by services like Audible, Amazon and iTunes.
They don’t place a limit on the high end, so I decided to deliver 320 kbps files, the highest that Media Encoder is happy to transcode into (as far as I know). Chapters must be under 120 minutes in duration by the way.
Since I ended up with about 60 sequences or so, one for each chapters of the book, I had to come up with a solution that would let me send them to Media Encoder all at once. Having to press CMD+M (or using File – Export) several times was just way too time consuming. Besides, perhaps I needed another format for something else – then what?
Although File – Export – Media only ever accepts a single file, I did manage to come up with a way to send multiple timelines over to Media Encoder in one fair swoop. It’s a tad complex to explain, so I’ve dedicated another full article on how to do that. Check it out if you’re interested.