![]() I made some new lower-third captions for my YouTube channel in Premiere the other day. I had a vision for some animations, and rather than spend several hundred dollars on pre-made snazzy clips, I thought I’d take on the task myself.
I made some new lower-third captions for my YouTube channel in Premiere the other day. I had a vision for some animations, and rather than spend several hundred dollars on pre-made snazzy clips, I thought I’d take on the task myself.
For those to be usable on top of other video footage in my screen casting software (Camtasia Studio 3), I needed the animations to be rendered out with an Alpha Channel. That way a mask is automatically created, letting other programmes crop out everything around the titles.
Since I never had to do that before, I asked myself: How do we render a clip with an alpha channel in Premiere?
After careful research, combined with some tireless trial and error, I found the solution to this puzzle – and here’s how to do it.
What creates an Alpha Channel
The trick is to create a timeline that actually contains some alpha-able effects (if that is actually a word). Standard video footage won’t do the trick, but creating a title or importing an image on top of other footage should work.
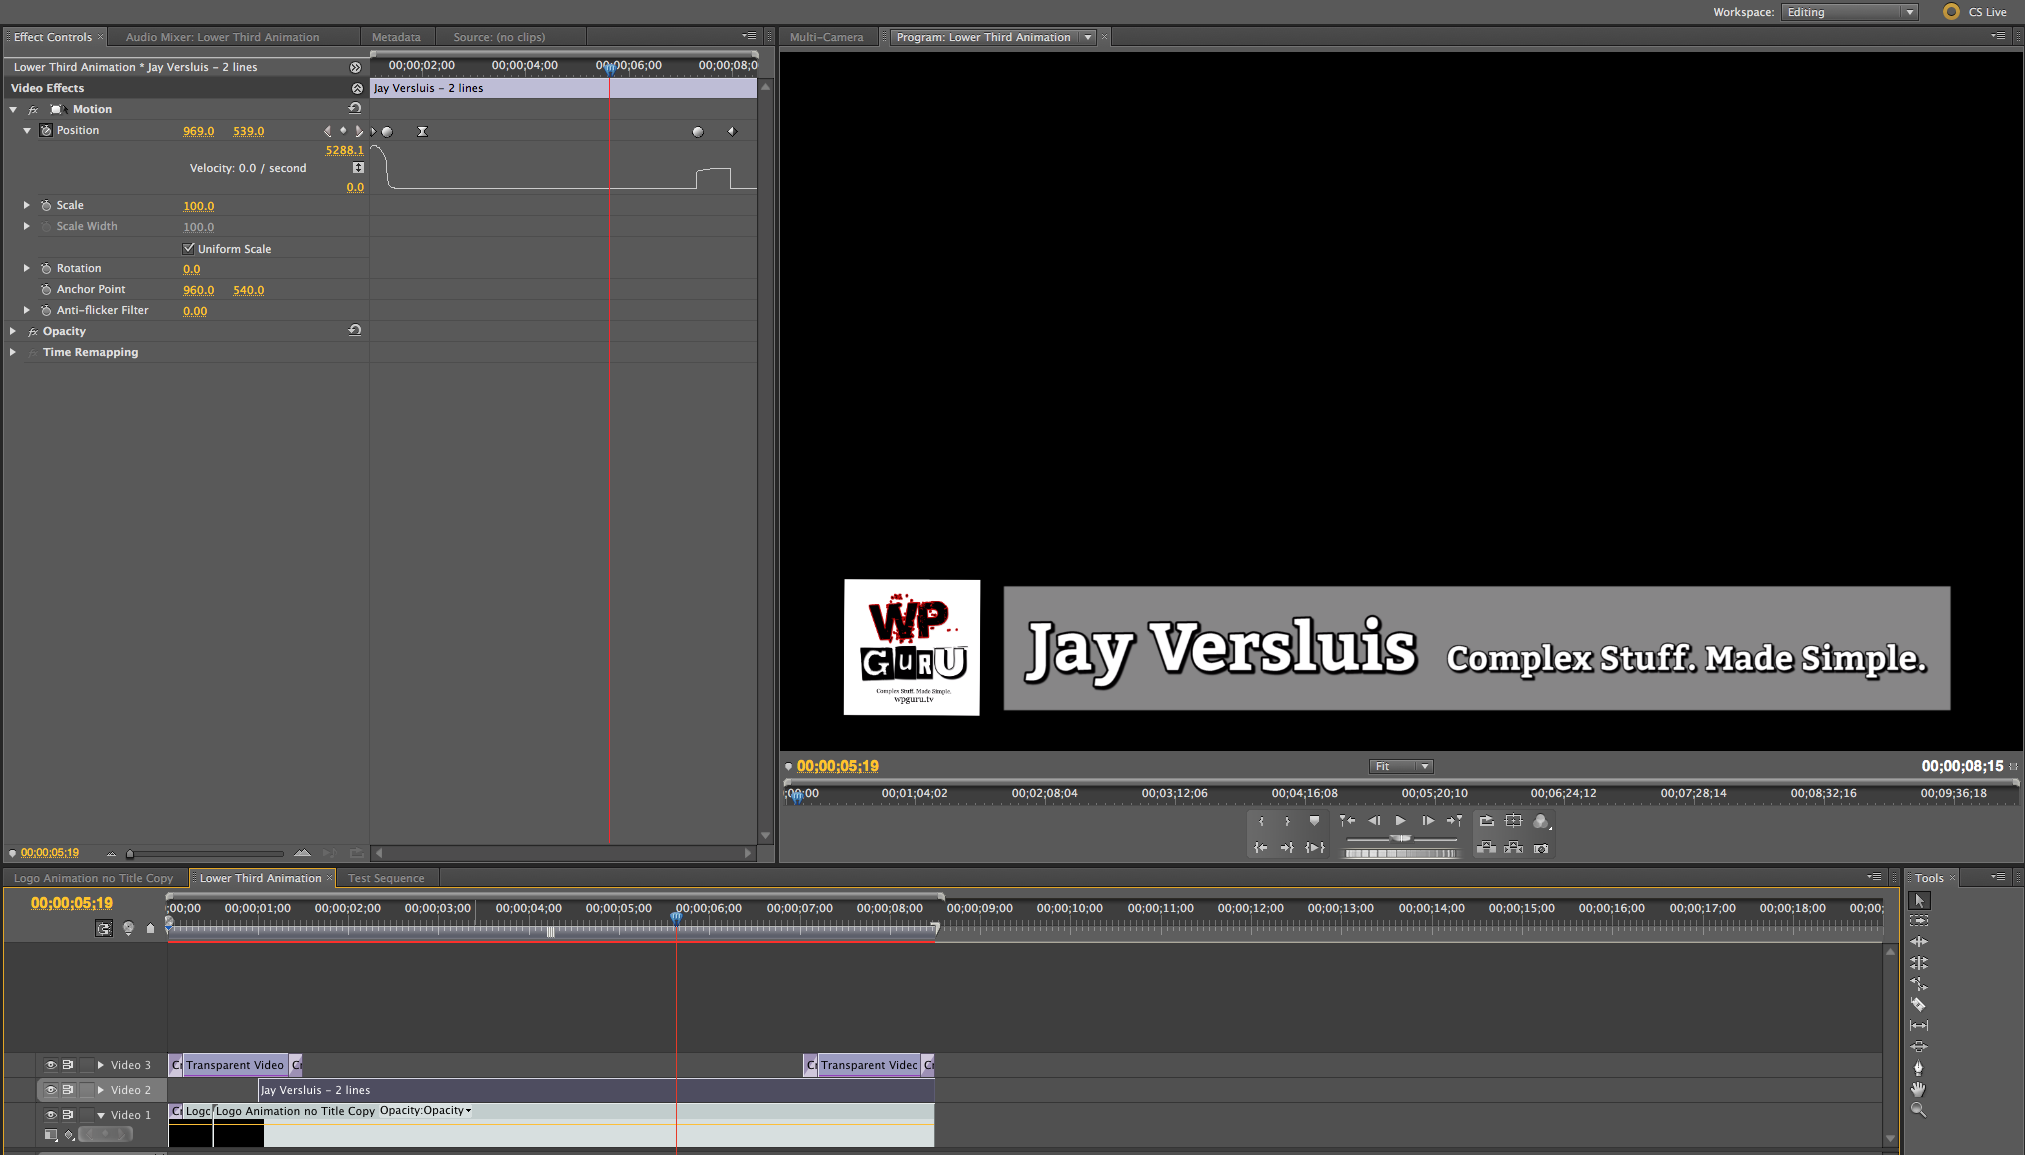
Make sure some space is showing around your footage, like in the example below. Everything that’s black in my preview window will be replaced by other footage, except for the logo and the strap, which are knocked out by the mask.
Rendering Media with Alpha Channel
The next step is rendering our sequence, respecting the Alpha Channel. Not every codec can do that. Quicktime with MP4 or H264 for example are not good choices, because they don’t give us the option to preserve the alpha channel (even though Premiere has created one).
Codecs that do a good job are Apple’s ProRes, PNG or AVI (without compression). ProRes is not available on every machine, not even on my Mac – but that’s probably because my outdated version of Premiere does not support it. If you’re using Premiere CC 2018 on a Mac, you should be able to choose it. AVI only exists on Windows, but my old friend the PNG codec is available to pretty much all of us.
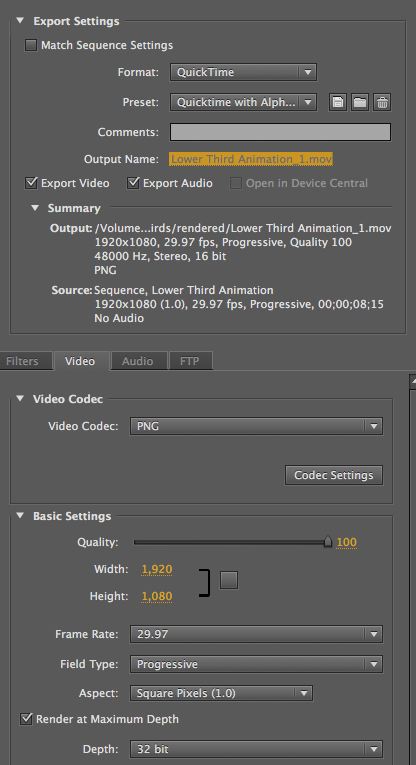
With your sequence selected, head over to File – Export – Media. This will bring up our trusty media encoding options.
In the top right corner, select your Container at the top (I’m choosing Quicktime), and further down under Video, choose your Codec (I’m using PNG). PNG supports transparency, but from what I understand only at higher bit depths. I’ve chosen 32 bit, and it worked flawlessly.
Since my animations were only a few seconds long, I chose to use 100% quality under quality settings. I’m making them for post production after all.
Here are my export settings for alpha channels:
Now choose either Export or Queue to render out your sequence.
Testing if it works
Import your rendered clip back into Premiere for a quick test. Create some colour bars or a colour matte, create a sequence from it, then drag your rendered clip into a video channel on top of your bars/matte/test footage.
You should see that the footage is occluded by your graphics, and thanks to the Alpha Channel, the footage on the track below is still showing.

You can see my new lower third captions in action on my YouTube Channel, starting in September 2018.
Thanks to Kevin Monahan for this tip 🙂
1 thought on “How to render media with Alpha Channel in Premiere Pro”