In this episode I’ll show you the complex process of setting up animated particles in Blender. I’m doing this for an Eevee render, but the principle will work in Cycles just as well. They can be used to give atmosphere and depth to your renders, or to create other exciting effects like bokeh. There’s a lot going on in this video, so I thought I’d provide some written instructions in this article too. Here’s what’s coming up:
- Setting up the Particle System
- Adding a Turbulence Force
- Setting up the Volumetric Material
- Adding our own geometry to the Particle Emitter
- Randomising our Particles
- Adding a Material to our Particles
- Adding Depth of Field to our Camera
- Changing the distribution of our Particles
- Final Thoughts
For this whole project I’ve used Blender 2.83.1. You can see an example of the effect in action on my Sad Robot animation. My wonderful Patreon Supporters have access to the scene file I’m building for dissection, study, amendment and commercial use.
Enjoy!
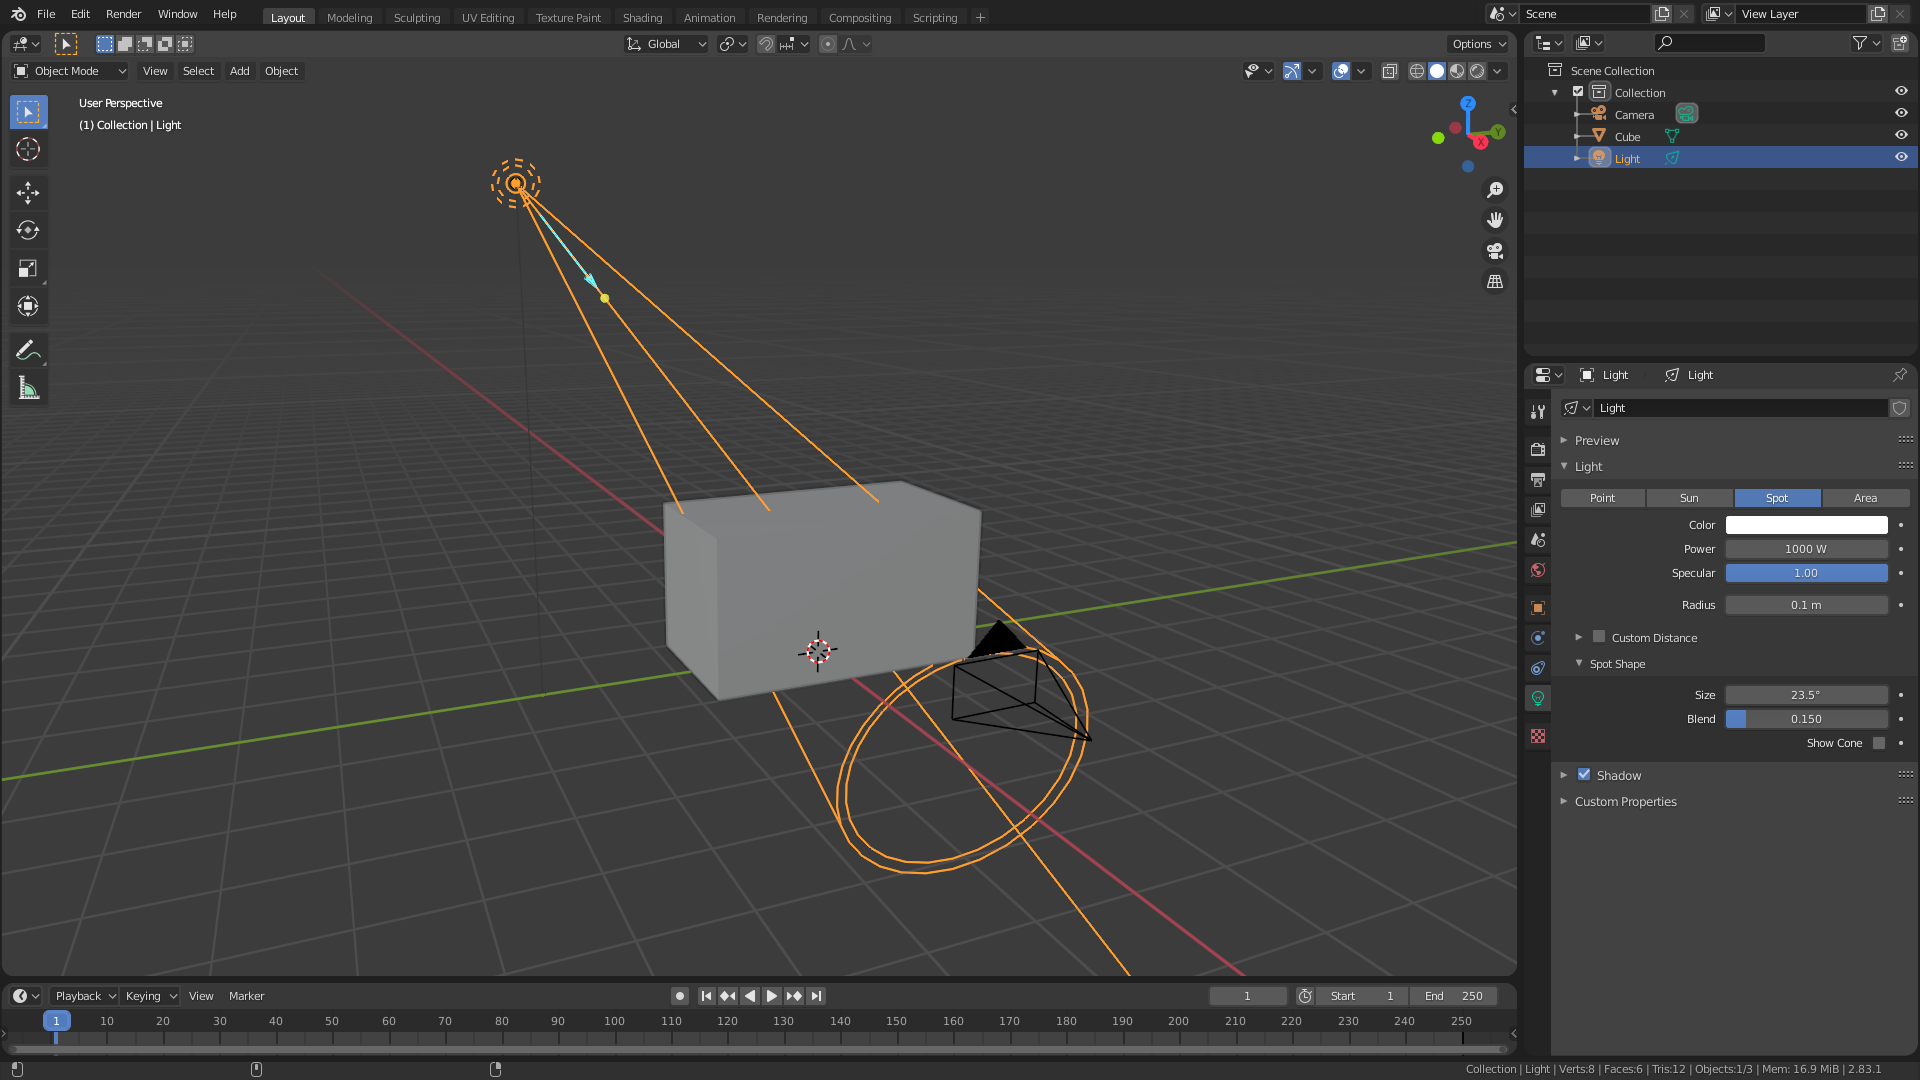
I’ll begin with a brand new default Blender scene, leaving the light and Default Cube intact. He’ll be the star of the show. All I’ll do is scale him a bit wider so that I can look directly at his front face as shown in the video. I’m turning the default light into a spot light and shine it at the top of the cube from the side. To emphasise the effect I’ll narrow the spot shape size to something like 23 degrees, until I see a scene like this (click to enlarge):
Setting up the Particle System
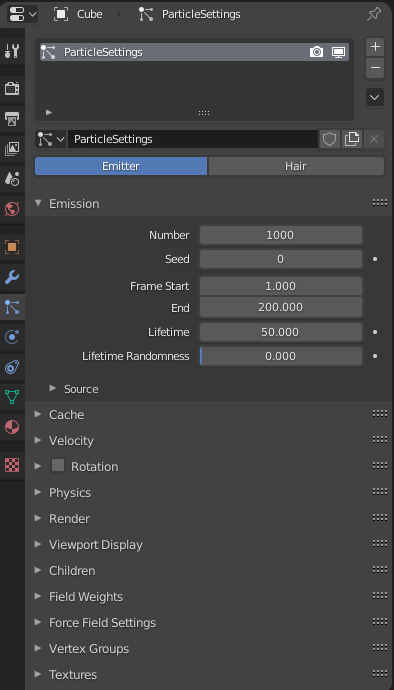
Our Default Cube will be the object emitting particles for us. Select it, then navigate to the little “flux capacitor” icon and click the plus icon at the top right. This will add the particle system. Don’t be scared: many of the myriad of confusing parameters we won’t touch. We’ll (briefly) focus on the following sections only:
- Emission
- Cache
- Velocity
- Rotation
- Render
- Field Weights
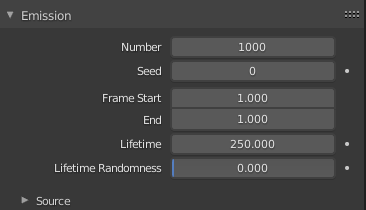
For my project I don’t want to animate the particles with the emitter, all I want to do here is to create them in one spot and make sure they don’t disappear. I do that by setting the Frame Start and End to 1, and adjust the lifetime of the particles to the duration of my animation. I’ll stick with the default of 250 frames.
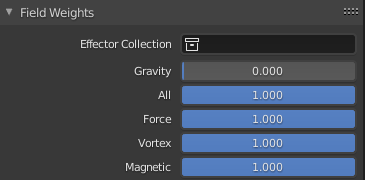
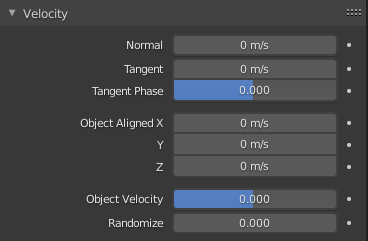
This will result it a clump of particles falling down. We don’t want that, so let’s head over to the Field Weights section and set the gravity to zero.
You’d think this would make all particles freeze in place, but it appears they’re flowing out to all sides now. This effect is caused by a Velocity Force applied to the direction of the normals. Let’s set that to zero as well, and our particles will be frozen in place.
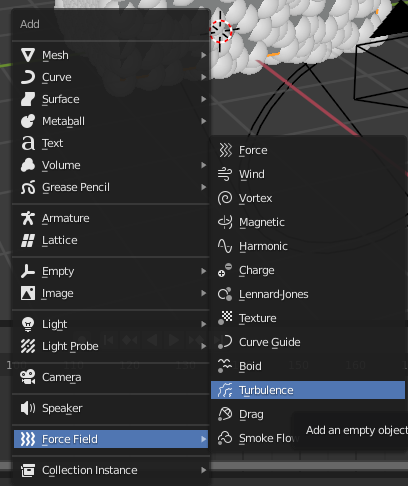
Adding a Turbulence Force
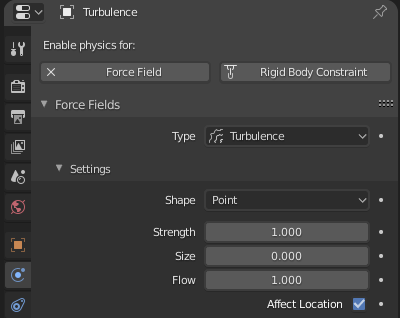
To make our particles move subtly, let’s add a Turbulence Force Field to our scene. CTRL-A will bring up the menu we need. I’m positioning it in the middle of our cube, so that the force can work its magic on all particles that are emitted from its sides.
To adjust the particle speed, I’m adjusting the Flow parameter to 1. It seems a little counter-intuitive to do this, but it leads to the desired effect. Increase this parameter for slow moving particles, decrease for faster particles.
Setting up the Volumetric Material
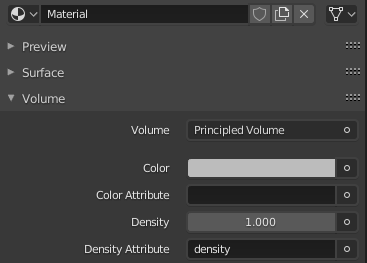
Right now we’ll see the outside of our cube, but we don’t really want that. We’d like to see right through his walls, and add a bit of atmosphere to the scene, like a hint of fog. We can do that by using a Volumetric Shader to it, and remove the Surface Shader altogether. I didn’t even know this was possible!
With the cube selected, head over to the Materials Tab. Under Surface, click on Principled BSDF and select “remove” in the huge list (top right). Under Volume, add a Principled Volume Shader. If the fog effect is too big, turn down the density value to your liking. I’m going to leave mine at the default of 1 for now.
The effect of our efforts can only be seen in the rendered and material preview shading. Switch your viewport accordingly (the last two ball icon at the top left).
Adding our own geometry to the Particle Emitter
Right now our emitter is producing white balls of indeterminate size. Those are placeholder particles that Blender shows us, just so that we can an idea of the settings we’re fiddling with. We can replace these with our own geometry under the Render Section of the Particle Tab (still with our cube selected). Change Render As from Halos to Object, then select your Instance Object to the geometry you’d like to use.
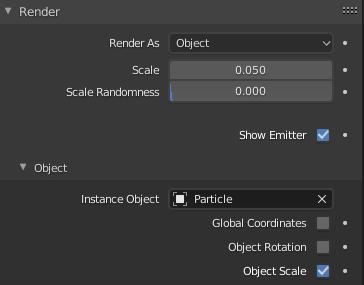
I’ve built an icosphere object in the video, but any object will do. Note that there are potentially thousands of those objects being replicated in your scene, so it’s advisable to keep the vertex count as small as possible. If you want to add more than one object, put everything you’d like to reproduce into a collection, then select it in the Render As and Instance Object options respectively. I’m showing how to do that in the video.
Randomising our Particles
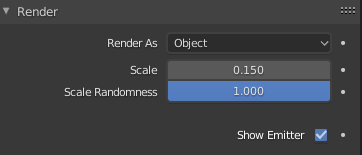
Right now our particles look all exactly the same: same size, same rotation, same everything. Let’s bring a bit of variety to the party by adjusting their size and rotation a bit. While we’re still in the Render Tab in the emitter settings, change Scale Randomness to 1. This will bring as much size variation as possible. Depending on the size of your custom particle, you can also adjust the scale right here to find the perfect fit for your scene. Note that you can also change the size of the actual particle object, whichever works best for your needs.
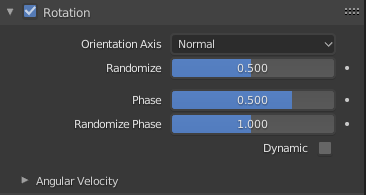
For the rotation, enable the tab first first, then set the Orientation Axis from its default Velocity/Hair to Normal. Adjust the parameters for Randomize, Phase and Randomize Phase according to taste. Note that these will only have a visual impact when your animation plays or restarts. I find it helpful to set my animation duration to 50 frames and let it loop, that way I get to see the impact of my changes every time the timeline restarts. Some parameters adjust without this trick, others need Blender to do some calculations. In case you think “my adjustment doesn’t do anything”, start the timeline and see if it makes a difference.
Adding a Material to our Particles
Right now we have a scene that looks something like this. Note that the particles aren’t showing up that prominently, especially if I disable my overlays as I have done in this screenshot (this is the rendered viewport).
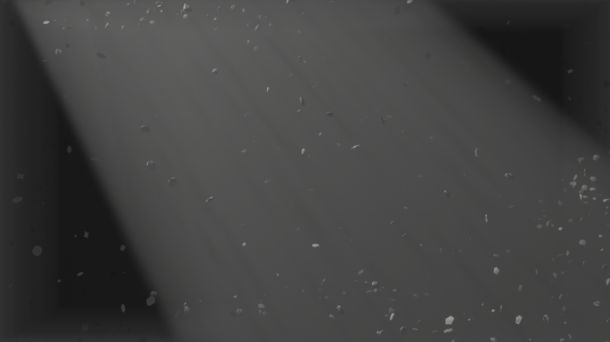
Everything looks like space debris. Cool effect, but not ideal for dust particles. This is happening because many of my particles are hidden in the dark volumetric parts of my cube. The easiest way to make them appear is to crank up that emission channel on their material. Let’s do that next!
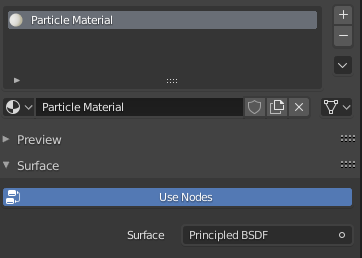
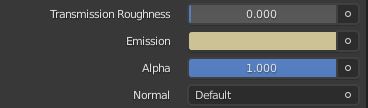
With the dust particle geometry selected, head over to the Materials Tab (little round ball icon) and create a new material. I’ve named mine Particle Material. Scroll down to the Emission channel and crank it up a bit, say to 75%. Add a colour tint of you feel like it, perhaps a tinge of orange-yellow.
Adding Depth of Field to our Camera
To add that extra bit of softness to our particles, a shallow depth of field effect can really make our project shine. I’ll select my camera and enable it, then set my f-stop to something really low like 0.5. It’s not exactly a real-life scenario, but it’ll give us what we need in Blender (if you ever do come across a lens with an f-stop of 0.5, please sent me a picture).
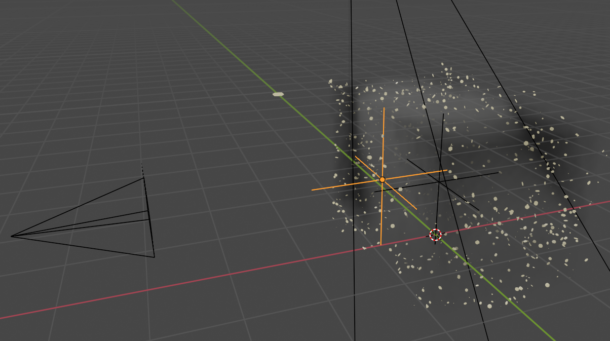
You’ll notice that perhaps the whole scene is now out of focus, and we need a way to adjust the focus, much like we do with a real-life DSLR. To make that happen, add an Empty object to the scene, then move it up a bit. It’ll be in a similar spot to our turbulence force field from earlier. Once created, select it in the camera settings as your “Focus on Object”. I’ve renamed mine Focus Helper so that I remember what’s what in my scene.

Things might look even more out of focus than before, and that’s because of the way our cube emits particles. It does so along its faces, hence there are more particles on the outside of the cube than there are on the inside. Our Focus Helper however is exactly on the inside, focussing on nothing in particular, and hence we don’t see any of our particles in focus. To alleviate this, move the Focus Helper slightly further forward, as I’ve shown in this next screenshot. The orange object is the position of my Focus Helper in relation to the other objects.
Now my rendered image looks something like this:

Changing the distribution of our Particles
One thing we haven’t talked about yet is the distribution of our particles. They look the way they look because a random number generator has been used behind the scenes to put them where we see them. That might not fit in with our scene. Perhaps I see one large particle right in the middle, or a clump of smaller ones that I don’t like the look of. You’re in luck: we can change the seed that’s used to make all this randomness happen. To do that, select your emitter cube and head to the particle settings once again. At the very top under Emission, change the Random Seed to something else. Flick though different numbers and see what happens.

Final Thoughts
It’s time to make some final adjustments to our animation. You may not like the amount of particles you see, the speed at which they move, perhaps size doesn’t fit in with your project, or any number of other things. Now’s the time to change that. Remember that the size of your cube, and the size of your particles, and the position of your camera directly impacts the effect. This is super important to remember if you re-create this whole setup at a different scale so it fist together with your project. If you adjust one, you must adjust the other values accordingly to get the desired effect.
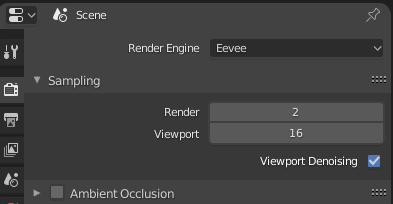
Rendering an animation with all these effects can take some time, even a still image can take almost a minute in Eeevee (which is long for an Eevee render). Most of what’s been calculated however doesn’t need to be that accurate. The default samples for the final render is set to 64, and that’s overkill for our project. Set that to 2 or 4 and try again, the visual impact is minimal.
That’s it for today. We’ve come a long way and done a lot together here. If you’ve been following along and get a similar result, CONGRATS! If not, hey I hear you – it’s easy to forget a step.Or I may have forgotten to mention something obvious. If anything is unclear, leave a comment below or on the video.
If you’d like to take a look at the scene file I’ve been creating here (which differs slightly from the one for the video), you can access both of them on my Patreon post.
Happy Rendering!